Important: Before adding new offers from the vendor product catalog, ensure that these conditions are met.
To update the platform product catalog with new offers that contain new or existing add-ons from the vendor product catalog, complete the following steps:
- In CloudBlue Commerce, go to Services > Applications.
- Click the name of the APS package you want to reconfigure.
- Click Configure Product to launch the wizard.
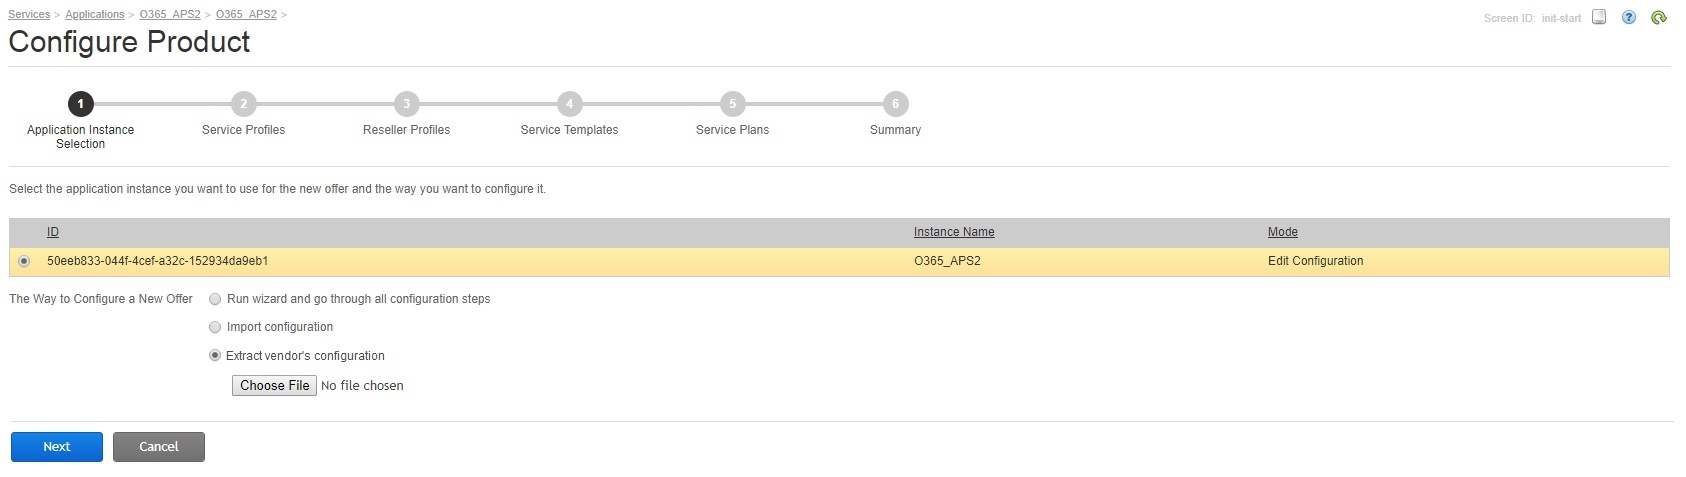
- Select the application instance you want to reconfigure.
-
Select the Extract vendor's configuration radio button to upload the new offers CSV file.
Click Next.
The platform parses the CSV file and finds offers in accordance with the MPN settings for which the ADD value is set in the A/C/D/U column. The received data is transferred to the APS connector, which processes the actual configuration of the new offers and returns the specially structured data to the platform. Based on the data received, the platform fills the wizard with the corresponding values.
Note: If the name of a service template is incorrectly provided in the CSV file, corresponding service plans will not be created, and a relevant warning message will be displayed.
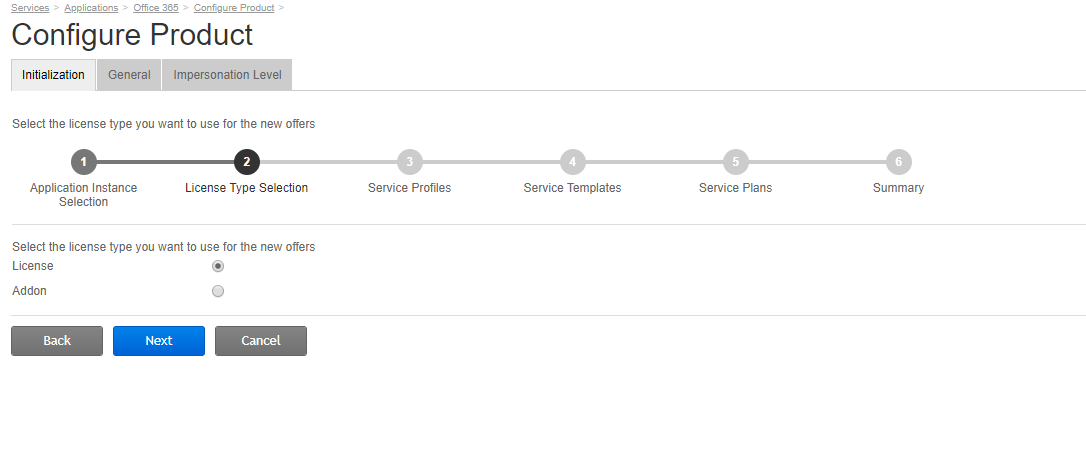
- (Optional) On the License Type Selection screen, select a license type to be used for the new offer. Click Next.
Note: This screen is displayed for the Vendor Product Catalog Extraction mode only, and only if an application instance contains more than one service profile type for which MPN settings are provided in the CSV file.
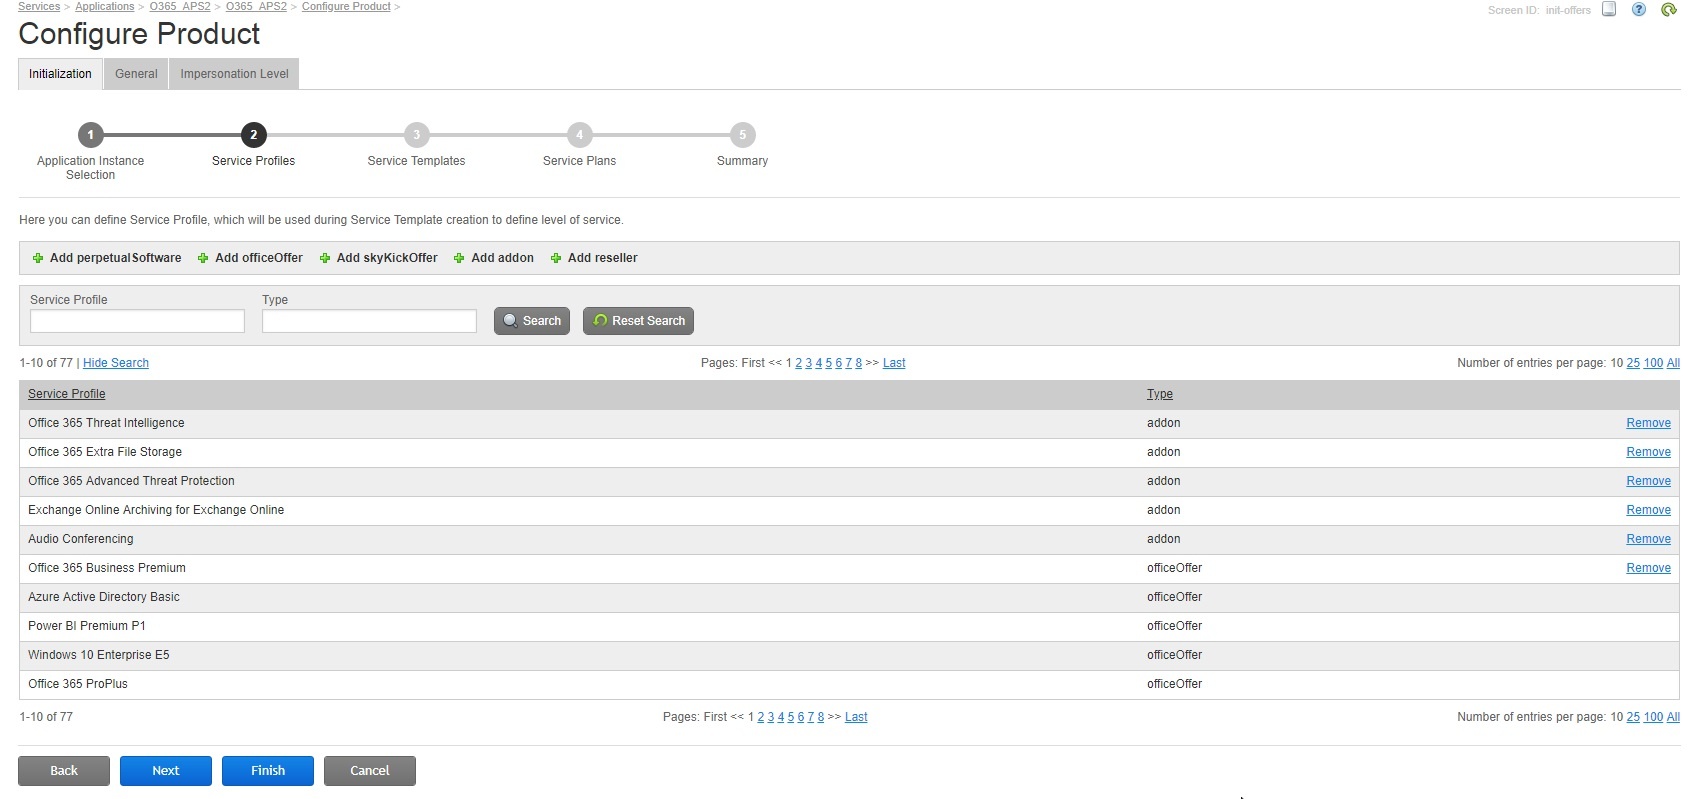
- On the Service Profiles screen, all existing profiles and those returned from the APS connector are listed. That is, there are current and new offers, as well as add-ons to be sold with them.
Note: If offers or add-ons already exist in the system, new service profiles will not be created, and the platform will use the current objects.
Click Next to proceed.
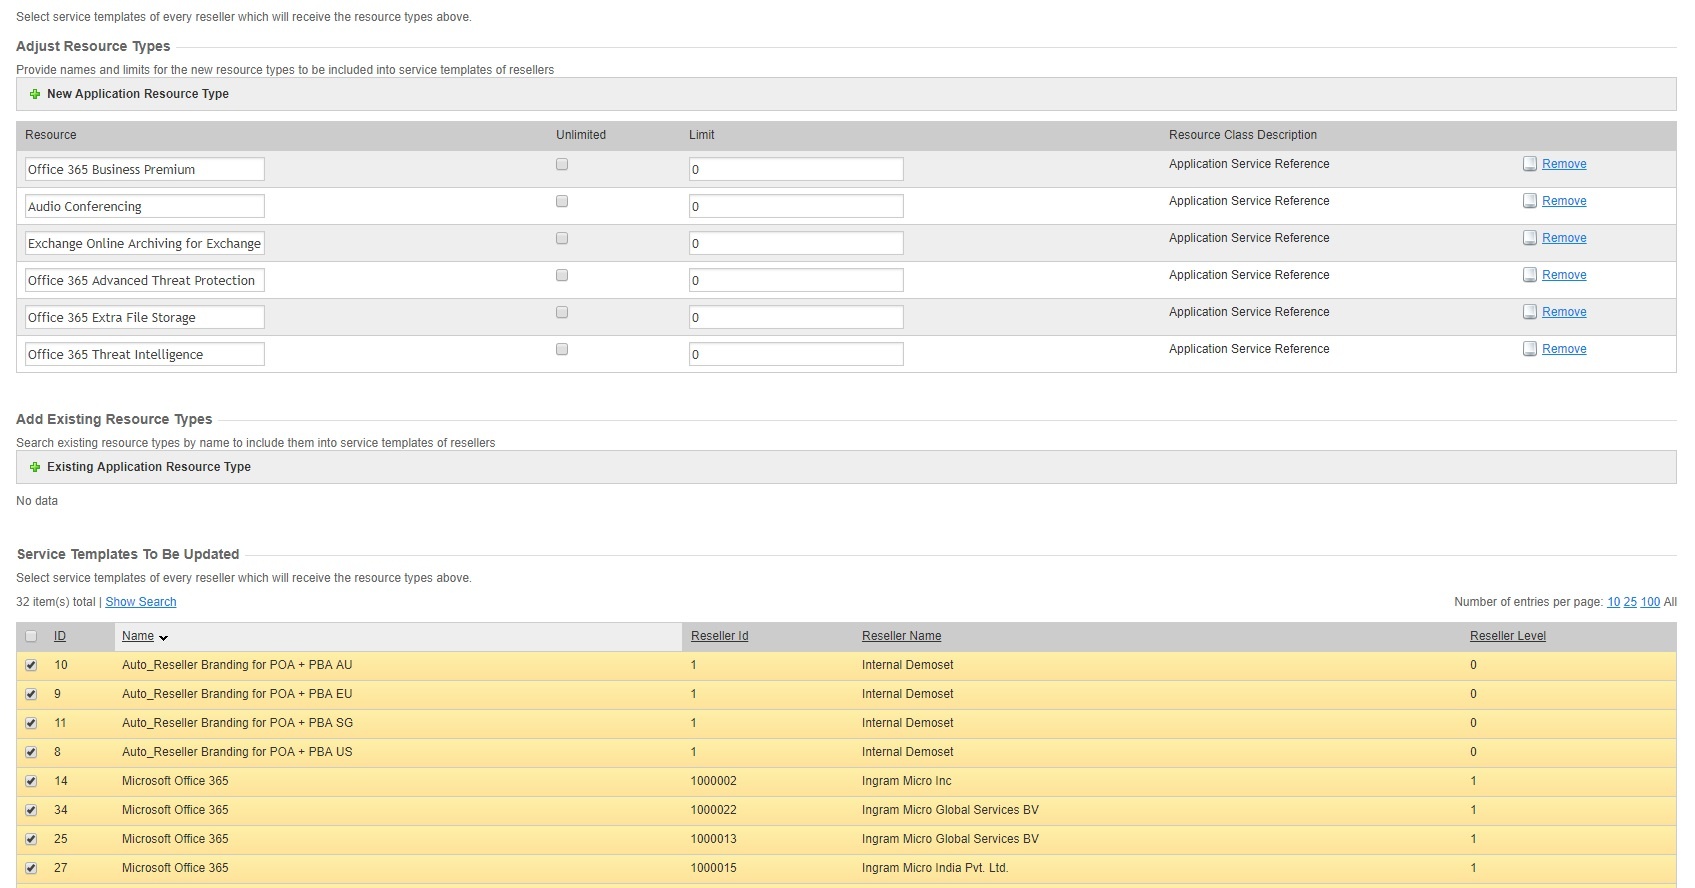
- On the Service Templates screen, specify limits for the new resource types linked to new offers or add-ons. Click Next to proceed.
Note: If only one service template (not a reseller branding template) that contains resources of this application instance was found at this step, this service template is selected automatically. If several service templates that contain resources of this application instance were found at this step, you must select the required templates manually.
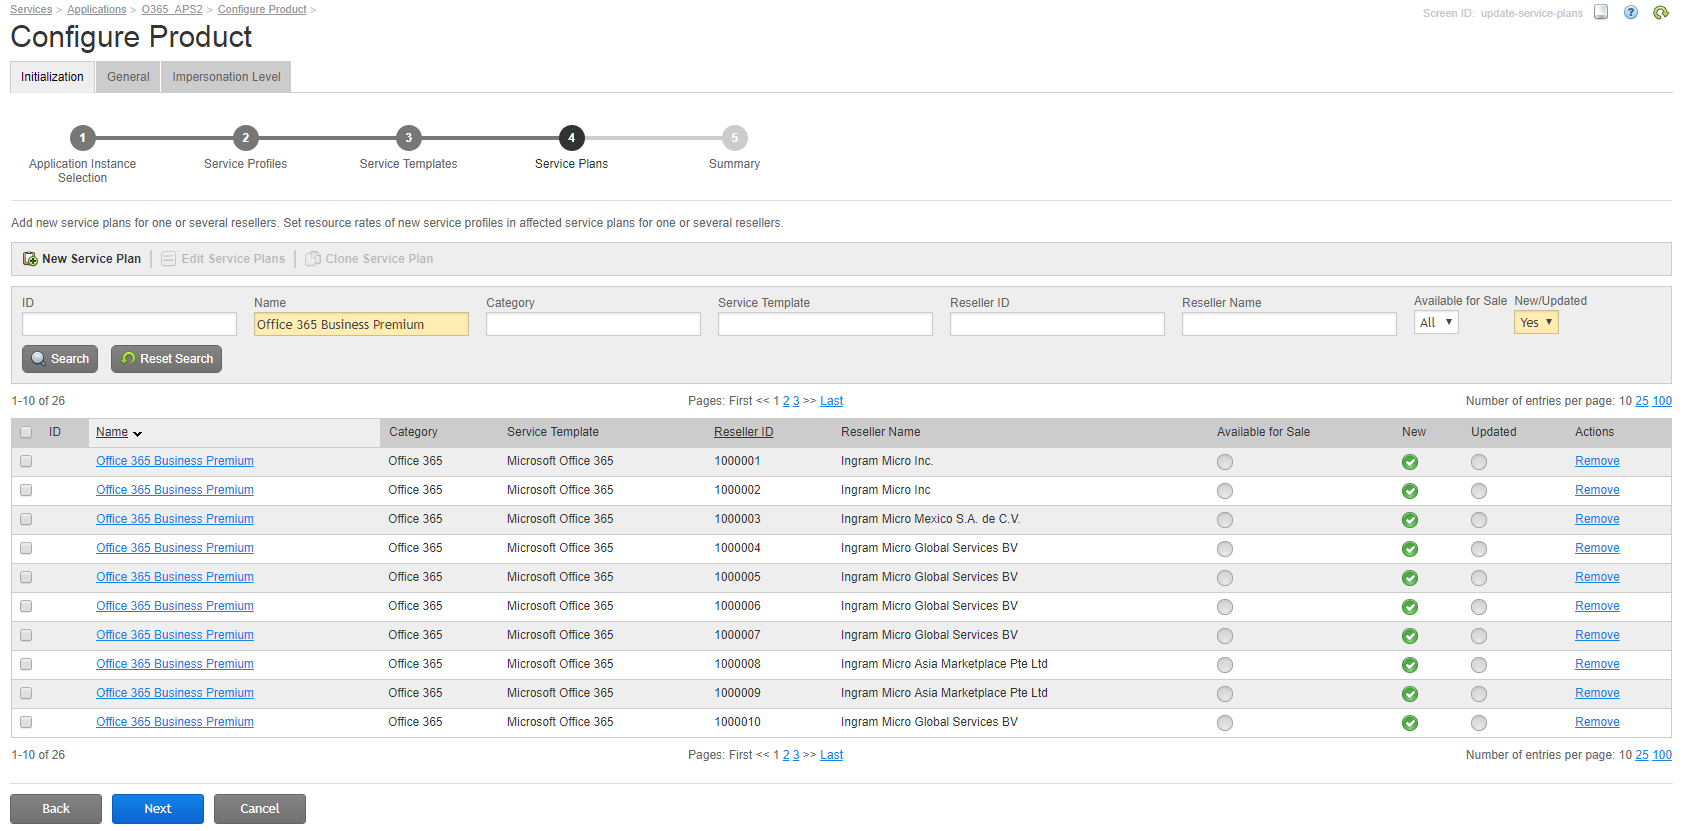
- On the Service Plans screen, new service plans are displayed. In accordance with the data received from the APS connector, parts of the structure are predefined (resource rates) and the following fields are prefilled:
- Plan name, Summary, Description
- Billing period
- Subscription periods
- Set of resource rates
Each reseller whose template was selected at the previous step receives a copy of these plans automatically.
To update settings for these new service plans:
- Select plans with the same billing period and click Edit Service Plans.
- Specify the following:
- The service plan, sales and resource categories;
- Service Terms and Terms and Conditions;
- Provisioning notifications;
- Service Templates to be used for delegation;
- Billing terms: billing model and billing period.
- Repeat for other new plan groups.
To delete a plan, click Remove under Actions.
Important: You must select a Plan Category for new plans.
Click Next to proceed.
- On the Summary screen, verify your changes and click Finish.