Overview
Reseller Subscription Management
Overview
UX1 panel introduces a single control panel for resellers, customers, and end users. UX1 adapts to different users depending on their role – a reseller, a customer's administrator, or a customer's service user.
With the UX1, resellers get access to the most critical parts of their business operations, including:
- End-customer accounts
- Financial status management: account balance, invoices, payments and available payment methods
- Account and staff management
UX1 is flexible and modular and can be easily enhanced by additional components that deliver value on top of basic capabilities:
- UX1 Marketplace (UX1 MP)
- Reporting and Data Export (RDE)
UX1 Marketplace
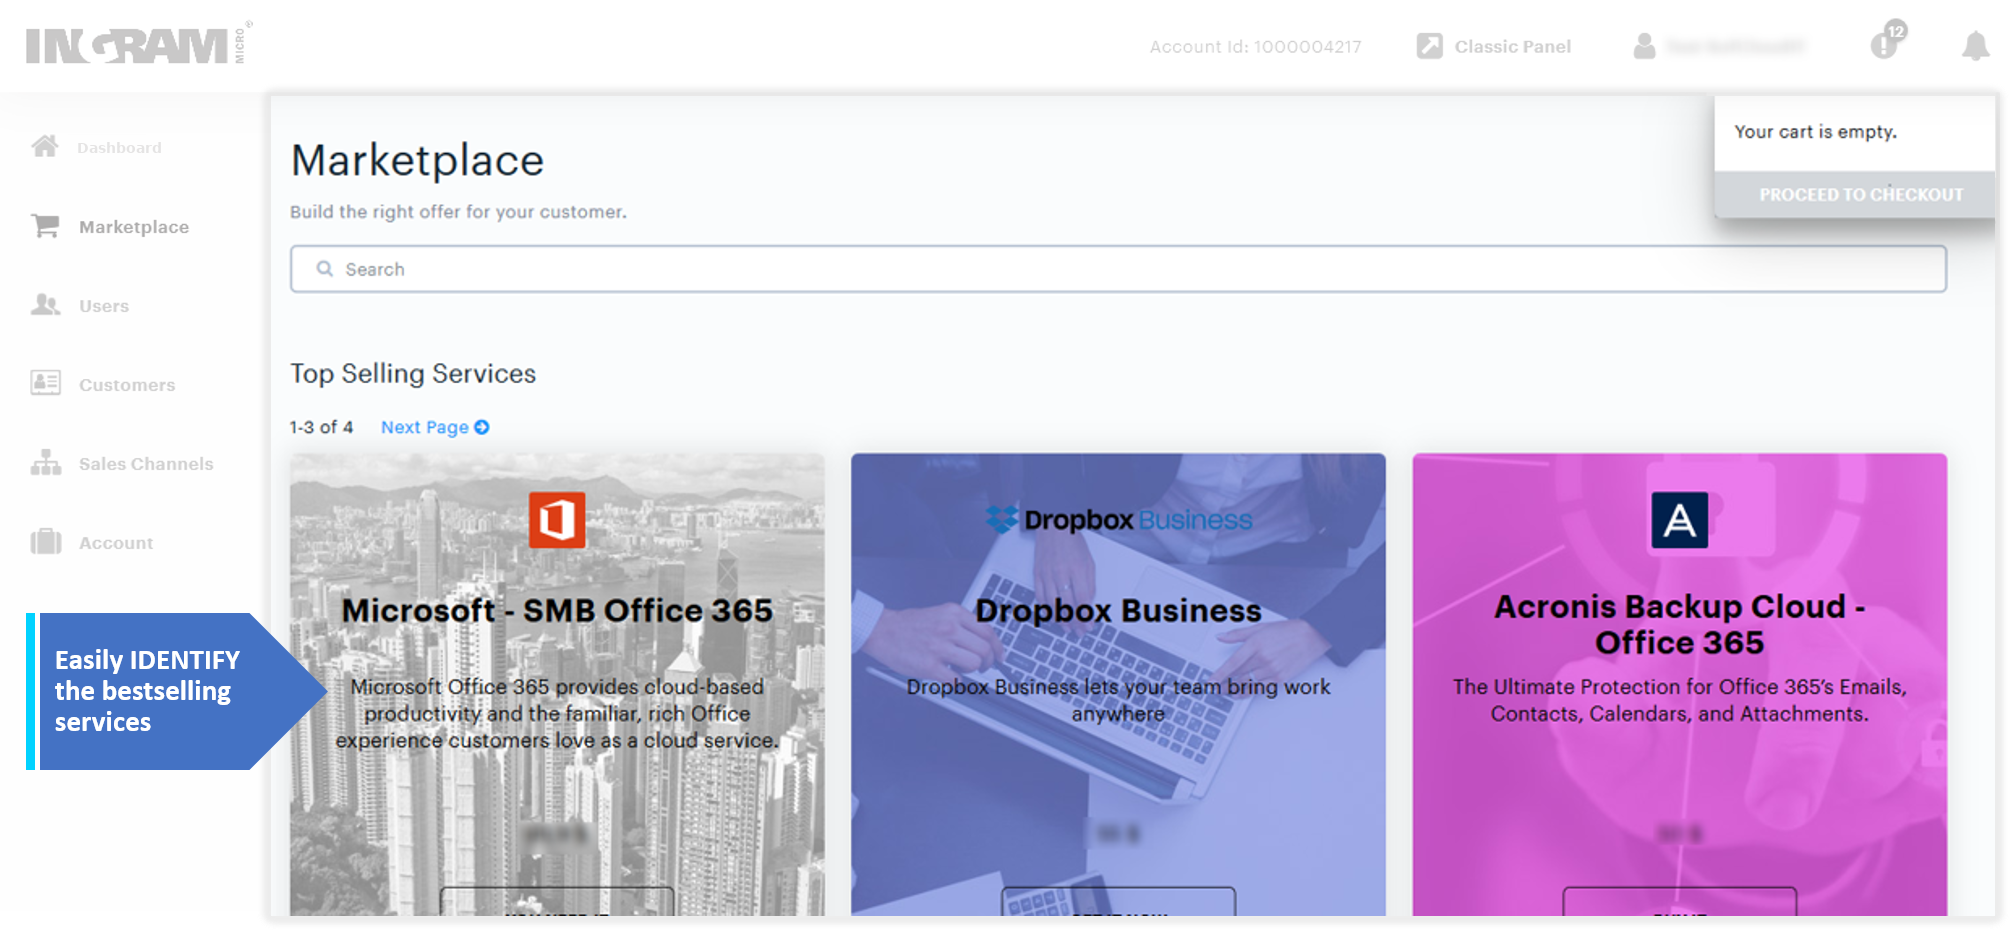
UX1 Marketplace (UX1 MP) is an eCommerce solution that delivers an outstanding buying and user experience. See the UX1 Marketplace documentation for more details.
Reporting and Data Export
Reporting and Data Export (RDE) is an additional component that allows resellers to generate and export reports about rated transactions. See the Reporting and Data Export documentation for more details.

Customer Account Creation
In UX1, your resellers can create new accounts, both business and personal. If you have configured the custom attributes functionality, they are also able to specify custom parameters during account creation.
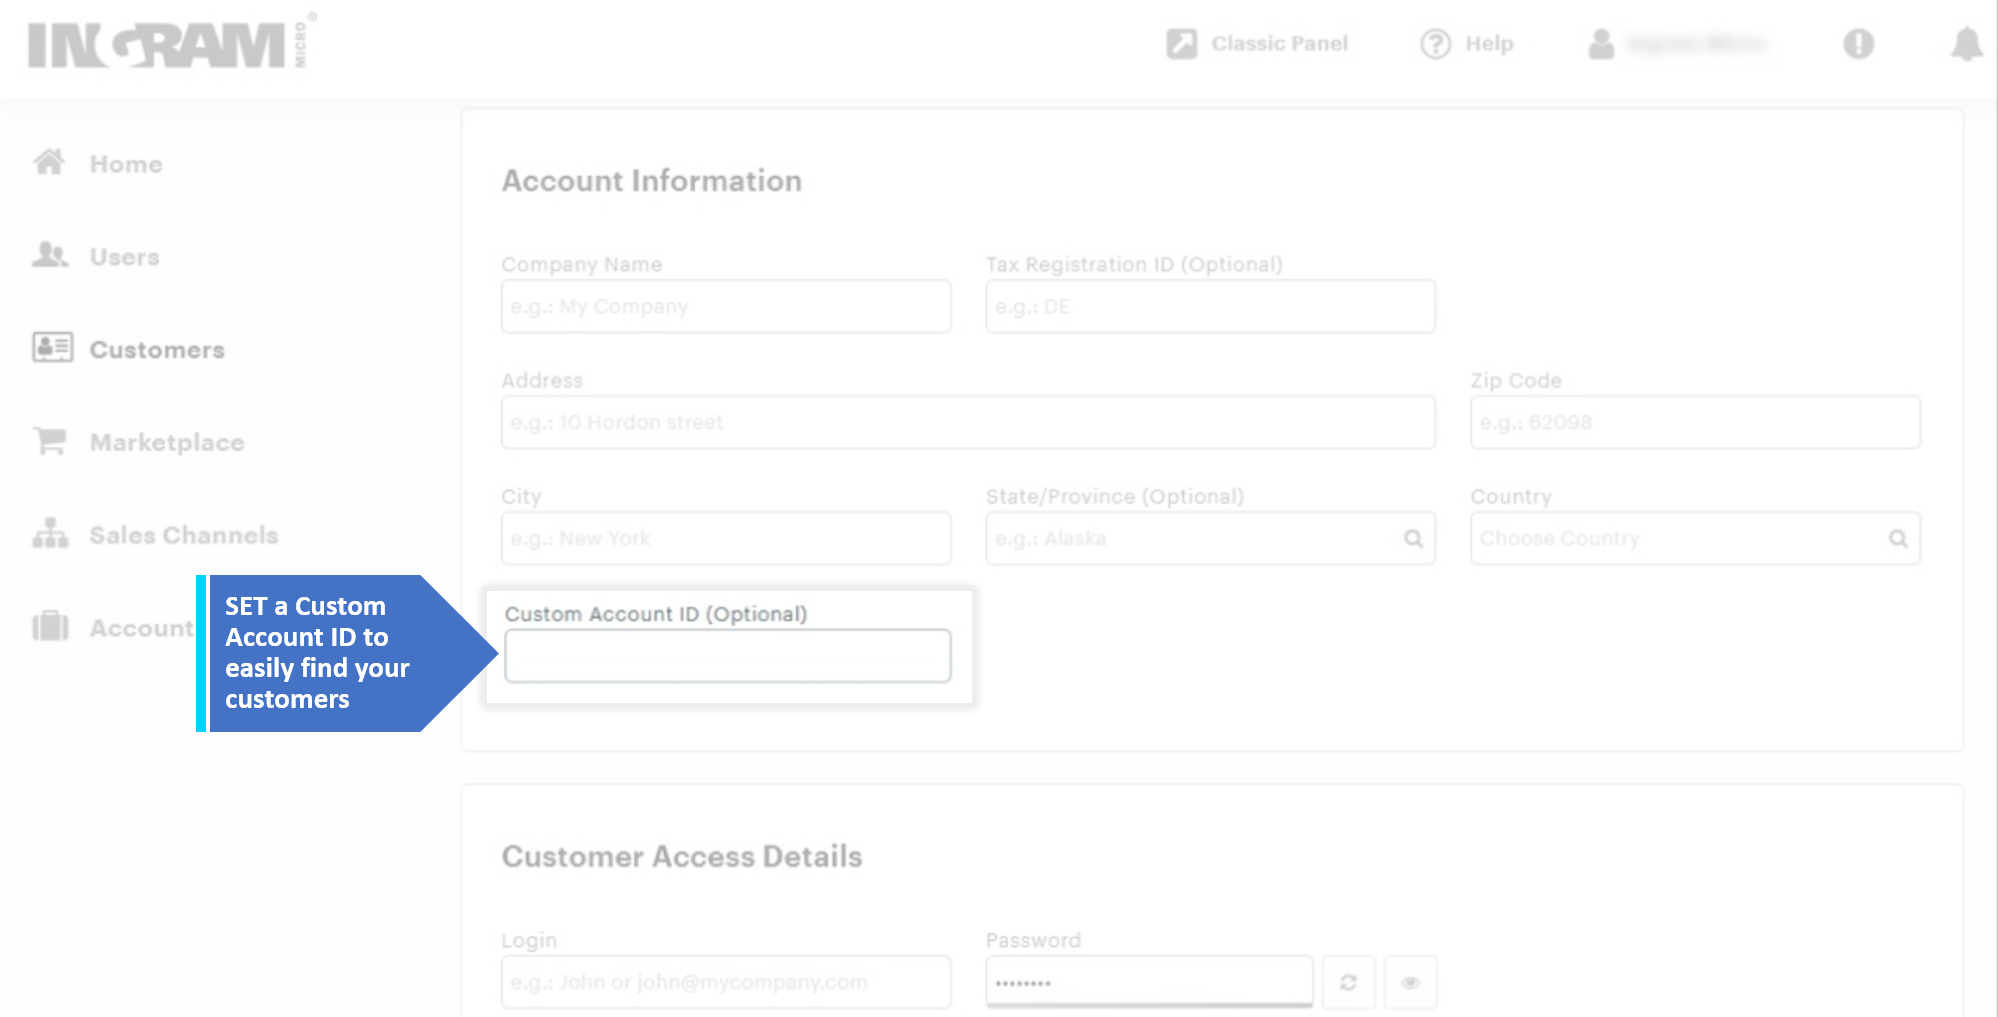
For instance, resellers usually use 3rd-party Account Management systems, and therefore do not host their customer base in CloudBlue Commerce. To preserve consistency between two account management systems (3rd-party and CloudBlue Commerce), your resellers can use the Custom Account ID field, where they can save the Customer ID of an account in the 3rd-party system.
By doing so, the customer account will be linked by the Custom Account ID field. To show this field in UX1, you just need to configure it by means of custom attributes functionality in CloudBlue Commerce.
Customer Management
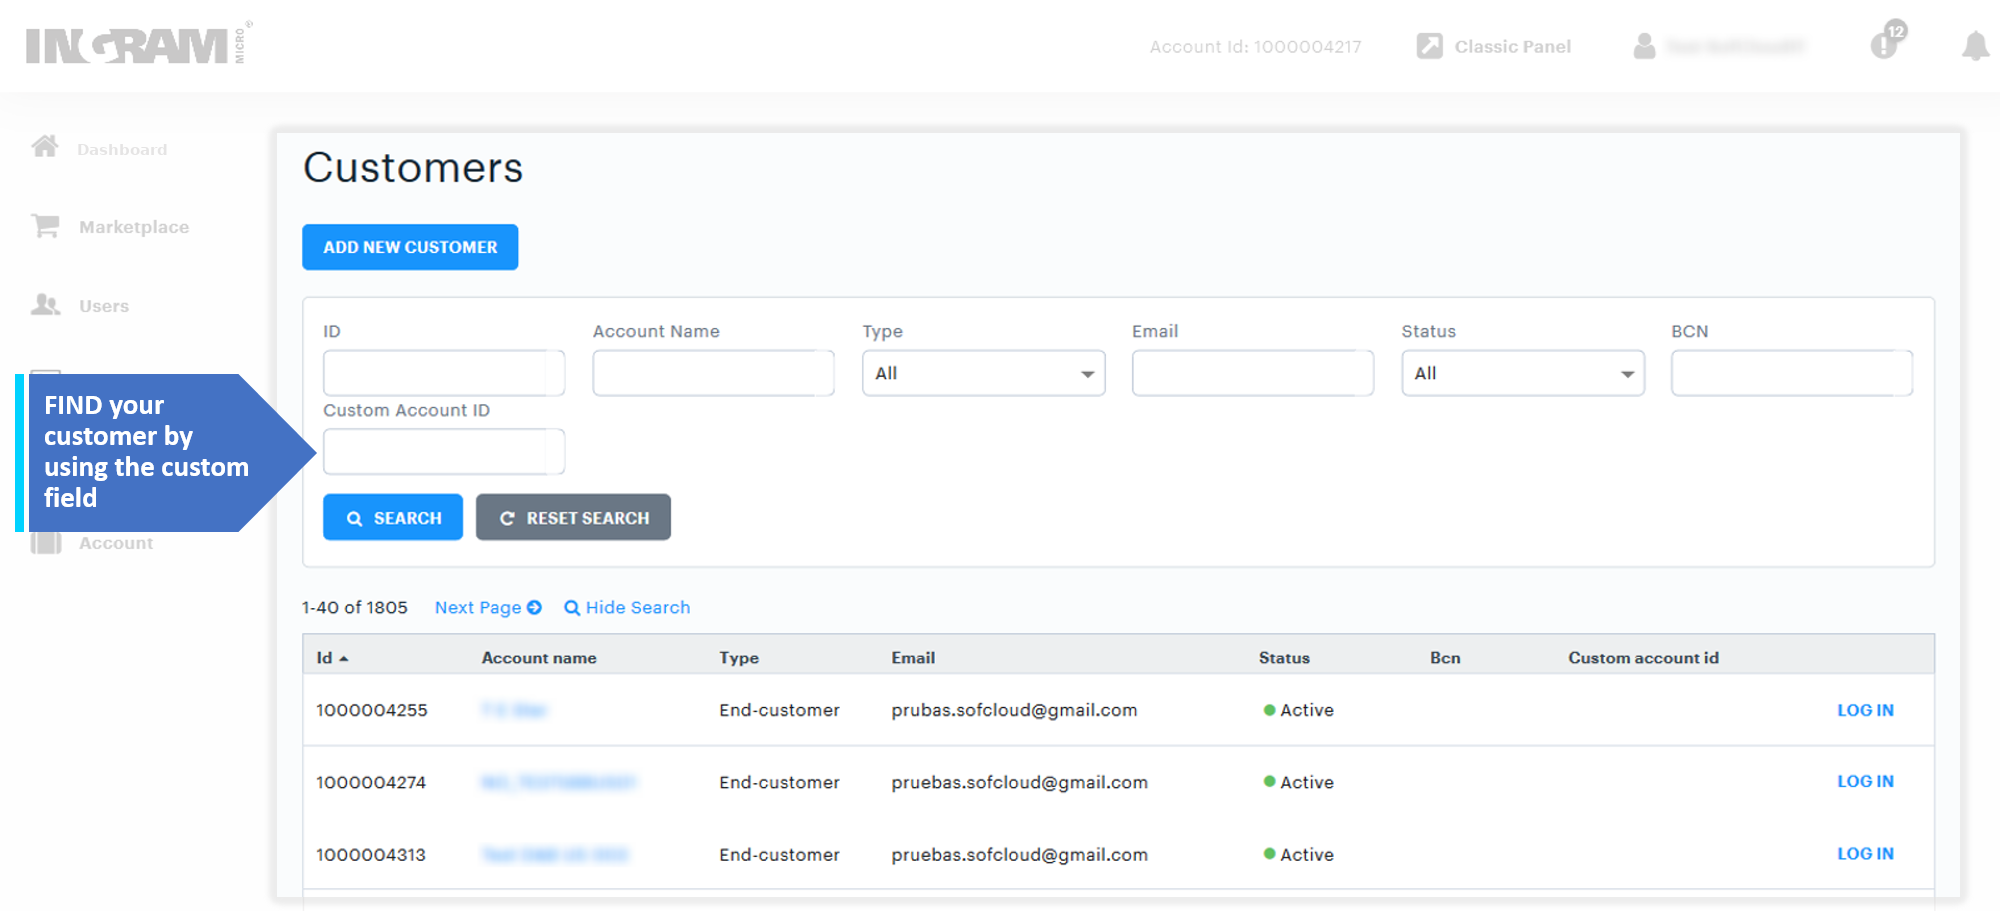
In UX1, your resellers can easily manage their customer base. They can search for a specific customer account using common or custom parameters in the filter.
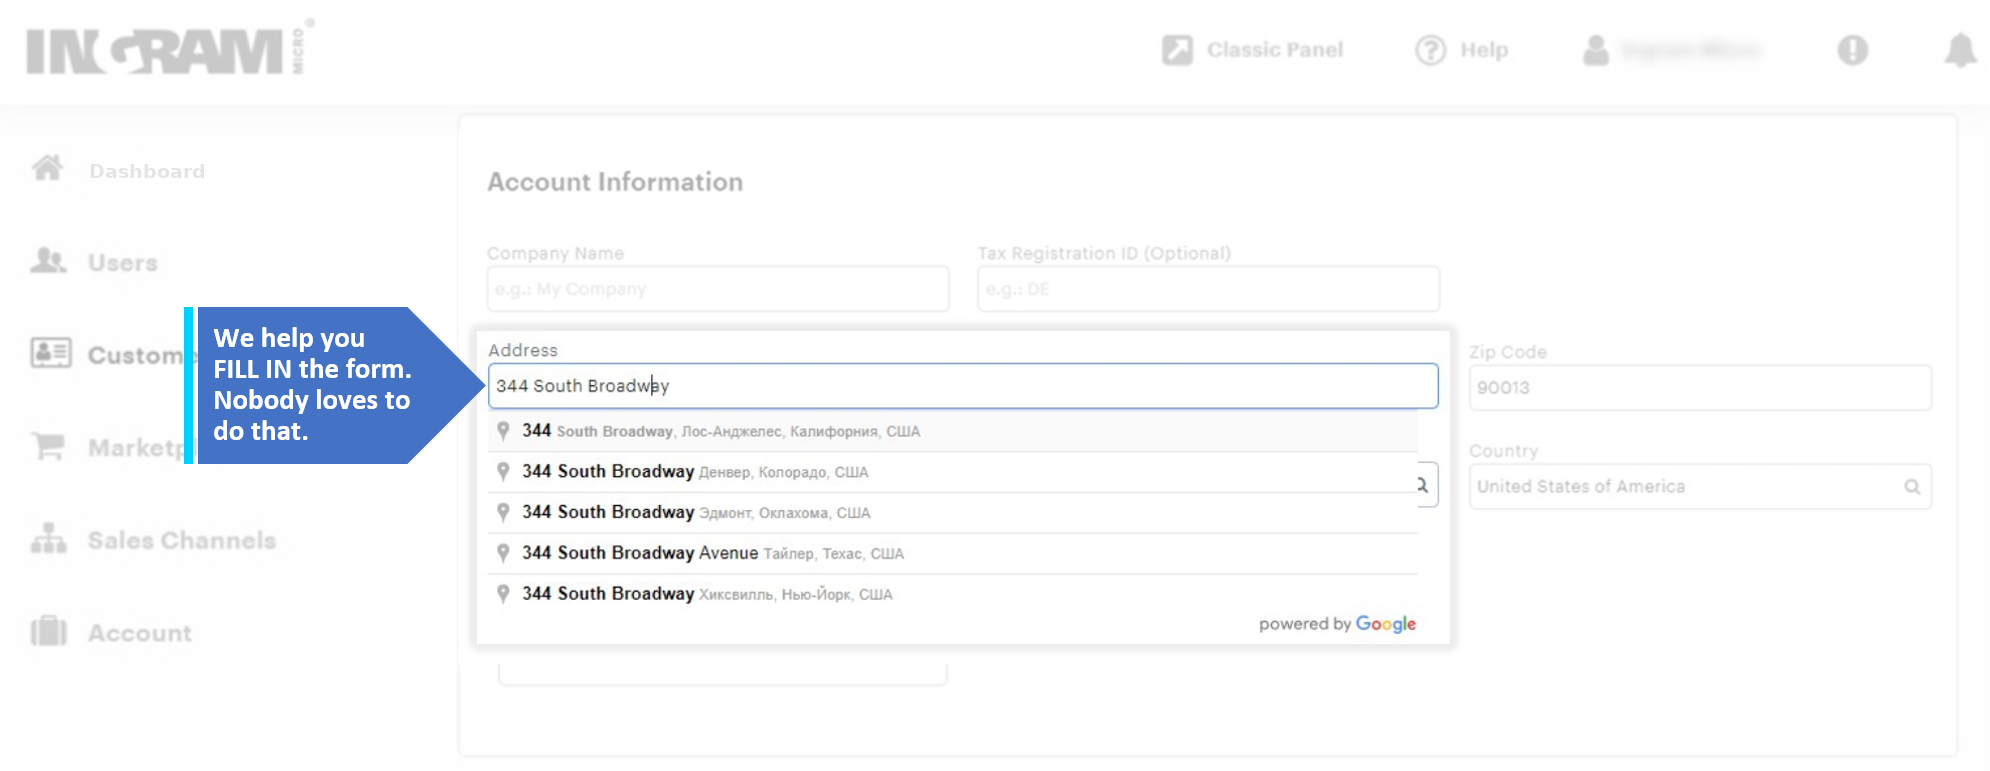
The integration of Google Places Autocomplete into UX1 makes the process of filling in an address effortless and eliminates errors. Your resellers just need to start typing the first few characters of an address and the autocomplete mechanism will make suggestions to fill in the rest.
Your reseller can select a particular customer and log in to UX1 on their behalf.
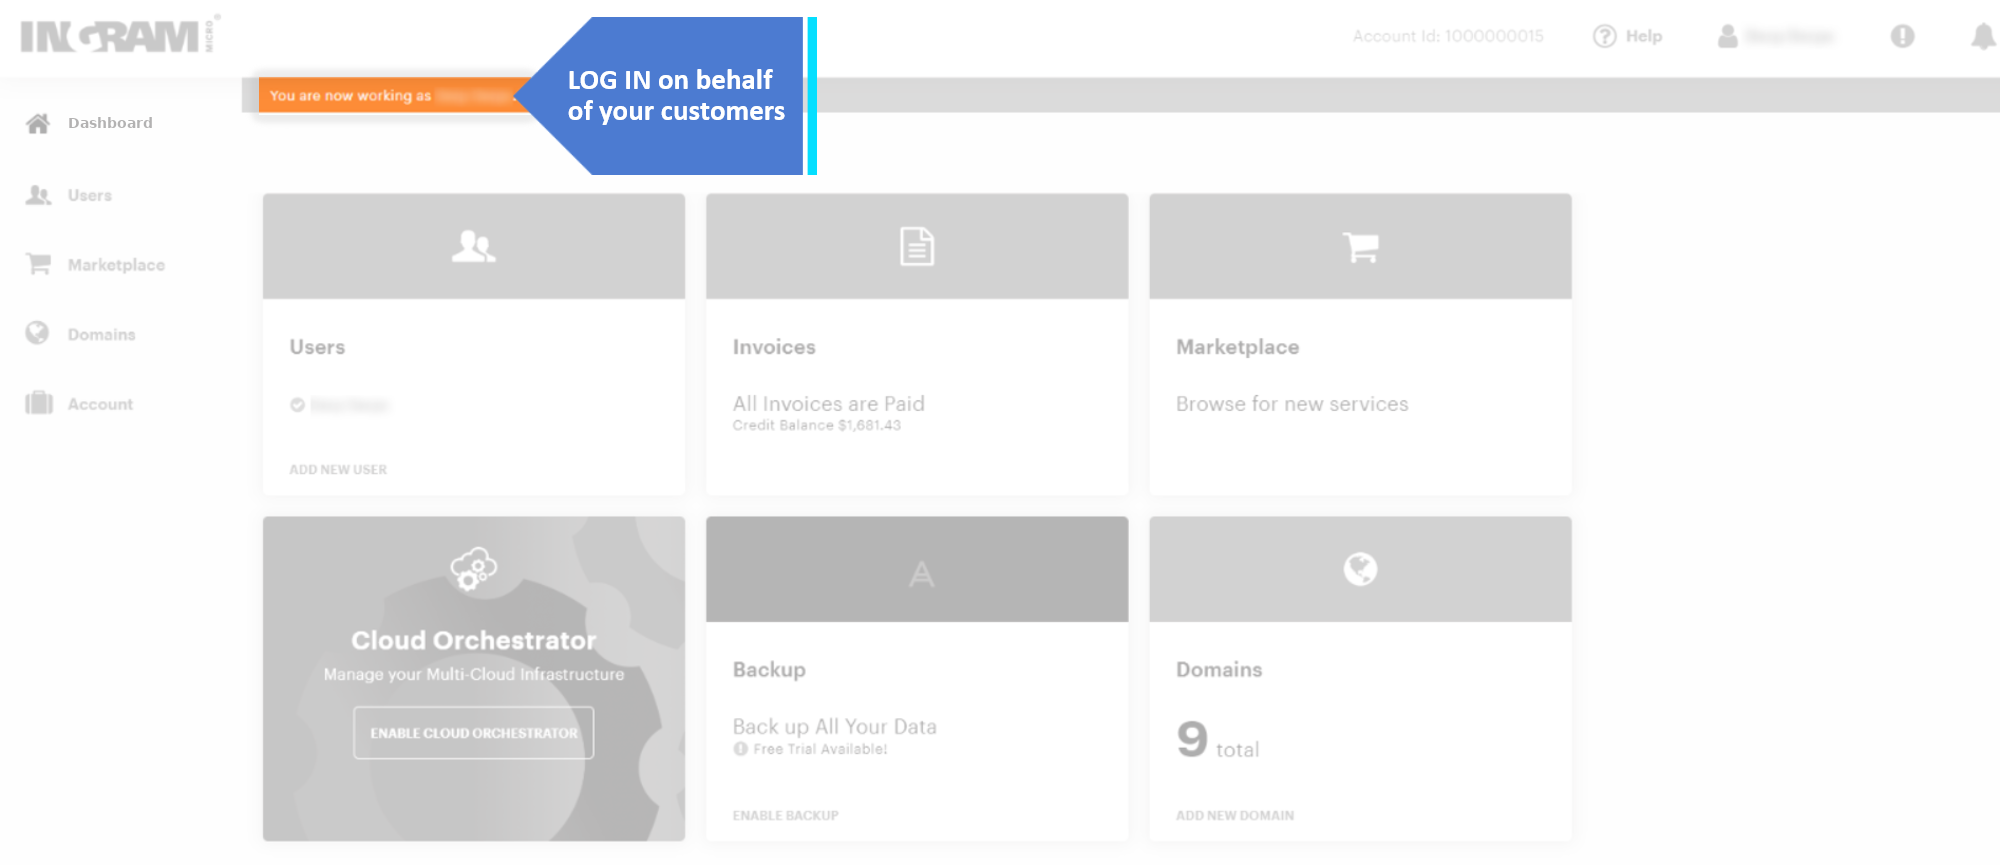
To log in as a customer, go to UX1 > Customers > account name > Log In as Customer.
Managing Customer Accounts and Subscriptions
Below is a short guide on how to carry out the following essential operations on accounts and subscriptions:
- Add customers
- View subscription information and search for subscriptions
- Change resource allotments for customers
- Renew subscriptions
- Suspend customer accounts
- Delete customer accounts
Adding Customers
To add a customer, go to Customers > Customers > Add New Customer.
After the customer is added, they can purchase items in the Marketplace or you can sign them up for services through the Marketplace.
To purchase services on behalf of a customer:
- Go to Marketplace, locate the service, and click Add to cart.
- Go to the cart, review the offer details, and click Next.
- Select the existing customer and click Next.
- Specify the store name and the administrator’s email address, and click Next.
- Review the order details and click Buy. The customer will receive further instructions by email.
To add a user for a customer’s organization:
Go to Customers > Log In (next to the customer’s organization name) > Users > Add New Users.
Viewing Subscription Information and Searching for Subscriptions
To view information about a subscription, go to Customers > Subscriptions. For your convenience, subscriptions are sorted into the following categories, according to their status:
- Active subscriptions
- Subscriptions that will expire within a month
- Subscriptions that should be renewed within one month
- Trial subscriptions
- All subscriptions
When searching for a subscription, you can narrow search results by filtering out subscriptions: by status (use the Status menu) and by ownership (use the Customer Type menu).
Viewing the History of Changes in Subscriptions
You can view the history of changes to subscriptions in subscription properties. The history displays all orders related to a subscription, including sales, change, upgrade, downgrade, renewal, and cancellation orders.
To do that, go to Customers > Subscriptions > customer name, and scroll down to the Subscription History section.
Renaming Subscriptions
To distinguish between subscriptions and to make it easier to find them by a certain tag or a memorable combination of symbols, you can rename subscriptions. To do that, go to Customers > Subscriptions > customer name, and click the subscription name to edit it.
Changing Resource Allotments for Customers
To change the amounts of resources available to customers or to subscribe customers to other service plans, go to Customers > Subscriptions > customer’s name > Change.
Renewing Subscriptions
The option to renew a subscription becomes available one month before the subscription's expiry date. To renew a subscription, go to Customers > Subscriptions > customer’s name > “…” icon (next to the Change button) > Renew.
Suspending Customer Accounts
To temporarily suspend a customer account and make all their services inaccessible, go to Customers > Subscriptions > customer’s name > “…” icon (next to the Change button) > Put on hold.
Deleting Customer Accounts
To delete a customer account with all related data, including information about orders and payments, go to Customers > Subscriptions > customer’s name > “…” icon (next to the Change button) > Cancel.
Account Status and Balance
To constantly provision services to customers, a reseller account balance must always be positive. Resellers can easily monitor their account's financial status to avoid any disruptions to business, and to ensure that their customers' orders are paid and provisioned on time.
On the Dashboard screen > Account Status tile, resellers can view a summary of their account status, including:
- Available balance (the amount of available credit)
- Number of unpaid customer orders
- A redirection link to auto-payment settings (if they are not yet configured)
On the Account > Account Status screen, resellers can view their balance information in detail.
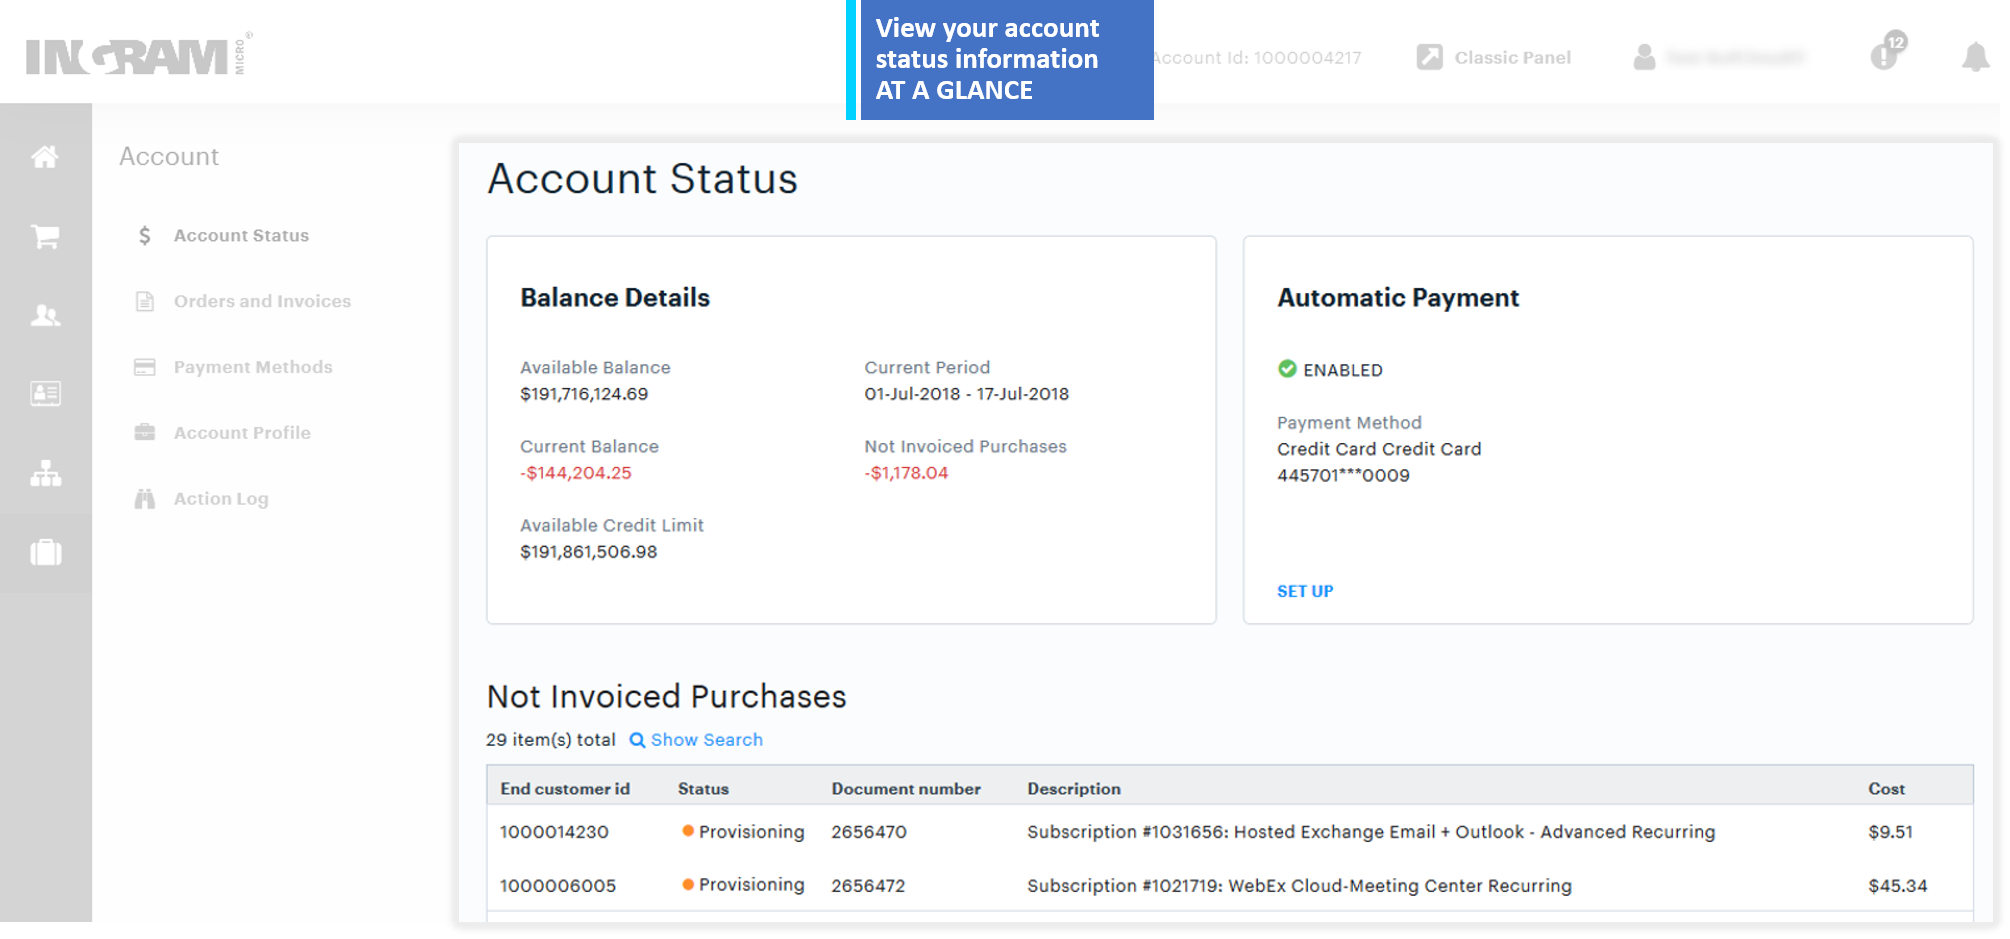
Balance Details
Available balance is the sum of all four parameters listed below. The "+" or "–" before a parameter name indicates whether the parameter value is added to or subtracted from the available balance.
- (+) Current balance is the sum of all open payments (payments from a reseller to the provider). In other words, current balance shows all documents' balance of the reseller account. For example, if a reseller made an extra payment to the provider, then this sum will be added to the reseller's current balance.
- (+) Payments processed through the provider is the total sum of all payments processed through the provider's merchant account. The provider may charge every transaction for a finance charge. If the sum of payments processed through the provider is zero, then the field is not shown.
- (+) Available credit limit refers to the credit given to a reseller from the provider for sales on trust. Depending on the provider's service provisioning terms, it can be from zero to positive.
- (–) Not invoiced purchases is the total sum by all services that a reseller has sold to end customers at wholesale price (provider's price). In other words, it shows how much the reseller owes to the provider by the end of billing period.
Automatic Payment
A reseller can assign one of the registered payment methods (credit card, bank account …) to be used for paying orders automatically. Only one payment method can be used for automatic payments, so if the reseller assigns a new payment method to be used for automatic payments, the previously selected option is replaced by the new selection.
A reseller can define which payment method will be used for auto-payments:
- Default payment method – the default for the reseller account.
- Specified payment method – specified explicitly to be used for auto-payments and can be different from the default one.
The Set Up button for automatic payment configuration can be hidden by means of the OSS privilege Show Auto TopUp Button in UX1. A provider can select a reseller, and on the Security tab > Privileges subtab find the privilege and disable it. As a result, the Automatic Payment tile will not have a Set Up button and the description will be changed to "Add new Payment Method for your account to get your unpaid orders automatically paid".
Not Invoiced Purchases
Resellers can easily track all their purchases that are not invoiced yet. At the end of the month, all purchases that have not been invoiced for this month are added to the billing order which summarizes what they owe to the provider. All sale transactions on the list are at the provider's prices. At the end of a billing period, a billing order is created with all purchases that have not been invoiced.
Account User Management
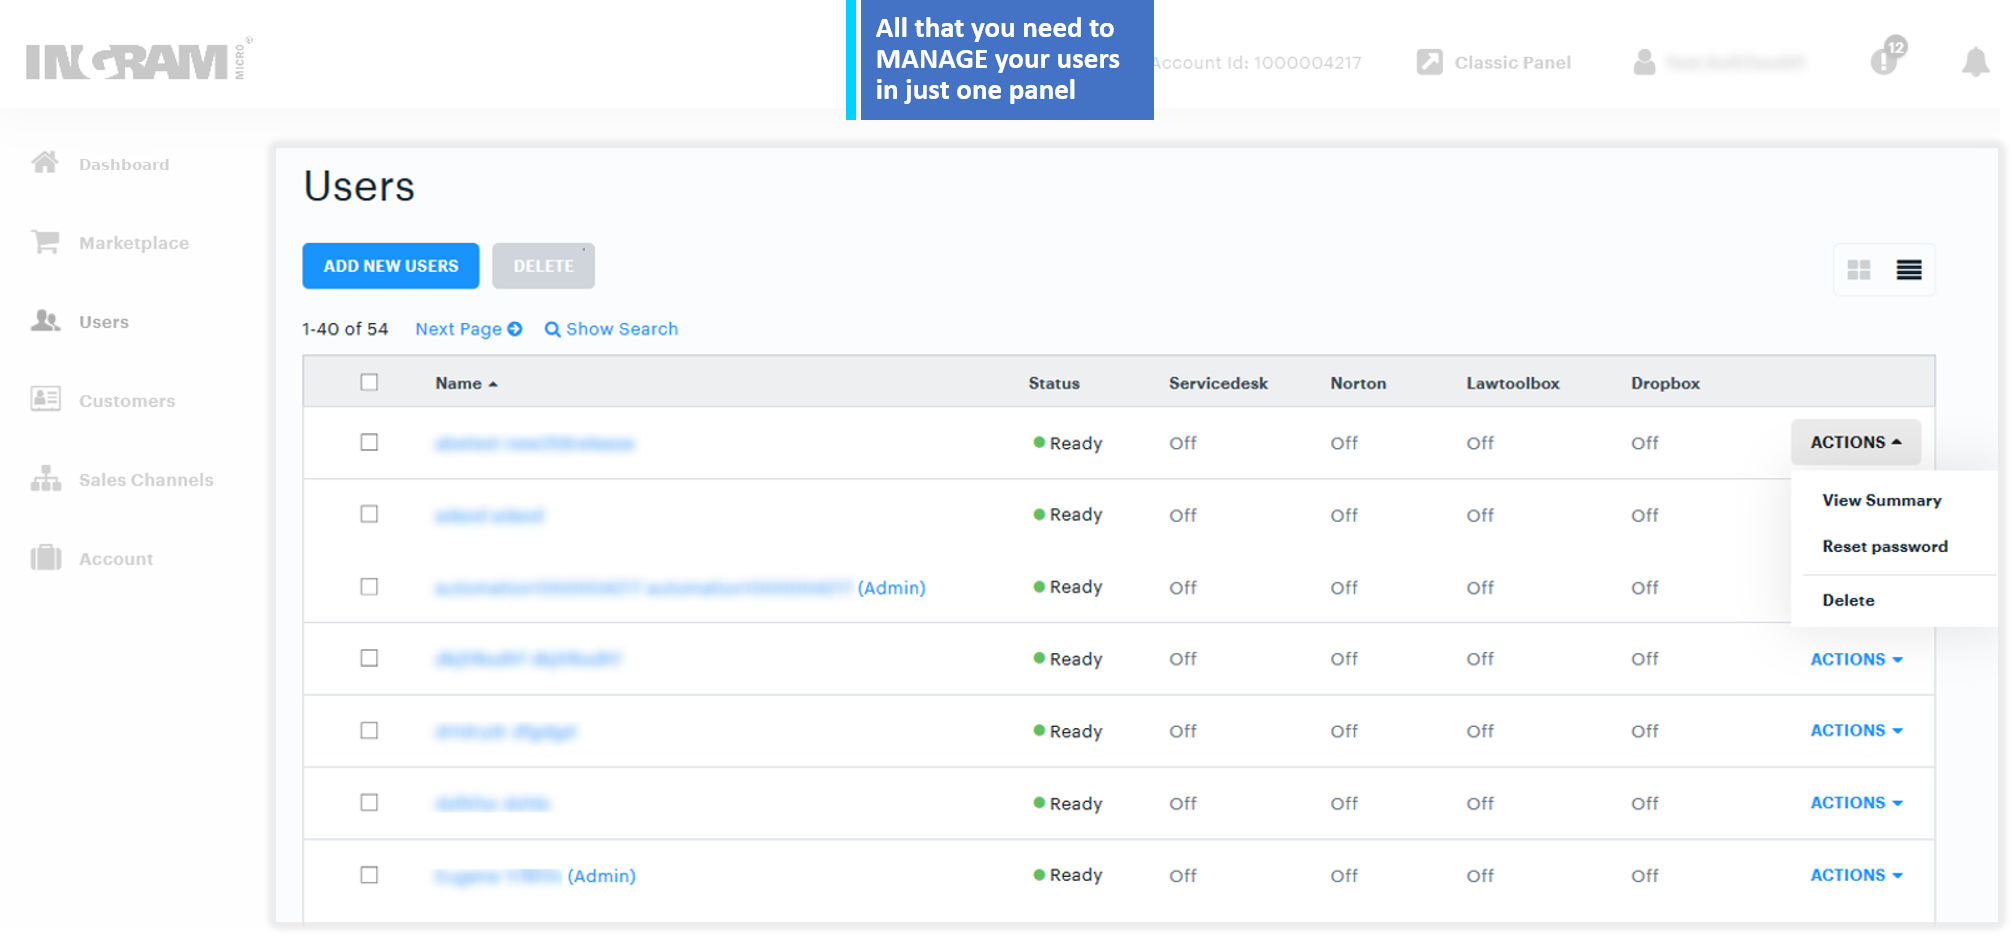
In UX1, resellers can manage users of their own account. They can:
- Add new users (one or several at once)
- Define two different email addresses: one for signing in to the system and one for receiving account and system notifications
- Change a user's password
- Assign services to users
- Log in to UX1 on behalf of a user
- And more
Invoices and Orders
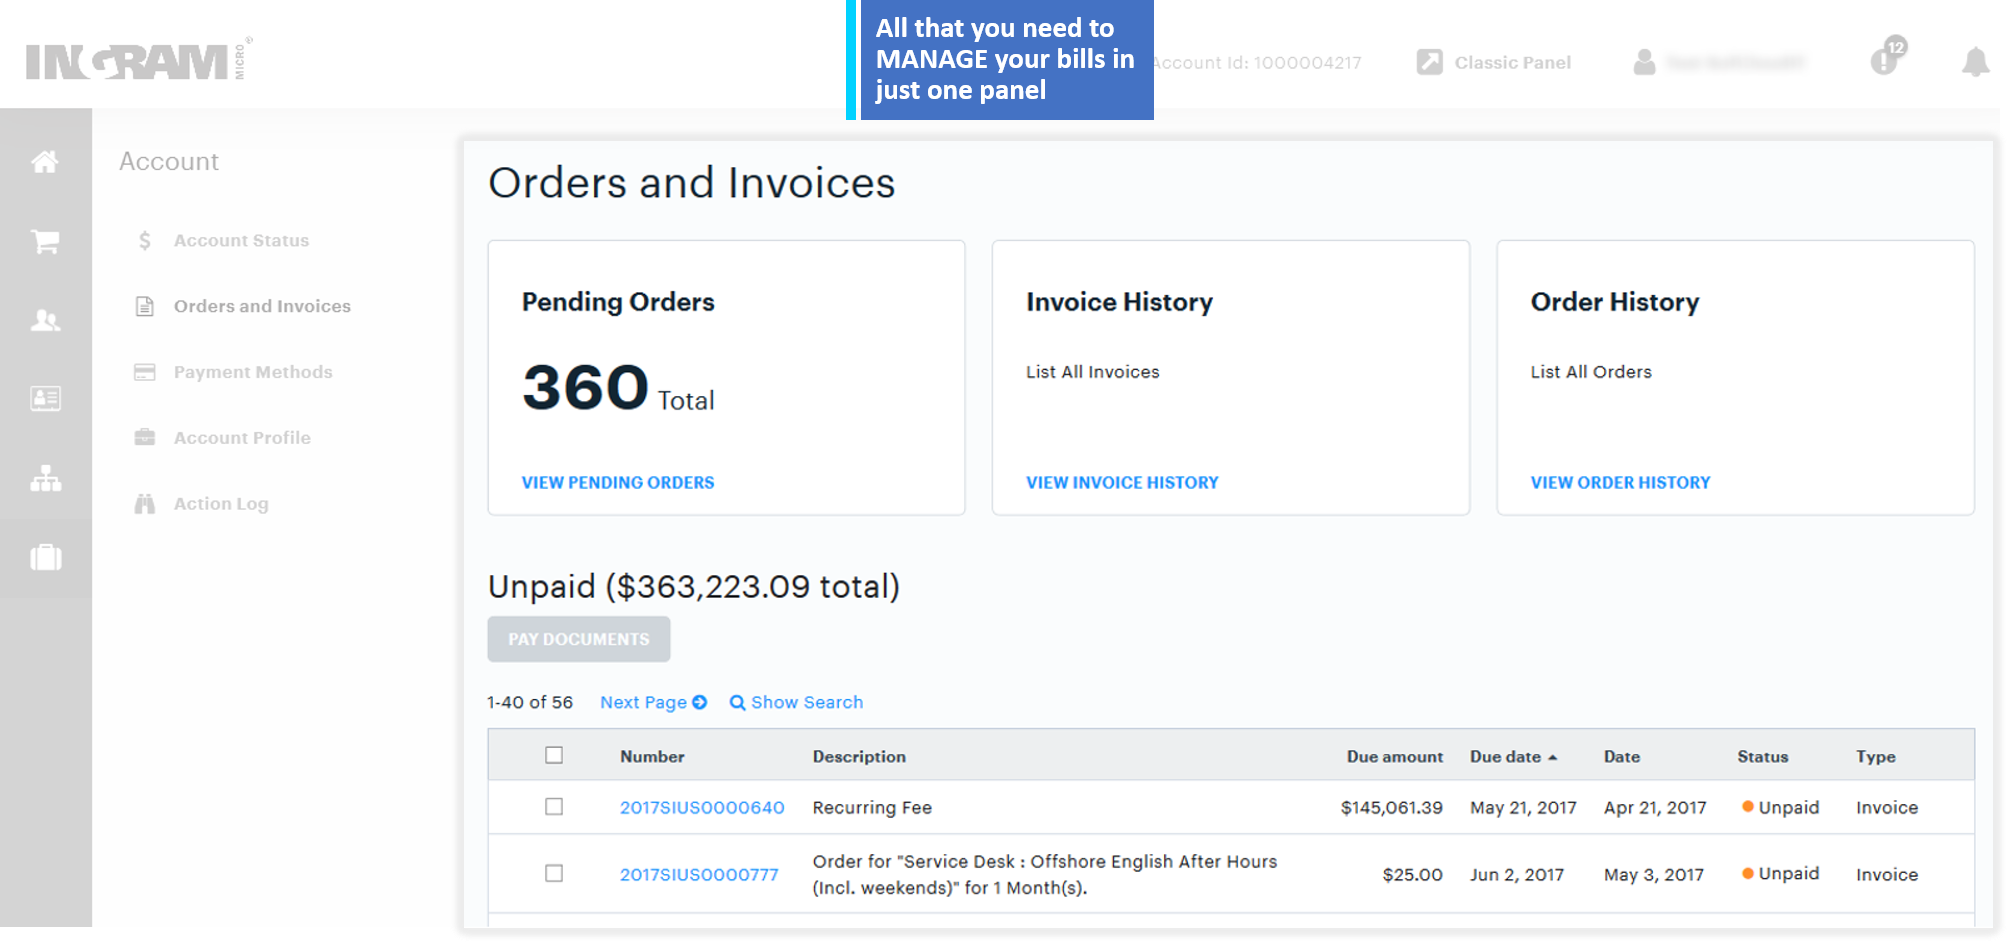
Resellers can view all pending orders and pay for unpaid orders and invoices.
In the list of Pending Orders are the orders for services they purchased from the provider for their own use.
In the Invoice History are invoices for services they purchased from the provider for their own use and for reselling services to customers.
Payment Methods
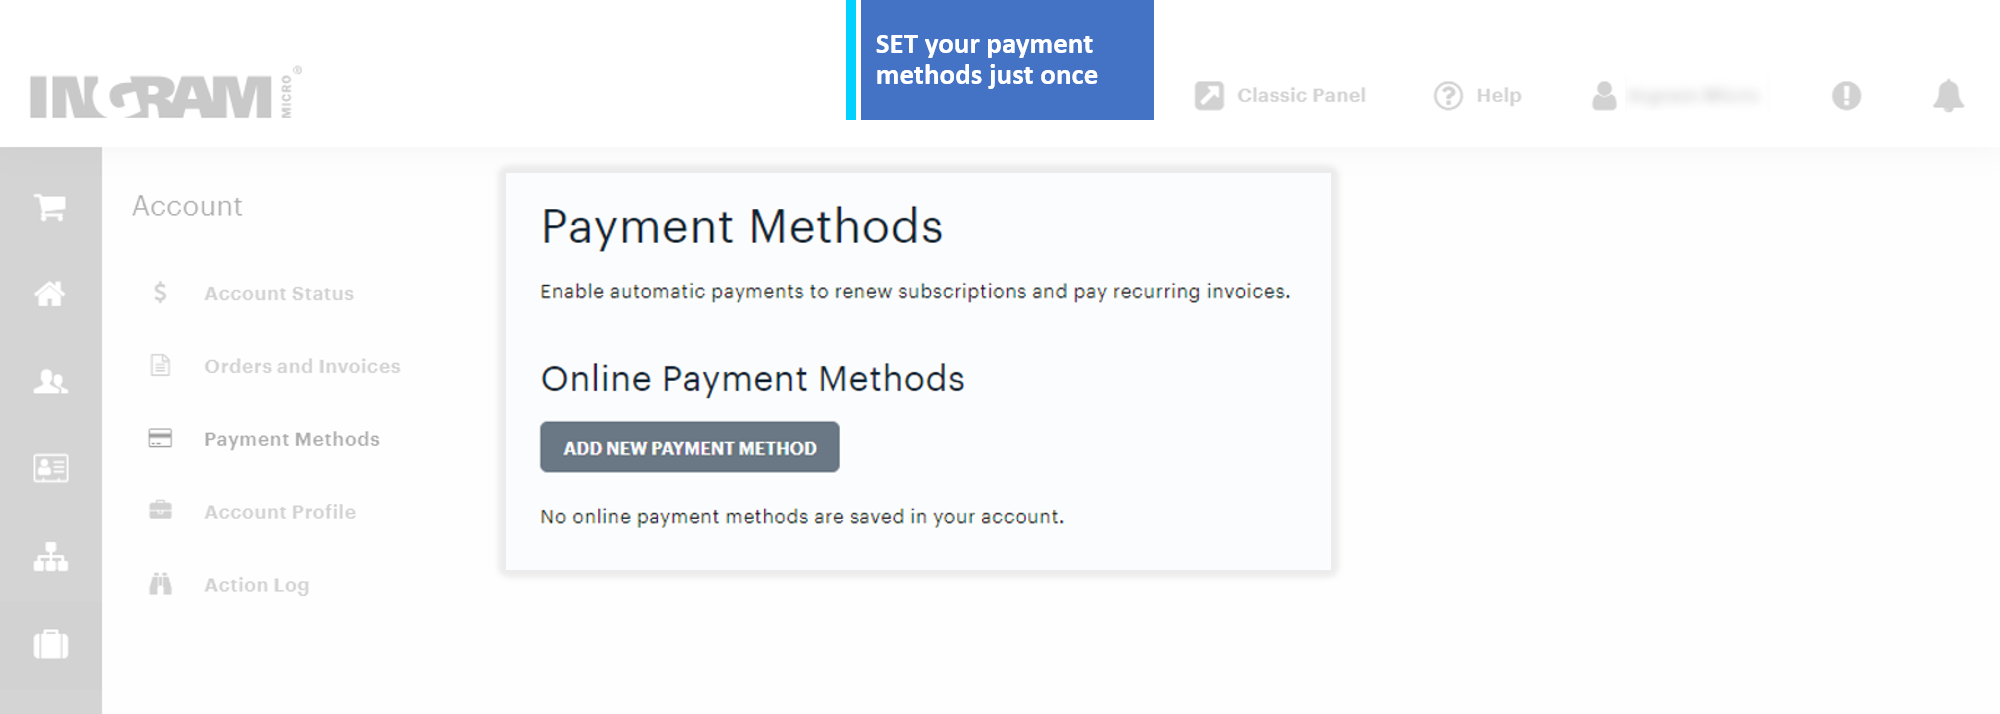
For convenience, resellers can specify how to pay their provider for the provisioned services by adding a payment method to their account. They can select a payment method for automatically paying recurring invoices.
There are two types of payment methods which resellers can bind to their account:
- Online payment methods (credit and debit cards)
- Bank accounts
The ability to add a payment method in UX1 depends on the provider's configuration. If payment methods are not configured by the provider, they will not be available in UX1.
If resellers have already entered the settings of their payment methods in the system, they will be saved in the system and shown on the Payment Methods screen.
Payment During Checkout
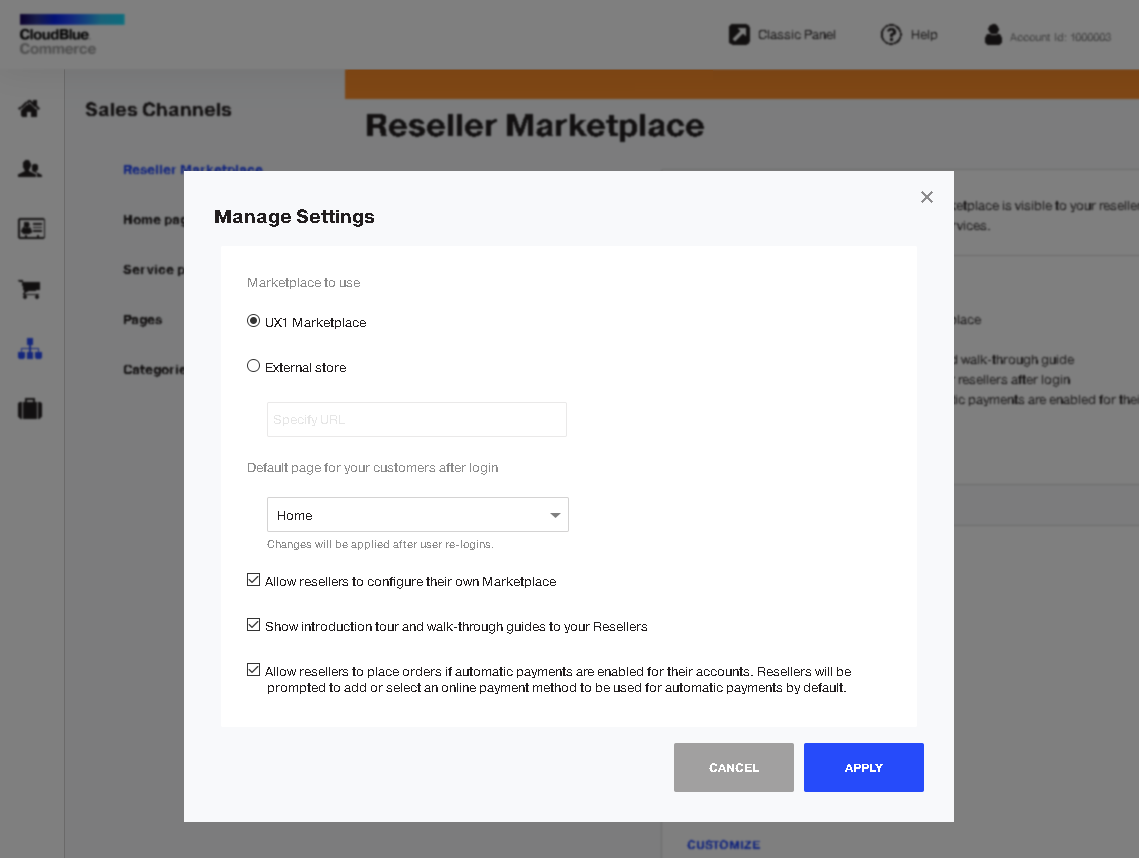
If you require resellers to pay upfront, in the UX1 Marketplace settings (Sales Channels > Configure), select the checkbox Allow resellers to place orders if automatic payments are enabled for their accounts. During the checkout, they will be prompted to specify a credit or debit card. The card will be saved for future use and will be used for automatic payments for subscription renewal and account balance top-up in Billing.
Reseller Subscription Management
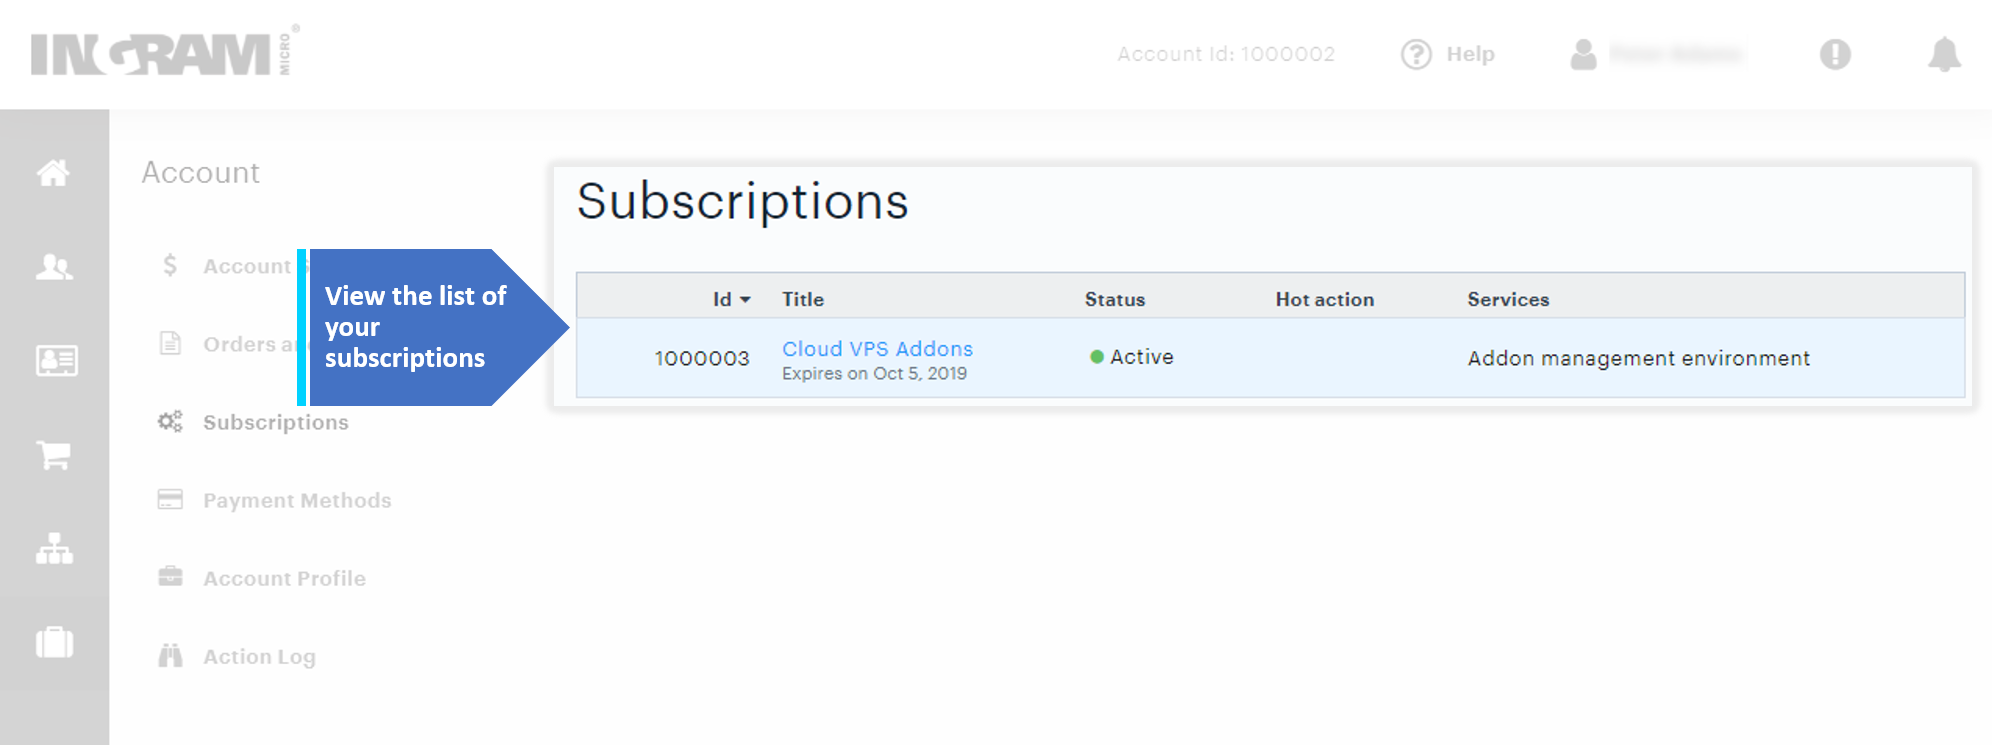
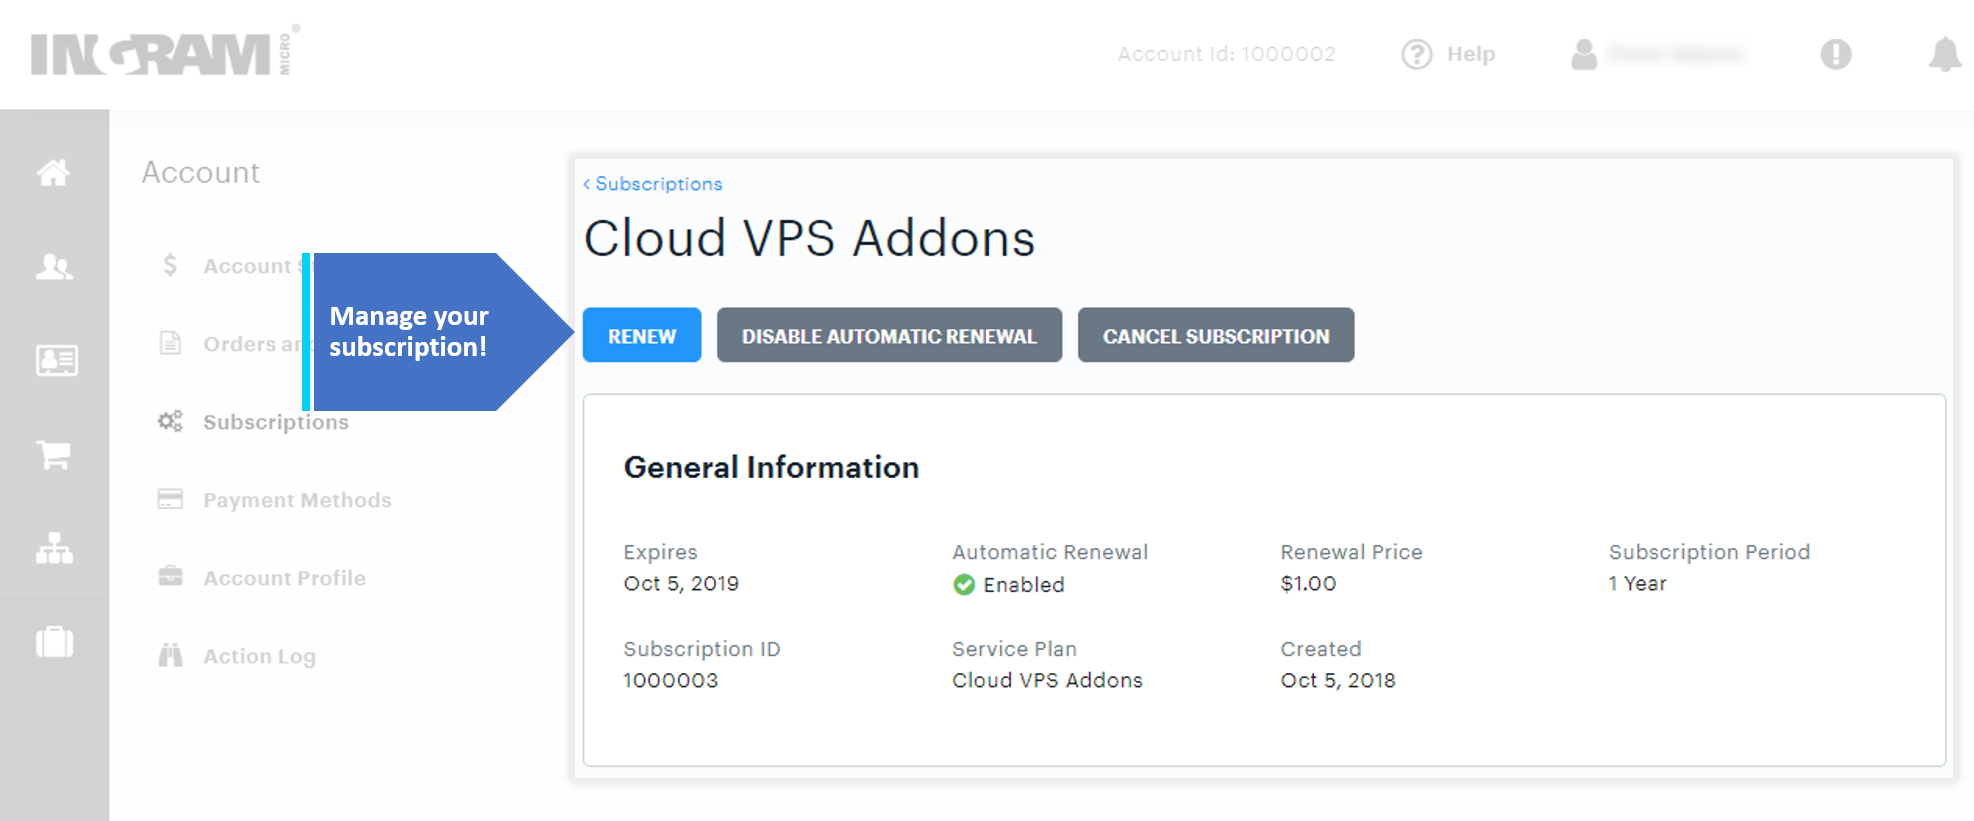
Resellers can now view and manage their own subscriptions in UX1, with the ability to:
- Cancel a subscription
- Renew a subscription
- Enable or disable an automatic renewal of a given subscription
- Upgrade to a paid subscription
Subscription management functionality does not provide management of services in UX1. Resellers can manage services on the vendor side.
Bulk Account Import
Important: To use this feature:
1. The User Account Management (UAM) microservice must be deployed.
2. A reseller must have the "Application Users and Accounts Onboarding: Customer Bulk Uploading" privilege.
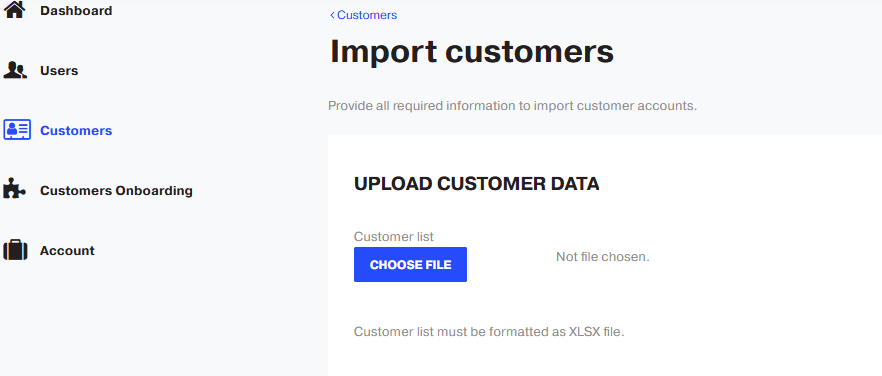
In UX1, resellers can now import customer accounts in bulk.
| Column Name | Format | Required | Description | Example |
|---|---|---|---|---|
| login | Valid CloudBlue Commerce login | Yes | The staff member log-in name. | Customer100 |
| externalid | String | No | The ID of an external account to be created or updated. To be stored in the PAAccount.externalId property. |
Customer100 |
| contactemail | Yes | The account email address for notifications. | customer100@email.email | |
| sendinvitation | Yes/No |
No (the default value) |
This value specifies whether to send an invitation email message. | No |
| givenname | String | Yes | The customer's first name. | John |
| familyname | String | Yes | The customer's last name. | Doe |
| telvoice | Phone | Yes | The customer's phone number (must be in international format, starting with the plus (+) sign and the country code). | +4954646433 |
| countrycode | String | Yes | The customer's country code. | de |
| postalcode | String | Yes | The customer's postal code. | 12345 |
| regioncode | String | Yes | The customer's region code. | AK |
| city | String | Yes | The customer's city. | Berlin |
| streetaddress | String | Yes | The customer's street address. | Address st. 100 |
| accounttype | String | Yes | The value defines the account type: Personal or Business. | Business |
| taxregistrationid | String | No | The customer's tax registration ID. | 12345678 |
| locale | String | Yes | The customer's locale code. | en-US |
| companyname | String | No | The company name. | |
| attribute:<name> | String | No | The customer's attribute. |