As a result of the installation of CloudBlue Commerce 20.5 using the installer script, only the English language pack is installed.
To install additional locales to your system:
- Step 1: Check which locales are installed to your system.
- Step 2: Install the locales to the Operations, Billing, and APS components.
- Step 3 (for a K8s-based UI cluster only): Install the locales to your Kubernetes-based cloud deployment of UI Cluster.
Important: The maximum number of language packs allowed in the system is 8 (including English). Installed language packs cannot be removed.
Note: To order additional language packs, please contact CloudBlue Commerce support.
Step 1. Check the Installed Locales
To view the locales installed to your system:
- Log in to the Provider Control Panel > Operations.
-
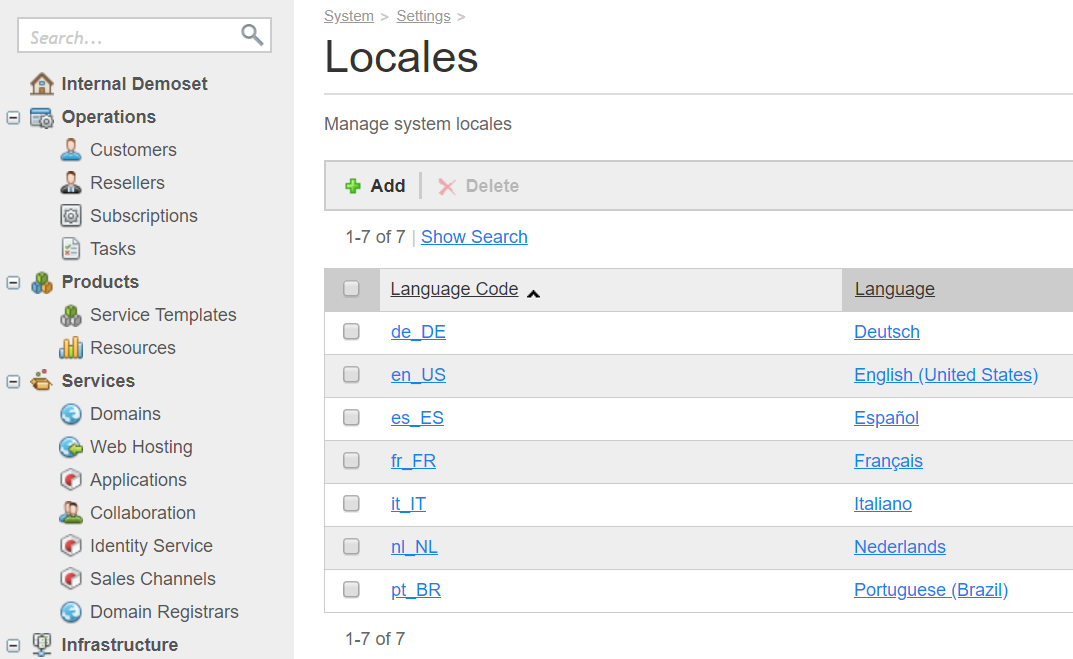
Go to System > Settings > Core > Locales. The installed locales will be displayed, including the English locale:
Step 2. Install Locales to Operations, Billing, and APS-based Components
To add locales to your system:
- Connect to the CloudBlue Commerce management node via SSH as root.
-
Run the update script passing the necessary locales to the --add-locales parameter:
oa-update --add-locales <LOCALE>[,<LOCALE2>]
where
- <LOCALE> is the ISO country code; available locales are:
{de|es|fr|it|ja|nl|pt|ru}
Example:
oa-update --add-locales de,es,fr
Note: During the locale installation, the Billing service will be restarted.
- <LOCALE> is the ISO country code; available locales are:
- To start using the newly added languages:
- After the locale installation is complete, re-log into CloudBlue Commerce.
- Enable the newly added languages on the login screen.
Step 3. Install Locales to a Kubernetes-based Cloud Deployment of a UI Cluster
To install the locales added above to a Kubernetes-based cloud deployment of UI cluster:
- Enter CloudBlue Commerce Management Node using SSH. Find the following values:
- The UI service name (for example: branding-ui-test):
Obtain a list of all services on the Management Node by executing the following command:
kubectl get service
- Identify the UI service in the returned list of services.
- The WildFly home path (for example: /usr/local/pem/wildfly-16.0.0.Final).
- The UI service name (for example: branding-ui-test):
-
Run the following script assigning the values that you found above to the corresponding parameters:
WILDFLY_HOME=<WILDFLY_HOME_PATH>
UI_CLUSTER_SERVICE_NAME=<UI_SERVICE_NAME>
export UI_CLUSTER_POD=$(kubectl get pods -l service=$UI_CLUSTER_SERVICE_NAME --no-headers --output=custom-columns=NAME:.metadata.name  | head -1)
kubectl exec $UI_CLUSTER_POD -- mkdir -p  /mnt/brands/pui_static/pem/resources
IFS=', ' read -r -a array <<< "$locales"
for locale in "${array[@]}"; do    ls -d $WILDFLY_HOME/ext/puiStatic/pem/resources/* | grep "$locale" | awk '{print "kubectl cp "  $1 " "  ENVIRON["UI_CLUSTER_POD"] ":/mnt/brands/pui_static/pem/resources"  }' | sh; done
Where:
- <UI_SERVICE_NAME> is the UI service name you found above.
- <WILDFLY_HOME_PATH> is the WildFly home path you found above.