UX1 Marketplace supports the Sales Assistant scenario for providers and allows them to configure Marketplace on the L0 level, enabling the provider’s staff members to sell services to their direct customers using the UX1 panel. Learn how to fill in your product catalog and get ready for selling below:
Enable access to Provider Marketplace
-
Log in as a provider staff member to CloudBlue Commerce and go to UX1, click Sales Channels and choose Provider Marketplace.
-
In the General section, click On.
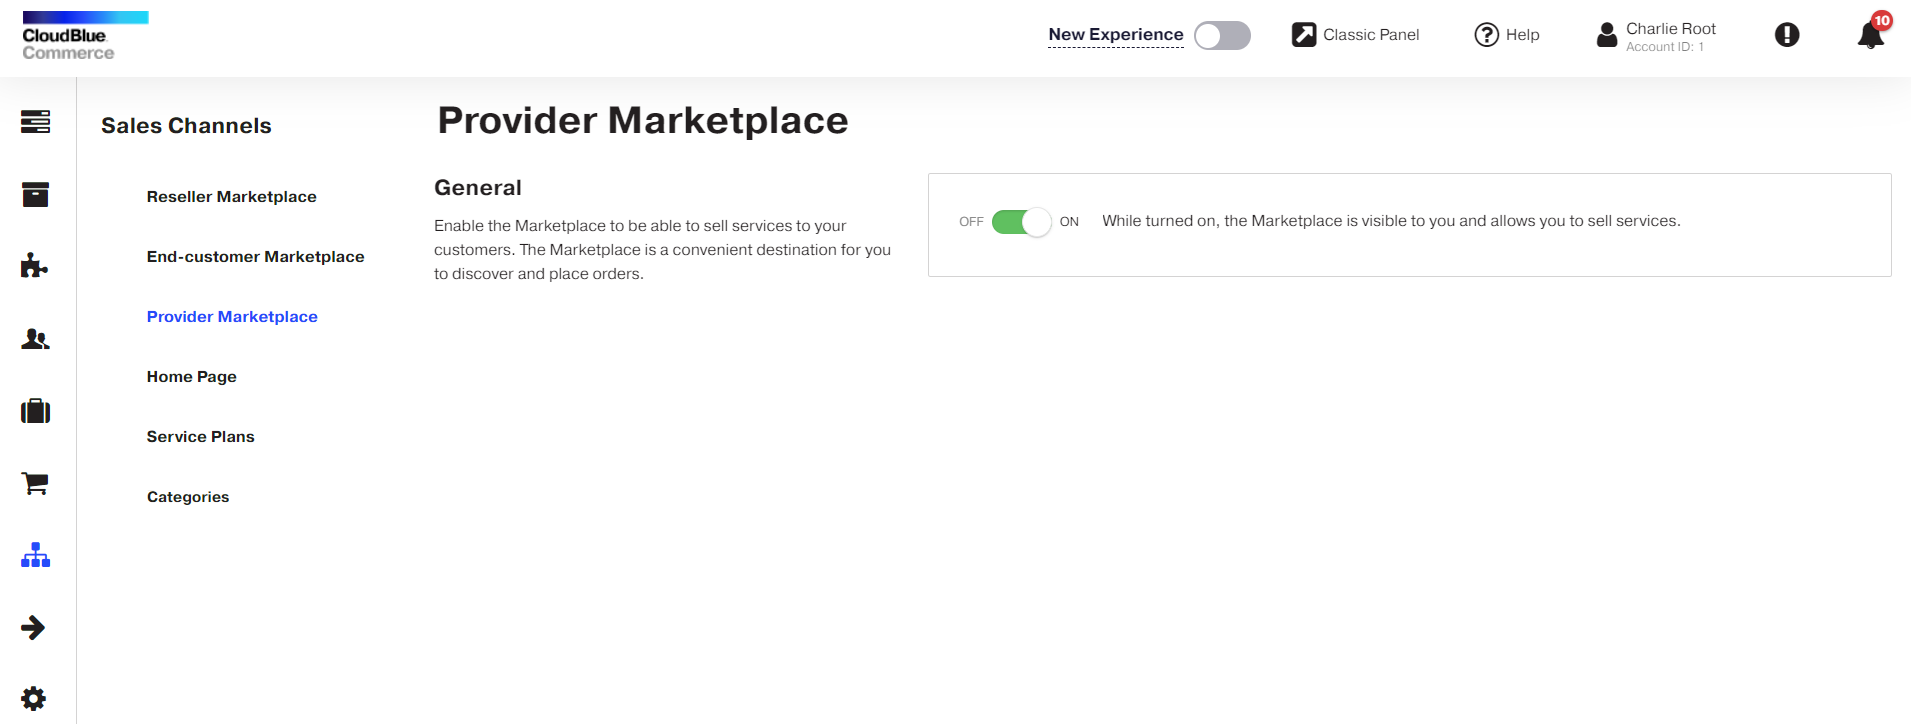
Note: Provider Marketplace is switched off by default.
Retrieve the catalog, review it, and adjust it
-
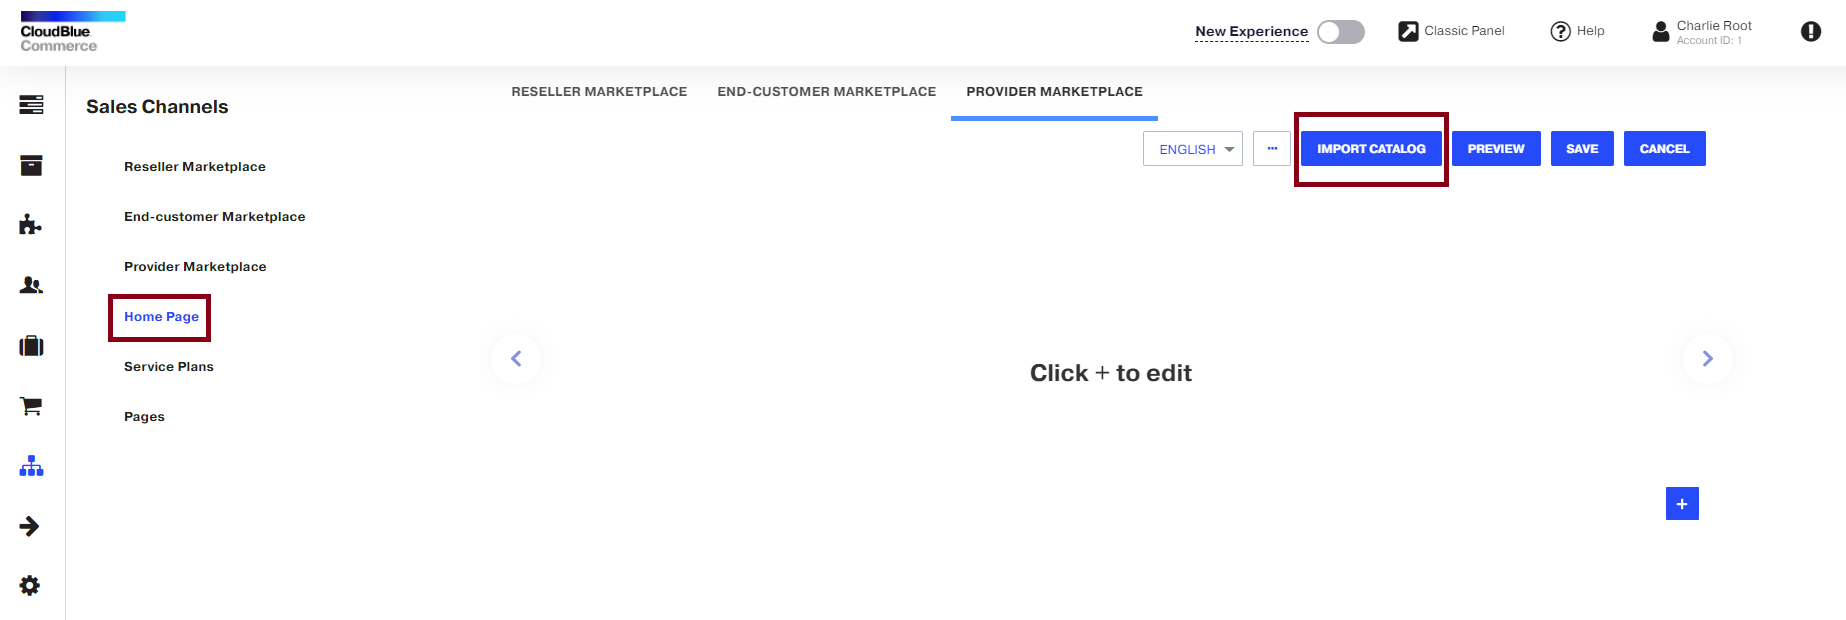
Go to Provider Panel, click UX1, then Sales Channels. Click Home Page in the left navigation pane, click Provider Marketplace at the top, and click Import Catalog. When the import is finished, review the plans and product pages that will be available in the Marketplace. These are the building blocks of a product catalog.
-
Go to Service plans and click Provider Marketplace.
To make a plan temporarily unavailable to users, hover the mouse pointer over the plan name and click the eye icon:
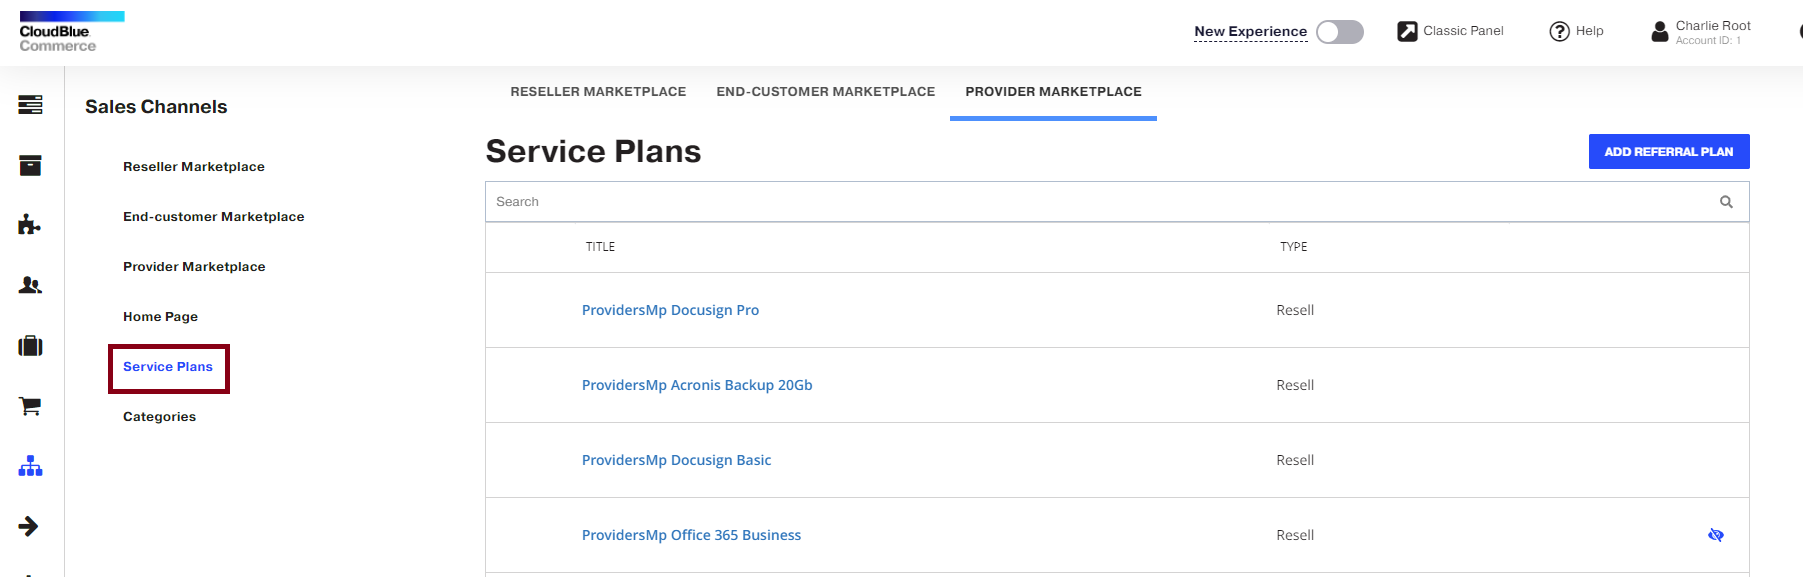
When finished with plans, go to Categories.
-
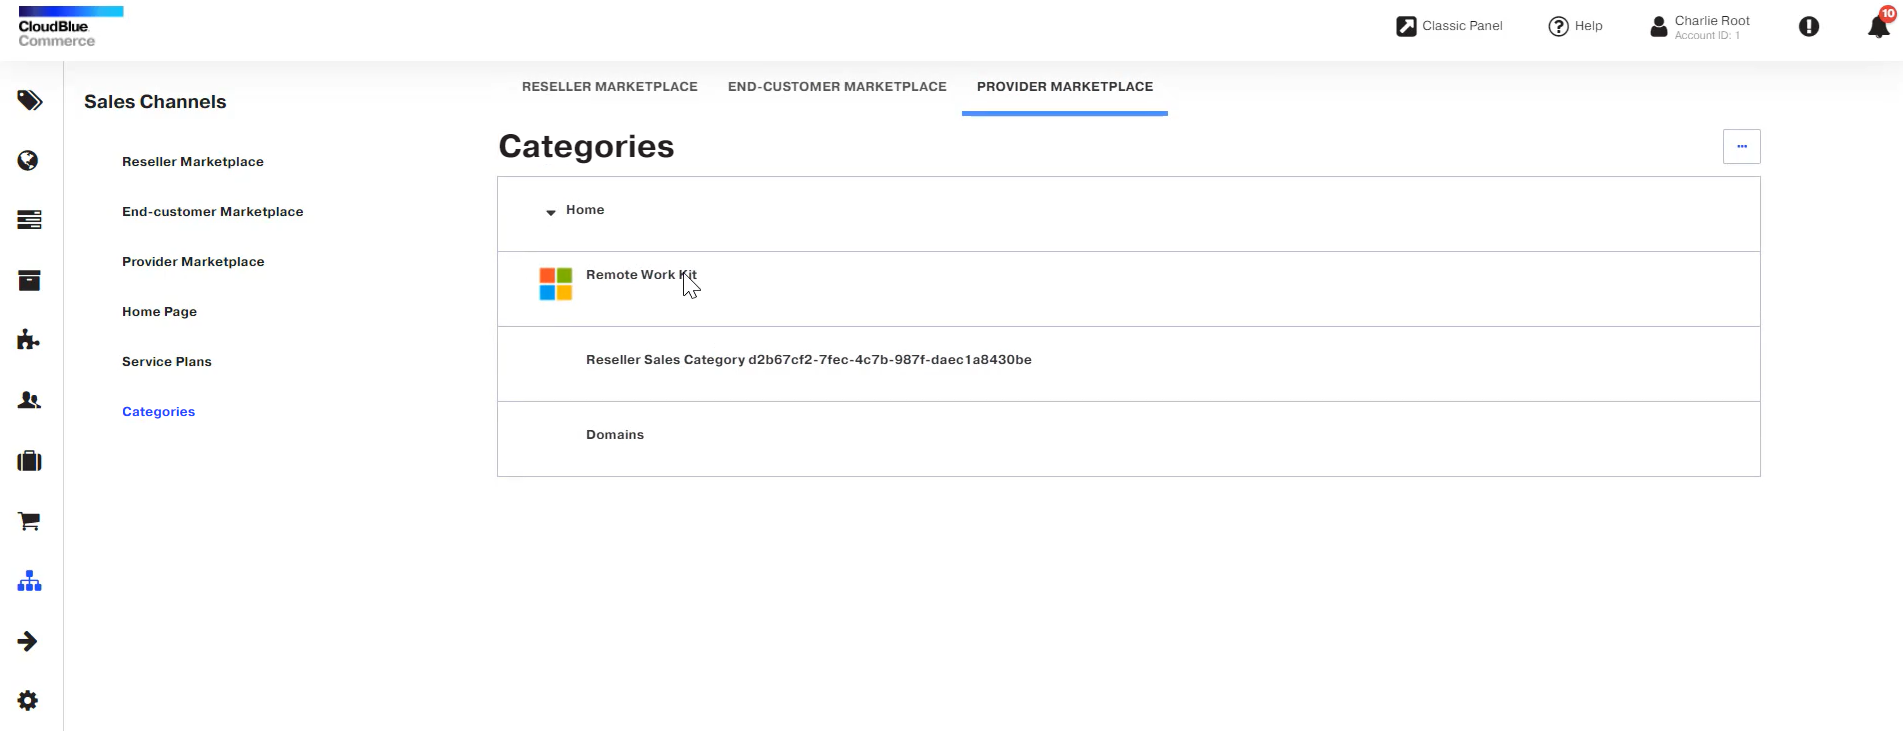
In Categories, go to Provider Marketplace. The pages are organized in a top-down structure starting with Home.
-
To edit a page with your offering, complete the following steps:
-
Click a page name. All items on the page must be editable by now. If you previously visited this area of the Marketplace settings and selected the Preview mode, click Edit to switch back to the editing mode.
-
Click the title and description to edit them.
-
Click the image icon to specify the URL to the icon that will accompany the product page in the showcase. You can select a background color to fill the transparent portions of the image with it.
-
On the Pricing tab, under Service Plans, select the plans that you will offer for users to purchase when they view the product showcase.
-
To add a plan from the list of all plans created earlier, click in the Add plan box, find the plan by name, and select it.
-
To rearrange plans in the showcase, drag plans by the icon.
-
To remove a plan from the showcase, click the icon.
-
On the Pricing tab, under Frequently Bought Together (this may also appear as Cross-Sell, depending on your Marketplace version, but it is customizable), select the complementary plans that you want to offer.
-
Go to the Overview tab. Provide more information about the solution that you offer. Add screenshots, video clips, and other marketing materials.
-
Go to the Support tab. Provide information about the ways to contact the technical support of the service vendor.
-
Go to the Resources tab to manage the following Rich Product Content:
-
Sales Materials. Sales enablement materials for your staff members to learn about product features and what the vendor recommends when selling the product. They include:
-
Sales guides and Sales sheets
-
Presentations
-
Logos
-
Additional files
-
Videos
-
-
Marketing campaign materials. Any additional assets that help your staff members run marketing campaigns, including:
-
Email templates
-
Other files such as marketplace banners
You can make the Resources tab visible for your staff members by switching the toggle button on.
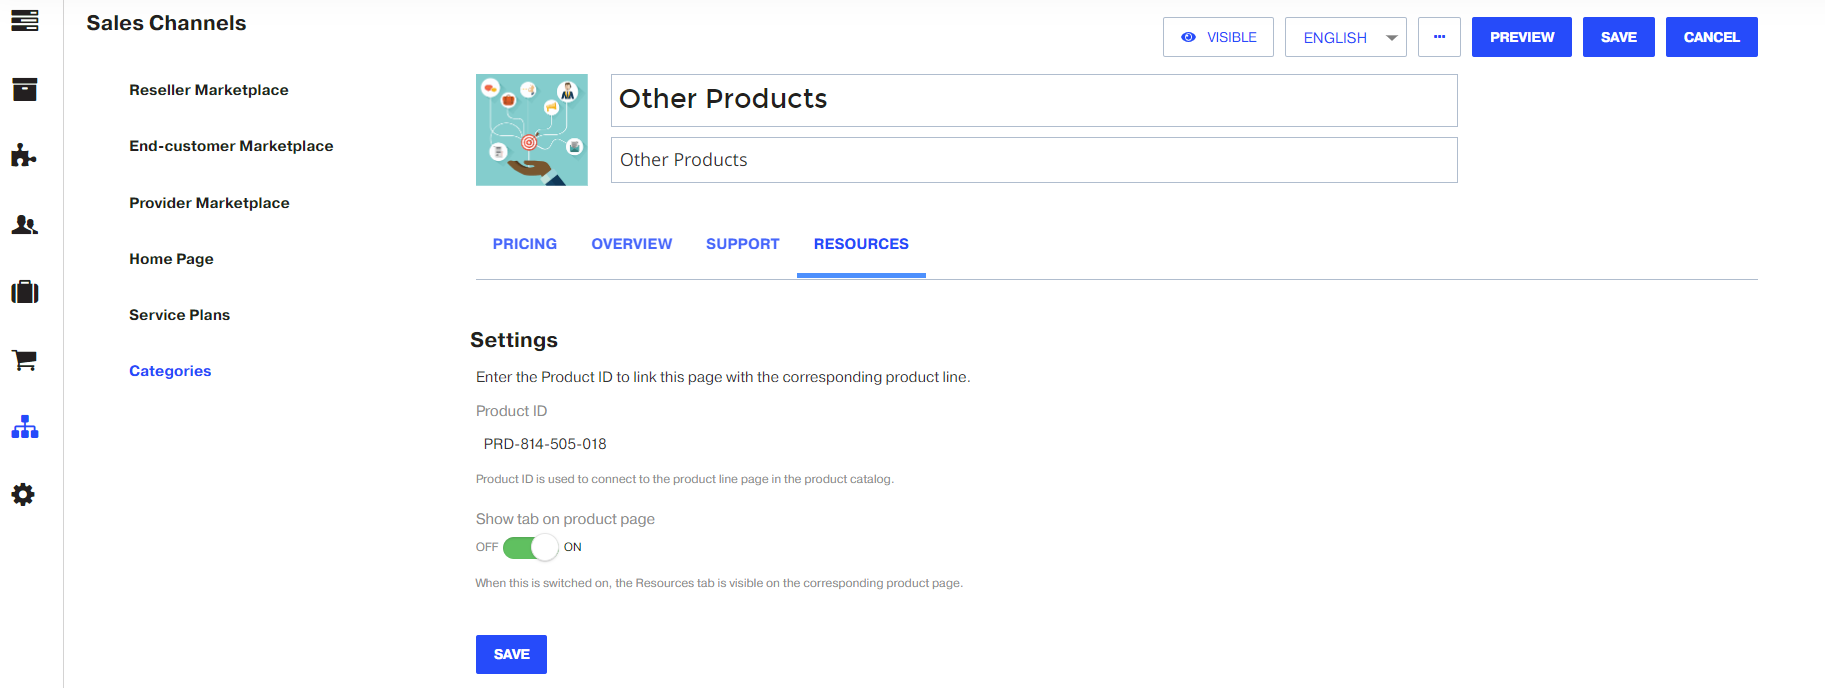
To connect this page with the corresponding product line in the product catalog, specify the Product ID parameter. Find the list of Product IDs in this Excel file.
-
-
-
Click Save.
-
-
To add a page, click the three dots icon, and select Add Category Page or Add Product Page. A category page is a container that you can use to group similar product pages together.
-
To rearrange pages, hover the mouse pointer over a page name, point at the six dots icon, and drag the page to another location.
Note: that by default, all pages are added without any particular order, and the order might change after you edit a page. If you want a specific order of pages, drag the pages within the structure.
-
To make a page unavailable to users, hover the mouse pointer over the page name, and click the eye icon.
-
Purchase on behalf of Customers
This section explains how to purchase services on behalf of a customer in Provider Marketplace:
-
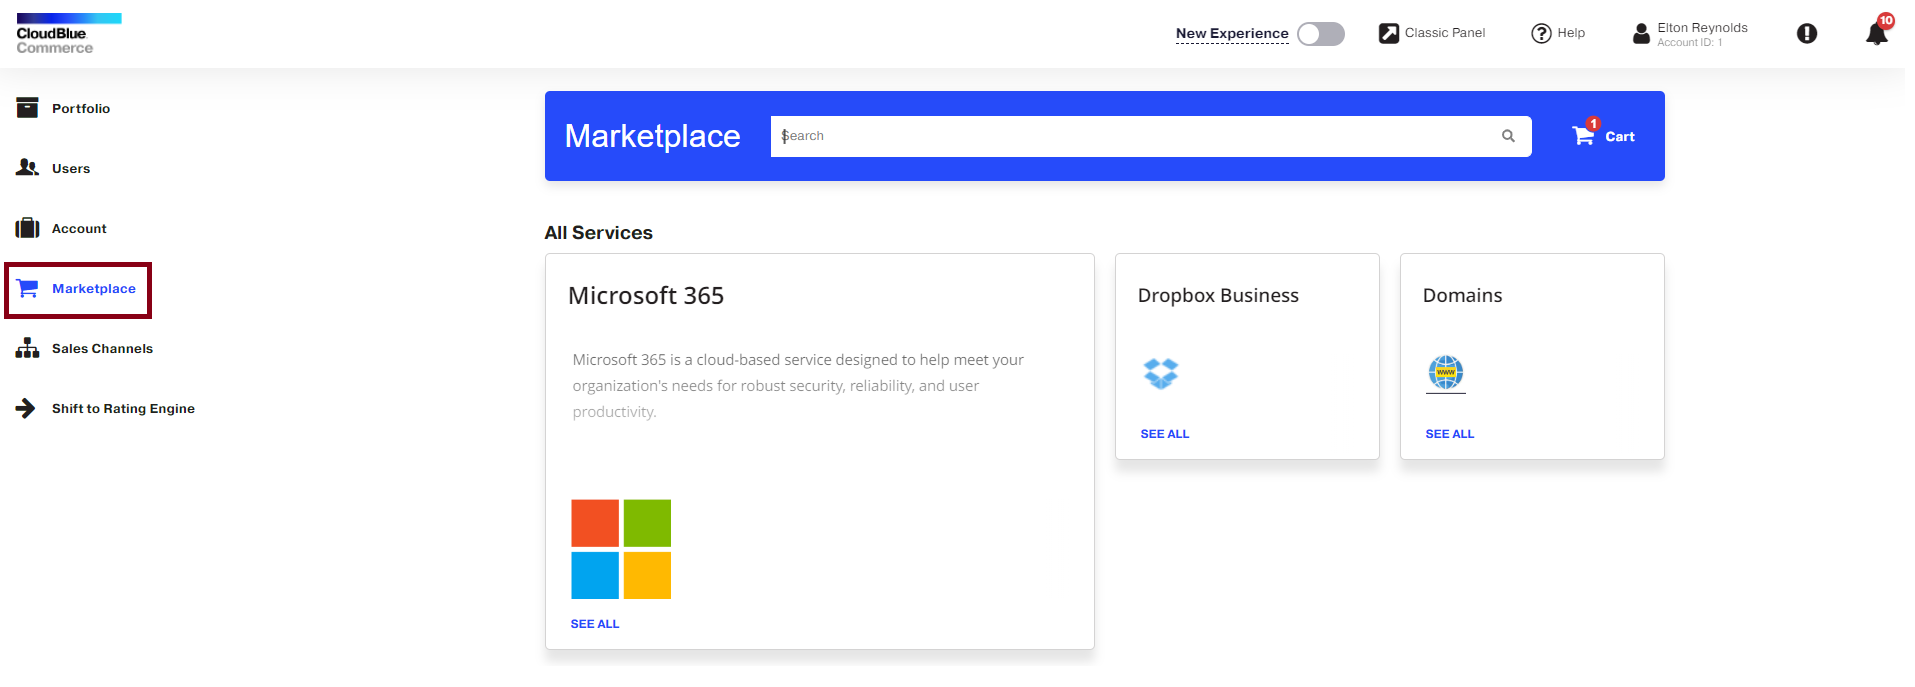
Go to the Provider Panel in UX1
-
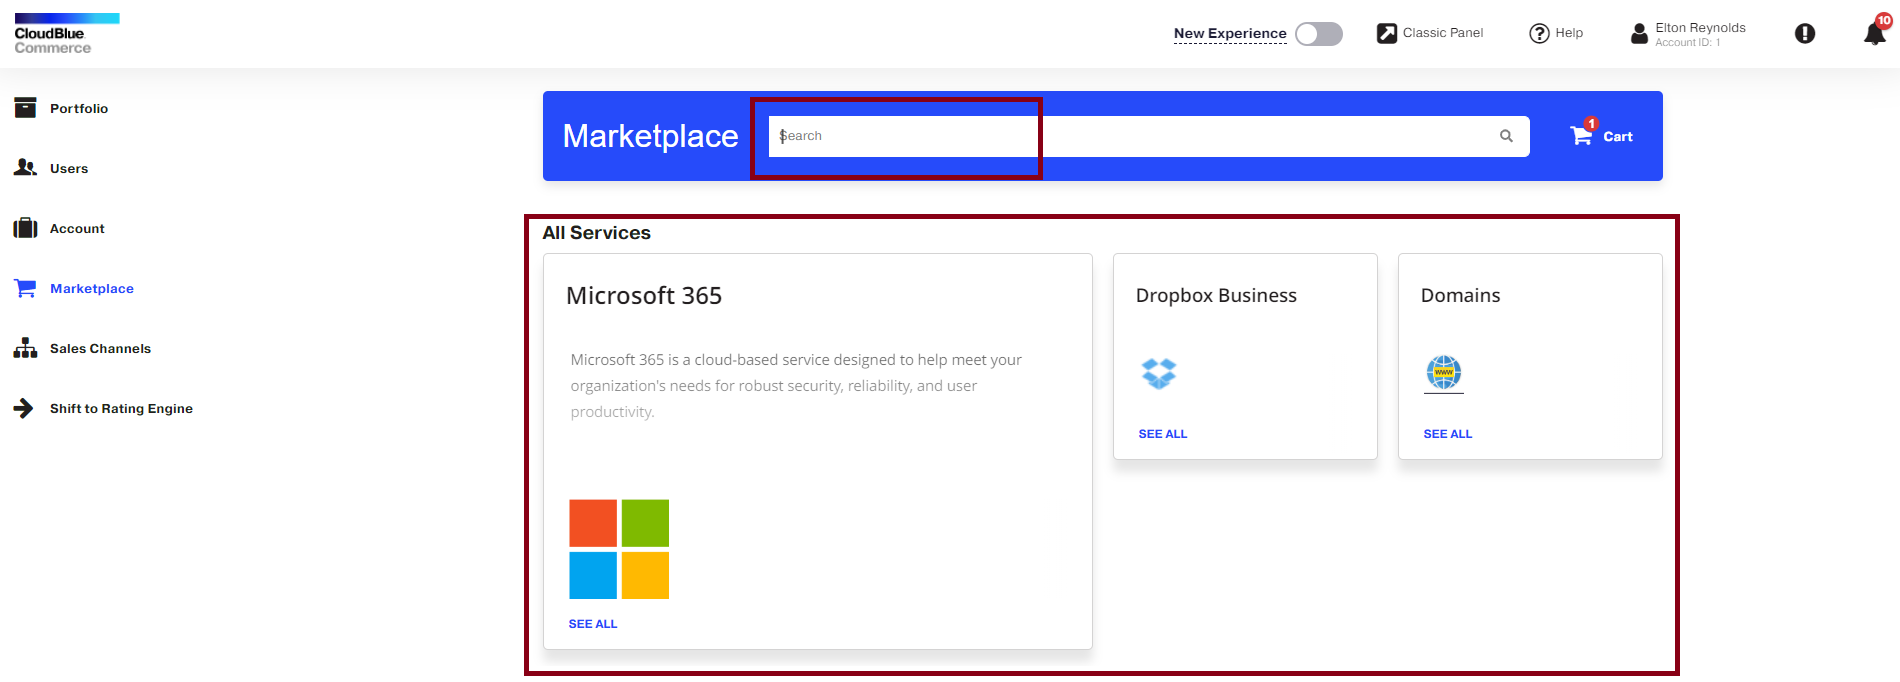
Click the Marketplace link in the navigation pane on the left.
-
Search for an app or service by using the search bar or browse all apps under All Services.
-
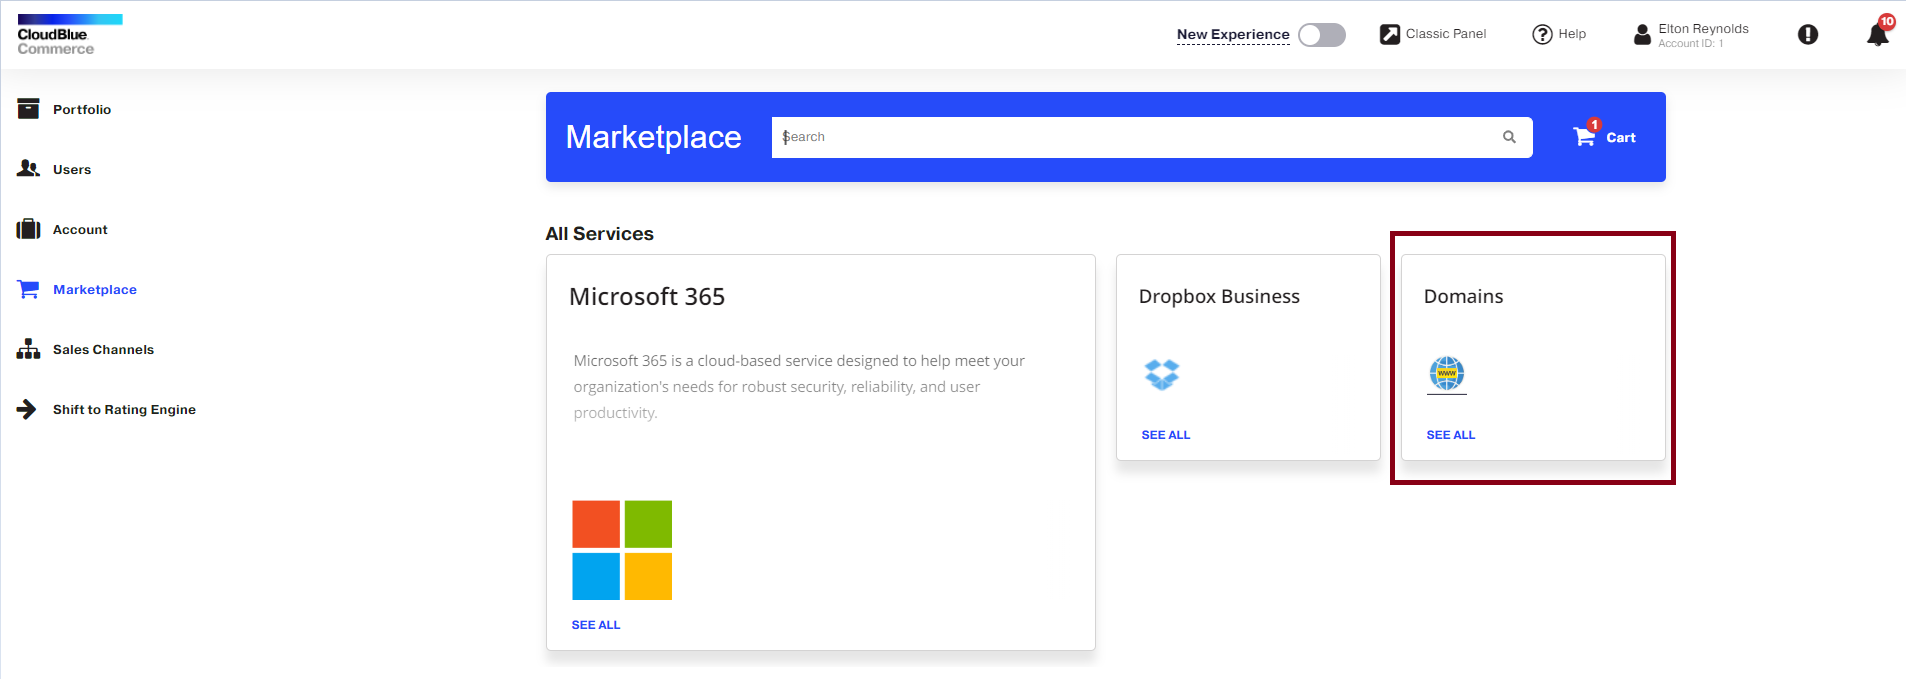
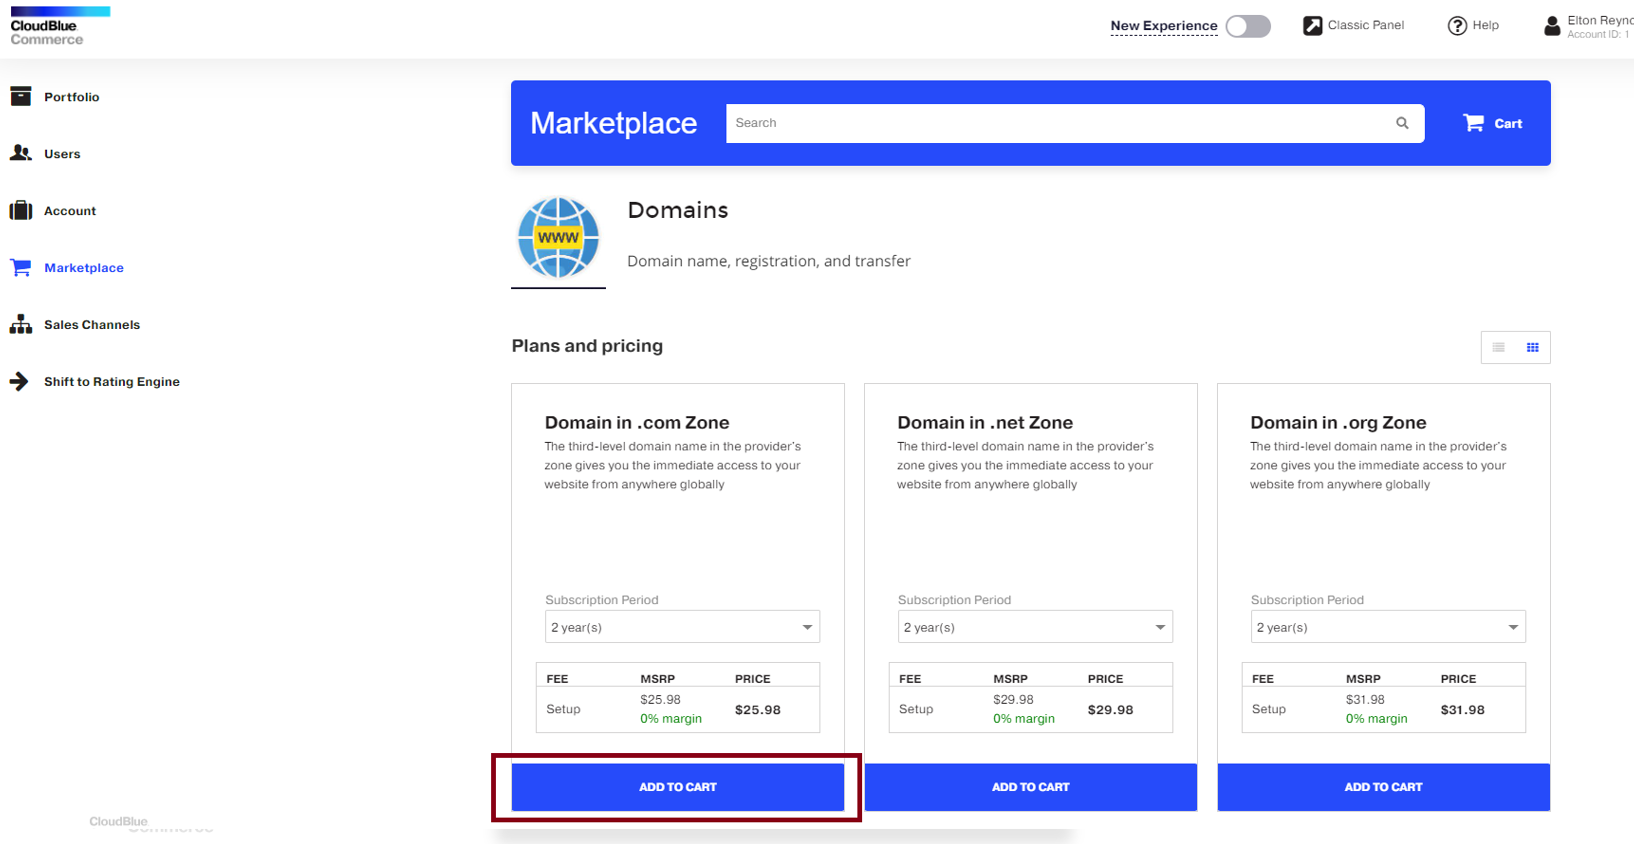
Click the tile with the name of the app that you want to purchase on behalf of the customer. For example, Domains.
-
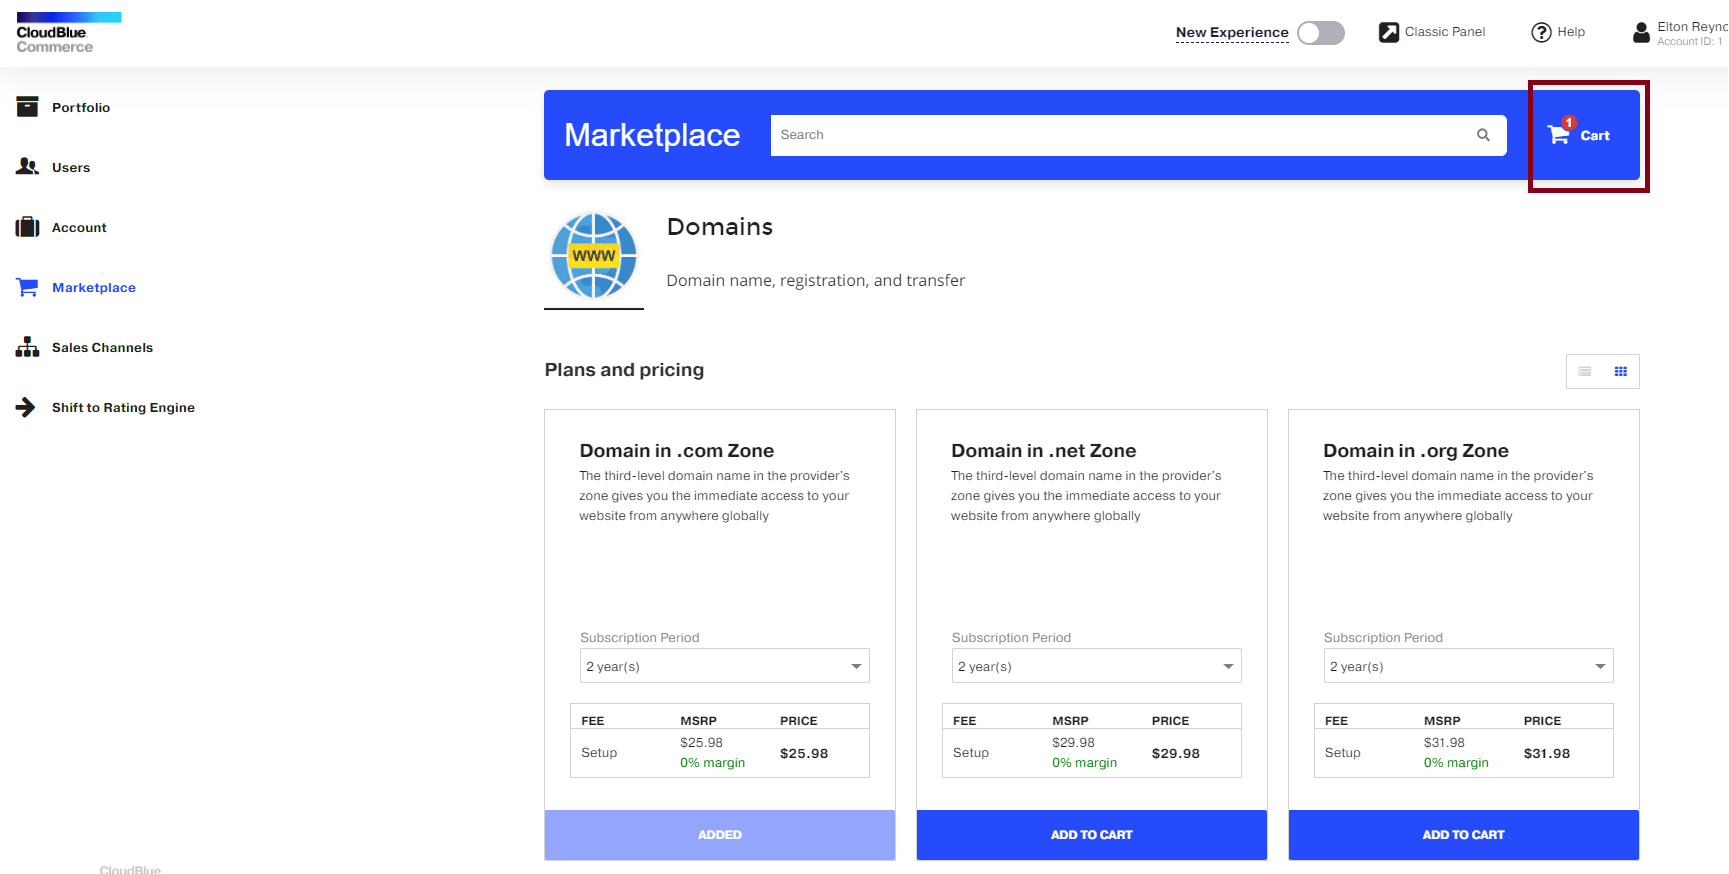
Under Plans and pricing, select the option you need and click Add to cart.
-
When ready to complete the purchase, in the top right corner, click the shopping cart.
-
Select Purchase, choose the options that you want and click Next.
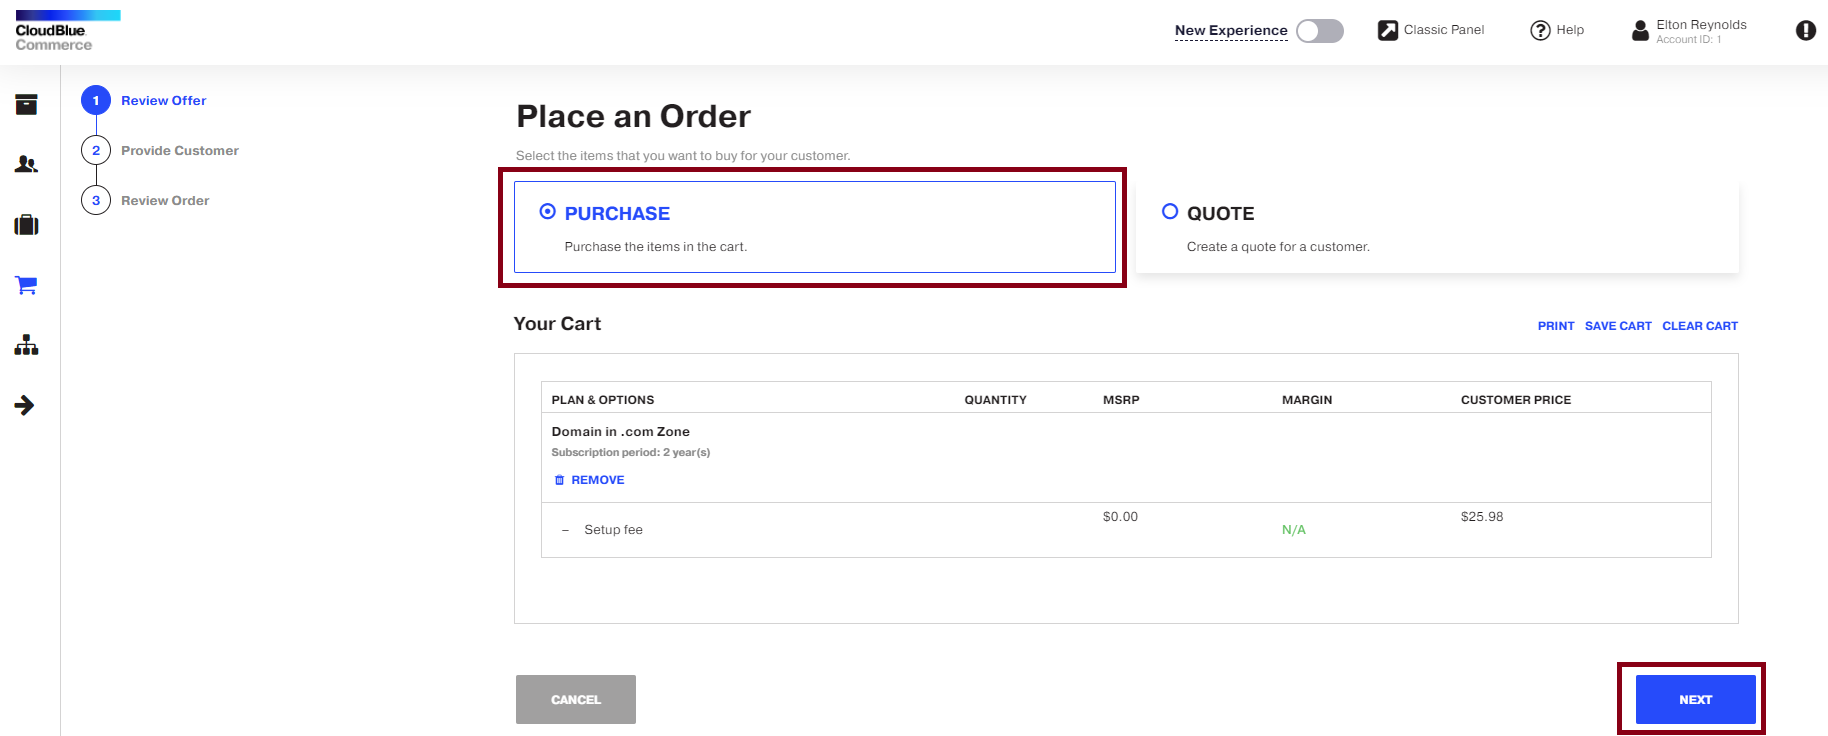
Important: You will see the final prices after adding a customer.
-
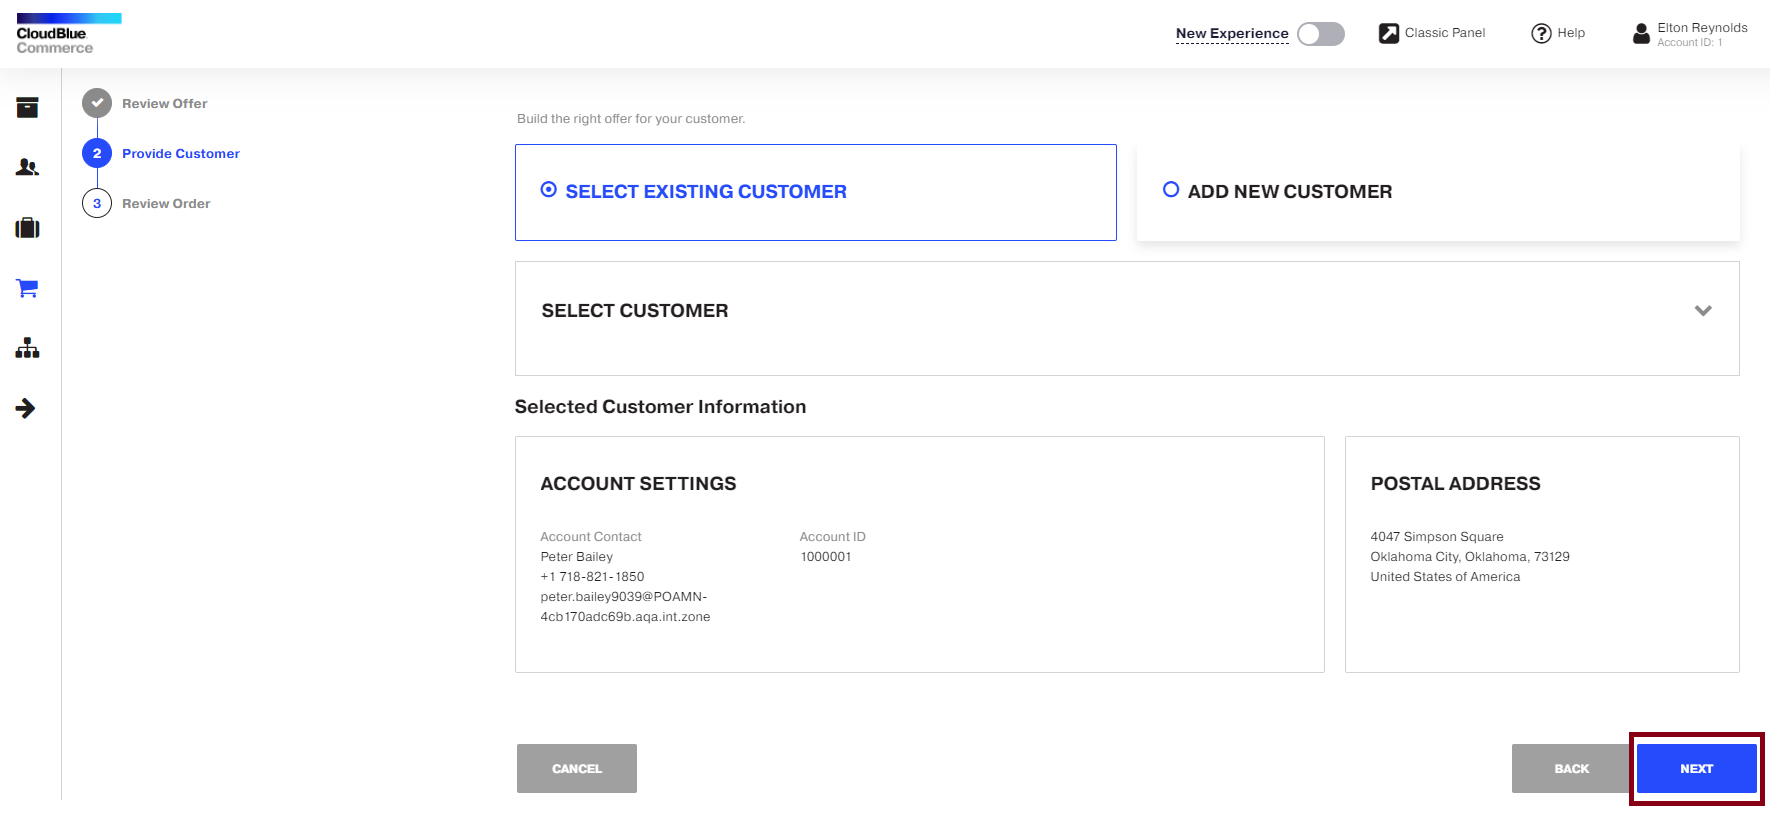
Select an existing customer or add a new customer for whom to purchase the service. Click Next.
-
Review the order. If you want to adjust prices for a customer, click Adjust Prices. Then click Buy.
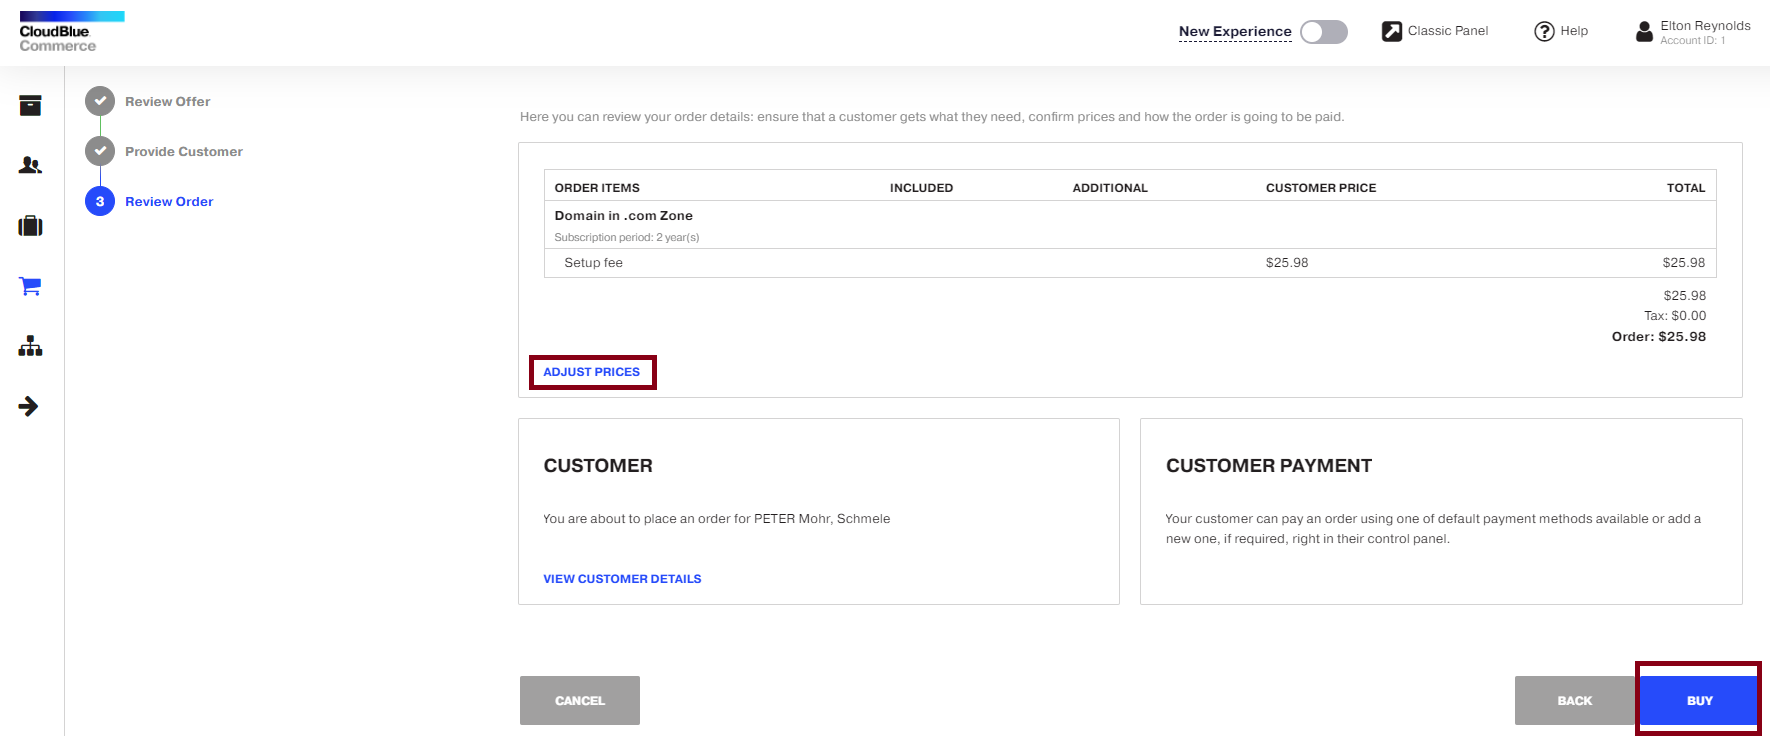
Note: The Adjust prices functionality is available only to provider staff members who can define prices and have appropriate privileges assigned.
When the service is provisioned and is ready for use, your customer will receive a notification by email.