You can easily configure integration with Google Analytics (GA) to get web statistics, analyze control panel traffic, your audience, and content consumption.
How It Works
You must be registered in Google Analytics and Google Tag Manager (GTM) and have an account where all statistics can be reviewed. Obtain the tracking code in Tag Manager and specify it in the branding settings in CloudBlue Commerce.
UX1 then automatically reports all user activities to Google and you can use Google Analytics to analyze the data.
How to Configure CloudBlue Commerce Integration with Google Analytics
Complete the following steps:
-
Create your account in Google Analytics. For more information, refer to the Google Analytics documentation.
Note: You will be responsible for the data you send to Google Analytics; please read both the Google Privacy Policy and Terms of Service carefully.
-
Under each of these Google Analytics accounts, create a Property for each brand that you want to track. Refer to the Google Analytics documentation for the instructions.
-
Obtain your unique Measurement ID to use for integration with your GTM:
-
In your Google Analytics portal, go to Admin > Data collection and modification > Data streams and click on your stream in the table.
-
Your measurement ID will be in the upper right area.
-
-
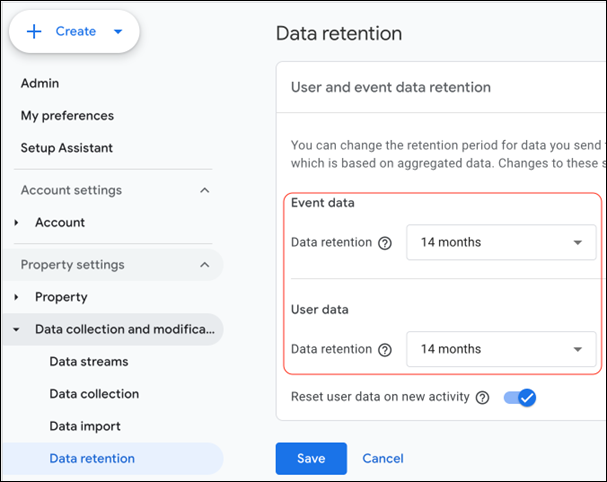
Set data retention period to maximum for both user and event data. Currently, the maximum allowed value is 14 months.
-
Go to Custom definitions, and select Custom dimensions.
-
Archive all custom dimensions that are not used by your organization. To do this, open the three-dot menu and click Archive.
-
Create all the dimensions listed below that do not exist. To create a dimension, click Create custom dimension. A form, similar to the following will open:
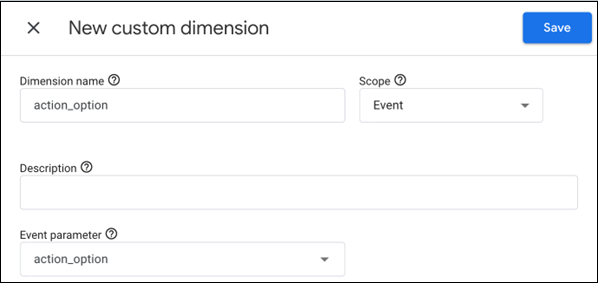
The table below lists the dimensions that you need to create and the scope that you need to specify.
Dimension name Scope actor_acc_level User action_option Event action_step Event actor_userId User cb_panel Event dimension1 Event dimension2 Event dimension3 Event dimension4 Event dimension5 Event dimension6 Event dimension7 Event dimension8 Event dimension9 Event dimension10 Event dimension11 Event dimension12 Event dimension13 Event dimension14 Event dimension15 Event dimension16 Event dimension17 Event dimension18 Event dimension19 Event dimension20 Event eventAction Event eventCategory Event eventLabel Event eventValue Event persona_acc_level User - Create a Google Tag Manager account. Follow details, refer to the Google Tag Manager documentation.
- Create a GTM container.
- Import a CloudBlue GTM container:
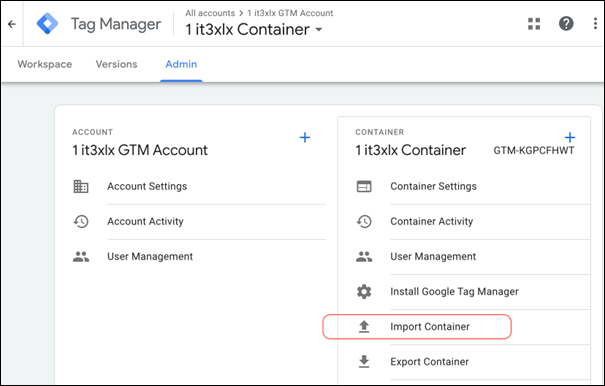
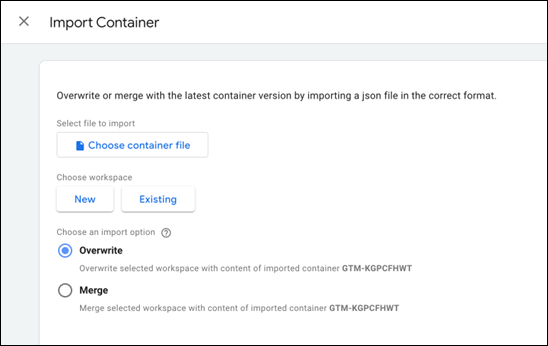
In the GTM panel, open Admin > Import Container.
-
Use this settings file for the import.
Choose Merge to merge the data you have in your container, or Overwrite to create a container from scratch.
-
Go to Variables, locate the
ga_measurement_idand change its value to the measurement ID obtained in step 3 of this instructions. -
At this stage, the following tags, triggers and user-defined variables must be configured:
Tags
-
CloudBlue Events Tag
-
Google Tag
Triggers
-
CloudBlue cb- Previxed Events Trigger
-
CloudBlue None cb- Previxed Events Trigger
-
ECommerce GA4 Events Trigger
User-defined variables
-
action_option
-
action_step
-
actor_acc_level
-
actor_userId
-
cb_panel
-
CloudBlue Default Event Parameters Set
-
CloudBlue Google Tag Default Parameters Set
-
dimension1
-
dimension2
-
dimension3
-
dimension4
-
dimension5
-
dimension6
-
dimension7
-
dimension8
-
dimension9
-
dimension10
-
dimension11
-
dimension12
-
dimension13
-
dimension14
-
dimension15
-
dimension16
-
dimension17
-
dimension18
-
dimension19
-
dimension20
-
eventAction
-
eventCategory
-
eventLabel
-
eventValue
-
ga_measurement_id
-
persona_acc_level
-
userId
Note: If there are other tags, triggers, or user-defined variables that are not used by your organization, you can delete them.
-
-
In the Tag Manager panel, click Submit to publish your GTM container.
-
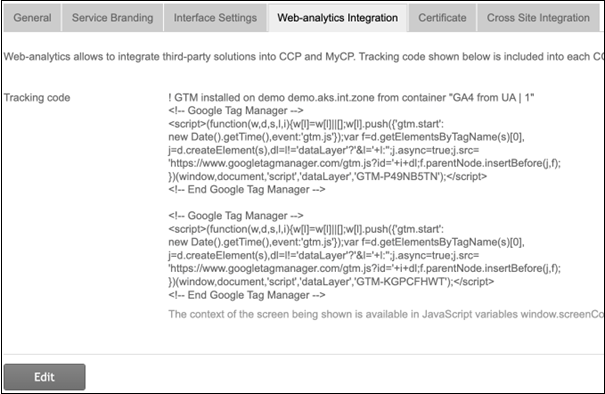
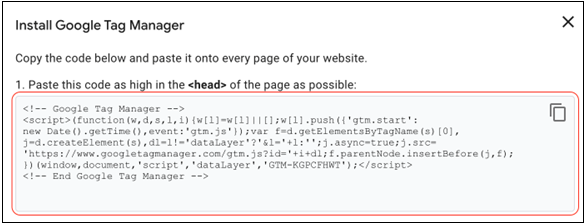
To configure integration with Google Tag Manager for your brand, obtain your GTM code and add it to CloudBlue as described below. Only use the <head> code snippet similar to the one in the picture below.
Note: Google Analytics has a limitation that it can take up to days to display the data after the first data from the website is received. During that period, use real-time reports or a debug view to verify that the data is being collected.
How to Add GTM Code in CloudBlue Commerce
To add the GTM code in CloudBlue Commerce, complete the following steps:
- In the CloudBlue Commerce control panel, go to System > Settings > Brands.
- Click the name of the brand for which you want to set up tracking.
-
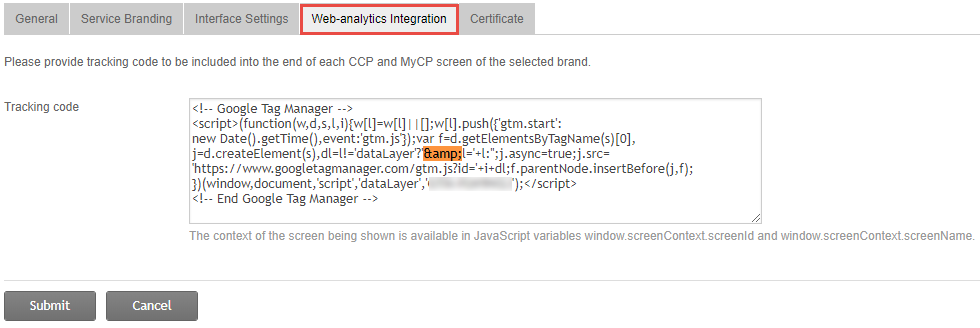
Switch to the Web Analytics Integration tab.
-
Click Edit, paste the tracking code, and Submit.
Note: Google Analytics has a limitation that it can take up to days to display the data after the first data from the website is received. During that period, use real-time reports or a debug view to verify that the data is being collected.
Using Multiple Google Analytics Integrations
There are two options of integrating multiple Google Analytics with your portal:
-
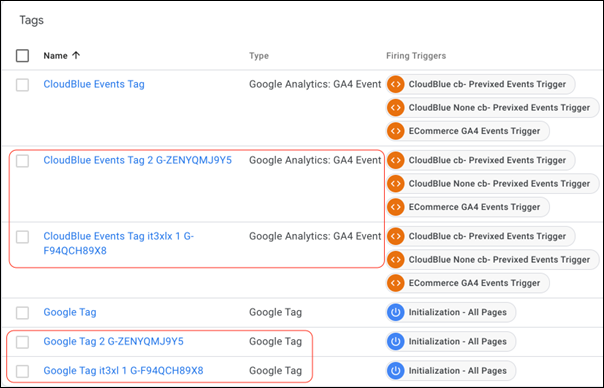
Configure multiple Google Analytics tags in the Google Tag Manager.
-
Use multiple Google Tag Managers. Currently, you can register up to two Google Tag Managers using the same JavaScript code provided by Google, as shown in the picture below.
