Reseller and Sub-reseller System Configuration
After you promote a customer to a reseller, before you can start sales it is necessary to perform initial system configuration, set up reseller store, and configure payment processing. This section provides detailed instructions on configuring the reseller account after it has been created.
A faster and easier way to configure most of the options, required for a reseller setup, is using the Reseller Setup Wizard
The Reseller Setup Wizard allows you to configure the most important settings, including branding options, plans, prices and resources setup, control panel and online store settings. Reseller Wizard starts automatically when the reseller logs in to Billing control panel for the first time.
To re-configure the reseller settings, log in to your Billing control panel (Classic panel) and go to System > Setup Wizard
Step 1. Initializing the Reseller via the Reseller Setup Wizard
-
Configuring account. You configure the account and select the currency in which you sell services to your customers. Preferred domains for online store and control panel are also configured.
-
Setting up plans.
You configure the set of plans for sale by activating/deactivating them. This is optional as all the plans delegated through the reseller service plan is available to reseller by default.
-
Setting up plan prices.
You select service plan periods you want to resell and adjust retail prices. Provider price is shown in brackets. The markup percentage is recalculated as you enter the retail price. This is optional as all the plans and prices delegated through the reseller service plan is available to reseller by default
-
Setting up resource prices (Optional)
You select service plan resource rates you want to resell and adjust retail prices. Provider price is shown in brackets. The markup percentage is recalculated automatically as you enter the retail price
-
Configuring control panel (Optional)
You configure your control panel branding. The hostname, SSL certificate for access URL, control panel visual settings are to be set.
-
Configuring online store (Optional)
You configure your online store settings, including hostname, SSL certificate for access URL, online store template, pages, website name, and meta keywords.
-
Final step.
You can review all the settings configured on the previous steps of the wizard – branding options and service plans to be published.
As a result, the reseller is initialized.
Step 2. Configuring Payment Processing
Payment system is a way a customer pays for provided services: credit cards, bank accounts, direct debit, check / cash, and the like. Payment method is an entity of payment system (credit card, bank account). Payment gateway is an organization responsible for processing payments and checking provided information authenticity.
Billing uses associations between payment system and payment gateway, to define payment gateways allowed to process payments of the particular payment system. Platform is delivered with a pre-configured set of payment systems, payment gateways, and associations. You cannot add or remove payment systems or payment gateways, you can only manage associations.
If the reseller is not using CloudBlue platform for direct invoicing to customers, then it is important to create a Payment method using Dummy Payment System. In most cases this payment is system is called “Auto Payment” and it is configured during the initial reseller on-boarding.
Please follow below steps to configure Auto Payment as the default Payment method for sub-resellers or for your own customers.
-
Dummy Payment system configuration
-
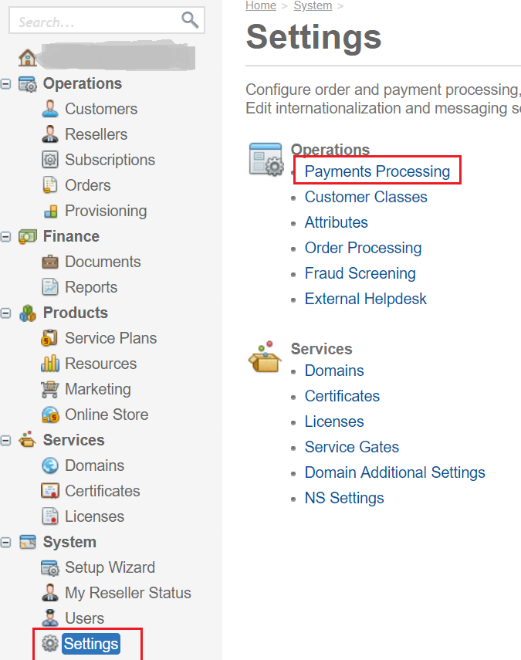
Navigate to Classic panel > Billing> Settings > Payments Processing
-
Check the Dummy Payment system under Payment Gateway’s tab. Make sure that it is active and Configured = yes

-
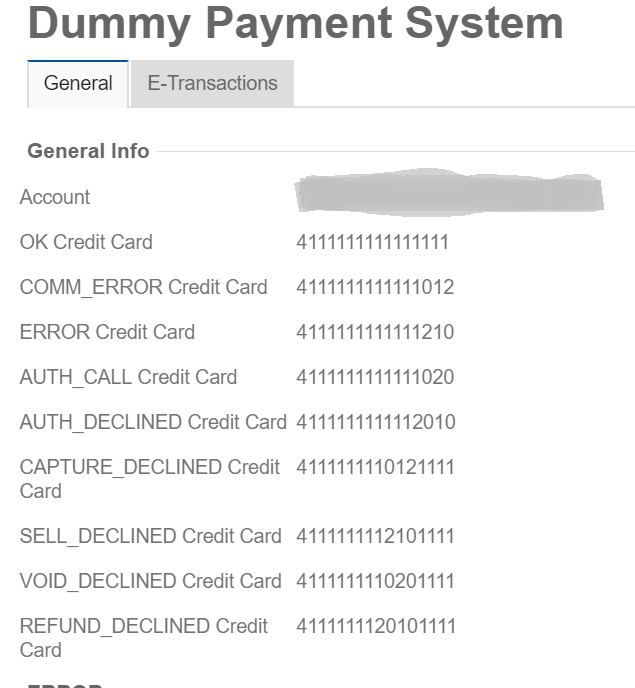
Click on Dummy Payment System. Check the “OK Credit Card” field under General tab. Below image shows the default configuration.
-
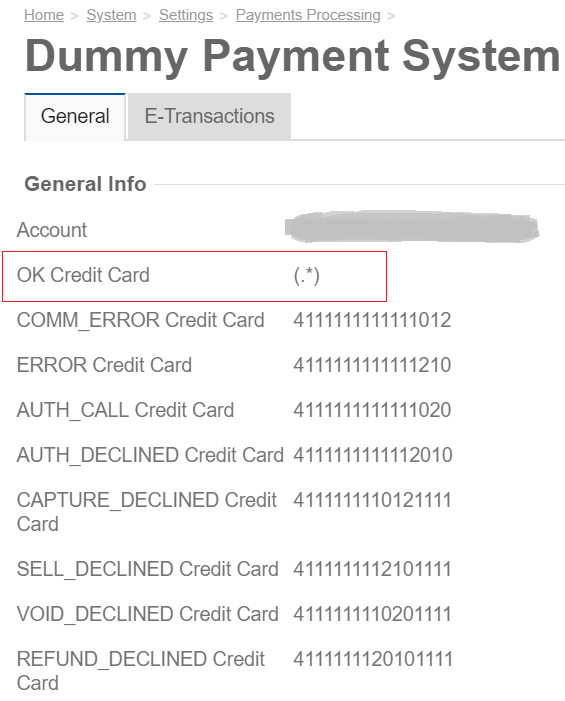
Click on Edit at bottom and replace this OK Credit Card field with “(.*)”. This is required to avoid marking the transactions as Fraud.
-
Click Save
-
-
Configuration of Auto Payment as a Payment method
By default, this should be available for all the resellers and enabled as well. For sub-resellers, this also depends on the configuration at parent reseller level. If the Auto Payment method is not available under Payment methods, follow below steps to add this to the reseller level
-
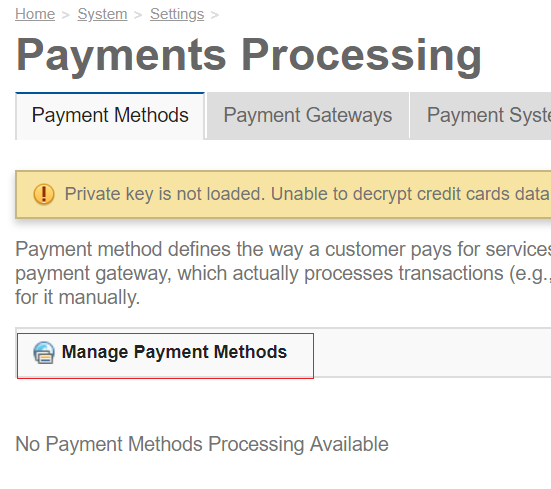
Navigate to Classic Panel > Billing > Settings> Payments processing
-
Click on Manage Payment methods
-
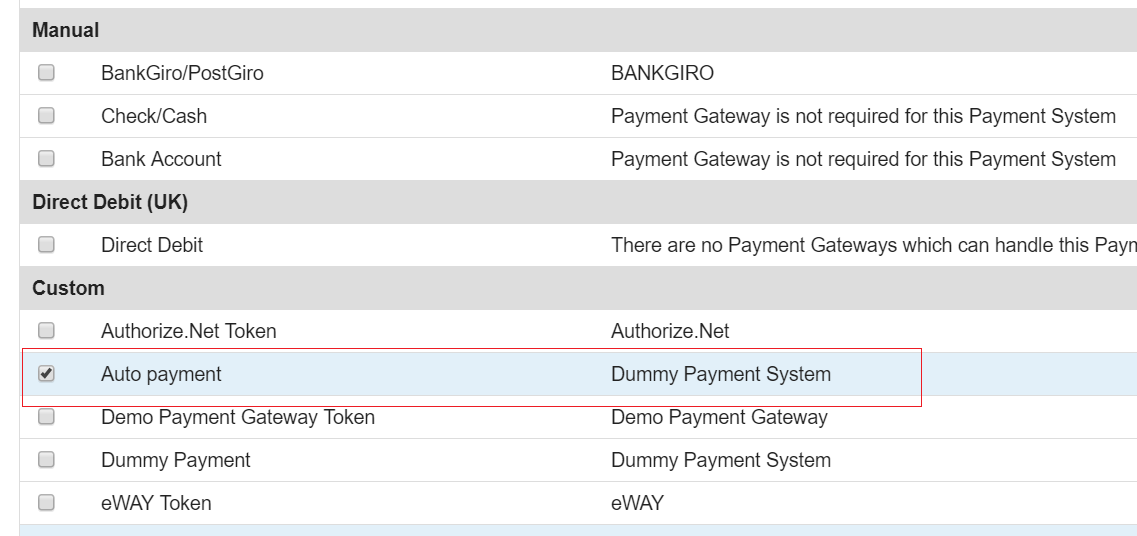
Select “Auto Payment” from Custom section and click on Save
-
This will add Auto Payment as a payment method for the reseller
-
-
Mark AutoPayment as default for reseller/customers
-
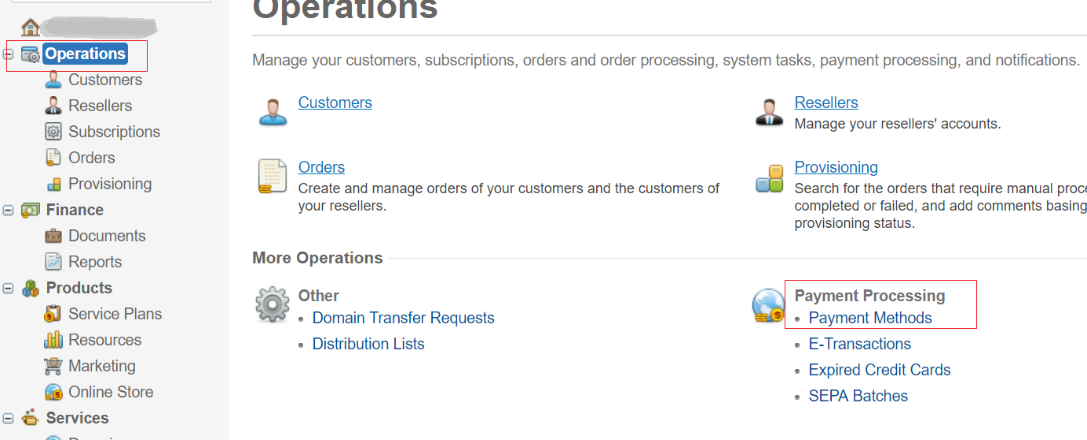
Navigate to Classic panel > Billing > Click on “Operations” and then select Payment methods
-
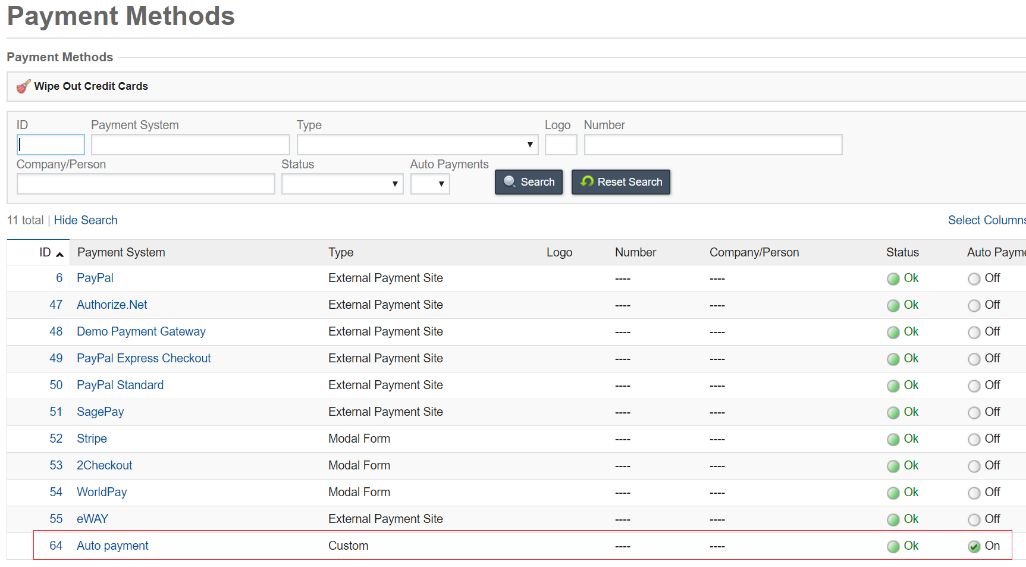
Make sure that for Auto Payment, status is OK and Auto Payments option is ON
-
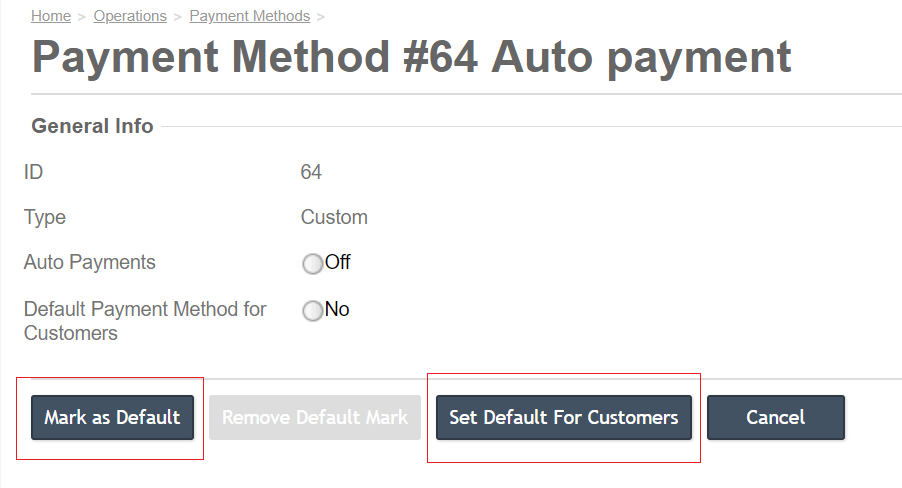
If not, click on Auto Payment and click on “Mark as Default” and “Set Default for Customers”.
-
Once this is done, this payment method will be added by default for any customers created under this reseller.
-
-
Mark Auto Payment default for customers
Once we are done with steps mentioned in point #c, all new customers created under this reseller will get Auto Payment added by default under payment method. However, make sure that the Auto Payments status is ON for this payment method under the customer account. To check this, follow below steps
-
Navigate to Billing > Customers> select customer > Select Payment Methods tab. Make sure that Auto Payments status is ON
-
If it is not On, select the Auto Payment and click on “Mark as Default”

-
Step 3. Configuring Pricing
As far as you sell delegated plans, you can customize prices at will, but cannot change plans structure (add or remove subscription periods, add or remove resources). Prices configuration comes to setting custom prices on subscription periods and resources in resource rates. Income is made on the margin between the wholesale price (charged by the service provider) and the retail price you configure.
-
Pricing rules
The pricing mechanism for resellers adheres to these rules:
-
Resellers can resell the service plans delegated by provider or create their own service plans with their own pricing.
-
When the provider changes the pricing of a delegated service plan, the changes will only affect the new subscriptions to this plan sold by reseller. The existing subscriptions by reseller's customers to this plan will only be affected upon subscription renewal.
-
-
Modifying Subscription Period Prices
Important: Viewing and managing prices or SKUs in the classic panel is not available after Price Manager is switched to production mode. To manage prices, as well as recommended prices (MSRP) and SKUs, go to UX1 > Portfolio > Prices.
-
Go to Products > Service Plans. The list of available service plans appears on the screen
-
Select a service plan you want to configure subscription periods for by clicking on the respective link in the Name column. Selected service plan properties appear on the screen.
-
Switch to the Subscription Periods tab. The list of subscription periods set appears on the screen
-
Select subscription period to configure by clicking on the respective link in the Subscription Period column Selected subscription period properties appear on the screen
-
Click Edit at the bottom of the screen. Fill out the form.
-
Type setup, subscription, renewal, transfer and cancellation fees into the Setup Fee, Subscription Fee, Renewal Fee, Transfer Fee, Deposit Fee, and Cancellation Fee fields respectively
-
Click Save to finish modifying subscription period
-
-
Modifying Resource Rate Prices
-
Go to Products > Service Plans.
-
Select a service plan you want to configure resource rates for by clicking on the respective link in the Name column. Selected service plan properties appear on the screen.
-
Switch to the Resource Rates tab. The list of resource rates set appears on the screen.
-
Select resource rates to configure by clicking on the respective link in the ID or in the Name column. Selected resource rates properties appear on the screen.
-
Click Edit at the bottom of the screen. Fill out the form:
-
Set setup, recurring and overuse fees. To do this, input appropriate values in the Setup fee, Recurring fee and Overuse fee fields respectively
-
Click Save to confirm changes
-