Provisioning
Having two bound service plans, you should create two subscriptions in such a way that the main subscription (cloud VPS) is a parent of a domain registration subscription and depends on the latter.


In this document:
Requirements
Your test product consists of the main service plan and the domain registration plan. The latter is upsell for the former. Your test customer must get two bound subscriptions:
Parent subscription provisioned from the main service plan. It allows the subscriber to create and manage virtual servers (VPSes).
Child “domain registration* subscription provides a domain in the
.testtop-level domain (TLD). The subscriber will be able to create a DNS A record for a VPS in the respective domain zone.
Continue Your Demo Project
Continue the demo project from the previous step.
Set up Customer
Make sure you have at least one customer for testing. For this purpose, in the Business Automation provider control panel, navigate to Operations > Customers. If there are no customers, create one by clicking New Customer Account and following the customer creation wizard.
Subscribe to Product
Follow these steps to order and provision both of the subscriptions.
Navigate to Operations > Orders and click Add New Order.
In the Edit Order Details step, fill in the required fields:
In the Account field, select your test account.
In the Service Plan filed, select the main service plan.
In the Subscription Period field, select the period you have configured for the main plan.
Click Next.
In the Parameters step, leave the Domain Name field empty and click Next.
In the Confirm Order step, click Place Order. The newly created order must appear in the list of orders. It contains a request for the main subscription provisioning item. You need to add a request for a child domain registration service.
Click on the order number to open it for editing.
On the Provisioning Items tab, ensure there is a request for a new subscription based on the main service plan.
Click Add Dependence Plan.
In the list of upsell plans, select the one that registers domains in the
.testTLD and then click Next.In the Select Subscription Period step, select an available subscription period and click Next.
In the Specify Domain step, in the Domain name field, enter the sub-domain name, for example, aps11 and then click Next.
In the Confirm Order step, click Place Order. Your order is ready for provisioning.
In the list of orders, click on the new order.
If the order price is not zero, switch to the Documents tab to pay the order as follows:
Click Add New Payment.
Assign
Check/Cashas the payment method.Click Add.
Select the payment document a click Release to change its status from
HoldtoOpen.
On the General tab, click Open Order. Periodically click Check Order Provisioning Status until the order status changes to
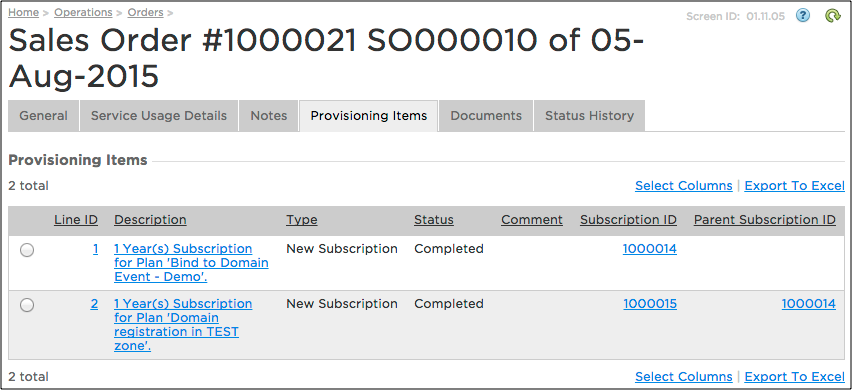
Completed.Optionally, you can ensure both provisioning items (subscriptions) are ready. For this, switch to the Provisioning Items tab.

Create VPS with DNS Properties
In the following test process, ensure the subscriber is able to select and bind a domain zone to a new VPS as well as assign a domain name to the VPS by adding a respective DNS A record to the selected domain zone.
Navigate to Operations > Subscriptions and find the two new subscriptions there.
To log in to UX1 on behalf of the subscriber, in the Actions column click on the icon that directs you to UX1.
In the Home dashboard, find the newly registered domain “aps11.test”.
In the left hand navigation panel, select VPS Management.
In the servers list, click New to start creating a VPS.
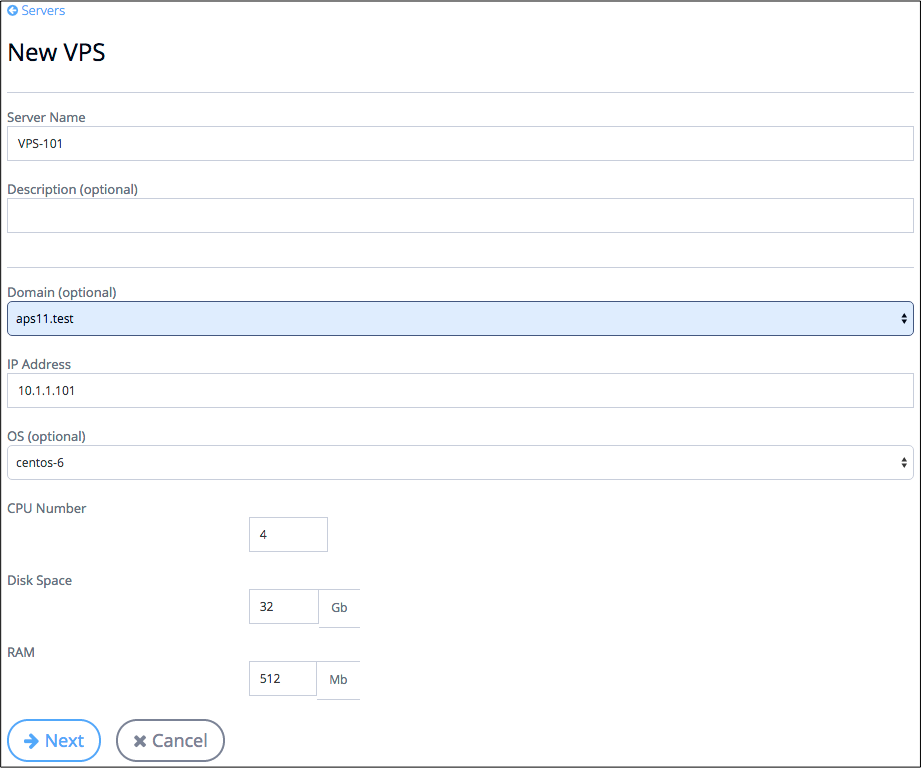
On the screen with VPS properties:
In the Server Name field, enter the VPS name, for example, vps-101.
Ensure the bound domain is selected in the Domains list.
In the IP Address field, enter an IP address, for example, 10.1.1.101.

Click Next.
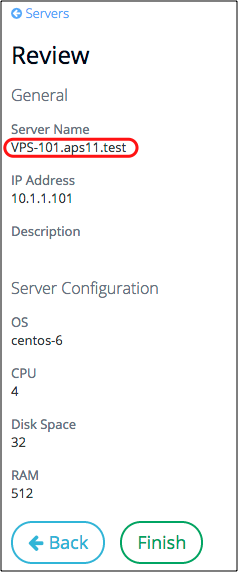
On the Review screen, ensure the expected domain name is assigned to the VPS.

Click Finish to complete creation of the VPS.
Verify if the system has created the expected DNS A record:
In the Operations Automation PCP, navigate to Services > Domains.
Open the domain bound to the test subscription, for example, aps11.tst.
On the DNS tab, select the DNS Records sub-tab.
The new A record must appear there.
If you need to bind one more domain to the main subscription, create another order for the child domain registration subscription. In the order, specify the main subscription as the parent of the new subscription. Then process the new order as explained earlier in this document.
Conclusion
This completes the APS application design-development-deployment-provisioning cycle.
If you encounter any issues when following the project steps, you can download
the sample package
and compare it with the demo package you have created.
