Provisioning
At the provisioning stage, you should verify if a customer is able to subscribe to the application services and manage the acquired resources.


In this document:
Continue your demo project from the previous step.
Subscribe to Application Services
In the PCP, create a subscription for your test customer using one of valid the platform methods. For example, if you use OSS without BSS, switch to the Subscriptions tab on the service template and start creating a subscription. Use all default settings, when directed by the subscription creation wizard.
Open the customer control panel using one of the valid methods. For example, in the list of subscriptions, find the new subscription and click the link in the rightmost column.
Test Generic Operations
In UX1, verify the functionality of the main create-read-update-delete (CRUD) operations used in your demo application.
Make sure, the VPS Management tab is available in the sidebar.
Open this tab to find the two items, Servers and VPS Creation Wizard.
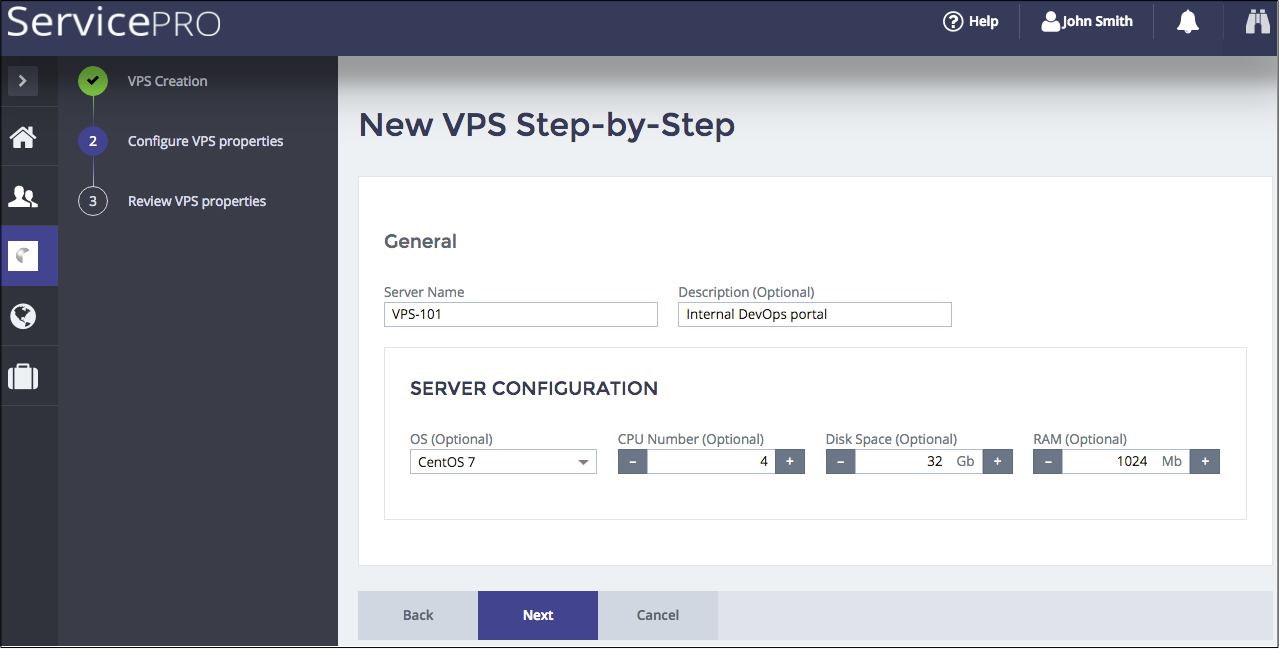
Select the VPS Creation Wizard and click the Next button to start creating a VPS.

Configure the server properties. Verify if all internal widgets and navigation buttons are functioning as expected. Click Next after that to go to the next step.
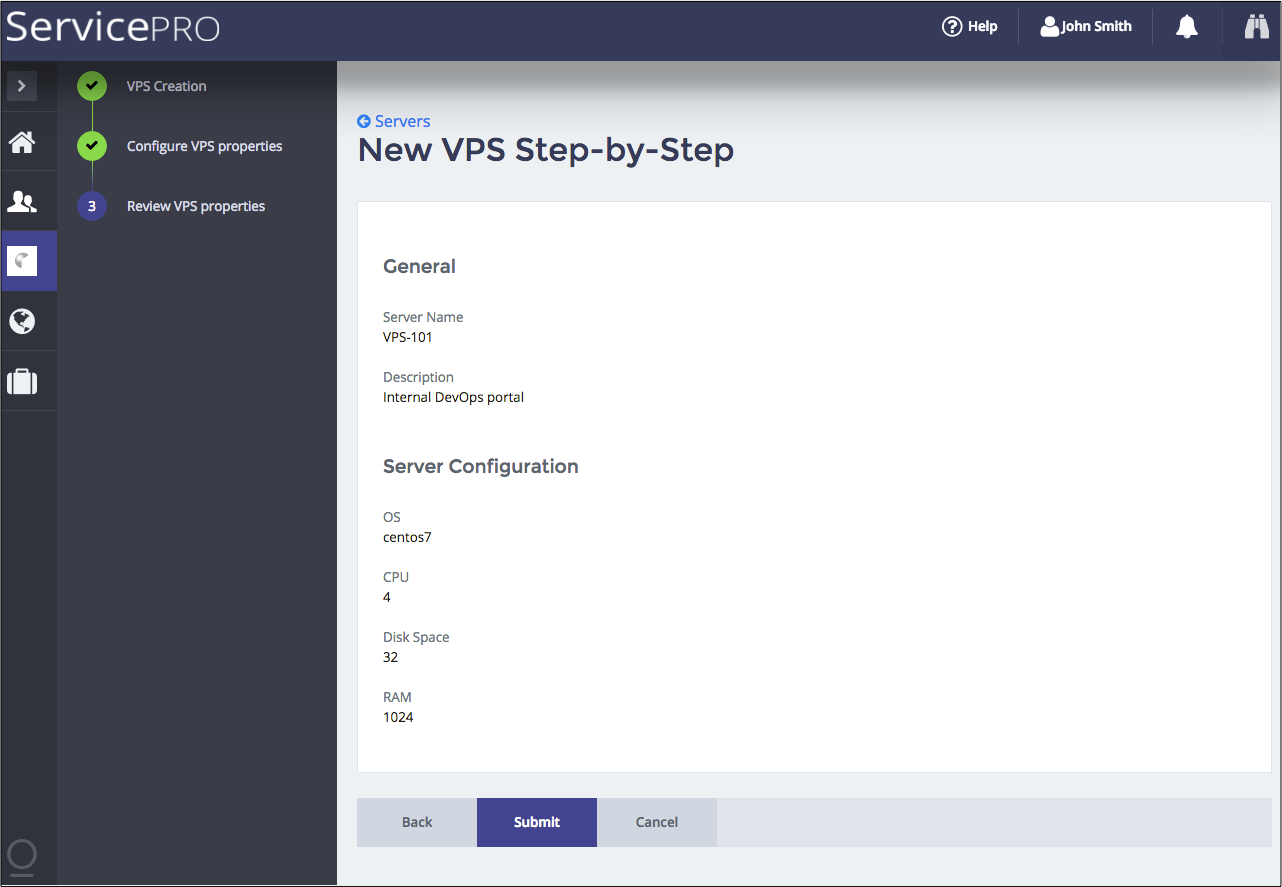
Review the VPS properties and click Submit.

The same way, create a couple of VPSes with different configurations. Start this process by clicking the New button in the Servers view.
The Servers page shows all the servers you have created:

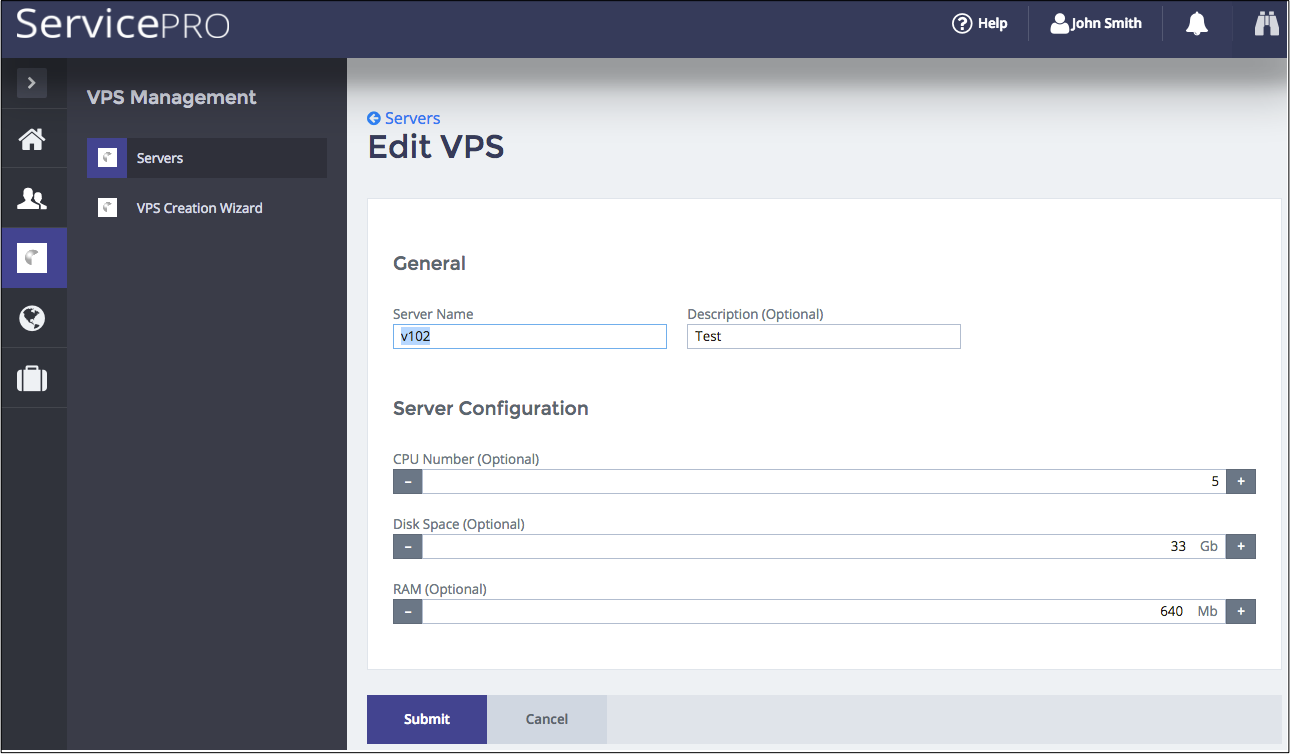
Click on the name of a VPS to open the editor.

Change any properties and click Submit.
Verify the Delete operation.
Test Custom Operations
There are two custom operations in this application, Start and Stop.
Select some VPSes whose state is Stopped and click Start. The VPS state must change for Running.
Select some VPSes whose state is Running and click Stop. The VPS state must change for Stopped.
Conclusion
This completes the APS application design-development-deployment-provisioning cycle.
If you encounter any issues when following the project steps, you can download
the sample package
and compare it with the demo package you have created.
