Table Of Contents
Application Packaging Standard
Last updated 18-Mar-2019Asynchronous Operations
By default, the APS controller requires an APS application connector to process the standard and custom provisioning operations synchronously.
However, some or all provisioning operations of an application can take a long time. To avoid error messages on the APS controller side in such cases, the APS application connector must require the APS controller to switch to the asynchronous mode and poll the APS connector for the completion of the operation with a specified period.
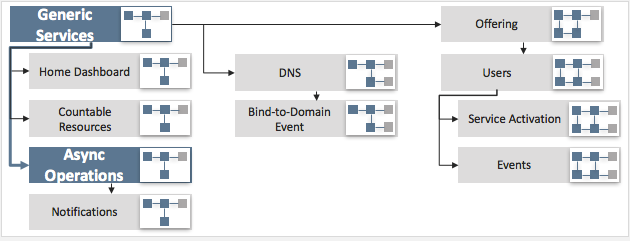
This document explains how an APS application can require the platform to perform some operations with the application resources in the asynchronous mode. It also directs you through a demo project that logically follows the Generic Services demo project.

Follow the scenario in this document if you want to practice in using asynchronous operations in the application provisioning logic.


In this document:
Introduction to Async Operations
As explained in the Execution details of a custom operation
as well as in the respective sections explaining the standard operations,
the APS controller can call a backend operation on an APS connector using either
synchronous (default) or asynchronous mode. The APS controller specifies the mode in
the APS-Request-Phase header whose value can be respectively sync or async.
When sending a request for an operation, the APS controller sends the APS-Request-Phase:sync header.
The APS connector can execute the operation in the sync mode and respond with the 200 OK return
code, or it can return the 202 Accepted code. The latter means that the application can perform
the required operation in the async mode only. In the same response, the APS connector
also sends:
- The
APS-Retry-Timeoutheader to specify the time-out in seconds the APS controller must wait before sending the next request for the same operation using theasyncmode - The
APS-Infoheader that contains a description of the task in the platform that the APS controller must create to schedule the next request
The APS controller polls the same operation in the async mode until the APS connector returns
the 200 OK code or another code different from 202 Accepted.
In the APS PHP framework, to use an asynchronous mode, the APS connector
must define an asynchronous operation paired with the corresponding synchronous operation
using the special naming rule. The rule requires that the asynchronous operation name must
consist of the paired synchronous operation name and the appended Async suffix.
For example, if the synchronous operation is start, the paired asynchronous operation
must be startAsync.
Scenario
The scenario demonstrates the development of a package using asynchronous provisioning. The customers will be able to create virtual private servers (VPSes) that are provisioned synchronously or asynchronously depending on the virtualization technology:
- If a VPS is based on the container technology, then the hosting platform provisions it pretty quickly, and the sync provisioning suits well for this case.
- If a VPS must have its own OS kernel, then a subscriber actually needs a virtual machine (VM) based on the hypervisor technology. The hosting platform may require substantially more time to create a VPS, and thus the async provisioning suits better in this case.
The customers will be able to monitor the state of the VPS:
- If a required VPS does not contain its own
isolated kernel, the APS connector performs the operation in the
syncmode immediately. This sets thereadystatus of the new VPS immediately. - Otherwise, the APS connector requires the APS controller to call the operation using
the
asyncmode. The APS controller sets the status of the new VPS toprovisioningand then, on completion of the operation, the status changes toready.
When modifying an existing package, the only required update is to define a pair of the sync/async provisioning operations for the service that manages VPSes. However, for demo purposes, this project also includes some modifications in the presentation logic to show the VPS status for customers.
Start Your Demo Project
Clone the package you have created in the demo project of the Generic Services scenario to the new one by following these steps.
Create a new project basing on the input package and using one of the ways:
- In the Eclipse or IntelliJ IDEA IDE, import the package and then rename it,
for example, assign it the
async1pname. - Copy all files of the input project to another folder, for example, to the
async1p/folder.
- In the Eclipse or IntelliJ IDEA IDE, import the package and then rename it,
for example, assign it the
Replace every occurrence of the application ID and type ID prefix with “http://aps-standard.org/samples/async1p/” in
APP-META.xml, PHP, and JavaScript files. This will replace the old application and types with the new ones.To verify if there are no typo in the new project, try to build the new package using either Eclipse IDE, IDEA IDE, or the following command from the command line tools:
$ aps build async1p
If no errors detected and you have successfully built a new APS package, then proceed to the next step.