Table Of Contents
Application Packaging Standard
Last updated 18-Mar-2019Provisioning
At the provisioning stage, verify if the system activates the proper provisioning method.
It must create a container (VM==false) using the sync provisioning mode, and
start the async provisioning when a customer requires a VM (VM==true).


In this document:
Continue your demo project from the previous step.
Subscribe to Application Services
Create a subscription for a customer and open the customer control panel as explained in the Generic Service Management demo project.
Test Sync and Async Operations
In the customer control panel, verify that the application uses the sync and async operations
as expected.
Make sure the VPS Management item is available in the left-hand side navigation panel and switch to it to perform all operations with VPSes.
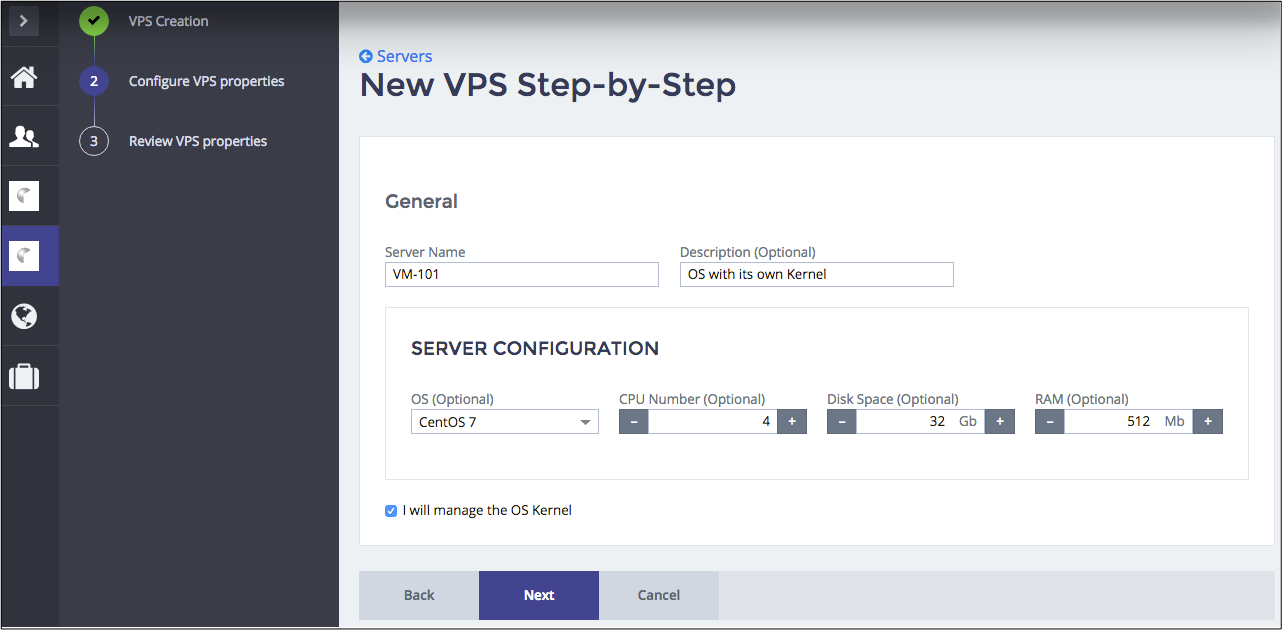
Click New to start creating a container. For this purpose, make sure the check-box I will manage the OS Kernel is clean. Complete creation of the container.
In the Servers list, notice the new VPS and verify its properties:
- Its State is Stopped. It means, it has been created immediately using the sync method.
- Its Provisioning status is Ready. This is one more evidence that the sync provisioning was used.
Start creating a VM. For this purpose, make sure the check-box I will manage the OS Kernel is ticked.

Complete creation of the VM.
In the Servers list, notice the new VPS and verify its properties:
- Its State is Creating. It means, it was not created immediately, that is the async method was used.
- Its Provisioning status is In progress. This is one more evidence that the async provisioning was started.

Click Refresh in about 30 s to verify if the State is changed for Stopped and the Provisioning status is Ready.
Verify Scheduled Tasks
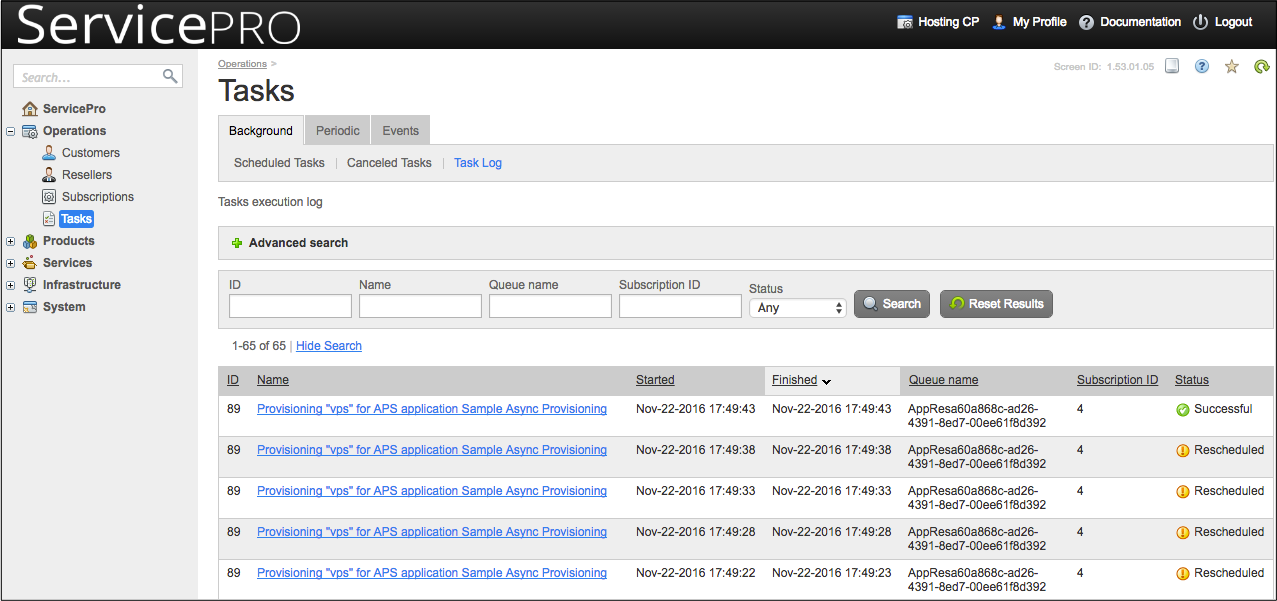
In the provider control panel, navigate to Operations > Tasks and find the scheduled task engaged into creating the requested VPS. If the provisioning is completed, seek for the task on the Task Log tab.

Conclusion
This completes the APS application development cycle. You have created an application that can require
the APS controller to use the async mode for the resource provisioning.
If you experienced any issues when following the project steps, you can compare your code
with the similar contents in the sample package.