Table Of Contents
Application Packaging Standard
Last updated 18-Mar-2019Provisioning
It is the time to verify if the application subscribes to various events as designed and logs the event notifications in a file.


In this document:
Continue the demo project from the previous step.
Subscribe Customer
In the OSS provider control panel, follow typical steps to create a subscription:
- Navigate to Operations > Customers to ensure you have a customer for testing. If there is no such a customer, create one.
- Open the customer profile, switch to the Subscriptions tab, and create a subscription from the service template.
Test Application in UX1
Log in to UX1 on behalf of your test customer and do the following to test the new application.
Make sure, the VPS Management tab and Event Notifications sub-tab inside it are available.
Follow the Add Users process in the User Management demo to create a user and a VPS for the user.
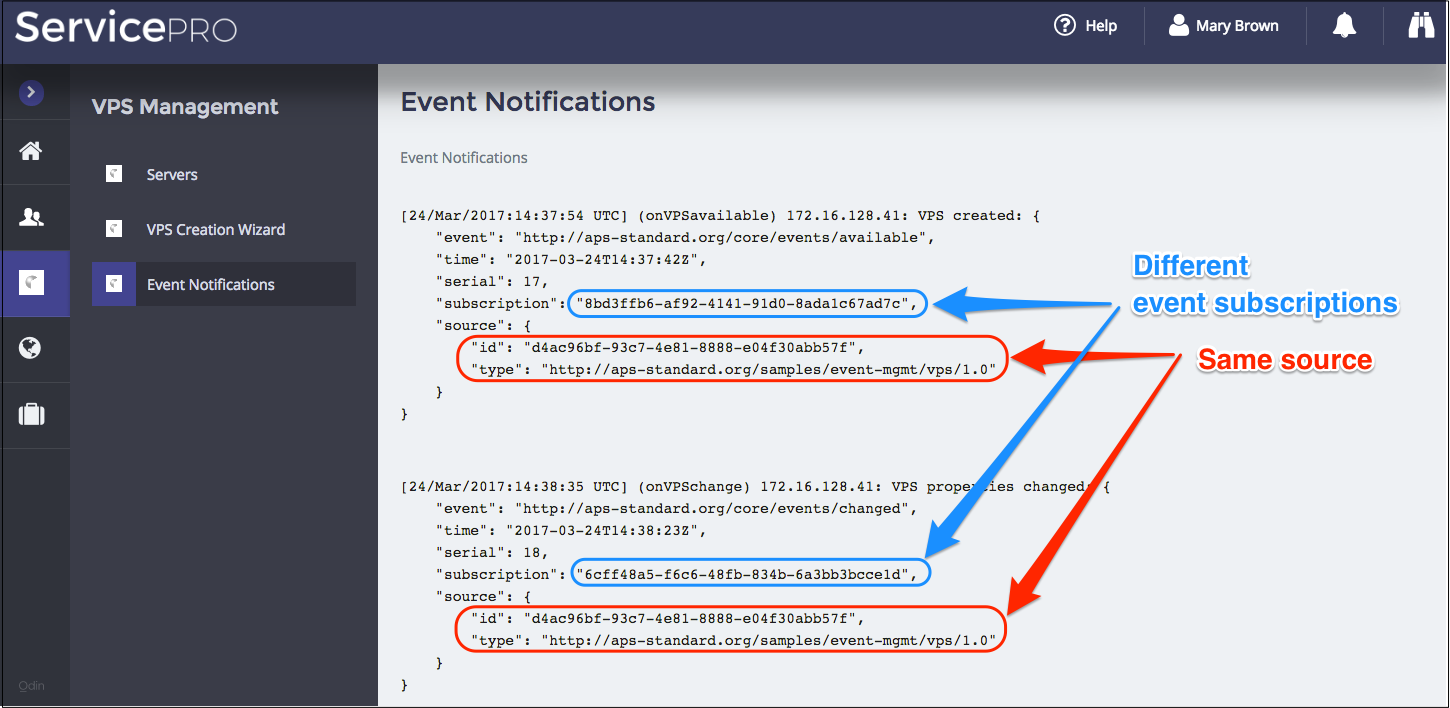
On the Event Notifications sub-tab, click Refresh to get the event notification log on the screen. Pay attention to the event subscription ID and the source ID, for example:
On the Servers sub-tab, find the new server. Click on its name to run the editor. Edit some properties, including the offer, and save the new configuration.
On the Event Notifications sub-tab, click Refresh to verify if the event notification log is printed out and it presents the expected event notifications: New offer linked and VPS properties changed. For example:
[24/Mar/2017:16:17:36 UTC] (onVPSofferLink) 172.16.128.41: New offer Linked: {
    "event": "http://aps-standard.org/core/events/linked",
    "time": "2017-03-24T16:17:24Z",
    "serial": 29,
    "subscription": "204ec074-64b5-497f-8477-c80b13a61730",
    "source": {
        "id": "09dcdba9-9f3b-4aa2-b6dc-36fc39cd343f",
        "type": "http://aps-standard.org/samples/event-mgmt/vps/1.0"
    }
}
[24/Mar/2017:16:17:36 UTC] (onVPSchange) 172.16.128.41: VPS properties changed: {
    "event": "http://aps-standard.org/core/events/changed",
    "time": "2017-03-24T16:17:24Z",
    "serial": 30,
    "subscription": "6cff48a5-f6c6-48fb-834b-6a3bb3bcce1d",
    "source": {
        "id": "09dcdba9-9f3b-4aa2-b6dc-36fc39cd343f",
        "type": "http://aps-standard.org/samples/event-mgmt/vps/1.0"
    }
}
On the Servers sub-tab, remove a VPS. Then remove a user.
Refresh the Event Notifications screen to verify if the new notifications appear there: VPS removed and User removed.
Conclusion
This completes the APS application development cycle. If you experienced any issues when following
the project steps, you can download the
sample package
and compare it with the demo package you have created.