Creating a Pool of Preconfigured AWS Standalone Accounts
Before placing an order to allocate an AWS account to a customer, it is necessary to create a pool of preconfigured AWS SPP Standalone accounts in the AWS Management extension. In this way, when a new order is placed, the connector will retrieve one of the accounts stored in the extension and it will use it in the new subscription. When a provider adds a preconfigured account to the extension, it becomes linked to them. Consequently, other providers cannot modify the account or retrieve it when creating new subscriptions.
The preconfigured AWS Accounts will be ready to use. However, they will have generic contact details and will be allocated to a particular customer when a new order is placed. Once a given AWS account is assigned to a customer, it will be marked as Allocated and it will not be used again.
The status of the stored AWS Standalone accounts will depend on the status of the order in which the AWS account was used:
-
Ready: This is the initial status of the account after being stored in the extension's database. The connector will retrieve the oldest account in Ready status for the corresponding provider and marketplace.
-
Provisioning in progress: This status indicates that the AWS Standalone account is being used in an order.
-
Invalid: The account is not valid and will not be used in future orders.
-
Allocated: The order using the AWS account has been completed. Once an account has been allocated, it will not be used again.
-
Provisioning failed: The provisioning of the order using the account has failed. The account will not be used in future orders.
Adding Accounts
You can either add AWS Standalone accounts one by one, or perform a bulk import. To add accounts one by one, complete the following steps:
-
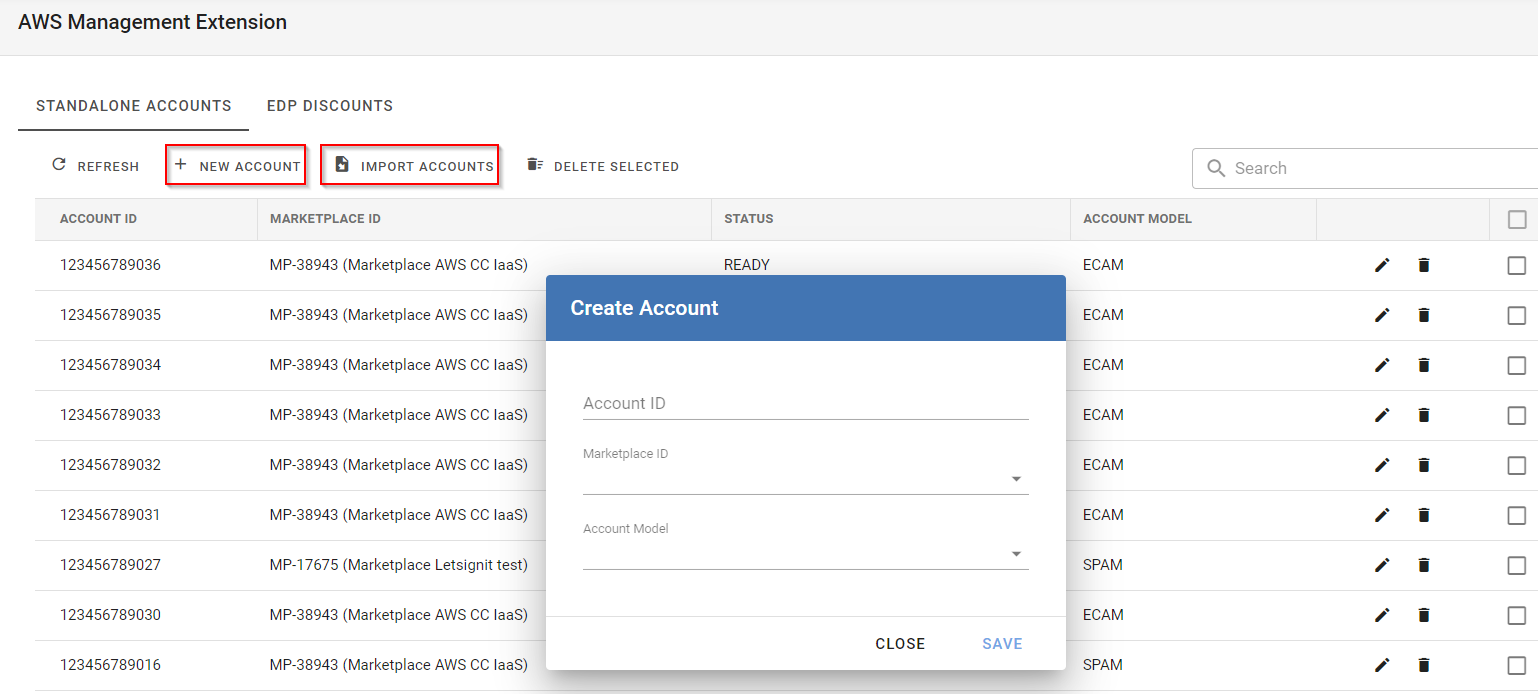
In the Connect Distributor portal, go to Settings and click the AWS Management Extension in the left menu (under Extensions).
Note: If you have not installed the extension yet, click here for additional information.
-
Click New Account to provide the AWS account ID. Then, select the marketplace ID where the account will be used and the account model to be followed (SPAM or ECAM). The selected model will be used for new orders.
-
Click Save.
Alternatively, you can add multiple accounts simultaneously by importing a .csv file. To do this, complete the following steps:
-
Prepare a .csv file containing the AWS accounts to be imported with the following format:
Copyaccount_id;marketplace_id,account_model
123456789012;MP-0000;SPAM
123456789013;MP-0000;ECAM -
Click Import Accounts, select the .csv file and click Save.
Editing Accounts
Once an account has been added, you can edit the marketplace and the account model (SPAM or ECAM). To do this, just click the pencil icon for the account you wish to edit and select a new marketplace or account model.
Note: Changing the model will only affect new orders using the AWS account.
Deleting Accounts
You can easily delete accounts by clicking the corresponding trash icons on the right. If you wish to delete several accounts at the same time, click the corresponding checkboxes and then click Delete Selected. To delete all the accounts, click the checkbox in the table heading and then click Delete Selected.