Managing Microsoft Outbound Transfers in CloudBlue (Transfer-Out)
The Transfer Out process in Seamless Move allows you to either approve outbound transfer requests that are in Pending status or create offline cancellation requests in CloudBlue for the subscriptions that are part of an outbound transfer in Completed status.
Note: Outbound transfers will only work if the destination partner creates the transfer specifying a product type (either Azure or Online Services).
Benefits Overview
-
Billing Accuracy: Automatically syncs the end of your billing liability with the moment the transfer is completed at Microsoft.
-
Reduced Manual Effort: Eliminates the need for manual reconciliation between Microsoft Partner Center and your billing platform.
-
Control & Security: Only authorized CloudBlue Agents can approve transfers, ensuring that customer churn or transitions are strictly validated.
-
Non-Obligatory Workflow: You are under no obligation to approve a request until all of your commercial agreements with the customer are settled.
Getting Started
To process your first Outbound Transfer:
-
Coordinate: When you see a new Transfer Request, ensure with the Customer that a legitimate Target Partner has initiated the request via Microsoft and the customer has established a Microsoft Billing & Invoicing (B&I) relationship with them using a Partner Invitation Link (PIL).
-
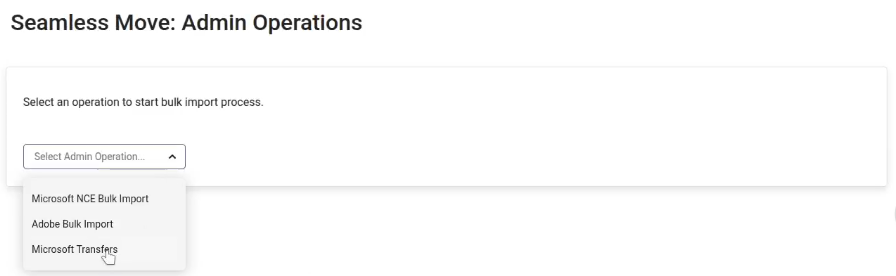
Navigate: In the CloudBlue UX1, go to Seamless Move > Admin Operations > Microsoft Transfers.
-
Approve: Locate the Pending transfer using the Microsoft Transfer ID or Customer ID and click Approve. You may also ignore the request and allow it to expire. Whatever you decide, Microsoft will separately inform the Target Partner.
-
Finalize: Once the status changes to Completed (which indicates Microsoft has finished processing—a step that may take a few days in some cases), use the Cancel Subscriptions action. This triggers the offline cancellation and halts local billing. CloudBlue will then retroactively align the billing to the Effective Date provided by Microsoft (after its processing time).
Initiating the Process
-
Click Admin Operations in the Seamless Move menu on the left.
-
Select Microsoft Transfers from the dropdown list and click Go.
-
Click the Transfer Out tab.
-
Provide the following fields:
-
Reseller ID: Enter the reseller ID.
Note: This field will only be visible if you log in as a provider.
-
Customer ID: The CloudBlue Commerce customer account ID owning the subscription.
-
Microsoft Domain Name: Source partner's domain name.
-
Microsoft Transfer ID: Transfer ID that includes the outbound transfer subscriptions.
Note: This is an optional field. If you do not have the transfer ID at hand, you can leave the field empty and choose the transfer from a list in the next step.
-
-
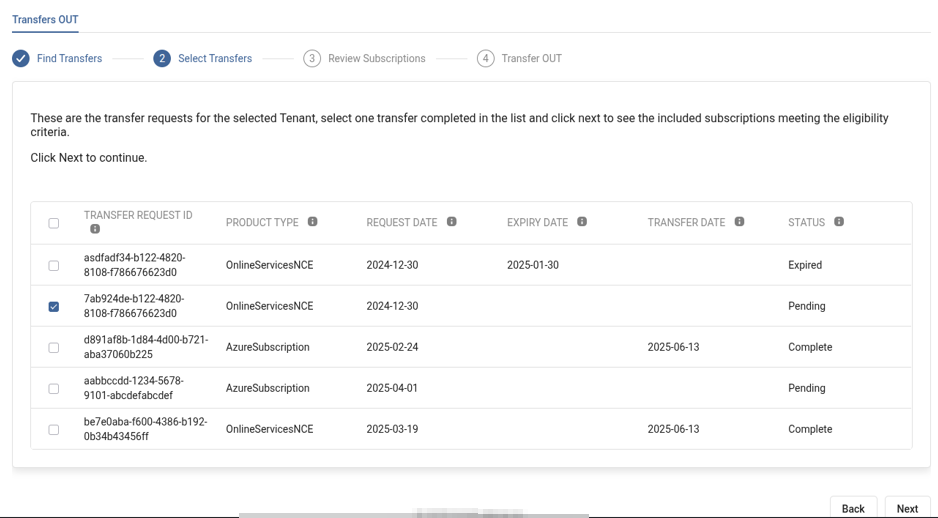
You can either select an outbound transfer in Pending status to approve the outbound transfer request or choose a transfer in Completed status to create cancellation orders for the subscriptions included in that transfer. Click Next.
Processing the Transfer
Based on the status of the transfer in the list, choose the appropriate workflow:
Pending Status (Approval)
When a transfer in Pending status is selected:
-
Select the subscriptions to be included in the outbound transfer. The Subscription ID column contains the ID of the subscriptions in CloudBlue Commerce. If this column is empty, it means that the corresponding subscription exists on Microsoft but not on CloudBlue Commerce. The ID column contains the ID of the subscriptions in the Microsoft Partner Center.
-
Click Approve to approve the outbound transfer. All the subscriptions selected in the previous step will be included in the transfer request approval that is sent to Microsoft.
Note: Once an outbound transfer is approved, the transfer process is usually completed in less than an hour in most cases. However, depending on the type of subscription being transferred, in some cases it may take up to 72 hours. Once the transfer is completed, you can follow the steps in the Completed Status section below, to create an offline cancellation order in CloudBlue for the corresponding subscriptions.
Completed Status (Offline Cancellation in CloudBlue)
Use this after a transfer is completed to ensure the customer is no longer billed in CloudBlue.
-
Click Cancel Subscriptions.
-
This creates an offline-mode cancellation order in CloudBlue Connect.
-
Result:
-
NCE Microsoft 365 (license-based): Local billing is realigned to match the effective date established by Microsoft. A prorated refund is generated based on the exact Transfer Completion Date timestamp received from Microsoft, overriding standard cancellation policies.
-
NCE Azure (usage-based):
-
Retain the Subscription: Keep the Azure Plan active in a "Monitoring" state.
-
Collect Usage: Continue to ingest "Late Landing" usage files from Microsoft for the pre-transfer period.
-
Terminate: Automatically terminate the Azure entitlement only after usage collection is confirmed complete.
-
-
For additional information about transfers, see Microsoft's documentation.
Note: Seamless Move does not currently support Distributors configured in the L0 tier.