Enable a Zap for CloudBlue Commerce to Salesforce Order Management Flow
This process explains how you can enable a Zap to capture order data from CloudBlue Commerce platform and transmit it to the Salesforce platform.
To enable the Zap, refer to the following sub-steps:
Set up the Zap trigger
You must set triggers to capture data from CloudBlue Commerce when a new request is created or an existing request is updated in CloudBlue Commerce. Requests are created or updated in CloudBlue Commerce when an order is placed or updated in Salesforce. The trigger is configured by default according to the template. You may modify the settings, if required.
To enable the Zap trigger, complete the following steps:
- Log in to Zapier.
- On the Dashboard, click the
 icon.
icon. - In the search bar, search for CloudBlue Commerce.
- On the left pane, click Zaps.
- Click the return zap for CloudBlue Commerce to Salesforce.
On the Zap template page, the following fields are populated by default based on the pre-configured template
- When this happens ... : Displays the name of the trigger as defined in the template.
- Choose App & Event: Displays the details as defined in the template. Here, the trigger captures the data when an Order is placed in CloudBlue Commerce.
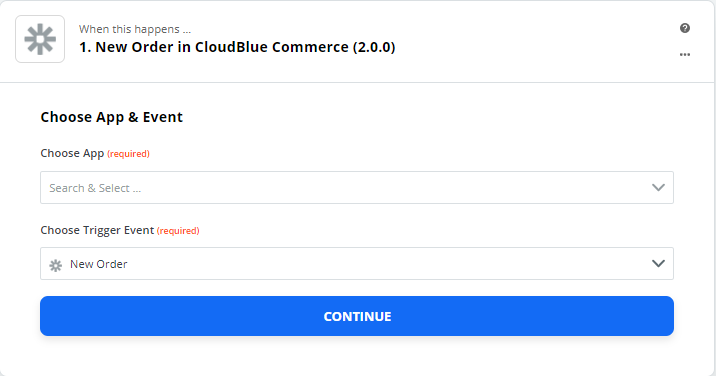
- Choose App: Displays the source application from where Zap captures the event.
- Choose Trigger Event: Displays the event in CloudBlue Commerce that triggers the Zap.
- Click CONTINUE.
- Choose Account: To capture the specified event in CloudBlue Commerce, log in to the platform. This field is pre-populated.
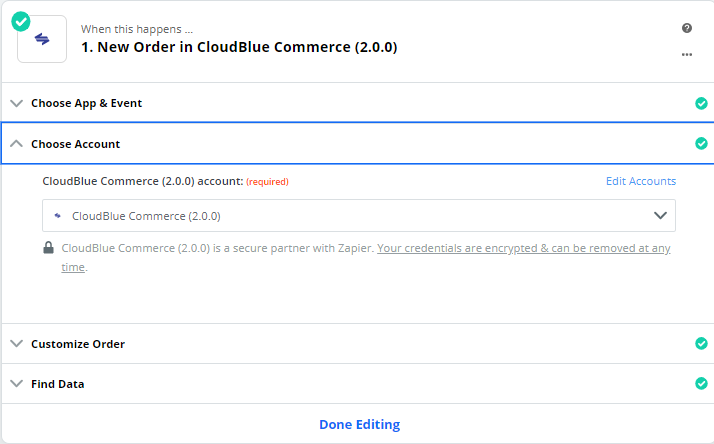
NOTE: If you are logging in for the first time, click Sign In to CloudBlue Commerce, provide the necessary credentials, and then click Allow to log in to a CloudBlue Commerce Provider account where the action must take place. To log in to a different CloudBlue Commerce Provider account, click +Add a New Account.
- Click CONTINUE.
-
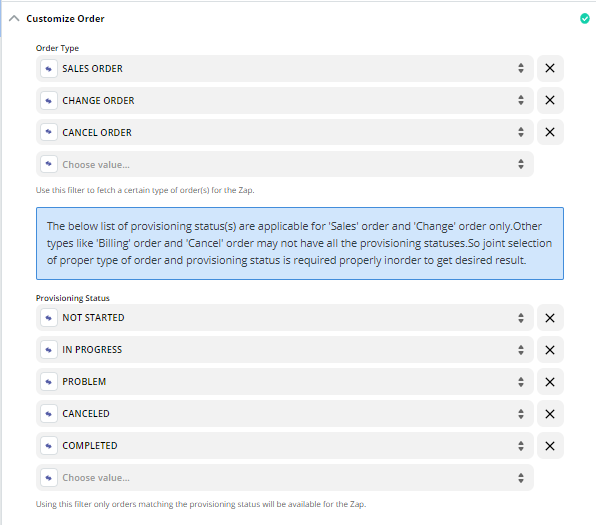
Customize Order: Displays the table that triggers the Salesforce Zap when it is populated with new order records.
- View Data: Displays the data related to triggers.
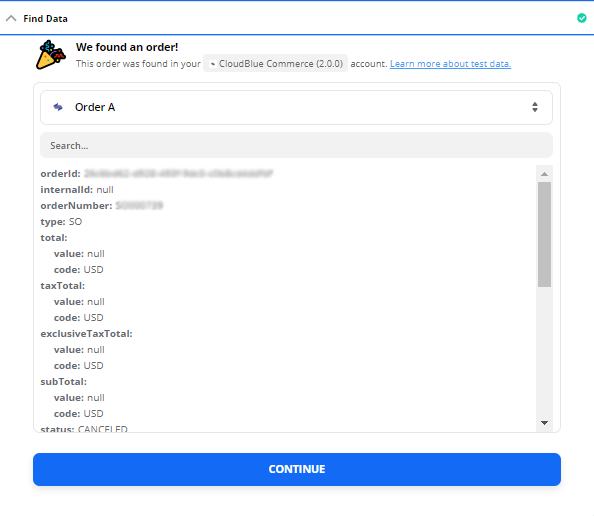
- Click CONTINUE.
- Click Done Editing to proceed.
When an order is placed in CloudBlue Commerce, a business rule is triggered in the back-end that captures all relevant data from the database tables in CloudBlue Commerce and passes it to the trigger. The trigger populates the new_wireless_order__c table in Salesforce. The required Zap for Salesforce is triggered and it creates a new Order in Salesforce.
Set up the Zap paths
Zap paths are advanced workflows that are created to run different actions based on defined conditions. Paths are created based on the if-then logic, where the required action is performed only if a specific condition is fulfilled in CloudBlue Commerce. In this scenario, the following two paths are defined:
- Create new customer and place new sales order
- Change order
Create new customer and place new sales order
Enable this path to trigger the Zap when a new order is placed in Salesforce by a new Enterprise Administrator or the Procurement Manager.
To enable the path, complete the following steps:
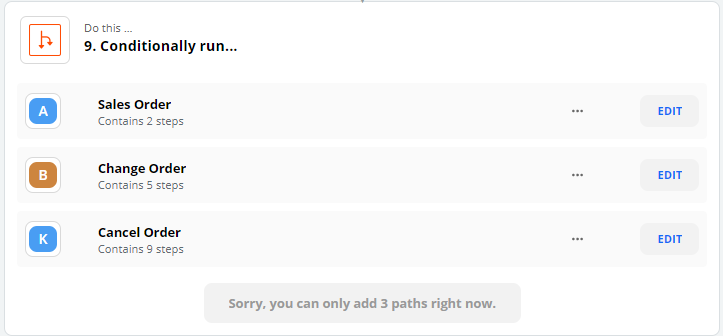
- Under Conditionally run..., to edit the Sales Order path, click EDIT.
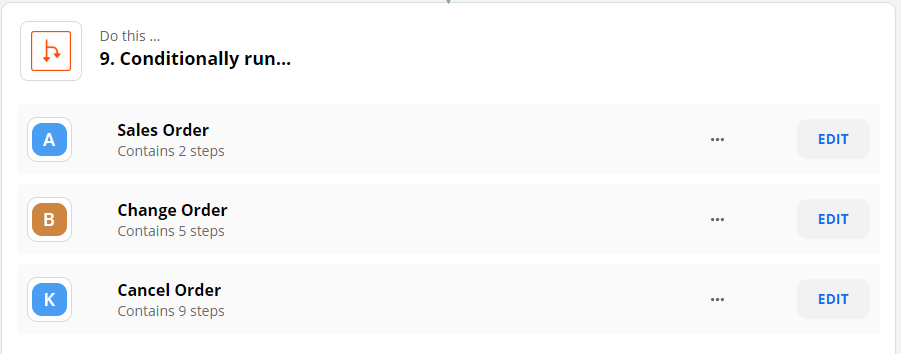
-
On the Edit page, under When this happens, the following fields are populated by default based on the pre-configured template.
- Name: The name of the path is displayed as defined in the template.
- Click CONTINUE.
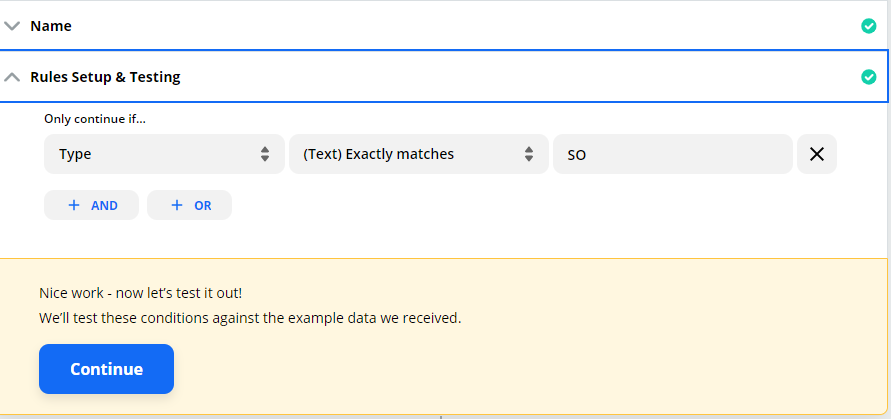
- Rules Setup & Testing: Displays the rules for the path as defined in the template.
- Click Continue.
- To proceed, click Done Editing.
Change order
Enable this path to trigger the zap when an existing order is modified in Salesforce by a new Enterprise Administrator or the Procurement Manager.
To enable the path, complete the following steps:
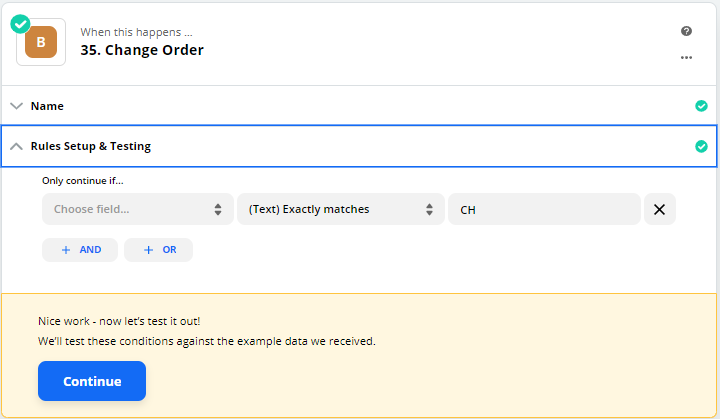
- Under Conditionally run..., to edit the Change Order path, click EDIT.
-
On the Edit page, under When this happens, the following fields are populated by default based on the pre-configured template.
- Name: The name of the path is displayed as defined in the template.
- Rules Setup & Testing: Displays the rules for the path as defined in the template.
- Click Continue.
- To proceed, click Done Editing.