ServiceNow Configurations
Adding update sets in ServiceNow
Update sets track changes made to applications and the features in a system platform. It enables developers to create a new feature in a non-production environment (instance) and migrate the changes to another instance to make it available for users accessing the target instance.
An Update Set is an XML file that contains:
- A set of records that uniquely identify the update set.
- A list of configuration changes.
- A state that determines whether another instance can retrieve and apply the configuration changes in the set.
The XML file below contains the following fields:
- Activation Tile
- SSO
- Homepage and Activation Tile Sharing Among Users.( Depending on roles and business unit information)
- Business Rules
- UI Action
- Client Scripts
- Tables
- Notifications
UpdateSet_ServiceNow_CBC.xml
Adding an activation tile to the ServiceNow home page
After the ServiceNow Enterprise System Administrator or Procurement Manager user logs in to the ServiceNow platform, they may need to activate the service from the activation tile. Therefore, the activation tile must be configured for the user using the update set (refer to Adding update sets in ServiceNow).
The activation tile is visible to the following users only:
- Enterprise System Administrator users: The Enterprise System Administrator has administrative privileges and can view the activation tile after logging in to the platform. The administrator can also view all the orders placed by all Procurement Managers registered to the ServiceNow platform.
- Procurement Manager users: Procurement Manager users can view the activation tile only if they are associated to the Business Unit for which the activation tile has been configured. A Procurement Manager can also view the orders placed by other Procurement Manager users, if they belong to the same Business Unit.
To view the activation tile, the ServiceNow Enterprise System Administrator or Procurement Manager user must configure a home page in their ServiceNow accounts.
To configure a home page in the ServiceNow platform, complete the following procedures:
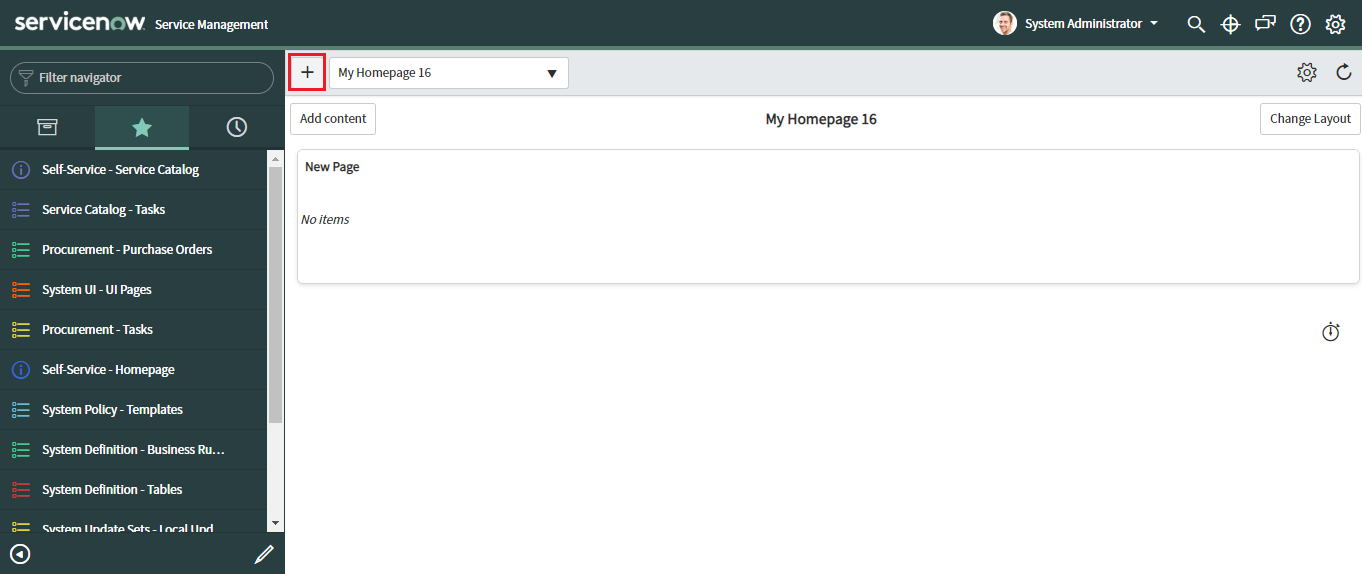
Create a home page and a frame
To create a home page and a frame, complete the following steps:
- Log in to ServiceNow.
- Click the Add (
 ) icon to create a new home page.
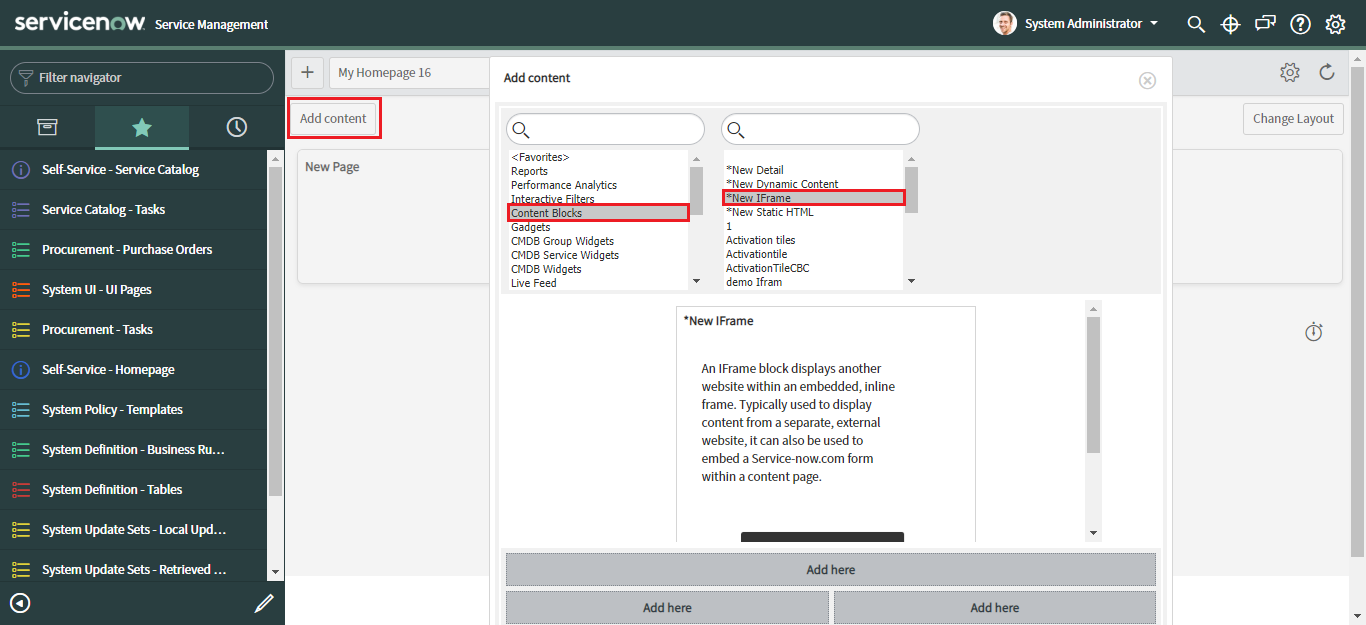
 - On the new home page, click Add Content.
- On the Add content window, select Content Blocks > *New IFrame.
- Click Add here to add a new IFrame widget to the home page. Activation tiles configured for this home page appear within this frame.
Configure the frame
You must configure the new frame to display activation tiles when a new order is placed, or an existing order is updated from the ServiceNow Service Management platform.
To configure the new frame, complete the following steps:
- On the home page, in the new IFrame, click the Edit Widget (
 ) icon.
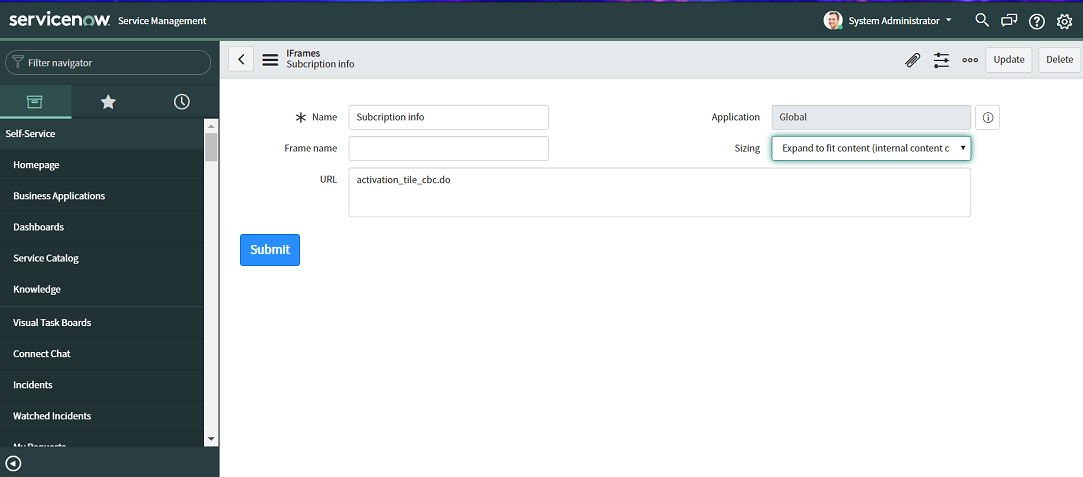
 - On the IFrames New record page, provide the required information.
- Name: Provide a name for the frame.
- Application: This field is set to Global by default.
- Frame name: Provide a name for the frame. This name is used for identifying the frame.
- Sizing: Select one of the following configuration options to specify the size of the frame:
- Expand to fit content (internal content only): This option is applicable to internal content proprietary to ServiceNow.
- Fixed size: Select this option to specify your preferred frame size in the Height andWidth fields.
- URL: Provide the system URL to display the activation tile on the home page.
- Click Submit.

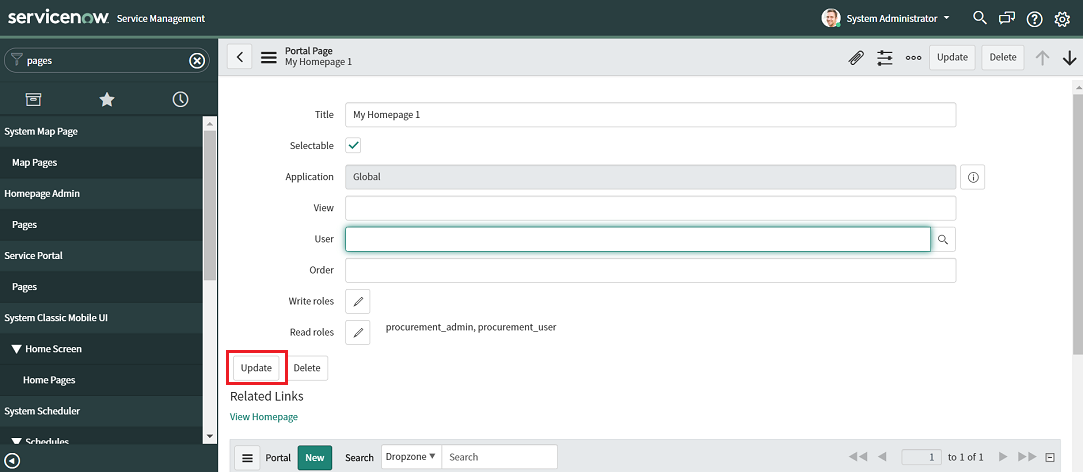
Configure the home page
Configure the new home page to specify users who can view the tile. Users can have Read or Write roles while accessing the tiles.
To configure the home page, complete the following steps:
- In the left pane, under Homepage Admin, click Pages.
- In the list of pages, click the new home page you created (here, My Homepage 16).
- Set the fields as required.
- Title: Displays the title of the home page.
- Selectable: Select the checkbox to display the home page to all users registered to ServiceNow. Clear the checkbox to remove user access to the homepage.
- Application: This field is set to Global, by default.
- User: Select a user to display the home page to that user only. Alternatively, keep this field blank to display the home page to all users. However, the page is only visible to users if the Selectable checkbox is selected.
- Read roles: Select the user roles who hase read access to the activation tile in the home page.
- Click Update.
You may use the search bar to search for Pages.