Table Of Contents
Application Packaging Standard
Last updated 18-Mar-2019Deployment and Synchronization
Once you have successfully validated and built your package, it is possible to deploy the package to your Odin Automation lab system and then periodically sync updates with it. APS provides the Deployment and Synchronization tools for it.
In this document:
Deployment
Connection Data
To deploy an APS application from a package, collect the following connection data for the targeted deployment system.
Control panel URL - used in a browser to login the platform control panel. The system identifies automatically by the user login name which one to open, either provider control panel, reseller control panel, or customer control panel.
Domain name or IP address of the platform management node.
TCP port on the management node to send the RPC requests. You can get it as follows:
In the provider control panel, navigate to System > Settings.
Follow the Public API link.
In the opened screen, you will find the Access Point property containing the full RPC URL, including the TCP port, similar to
http://172.16.254.109:8440/.
Deployment Targets
APS tools allow you to store a list of platforms used as deployment targets. To add a target, follow these steps.
In the Eclipse menu, select Preferences….
Navigate to APS SDK > Deployment Targets.
On the right-hand side, click Add….
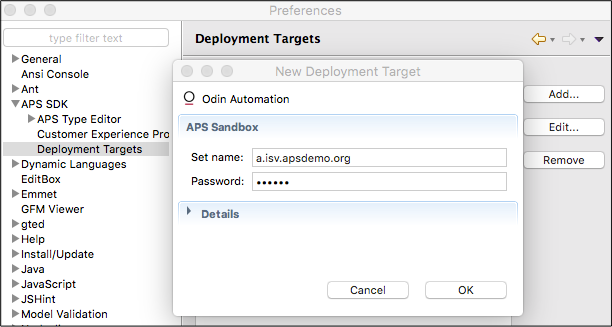
Fill out the popup form with the connection parameters of the targeted platform.
In the simplest case, for example when you use a developer sandbox, the name and password you set in the pop-up window would be enough to configure the whole deployment target.
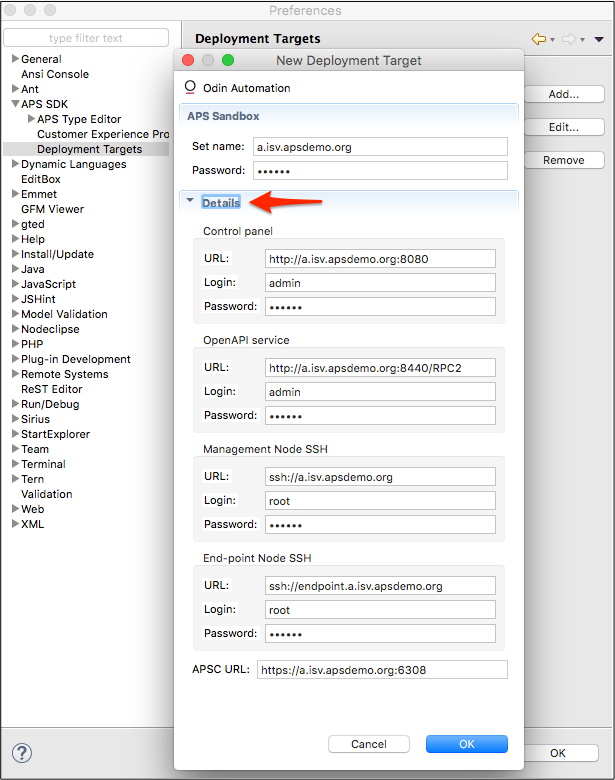
If you have to configure the target components individually, click Details to open the full configuration list.
Deployment Procedure
Follow these steps to deploy the package on an platform:
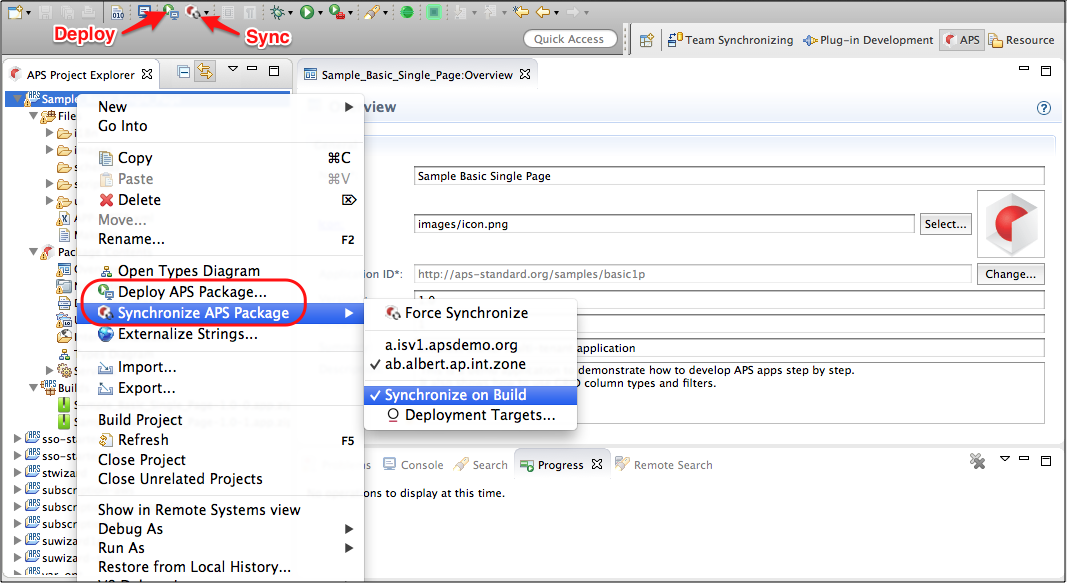
In the APS Project Explorer panel, right click on the project you wish to deploy.
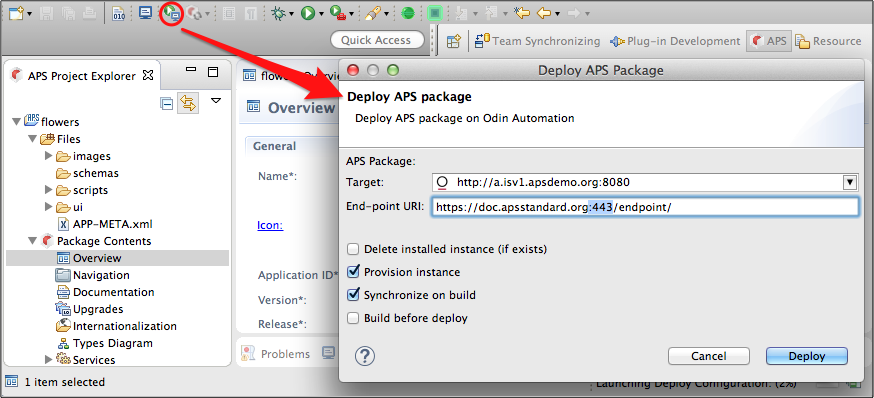
In the pop-up menu, select Deploy APS Package….
Select a deployment target and endpoint host:
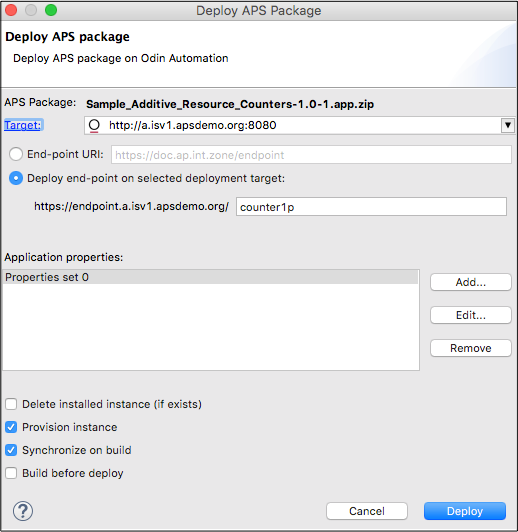
- Use the Target drop-down list to select the target to deploy the application.
- To deploy the application provisioning logic on the endpoint host, select the Deploy end-point on selected deployment target and specify the application endpoint suffix.
- The Application properties field allows you to keep a list of property sets. A property set contains service properties that the application may require during its deployment. You can select a set for deployment. You can miss properties if they are optional and you must assign proper values to the required properties.
Specify necessary setup tasks by selecting the proper checkboxes:
- Delete installed instance - removes all APS application instances on the specified APS application endpoint.
- Provision instance - install an APS application instance on the specified endpoint.
- Synchronize on build - start automatically package synchronization every time you build the package.
- Build before deploy - when you require a package deployment, start building the package before the deployment.
Click Deploy.
Once the deployment is completed, you will find an invitation in the console log to enter the control panel.
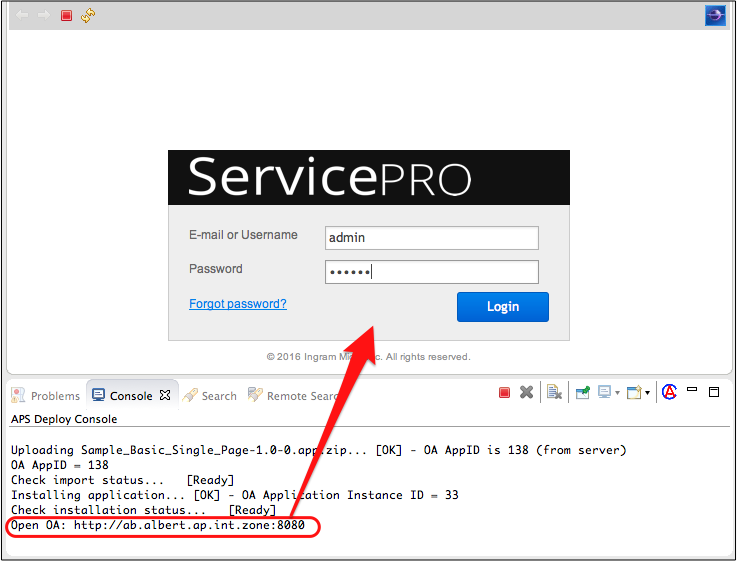
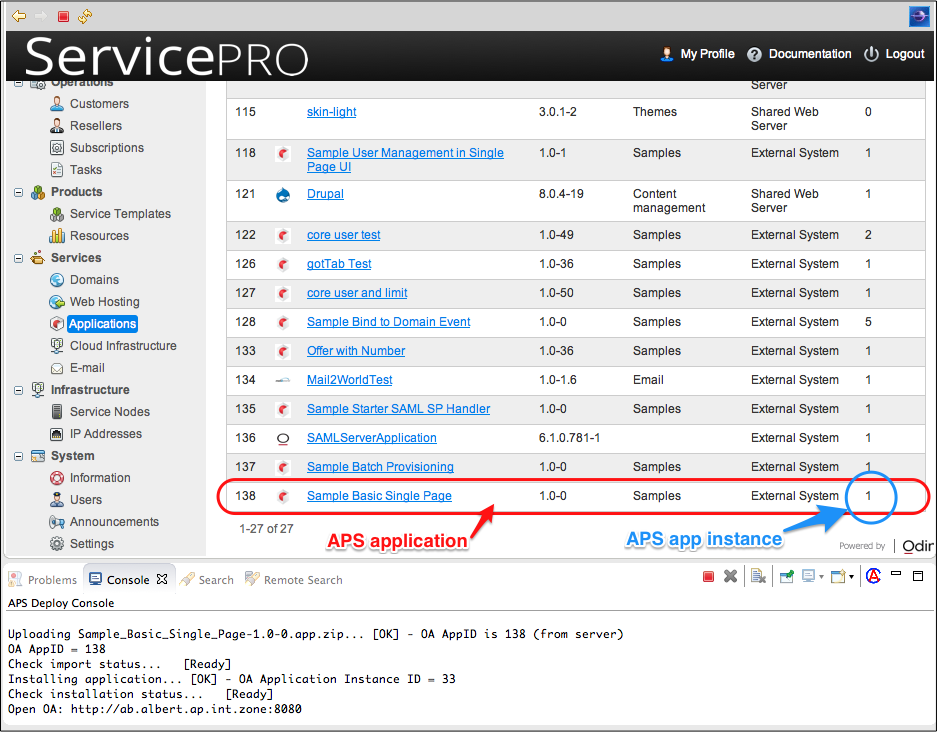
Log in the control panel to verify if the APS application package is imported and an APS application instance is created in the endpoint environment you specified in the deployment target configuration.
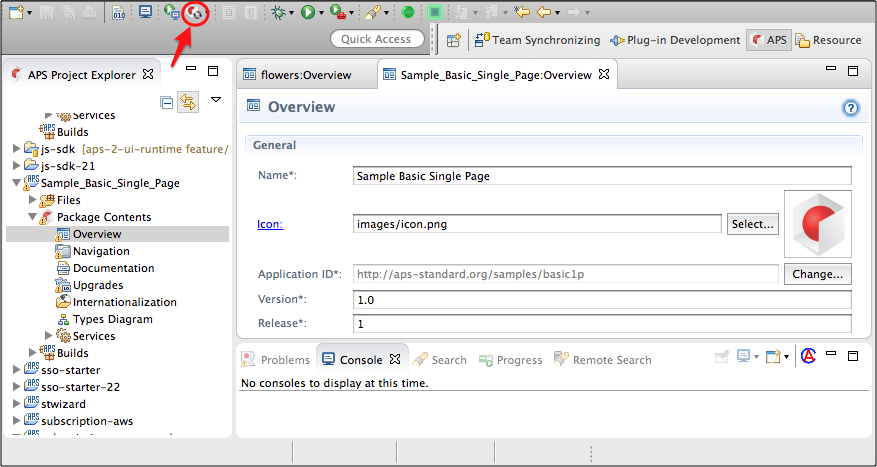
The other way to call the deployment is to click on the Deploy APS Package button on top of the screen:
Synchronization
If you did some updates in the package, you can sync them with the management node.
Sync Types
If your application is in production, you should increase the package version (consisting of the application version and package release) on each update as explained in Application Upgrade in details.
When you are developing a package, it is not necessary to increase the package version each time unless you change a resource schema. If you turn on the Development Mode on the targeted platform, the updates you send to it will take effect immediately. As follows from the above, we have two cases:
- If the package version is not changed, you run the package synchronization to sync the updates with the deployment target.
- If the package version is changed:
- Build the package.
- Deploy the new package version on the deployment target.
Manual Sync
Once you updated anything in the project that does not require increase of the package version, you can sync it with the deployment target as follows:
In the APS Project Explorer, right click on the project and then in the pop-up menu select Synchronize APS Package.
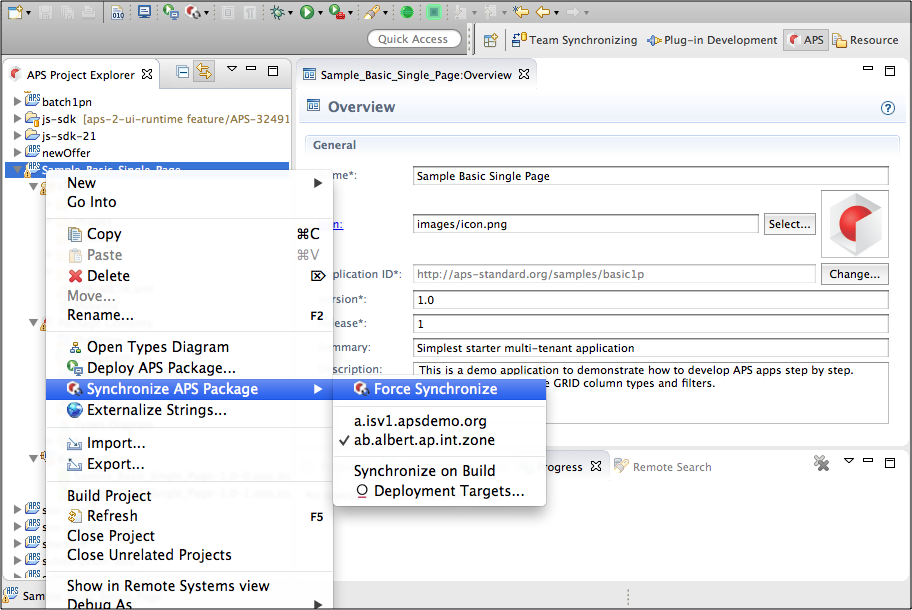
To start the sync process select one of the targets:
- To sync the updated project with the current deployment target, click Force Synchronize
- Select another target in the list
The other way to call the synchronization is to click on the Synchronize APS Package button on top of the screen:
Automatic Sync
You can require the synchronization process to start automatically once a package is built or rebuilt. Configure it this way:
In the APS Project Explorer, right click on the project and then in the pop-up menu select Synchronize APS Package.
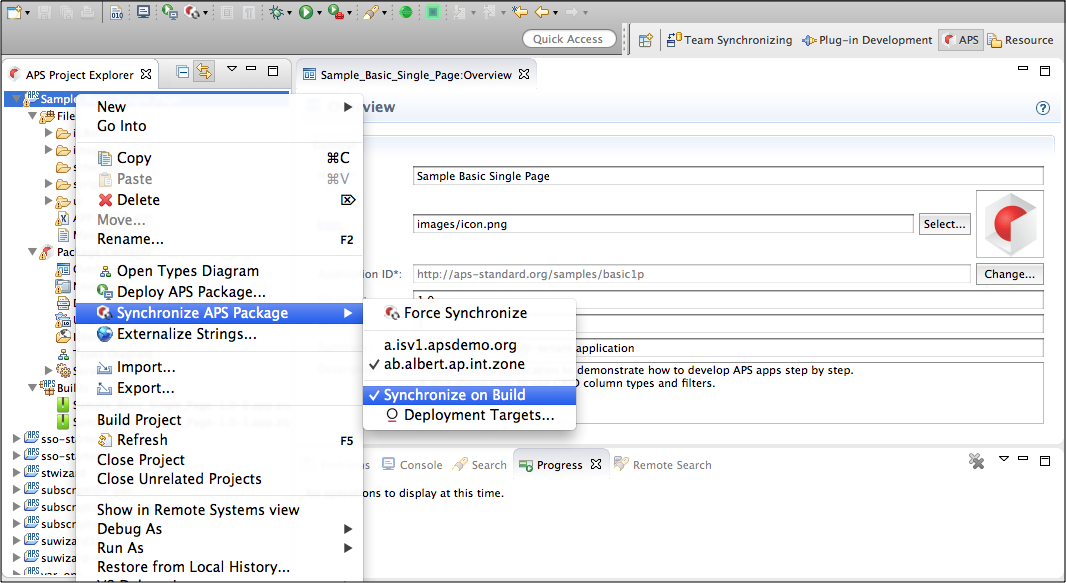
Ensure, the Synchronize on Build mode is turned on.
You can make this process even more automated by making the build process automated. In this case, each time you save anything in the package, the build process is started and on its completion the update is synced with the deployment target.