Table Of Contents
Application Packaging Standard
Last updated 18-Mar-2019Get Started
You can get started with an APS project by either importing an existing APS package, or by creating a new project from scratch, or by creating a new project based on an APS template.
In this document:
Import Project
If you need to update an existing package created somewhere or use an existing package as the basis for creating your new project, import the package to IDE as follows:
Note
Do not copy the package to the Eclipse working folder manually. This will be done by APS tools.
Navigate to File > Import….
In the tree, select APS Project as a source.
Select one of the following ways to import the package:
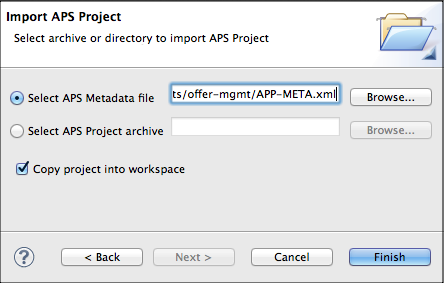
- If the package is unpacked in a folder, use the Select APS Metadata file option and provide the path
to the
APP-META.xmlfile of the project. - If the package is archived, use the Select APS Project archive option and provide the path
to the APS package archive having the
app.zipname extension.
- If the package is unpacked in a folder, use the Select APS Metadata file option and provide the path
to the
Start New Project
If you wish to create an APS project from scratch or basing on one of templates (sample packages) from the APS catalog, follow this sequence:
Navigate to File > New > Project, select APS Project, and then click Next.
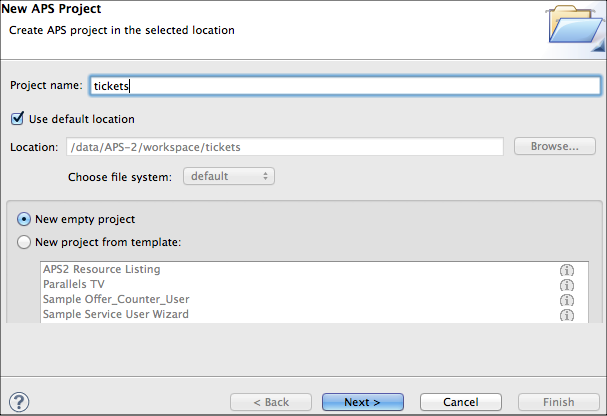
Specify the project name and location.
You have different options to start a project:
- Start a new project from scratch. Therefore:
- Enter the project name.
- Use default Eclipse location (workspace) or select another folder available on your local system.
- Create a project from a template. Therefore:
- Select the New project from template radio-button.
- Select a template from the list.
- Use existing APS package. Therefore:
- In the Location field, specify the exact path to the existing package.
- Start a new project from scratch. Therefore:
Click Next to proceed with configuration of package general settings.
On the APS project details screen, fill in the following fields:
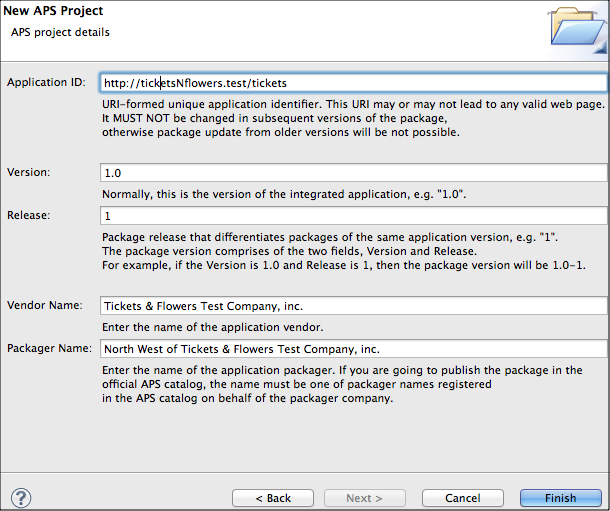
Application ID must be a unique identifier in the URI format, permanent during the application life-cycle. All package versions of this application are bound to it through this ID. If in any new package version, the application ID is changed, the hosting platform will consider this package belonging to different application. Usually this ID is also used as a prefix in all APS type IDs. In this case, the entered ID will update all APS type IDs and reference to them throughout the new project.
Version should be the version of the application you need to package.
Release must be increased each time you need to update the package without changing the application version.
Note
Together, Version and Release, define the package version. For example, if the version is 3.2.1 and the release is 1, the package version will be 3.2.1-1.
Vendor Name identifies the application vendor or ISV (independent software vendor).
Packager Name identifies the package developer. If you are going to import the developed package to the APS catalog, the name must be identical to a packager name registered by you or your company in the APS development portal.
Click Finish to complete creation of the project.