On the Mapping screen, you can map your customers and products between Reseller Marketplace and Dynamics 365 Business Central.
Mapping Customers
There are three ways to map your customers between Reseller Marketplace and Dynamics 365 Business Central:
- Through the subscription synchronization wizard, during subscription synchronizing.
- Through the customer import wizard, automatically.
- Through the Mapping screen in bulk.
- Through the Mapping screen.
To map your customers using the Mapping screen, complete the following steps:
-
In your UX1 for Resellers, click Integrations.
-
On the dashboard, click the gear icon and select Mapping.

-
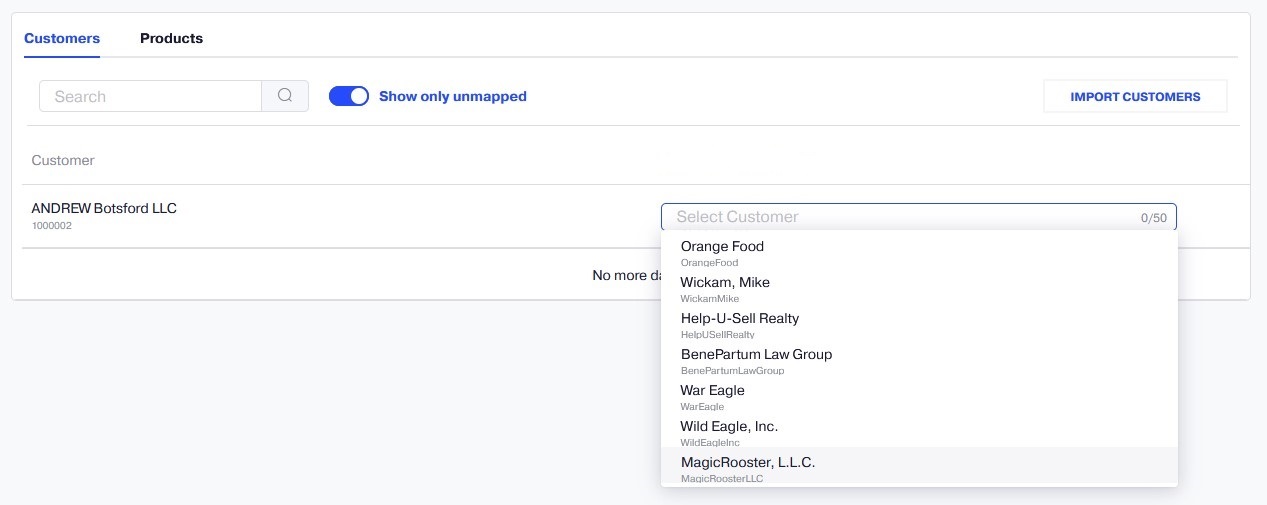
In the Customers tab of the Mapping screen, select a customer you want to map.
Note: Select Show only unmapped to filter out only unmapped customers.

To unmap a customer, select the three-dot icon for the customer and click Unmap.
Configuring Autosync Per Customer
You can configure automatic task synchronization per mapped customer. To use this feature you first need to enable autosync for the integration.
To enable or disable autosync for a customer, complete these steps:
-
Open your integration.
-
Click the gear icon and select Mapping.
-
Disable the Show only unmapped option.
-
Choose the customer, click the three dots and select Enable autosync or Disable autosync.
Note: You can enable or disable autosync for all customers by clicking the three dots above the customer list and selecting Enable automatic synchronization for all mapped customers or Disable automatic synchronization for all mapped customers.
Mapping Products
Several products from CloudBlue Commerce can be mapped to a single product in an external system. In such a case, a separate agreement must be used for synchronizing each of these products. To use this feature, you need to enable it in integration settings.
There are two ways to map your products between Reseller Marketplace and Dynamics 365 Business Central:
- Through the subscription synchronization wizard, during subscription synchronizing.
- Through the Mapping screen in bulk.
- Through the Mapping screen.
To map your products using the Mapping screen, complete the following steps:
- In your UX1 for Resellers, click Integrations.
-
On the dashboard, click the gear icon and select Mapping.

-
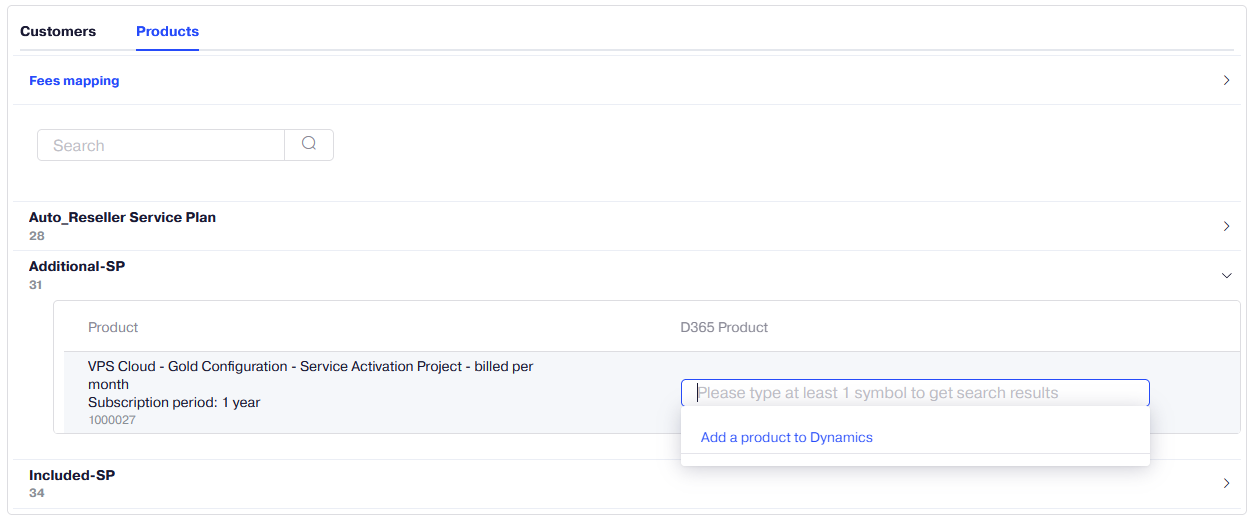
In the Products tab of the Mapping screen, select a product you want to map.
Note: At this step, you can also add a product to Dynamics 365 Business Central by clicking Add a product to Dynamics in the drop-down menu and configuring its parameters.

To unmap a product, select the three-dot icon for the product and click Unmap.
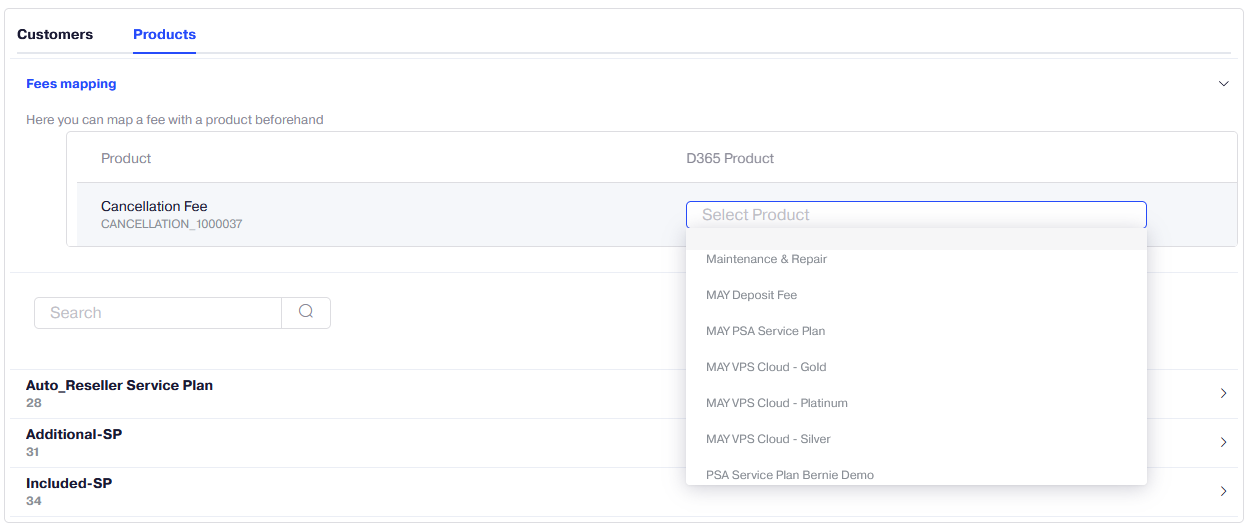
Also, in the Fees Mapping pane, you can map a Cancellation Fee with a product before their synchronization.

Synchronizing Mapped Products
In Native Integrations 4.2.553 and later, you can synchronize the Prices, Costs, and SKUs changes of the mapped products between Reseller Marketplace and Dynamics 365 Business Central.
-
In your UX1 for Resellers, click Integrations.
-
On the dashboard, click the gear icon and select Mapping.
-
In the Products tab of the Mapping screen, click Sync mapped.
-
You can do one of the following:
-
Synchronize one mapped product at a time by clicking Sync .
-
Synchronize multiple mapped products by selecting them and then clicking Sync selected.
-
Synchronize all mapped products by clicking Sync all.