CloudBlue Commerce API
Application Deployment
To integrate an original cloud application with the platform, the provider must deploy the corresponding APS application on the platform. Typically, an APS application logic consists of two parts:
The presentation logic implemented by a JavaScript code plugs the application custom UI into the platform control panels, allowing the provider and its customers to manage the application resources.
The provisioning logic (backend logic) of an APS application is implemented by an APS connector that exposes an APS application endpoint. The latter must be able to receive REST requests from the APS controller. The APS connector converts APS REST requests to the application original API and vice versa.
In this document:
APS Package Contents
Typically, an APS application is installed from the application APS package, which usually contains the following parts:
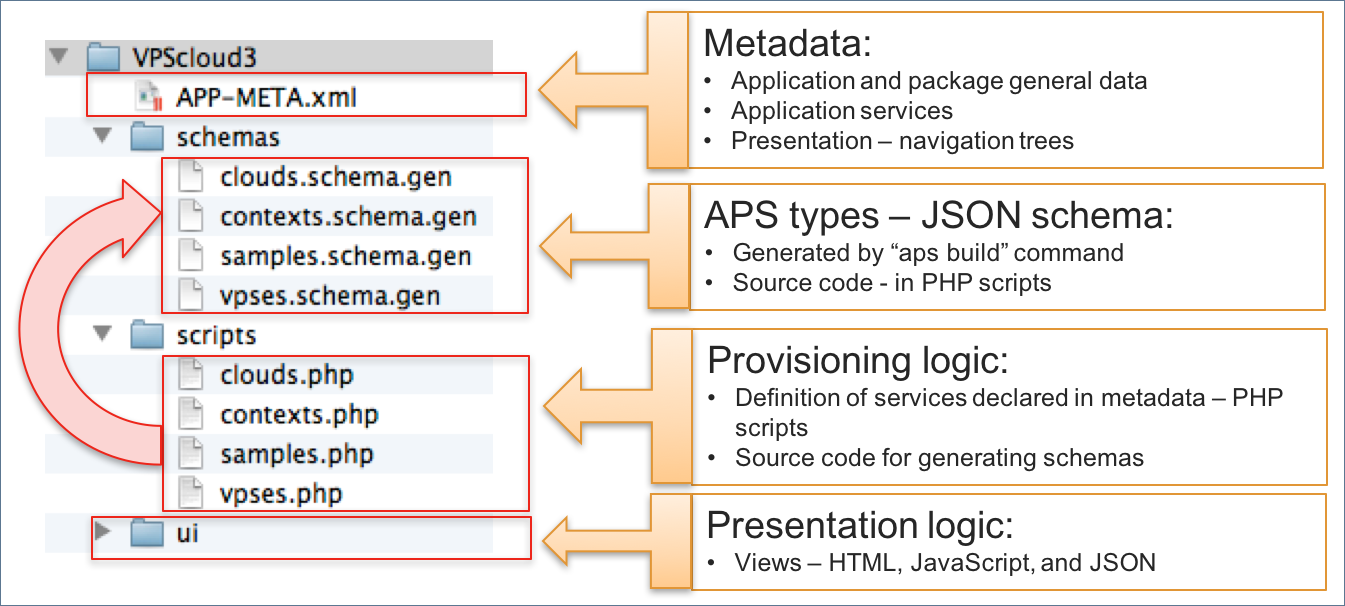
Metadata with a general description of the APS application and the package
APS types that will be used for creating APS resources; normally generated by the aps build command from the provisioning scripts
Provisioning logic, for example, PHP scripts, containing a definition of each services declared in the metadata; may also contain the source definition of APS types
Presentation logic implemented by a JavaScript code that renders and processes visual and control elements in user panels
Note
Depending on the application complexity, the package structure can be more complicated and it can contain many more files.
APS Package Deployment Schema
The deployment of an APS package is a part of the whole APS application deployment and consists of the following steps:
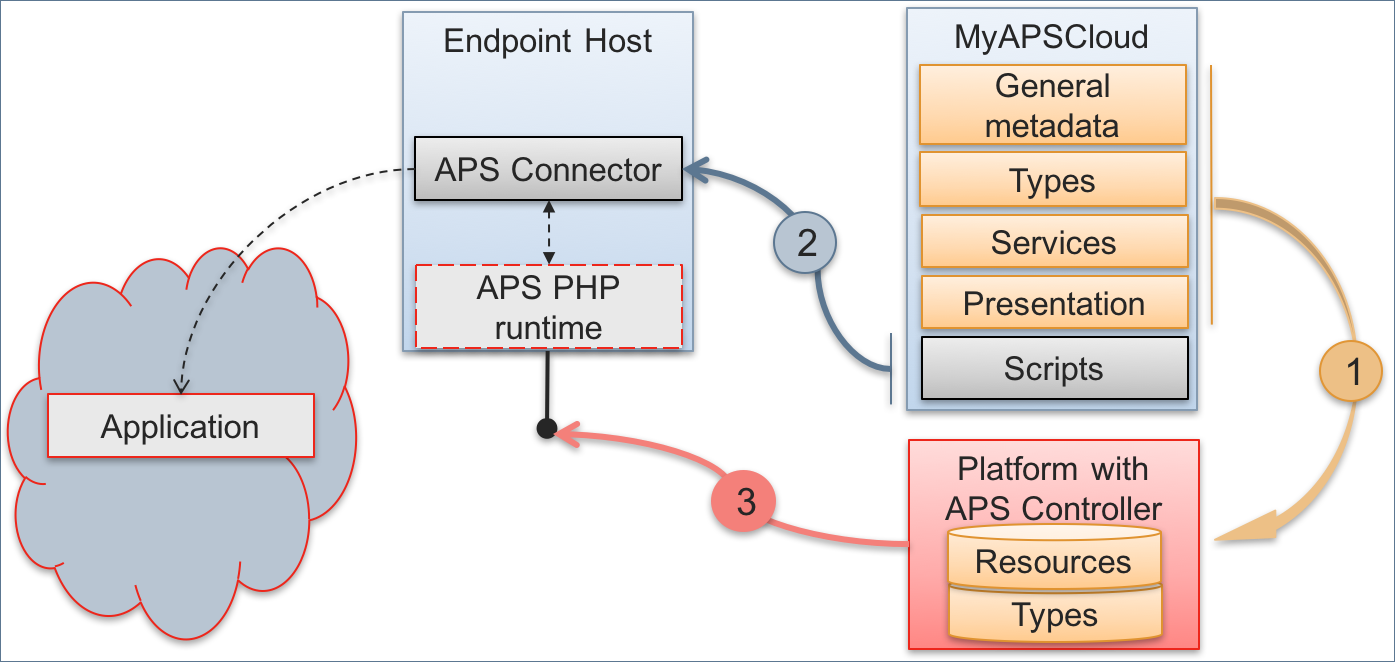
The whole package must be imported to the platform. The APS controller will need general application metadata, definition of types and services for subsequent application configuration and provisioning. The presentation logic will be embedded to the specified control panels.
The provisioning scripts must be used to set up an APS connector. The latter exposes the APS application endpoint for the APS controller.
During the installation of an APS application instance step, the APS controller configures an APS application instance through the APS application endpoint.
On completion of the above steps, the provider will be able to proceed to the following configuration steps:
The Setting Reference Resources step is needed when the application requires some parameters to be applied globally to the application resources.
The Creating Resource Types and Creating Service Template steps are the required deployment steps for any service provided through the platform. The APS specifics in this step are that platform resource types are bound to APS reference resources or to APS types.
To sell application resources, the provider must go to Sales Configuration in BSS.
Deployment Methods
The developer of an APS application must choose a deployment method that allows the providers to reliably and simply deploy the APS application on their platform.
There are different approaches to the deployment of APS connectors as explained in the following documents.
Note
The deployment of the presentation logic (UI) is fully automated and does not depend on the methods used to deploy APS connectors.
Docker Based Deployment
For the providers, the Docker based deployment is the preferable method to deploy APS connectors due to its simplicity and reliability. It uses the Docker virtualization technology to deploy every APS connector in its own Docker container.
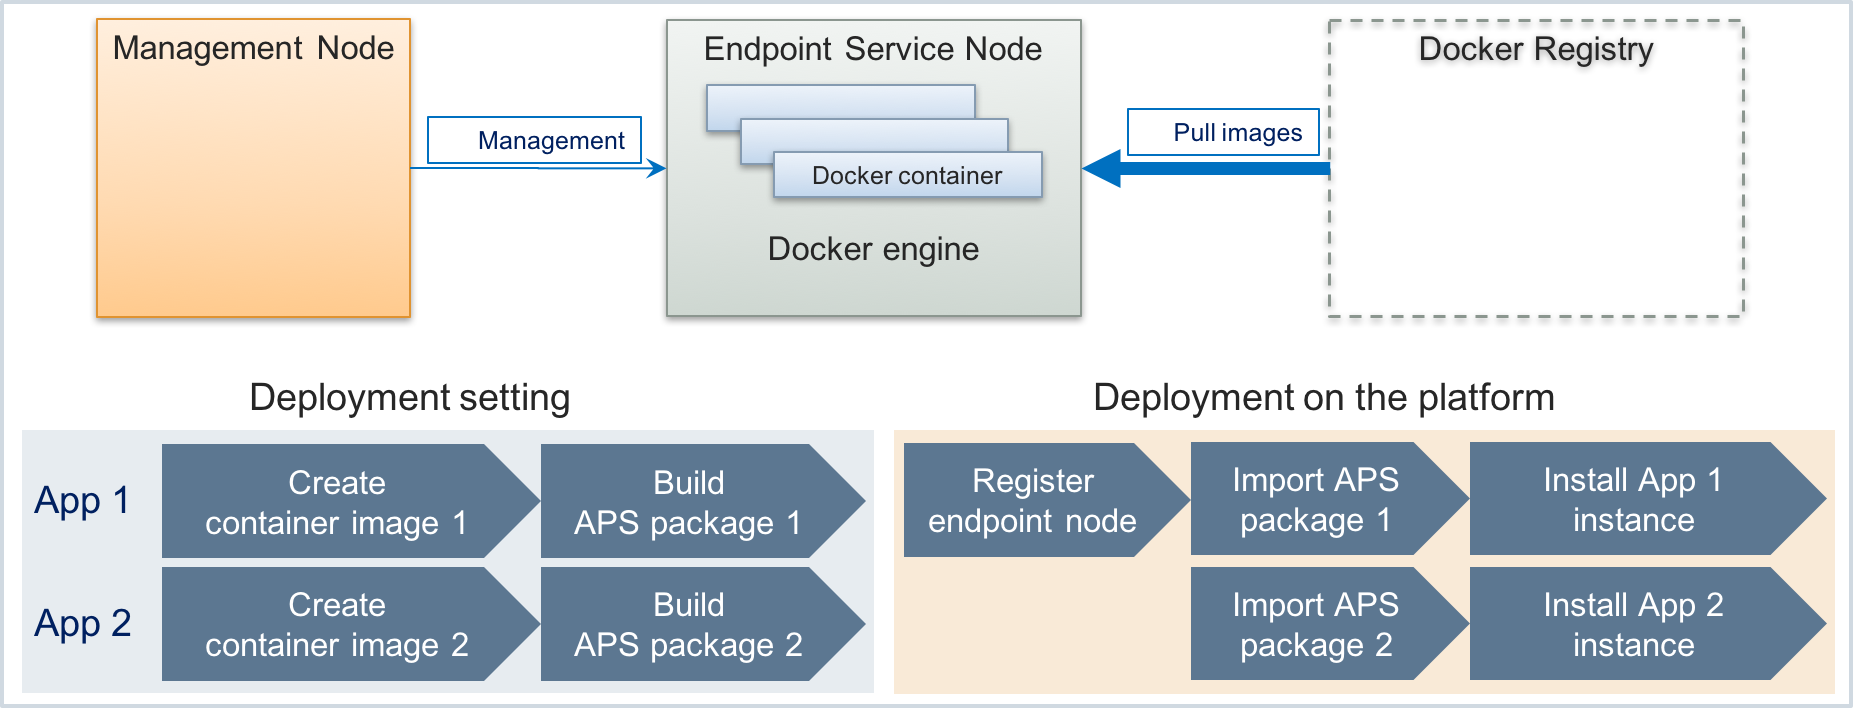
The deployment schema includes a server that must be registered in the management node to carry out the APS Endpoint Node role. A Docker registry server is used to pull container images when creating Docker containers.
When creating an APS package, the developer or integrator must also create a container image and save it in the Docker registry.
To deploy an APS application connector on a platform, the provider runs two simple operations in the provider control panel: import the package and install an APS application instance.
Deployment in a Shared Apache Web Space
The deployment in a shared Apache web space is based on the Apache name-based hosting to deploy every APS connector in its own Apache virtual host.
To use this schema, the provider must prepare a web server environment for installing APS connectors as web application services.
For example, when using the APS PHP framework, the provider must install the APS PHP runtime package and configure the Apache web service to prepare the endpoint host for installing APS connectors.
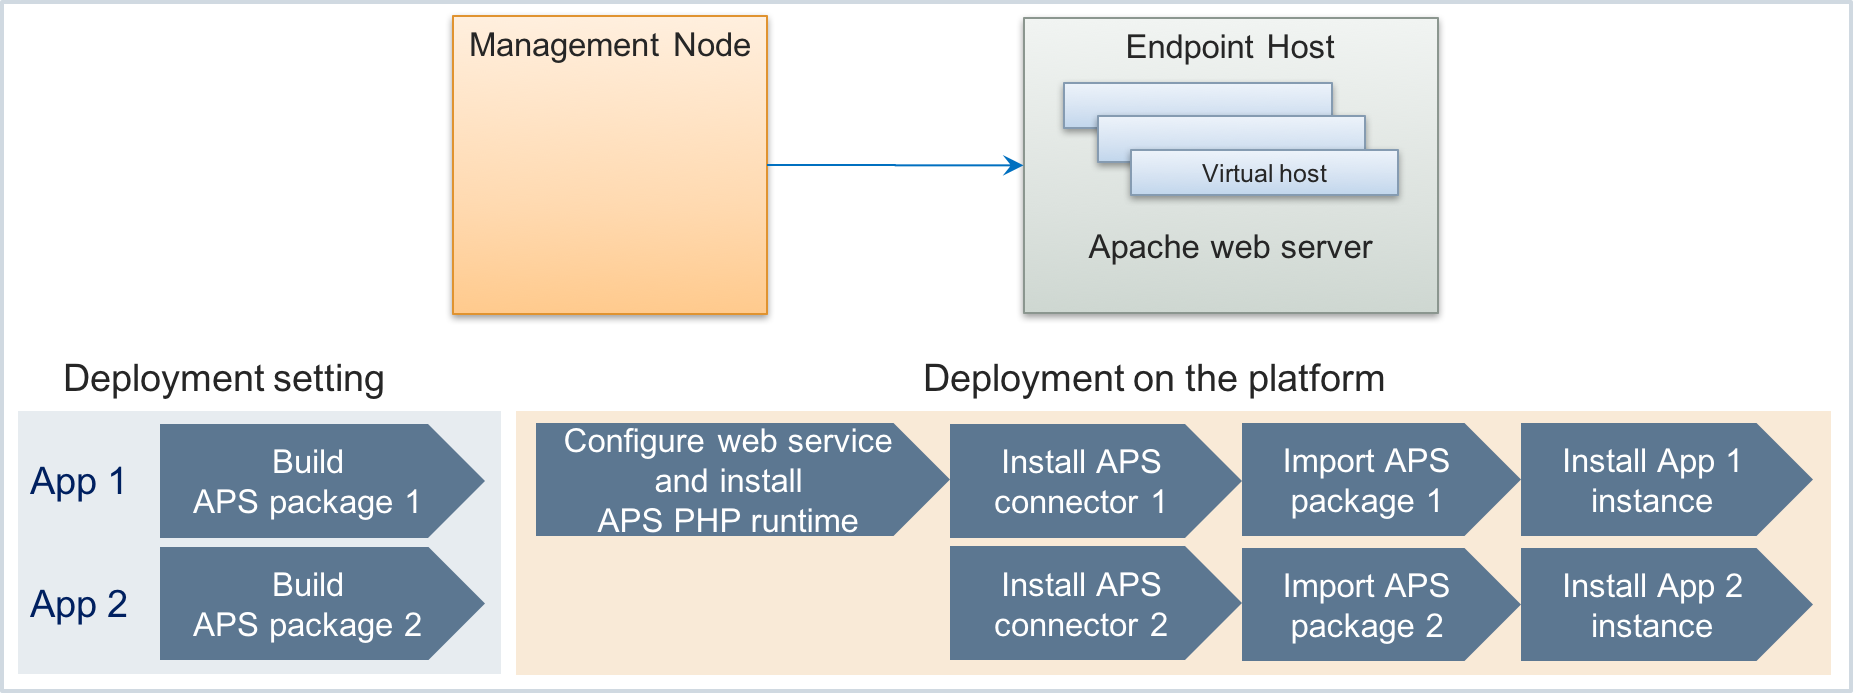
Every APS connector requires a separate installation step on the endpoint host. After that, the provider performs the same APS application deployment steps as in the previous method.
Internal and External APS Connectors
When deploying an APS connector to connect a platform with an original application, the provider can install the APS connector in the private network or in the Internet as explained in the Deployment Schemas document.
Development Mode
When testing and debugging APS applications on a lab platform, enable the APS development mode. This mode changes the platform functionality in the following way:
The platform removes the restriction on updating an APS application by importing another package that has the same application ID and version.
Some APS related screens will not be cached in web browsers. This allows the developers to see the effect of script changes immediately. At the same time, it may delay screen rendering.
The platform log will store more details on APS operations.
You can enable this mode on your lab platform by following these steps:
In the provider control panel, navigate to System > Settings.
Follow the System Properties link.
On bottom of the System Properties screen, click Edit.
Mark the APS development mode checkbox and click Submit to save the setting.