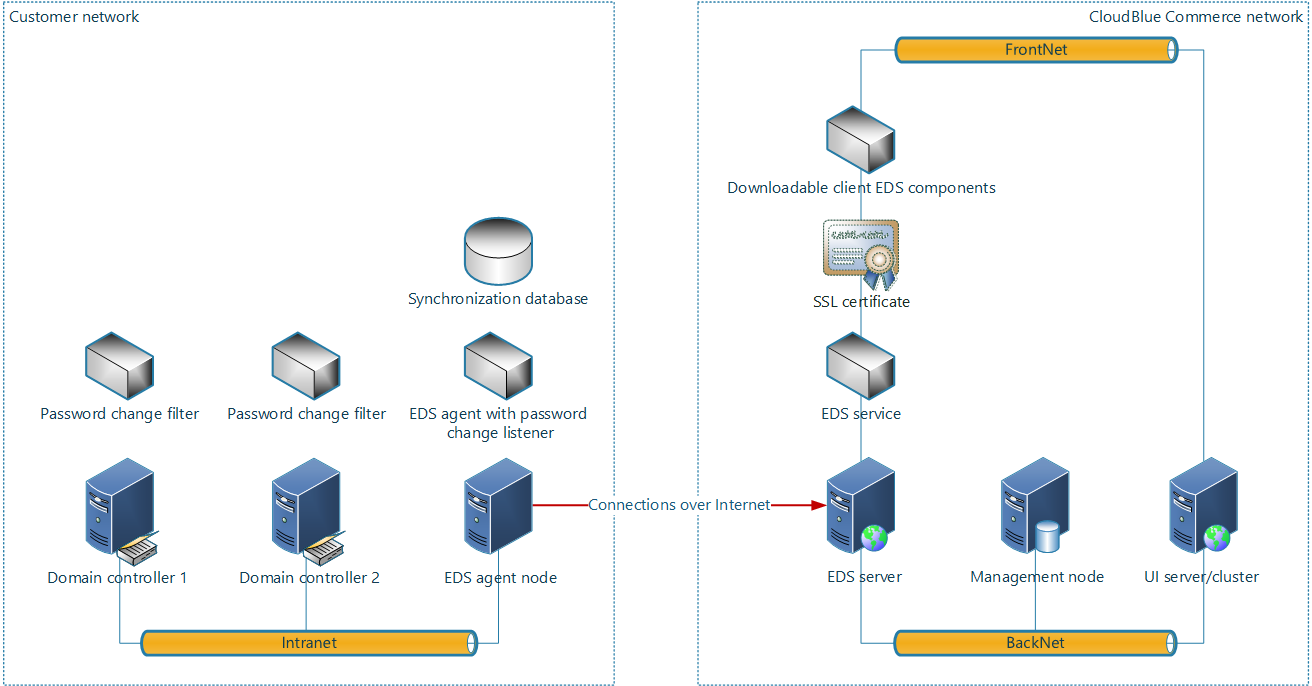
This section describes the overall process of EDS service deployment.

Deployment is performed on both the provider side and the customer side.
As a provider, you must perform the following steps:
- Prepare a server for the EDS service. See Hardware Requirements for details.
- Prepare the network of your CloudBlue Commerce instance. See Network Requirements for details.
- Prepare a DNS record for the EDS service. See DNS Requirements for details.
- Prepare an SSL certificate for the EDS service. See SSL Certificate Requirements for details.
- Install necessary software components on the EDS server. See Preparing the EDS Server for details.
- Install the SSL certificate. See Importing and Binding the SSL Certificate for details.
- Configure access to the CloudBlue Commerce APIs. See Configuring Access to the CloudBlue Commerce APIs for details.
- Install the EDS service. See Installing the EDS Service for details.
- Make the client EDS components available to your customers. See Uploading the Customer EDS Components to a Web or an FTP Server for details.
- Configure the EDS resources. See Configuring the EDS Resources for details.
A customer who wants to use the EDS service must perform the following steps:
- Subscribe to a Hosted Exchange application service plan that includes the necessary EDS resources.
- Activate the EDS service.
- Download the EDS agent (
ADSynchronizationAgentx64.exeorADSynchronizationAgent.exe). - Install the EDS agent on a server joined to the required Active Directory domain.
-
(Optional) Download and install the EDS password filter (
ADPasswordChangeFilterx64.exeorADPasswordChangeFilter.exe) on all domain controllers of the required Active Directory domain.Note: The customer needs to perform this step only if password synchronization is required.
- Configure user synchronization.
- Configure mailbox provisioning for newly synchronized users.
- Perform the initial synchronization.