Placing an Order to Purchase an Adobe Product (Legacy)
In this section, you will find a step-by-step walk-through of the purchase order process.
-
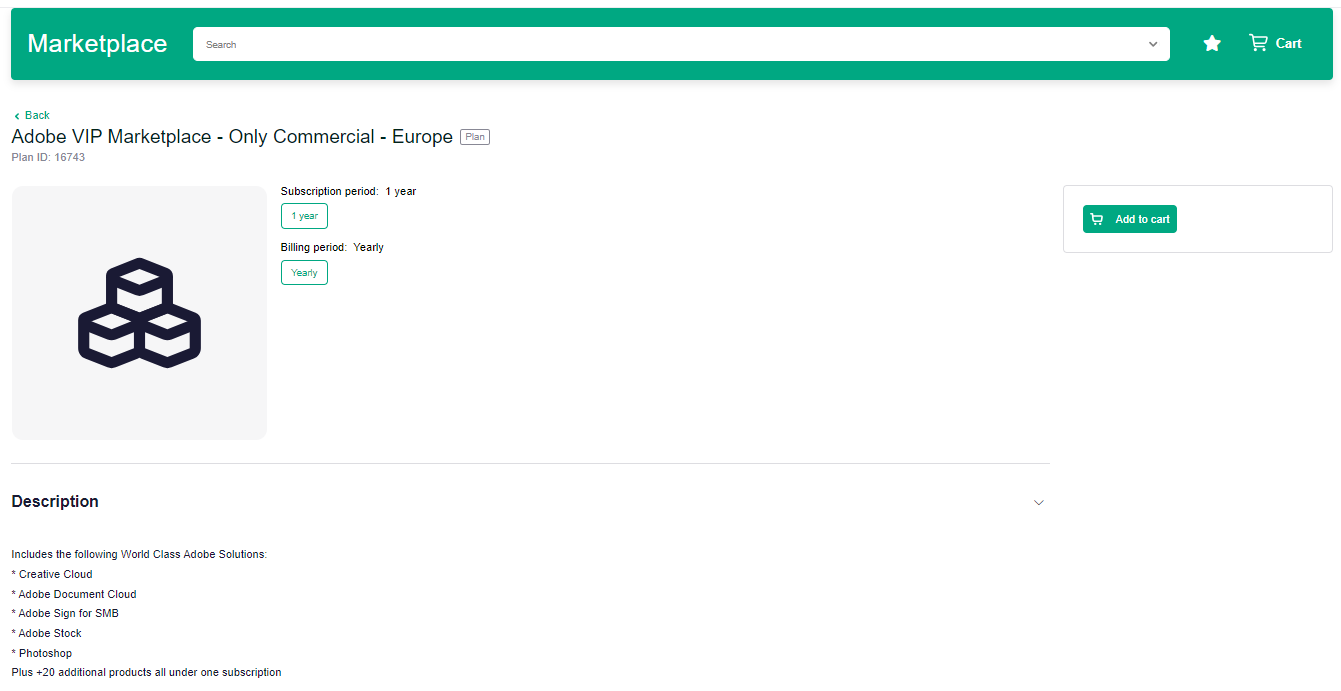
Log in to UX1 Marketplace, click the Marketplace option in the left menu, and type Adobe VIP Marketplace in the search box.

-
Click the Add to cart button.
-
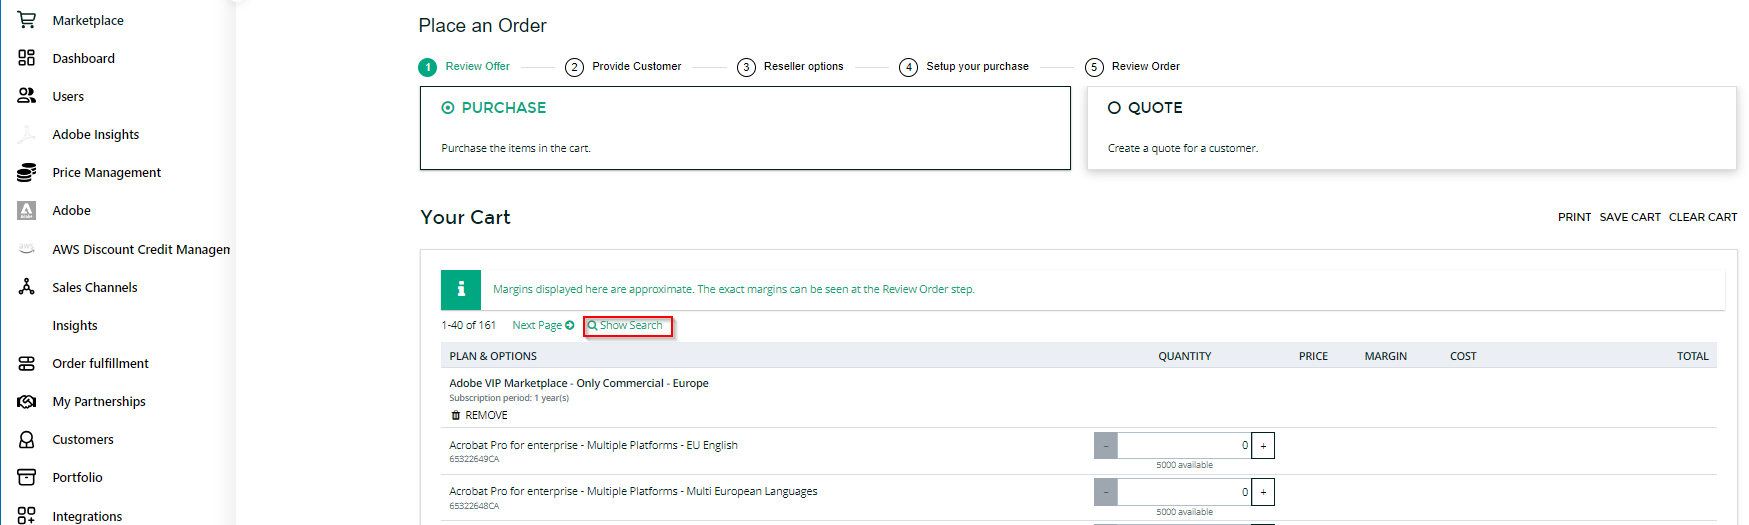
Click the Cart icon and then look for the Adobe products that you would like to purchase. To filter the list click the Show search link and then type the name of the product in the field.
-
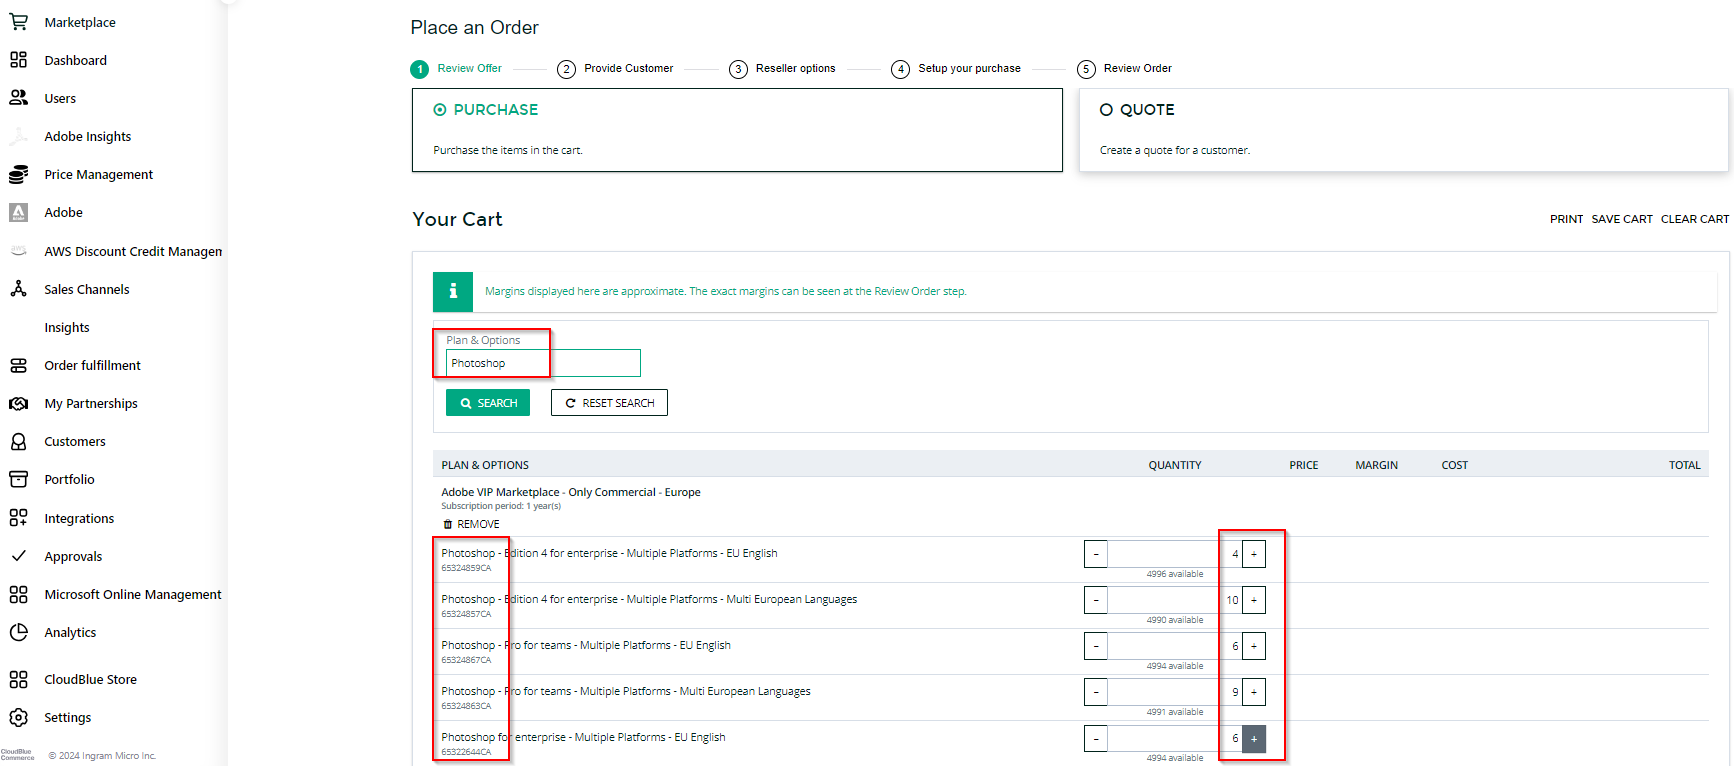
In this example, we will be purchasing Adobe Photoshop. If volume pricing is available for the products you are purchasing, you will be able to see the margin and cost for the different license volume levels.
-
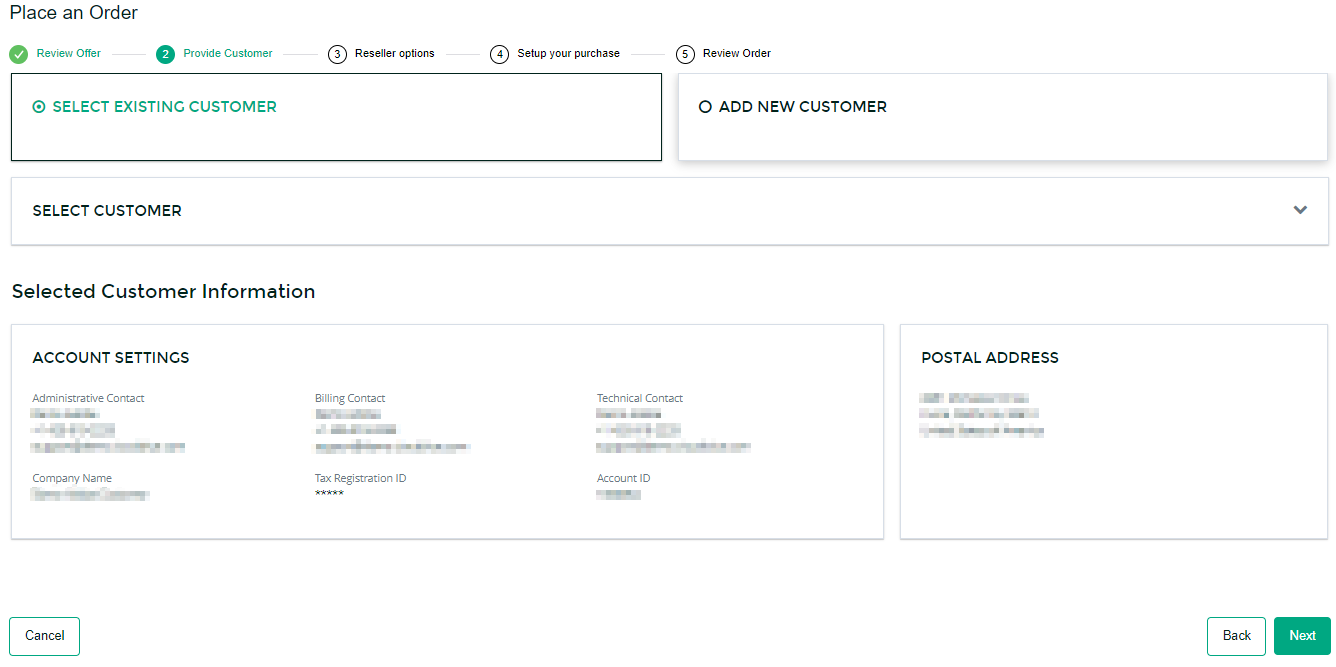
Select an existing customer or add a new customer. In this example, we will be selecting an existing customer. Click Next.
Note: The admin contact specified must contain the Partner's details. The Account information should be the end-user information. Please use the end customer's Company Name in the customer details.
-
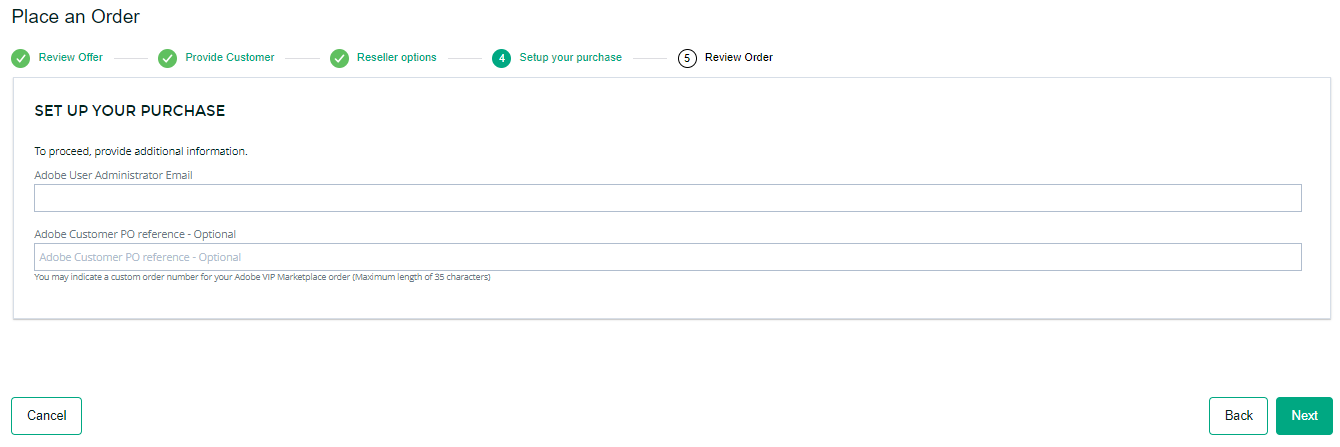
Specify the Administrator Email. The administrator specified will be the one in charge of managing the Adobe admin console to create users and assign licenses. Additionally, if you are purchasing an intro offer or a promo offer, enter the offer ID in the corresponding field in the format specified in the Adobe Intro Offers and Promo Offers section. If several IDs are specified, they must be separated by commas. Optionally, you can also specify a PO number reference from your end-customer.
Note: The Administrator Email must be unique and it must not be a primary admin with previous Adobe licensing.
Important: - Email addresses with the @mailinator domain are not allowed for account provisioning in Adobe Sandbox.
Notes:
- If you are placing an order for an Adobe Government or Adobe Education product, you will be asked to select your industry sector from a list.
- If you are placing an order for an Adobe Education product, select the corresponding sub-segment (k-12 school, Higher education or Nonprofit organization). The selected sub-segment must correspond with the Adobe Education product you are purchasing. -
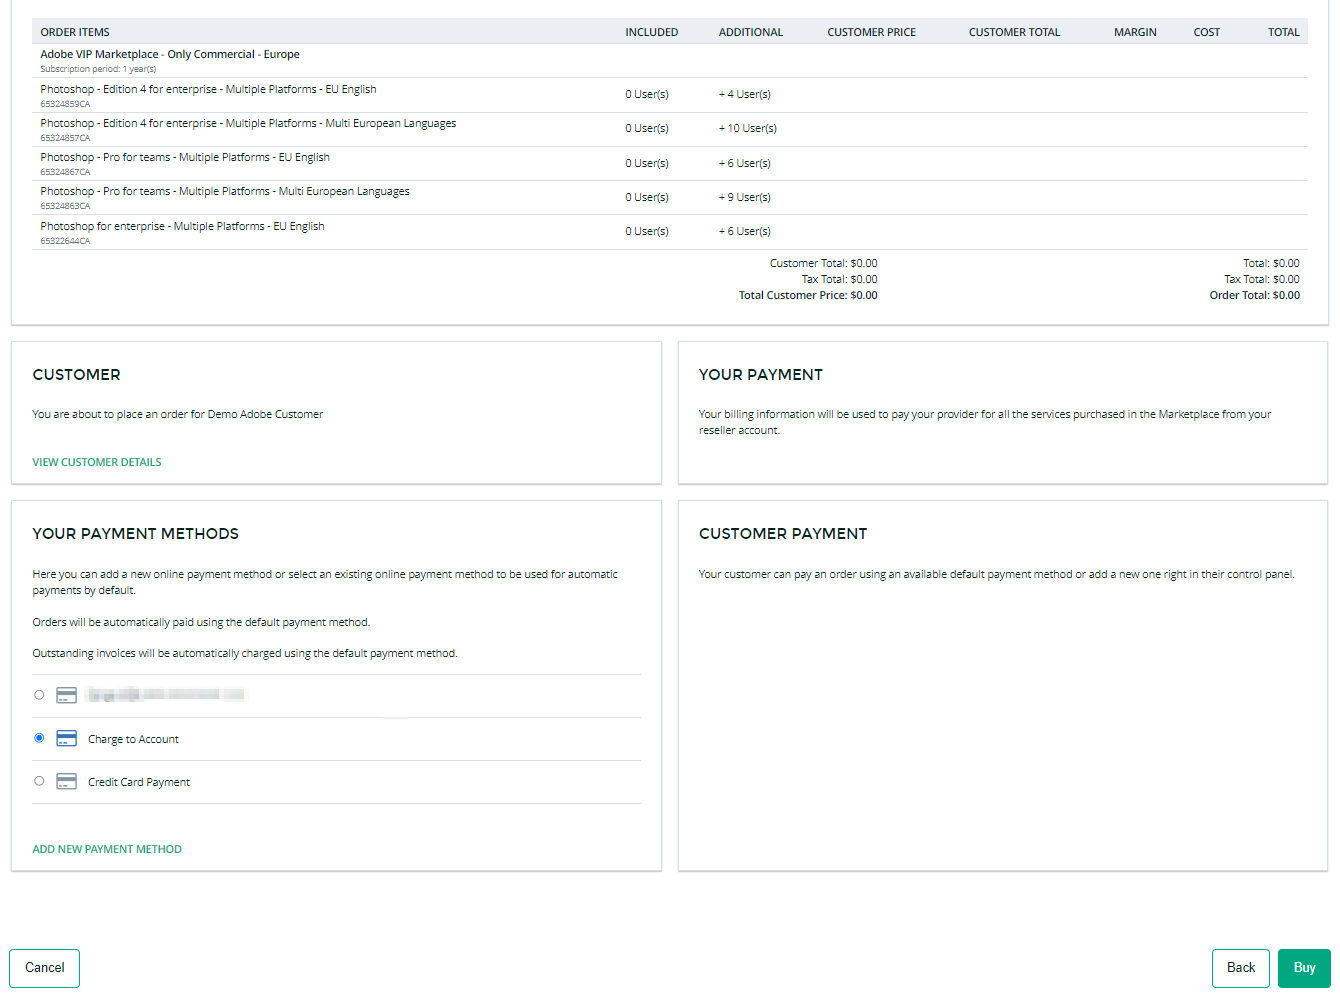
Review the order details and click Buy to complete the order process.
-
You can see the order details and the provisioning status by clicking Customers > Orders in the left menu of the UX1 control panel.
Optionally, you can also track the order in CloudBlue Connect. In the CloudBlue Connect main navigation menu, click Subscriptions, select the subscription request that was created and go to the Fulfillment tab to see the details of the request. You can check the parameters, information on the request status, etc. For additional details on how to manage subscription requests in CloudBlue Connect, refer to the CloudBlue Connect Documentation.