Order Process as a Transacting Partner
In this section you will find a step-by-step walk-through of the order process as a transacting partner.
-
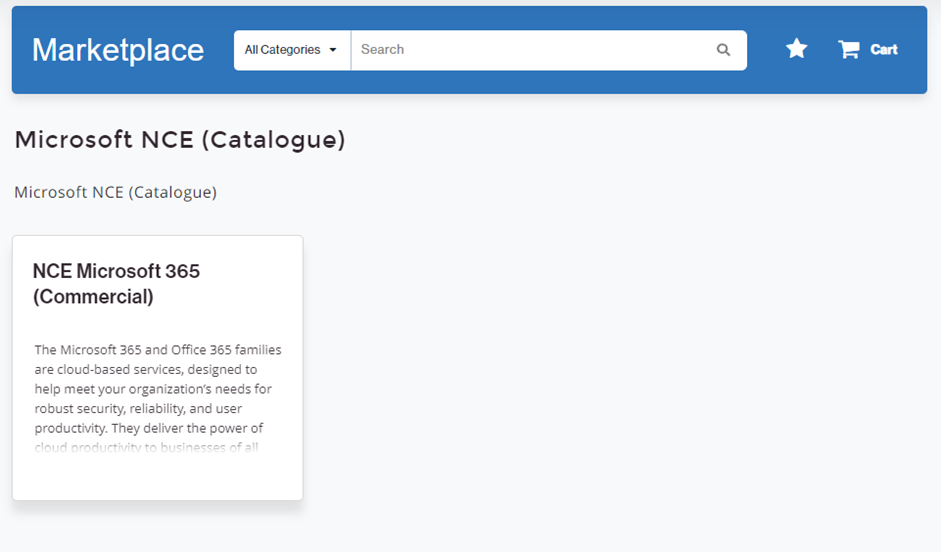
Log in to the Marketplace, click the Microsoft NCE tile and select NCE Microsoft 365 (Commercial).
-
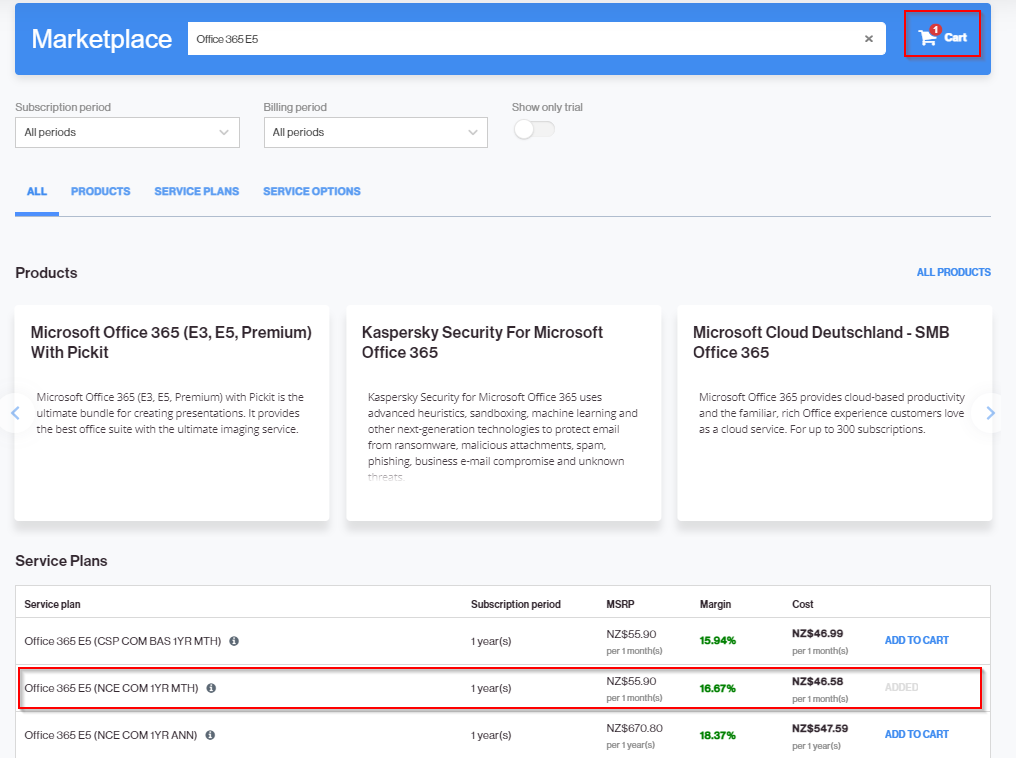
Search for the service plan that you would like to purchase and click Add to Cart. Once a service plan is added, a red notification icon will appear on the cart, indicating the number of items currently in your cart.
-
Click the cart icon to review your order. You can add or remove licenses by using the + and - buttons. Then, click Next.

-
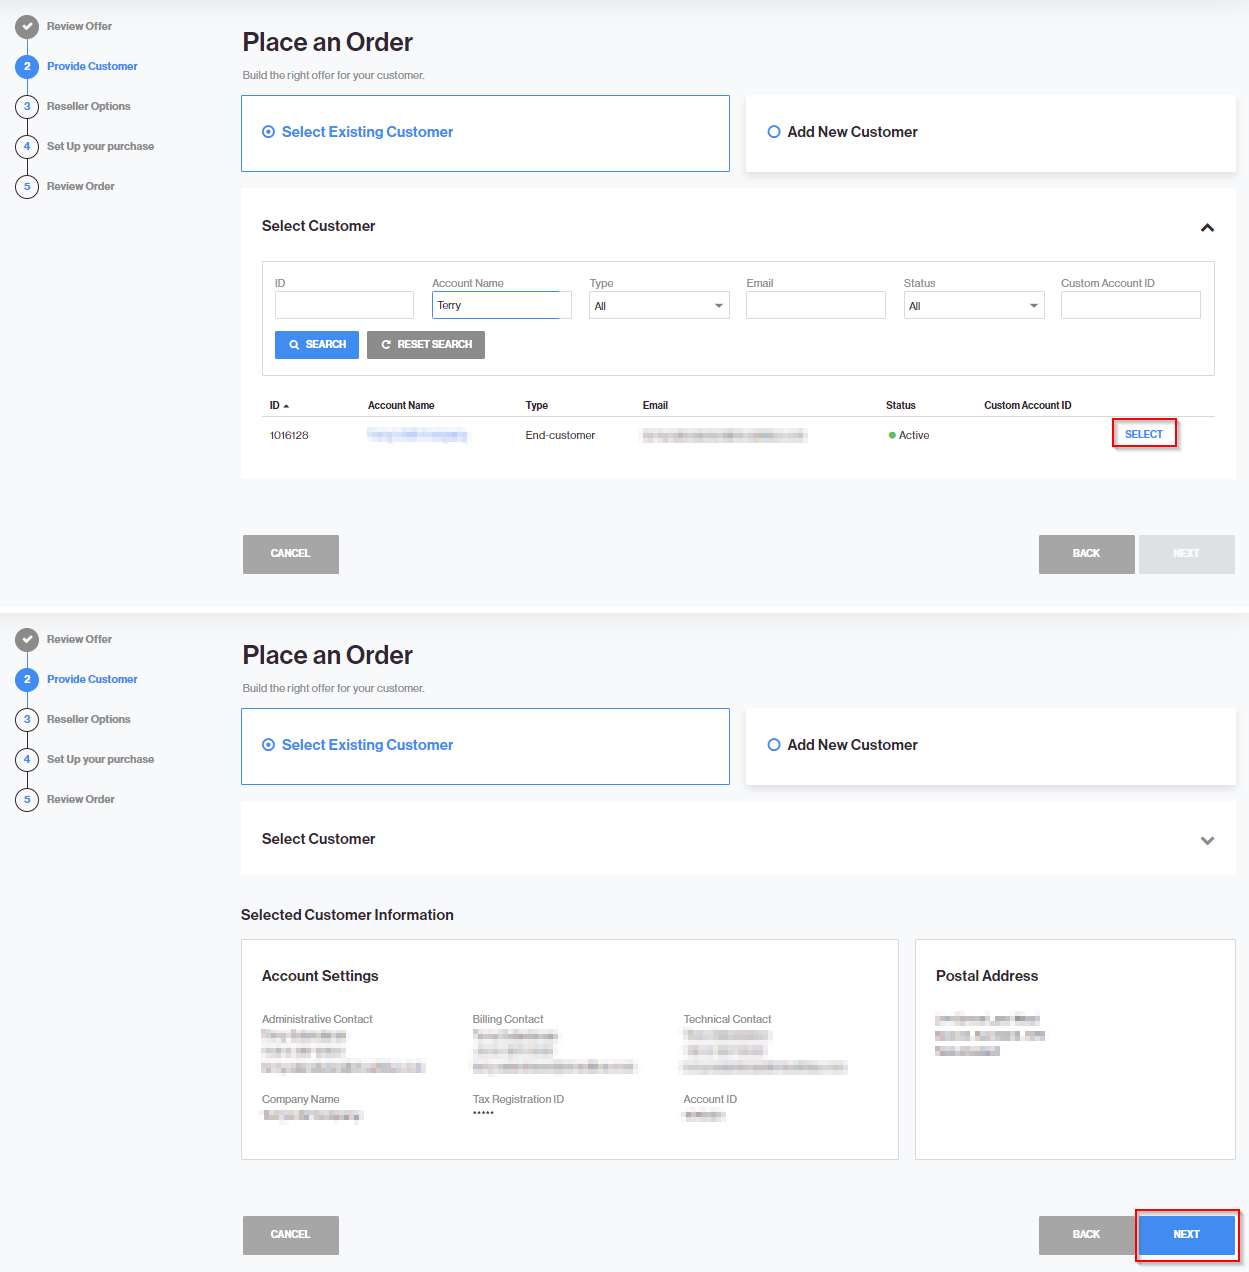
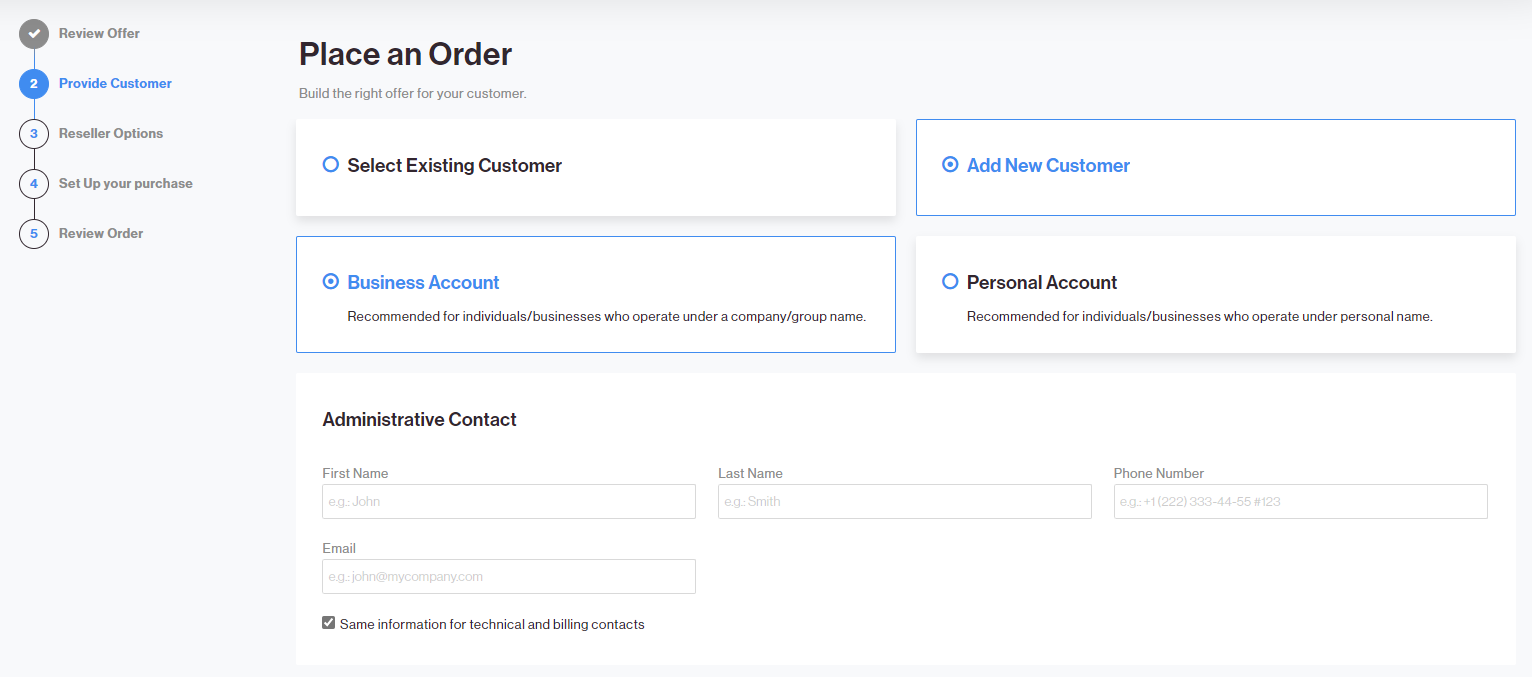
You can choose to either purchase the subscription on behalf of an existing customer, or create a new customer.
-
To select an existing customer, click Select Existing Customer. To find existing customers, click Show Search and use the available fields to search for an existing customer by ID, account name, email, etc. Once you find the customer, click the Select option next to it. Click Next.
-
To add a new customer, click Add New Customer and fill out all the required fields on the form. Click Create Customer to move on to the next screen.
-
-
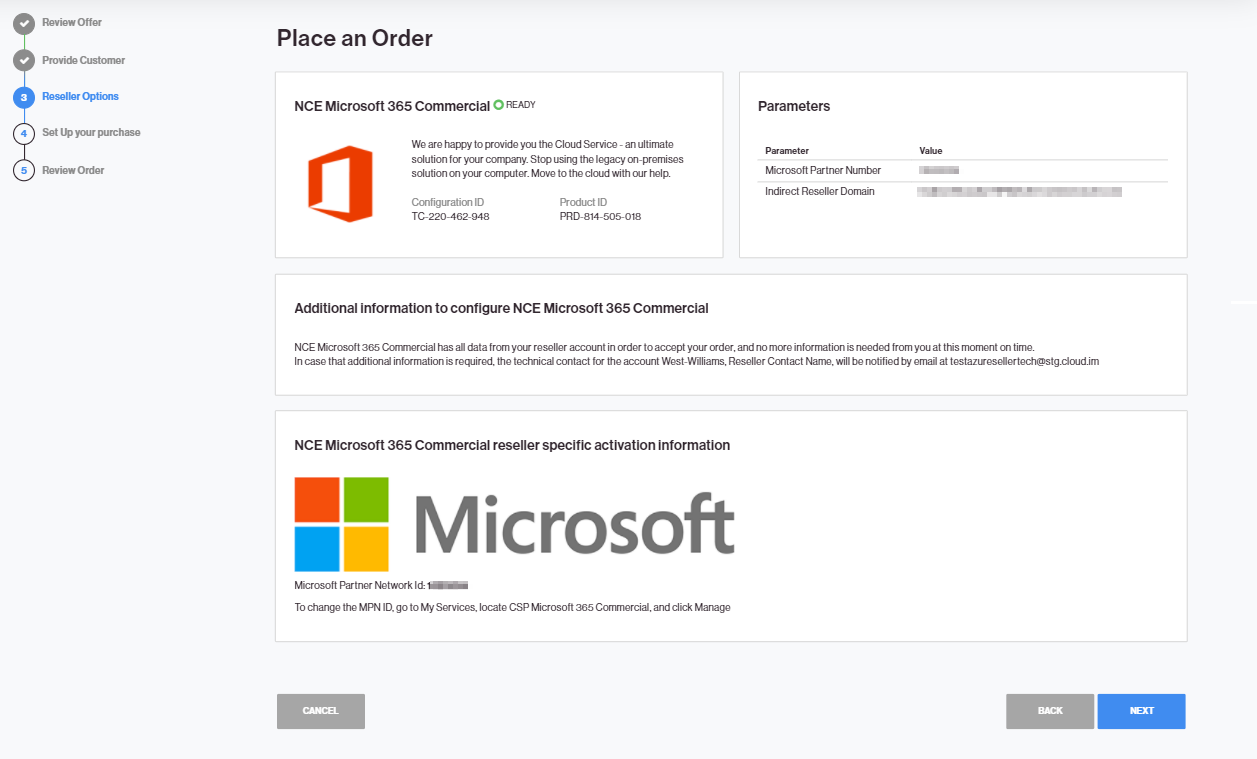
If the Partner MPNID and Indirect Reseller Tenant ID have been entered correctly, you will see Ready status and details, with details of your parameters and no additional information needed. In this case, skip to step 7.
On the contrary, if the PLA MPN ID and PCD AAD Tenant Name (for example,MyBusiness.OnMicrosoft.com) has not been submitted yet, you will see an Inquiring status on the NCE Microsoft 365 Commercial section, as well as a link in the Additional Information tile. Click on the Here link highlighted in the image below to enter your details.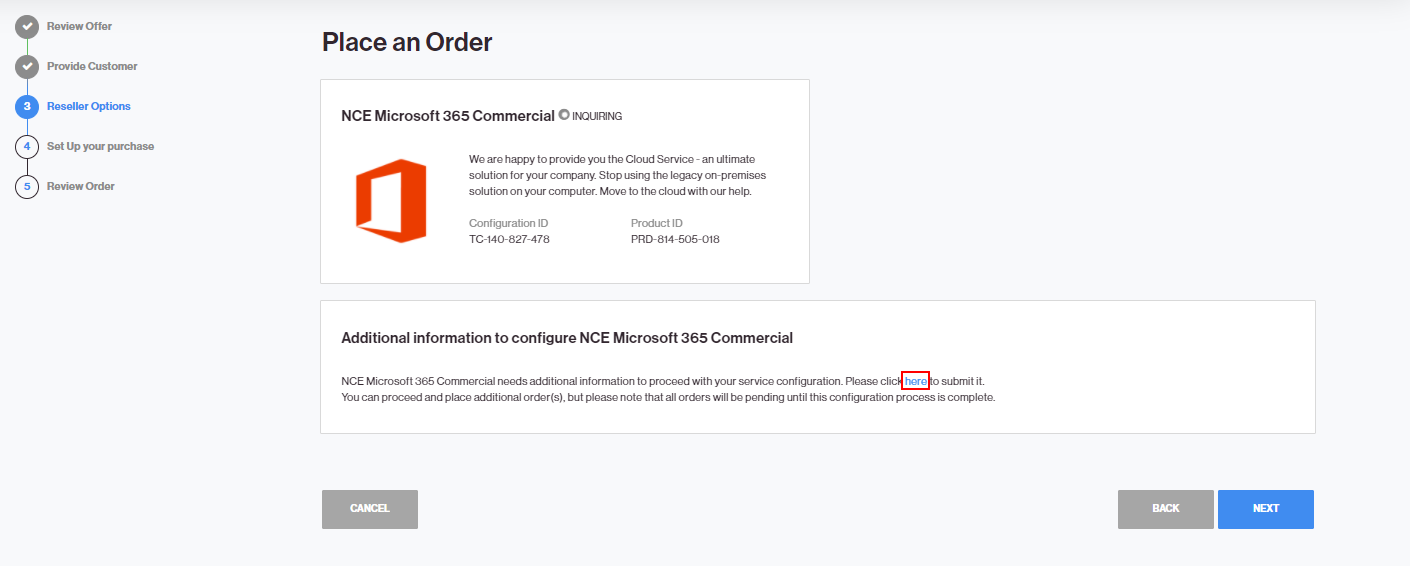
-
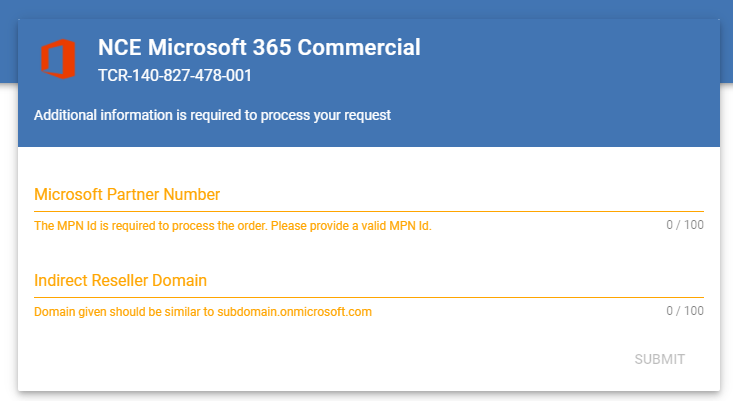
Enter your Microsoft Partner Number and the Indirect Reseller Domain. For more information about how to obtain your Partner MPNID and Indirect Reseller Tenant ID, please refer to the Obtaining your Partner MPNID and Indirect Reseller Tenant ID section. Click Submit.
-
The Reseller Options screen will display the MPN ID and Tenant Name in the Parameters tile, and the NCE Microsoft 365 Commercial tile should display a Ready status. Click Next to continue.
-
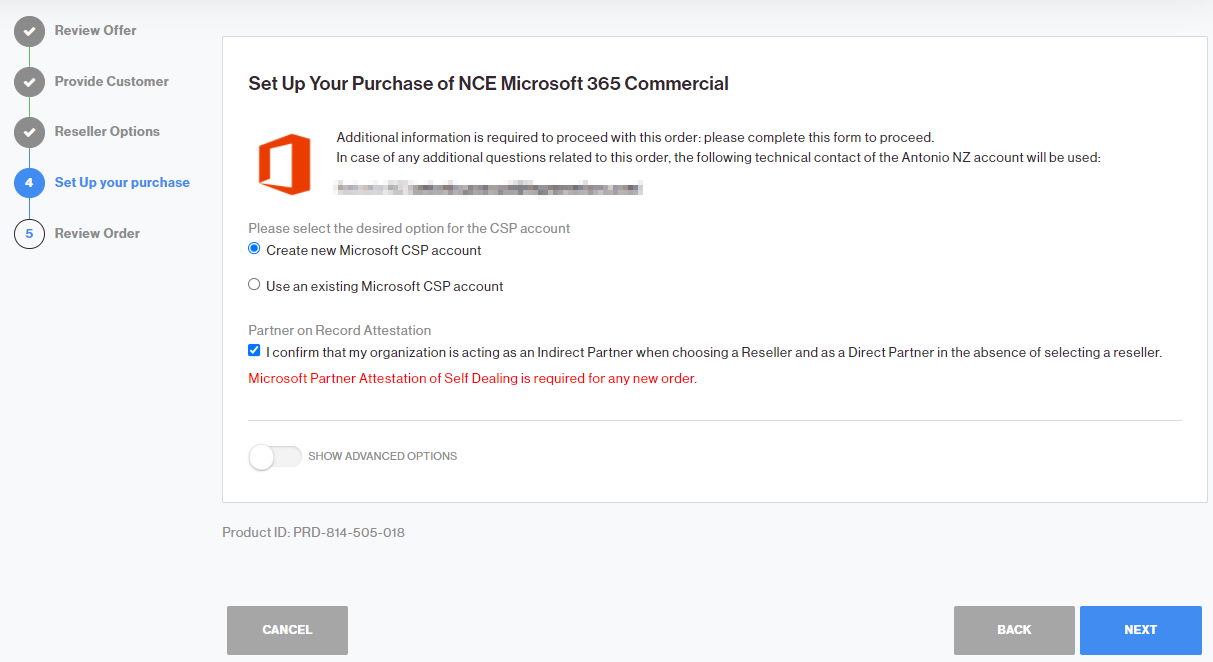
In the Set Up Your Purchase screen, you can choose to Create a New Microsoft CSP Account or Use An Existing Microsoft CSP Account.
-
Creating a New Microsoft CSP Account
-
Select Create a New Microsoft CSP account and confirm the Partner of Record Attestation.
-
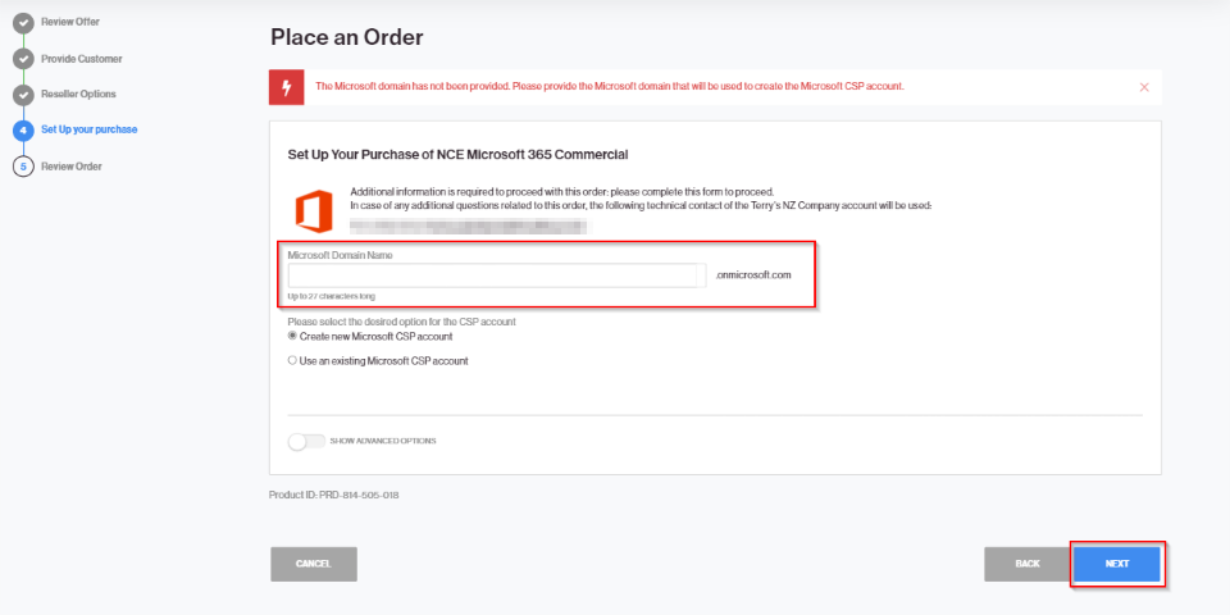
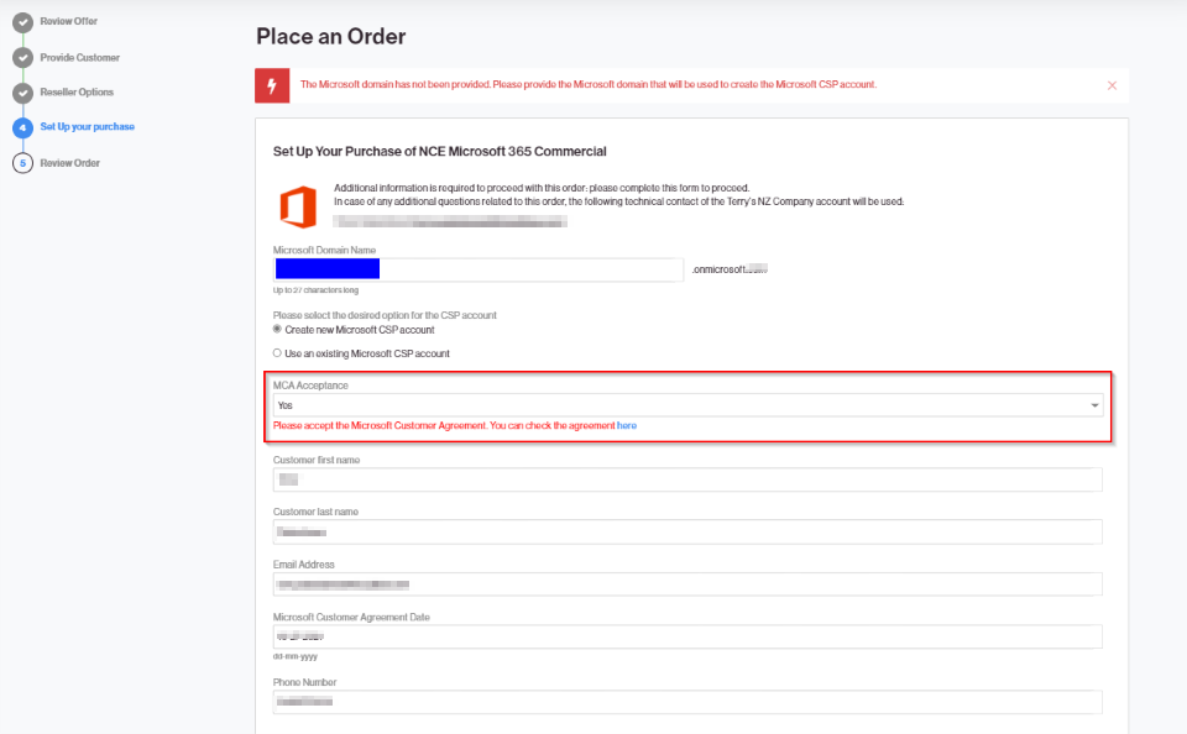
Enter your Microsoft Domain Name. Click Next to continue.
-
-
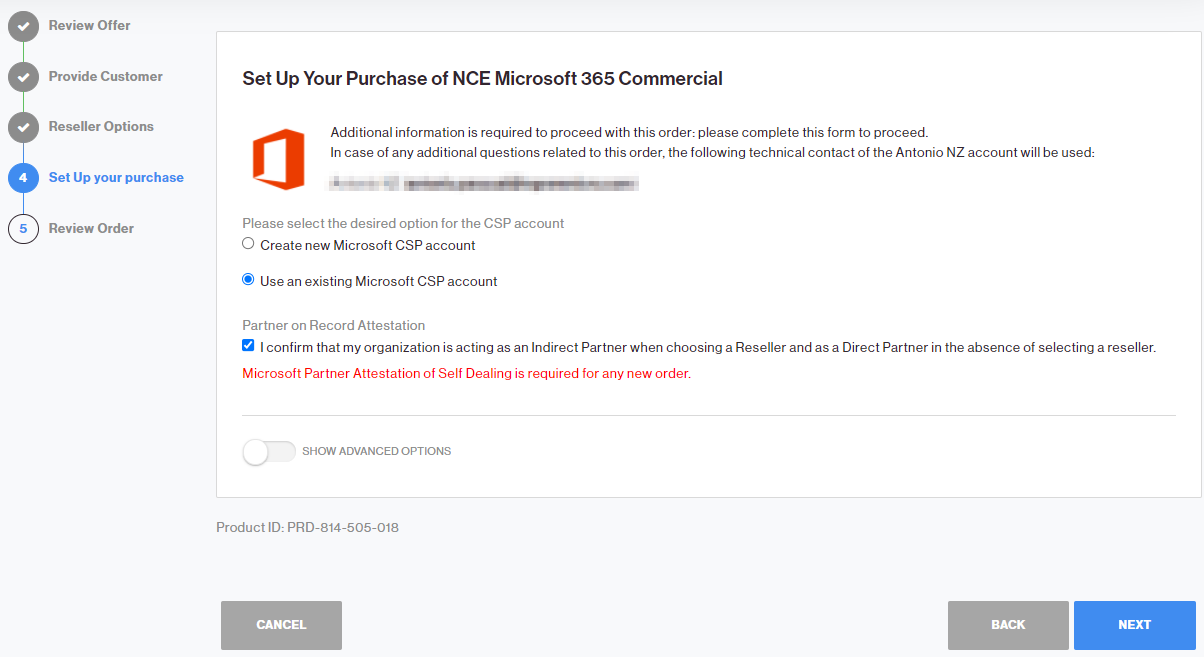
Using an Existing Microsoft CSP Account
-
Select Use an existing Microsoft CSP account and confirm the Partner of Record Attestation. Click Next.
-
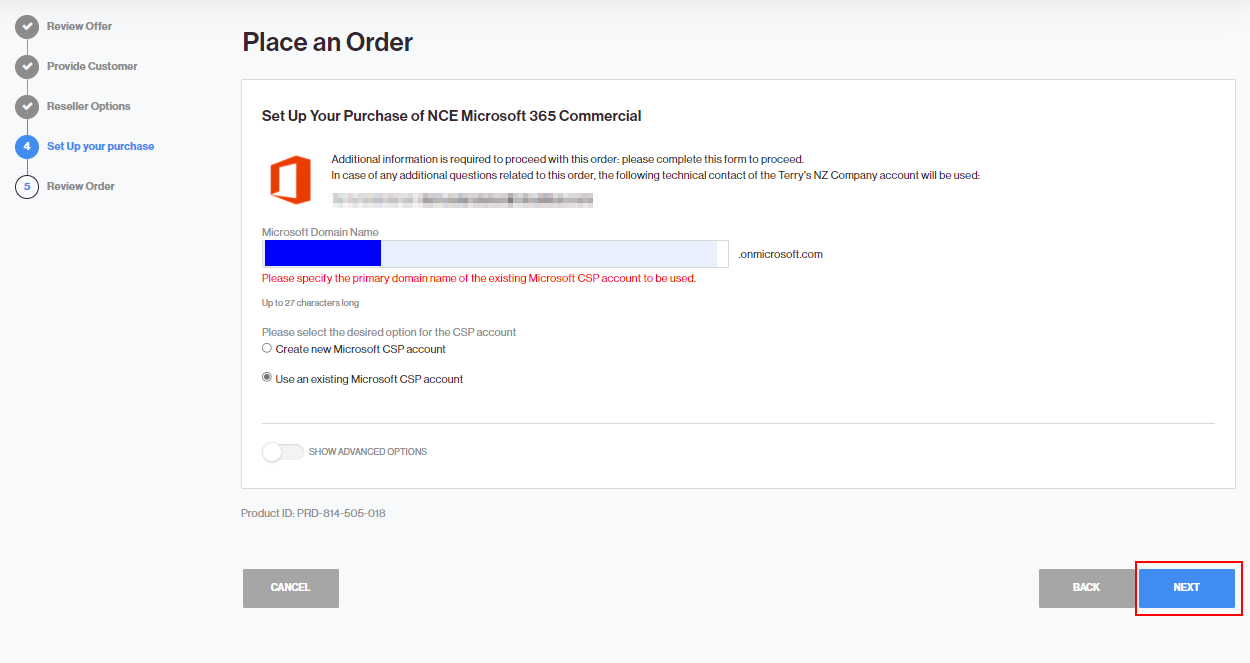
Enter the primary domain name of the existing Microsoft CSP account, and click Next.
-
Optionally, if you cannot provide all the product parameters yourself, you can use the Show Advanced Options toggle to see the Advanced Options section, which allows you to send an email to the end-customer so that they can provide the required parameters.
-
-
-
Accept the Microsoft Customer Agreement and verify the customer information. Click Next to continue.
-
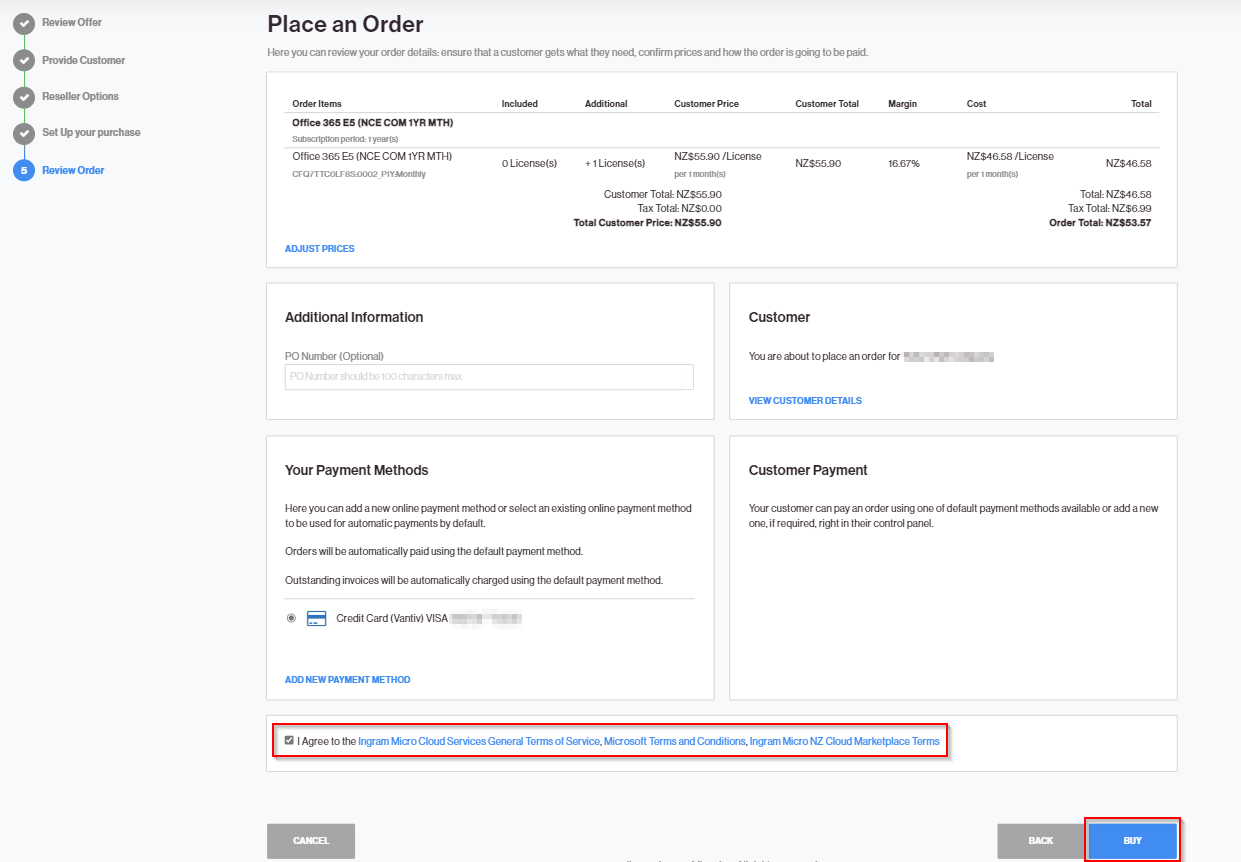
In the Review Order screen, once you have reviewed your order and read the Terms of Service, select the checkbox to confirm that you agree to the terms. Then, click Buy to complete the order.