Configuring Custom GDAP
The Microsoft Management Settings extension allows you to configure the list of custom roles that will be used in GDAP requests. You can not only create a default configuration for custom GDAP, but also configure custom GDAP per marketplace. In this section, we will be describing the steps you need to follow to configure custom GDAP in both scenarios.
Note: This functionality is not available for syndicated providers.
Default Configuration for Custom GDAP
The default configuration for Custom GDAP is used when a specific custom GDAP configuration is not available for a specific marketplace. To configure it, complete the following steps:
-
Go to Integrations > Extensions and click the Microsoft Management Settings extension.
-
Click Open Settings > GDAP.
-
In the Custom GDAP Configurations tab, click the ID corresponding to the default GDAP configuration.

-
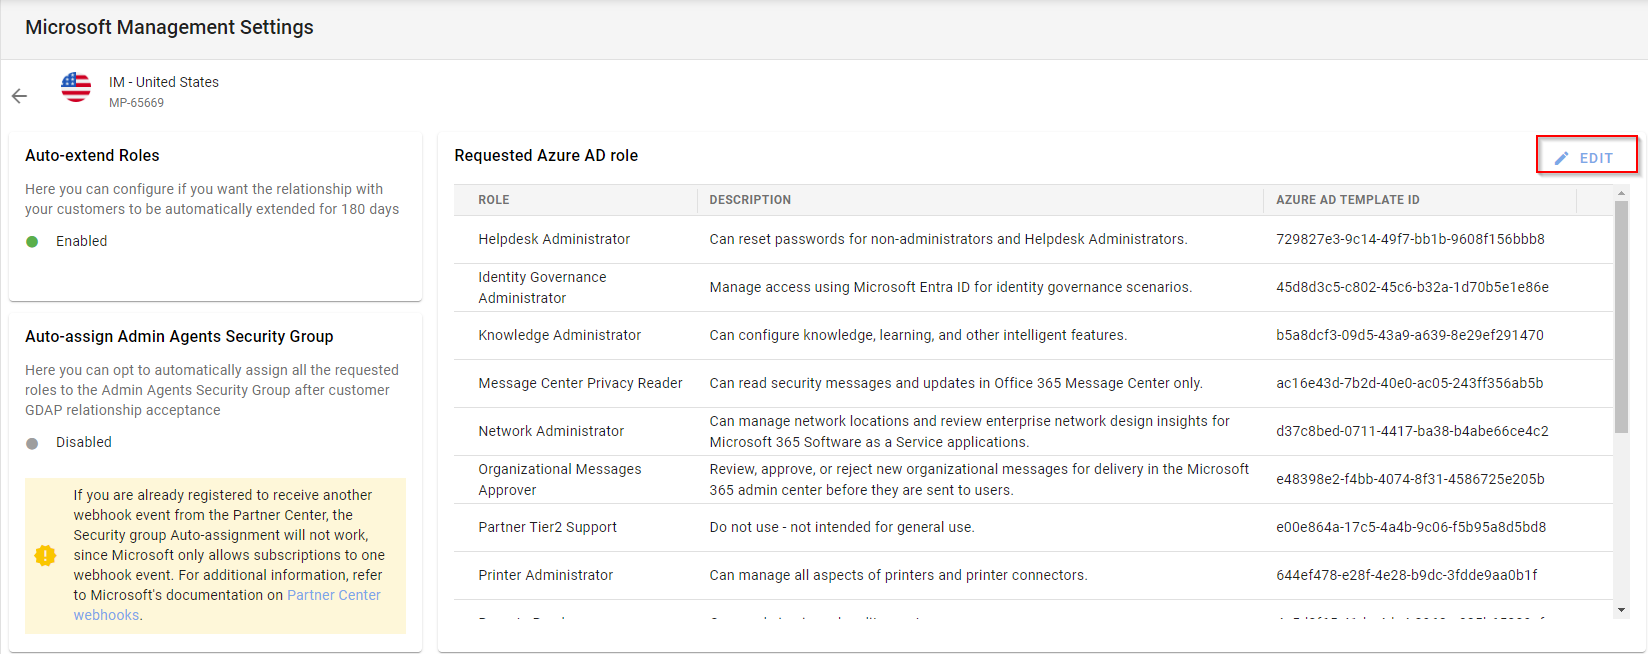
Click Edit and select the default roles and configure the GDAP automatic extension and the security groups auto-assignment as required.
-
Click Save.
Configuring Custom GDAP per Marketplace
-
Go to the Integrations > Extensions module in the CloudBlue Connect Distributor portal.
Note: If the extension is not installed yet, click here to obtain more information
-
Click the Microsoft Management Settings extension and then click Open Settings > GDAP.
Note: Alternatively, you can also find it in your account settings (Settings > Microsoft Management Settings).
-
In the Custom GDAP Configurations tab click Add.

-
Select the marketplace in the drop-down list.
-
Select the Azure AD roles that you wish to add. If there are roles currently active in the provider's installation, the checkbox for such roles will be selected. Ensure that all the roles that you wish to include in the GDAP request are selected.
-
Use the available checkbox to specify if you wish to auto-extend the GDAP Relationship for incremental 6-month customer-revokable terms.
-
When this feature is Enabled, the parties to the relationship will not receive any communications from Microsoft or from CloudBlue concerning term end or renewal. Microsoft will auto-extend the GDAP relationship for incremental 6-month terms indefinitely. Parties to the relationship may revoke it at any time.
-
When this feature is Disabled, the current GDAP relationship will continue until the relationship term end date. The parties to the relationship will receive advanced communications from Microsoft concerning term end and expiry, but will not receive any communications from CloudBlue. Microsoft will expire the GDAP Relationship on the current relationship term end date.
Note: CloudBlue does not send communications to the parties of a GDAP Relationship concerning term end, renewal or expiry, regardless of the feature setting.
-
-
Use the available checkbox to specify if you wish to automatically assign the Admin-Agents security group to the relationship once it is accepted by the customer.
Note: The Global Administrator role cannot be included when the auto-extend feature is enabled.
-
Click Save.
Important: If Azure or Azure RI connectors are in use for one or multiple marketplaces, it is strongly recommended that either “Cloud Application Administrator” or “Application Administrator” AD Roles are requested via Custom GDAP so that important connector operations requiring customer impersonation can be performed without issues. Some operations requiring customer impersonation include retrieving subscription status and estimate consumption, or properly handling cancellations.
It is also recommended to turn on Auto-Extend so that GDAP consent does not need to be manually requested to the customer after the GDAP relationship expires.Editing an Existing Custom GDAP Configuration
In this section we will learn how to edit an existing custom GDAP configuration for a marketplace.
-
Go to Integrations > Extensions and click the Microsoft Management Settings extension.
-
Click Open Settings > GDAP.
-
In the GDAP Roles Configuration tab, click one the ID of the GDAP configuration that you wish to edit.

Note: Clicking one of the trash icons on the right will allow you to delete the corresponding GDAP roles configuration.
-
Click Edit.

Note: If a red warning sign appears next to one of the roles, it means that the role no longer exists in Microsoft, so the role will be removed when you save changes.
-
Make the required changes to the GDAP configuration for the marketplace and click Save.

-