Enable a Zap for ServiceNow to CloudBlue Commerce Order Management Flow
This process explains how to enable a Zap to capture an order data from the ServiceNow platform and transmit the data to the CloudBlue Commerce platform. To enable the Zap using Zap templates, complete the following procedures:
Set Up the Zap Trigger
You must set triggers to capture data from ServiceNow, when an order is placed or an existing order is updated in ServiceNow. The trigger is configured by default according to the preconfigured template. You may modify the settings if required.
To enable a Zap trigger, complete the following steps:
- Log in to Zapier.
- On the Dashboard, click the search icon (
 ).
). - In the search bar, search for CloudBlue Commerce.
- On the CloudBlue Commerce Integrations page, search for the app (that is, ServiceNow) with which you want to integrate CloudBue Commerce.
- On the CloudBlue Commerce + ServiceNow Integrations page, scroll down to view the list of Zap templates configured for this integration.
- In the list, the TRY IT button beside the ServiceNow to CloudBlue Commerce flow. This is the forward flow.
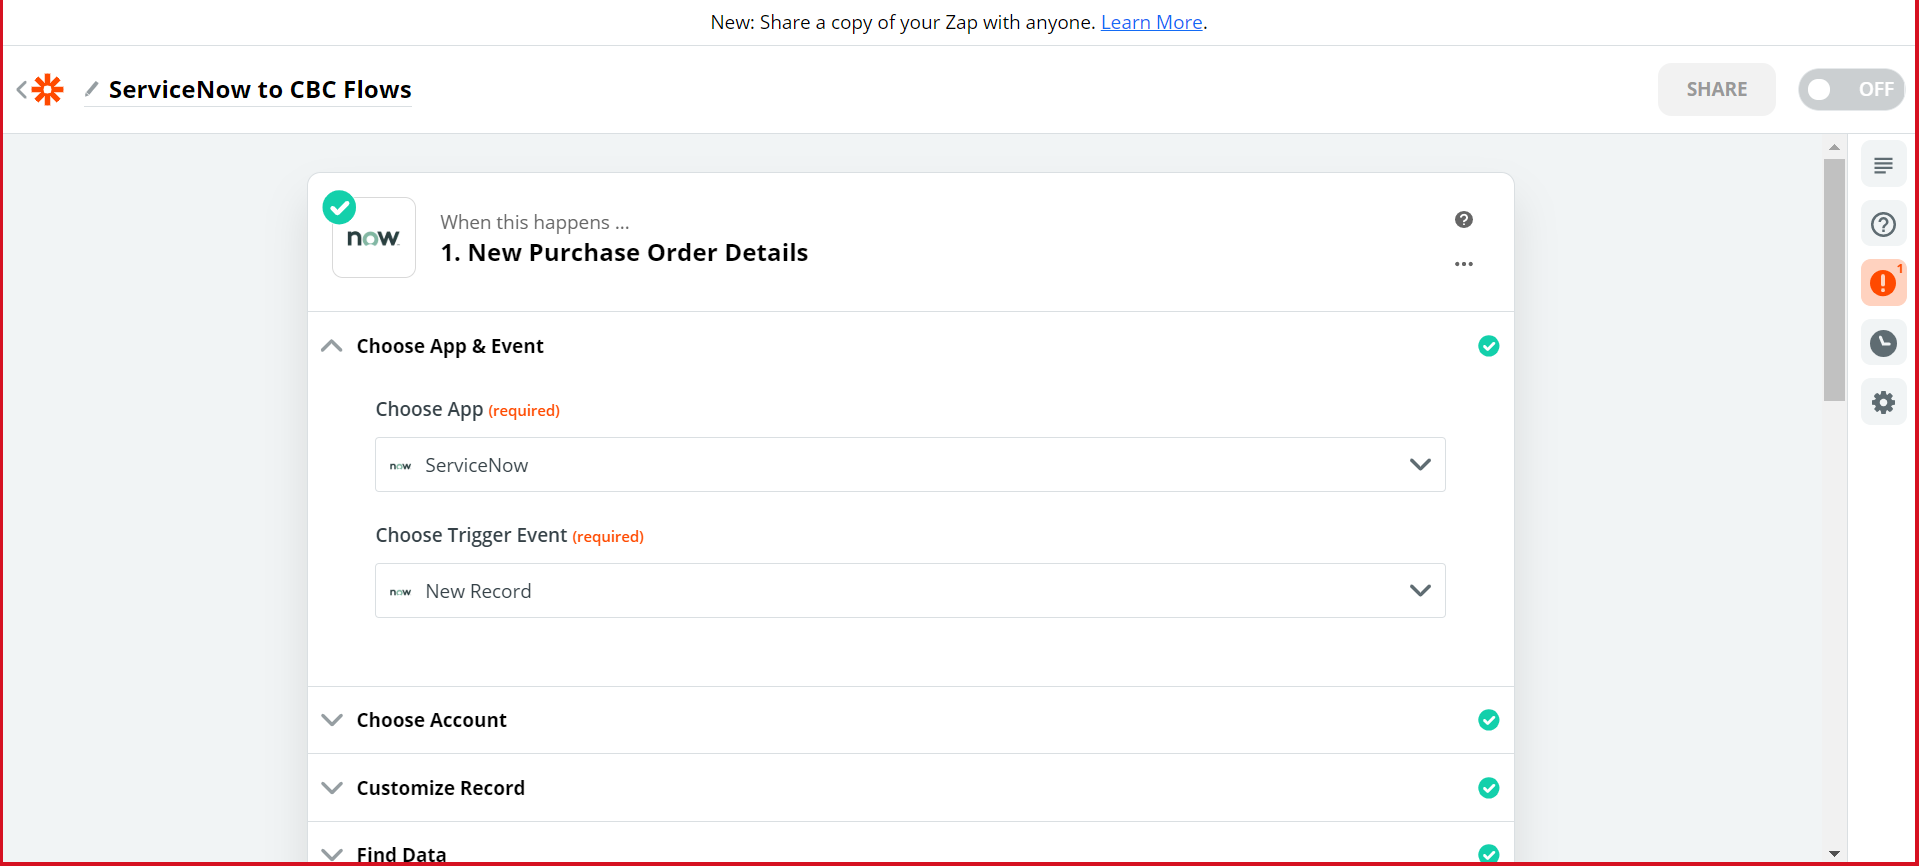
- On the Zap template page, the following fields are populated by default based on the preconfigured template.
- When this happens ... : Displays the name of the trigger as defined in the template.
- Choose App & Event: Displays the details as defined in the template. Here, the trigger captures the data when a Purchase Order is placed in ServiceNow.
- Choose App: Displays the application from where Zap captures the event.
- Choose Trigger Event: Displays the event in ServiceNow that triggers the Zap.
- Choose Account: To capture the specified event in ServiceNow, you must log in to ServiceNow. This field is populated by default if you have logged in to the application previously.
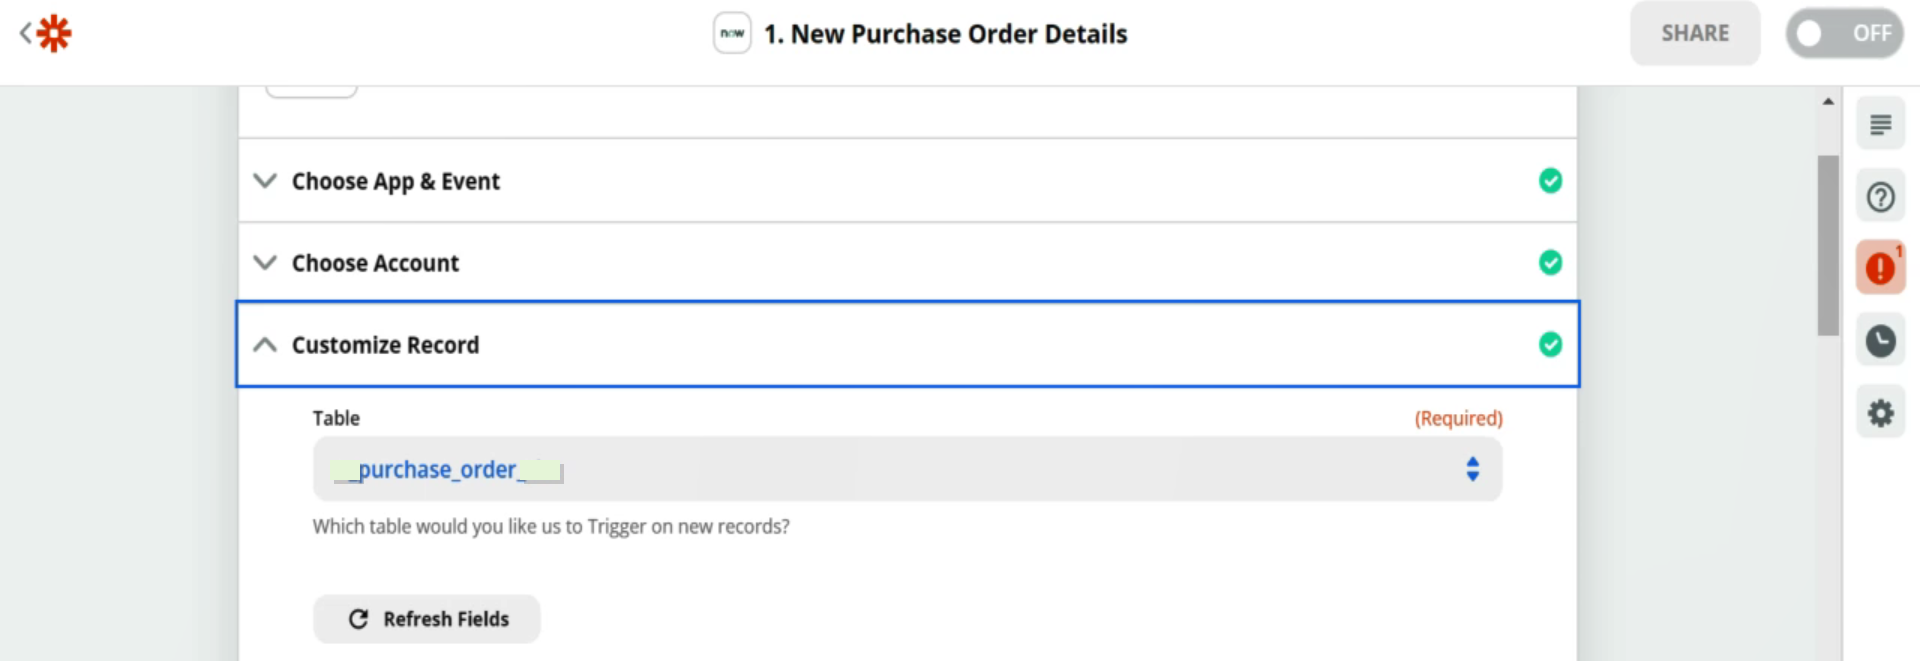
- Customize Record: Displays the table name that triggers the ServiceNow Zap, when it is populated with new order records. Click Refresh Fields.
- Find Data: Displays the list of records found in the registered account. For records A, B, and C, click Load More and choose the records that you want the Zap app to fetch.
- Click CONTINUE to view the data.
If you are logging in for the first time, click Sign In to ServiceNow, provide the necessary credentials, and then click Allow to log in to the ServiceNow account where the action must take place. To log in to a different ServiceNow account, click +Add a New Account.
When an order is placed in ServiceNow, a business rule is triggered in the backend that captures all the relevant data from the database tables in ServiceNow and the u_purchase_order_cbc table is populated in ServiceNow. After the u_purchase_order_cbc table is populated, the required Zap for ServiceNow is triggered that creates a new Order in CloudBlue Commerce. Subsequently, an email is sent from ServiceNow to the Enterprise Administrator or the Procurement Manager user stating that an order has been placed in the ServiceNow portal.

Set Up the Zap Actions
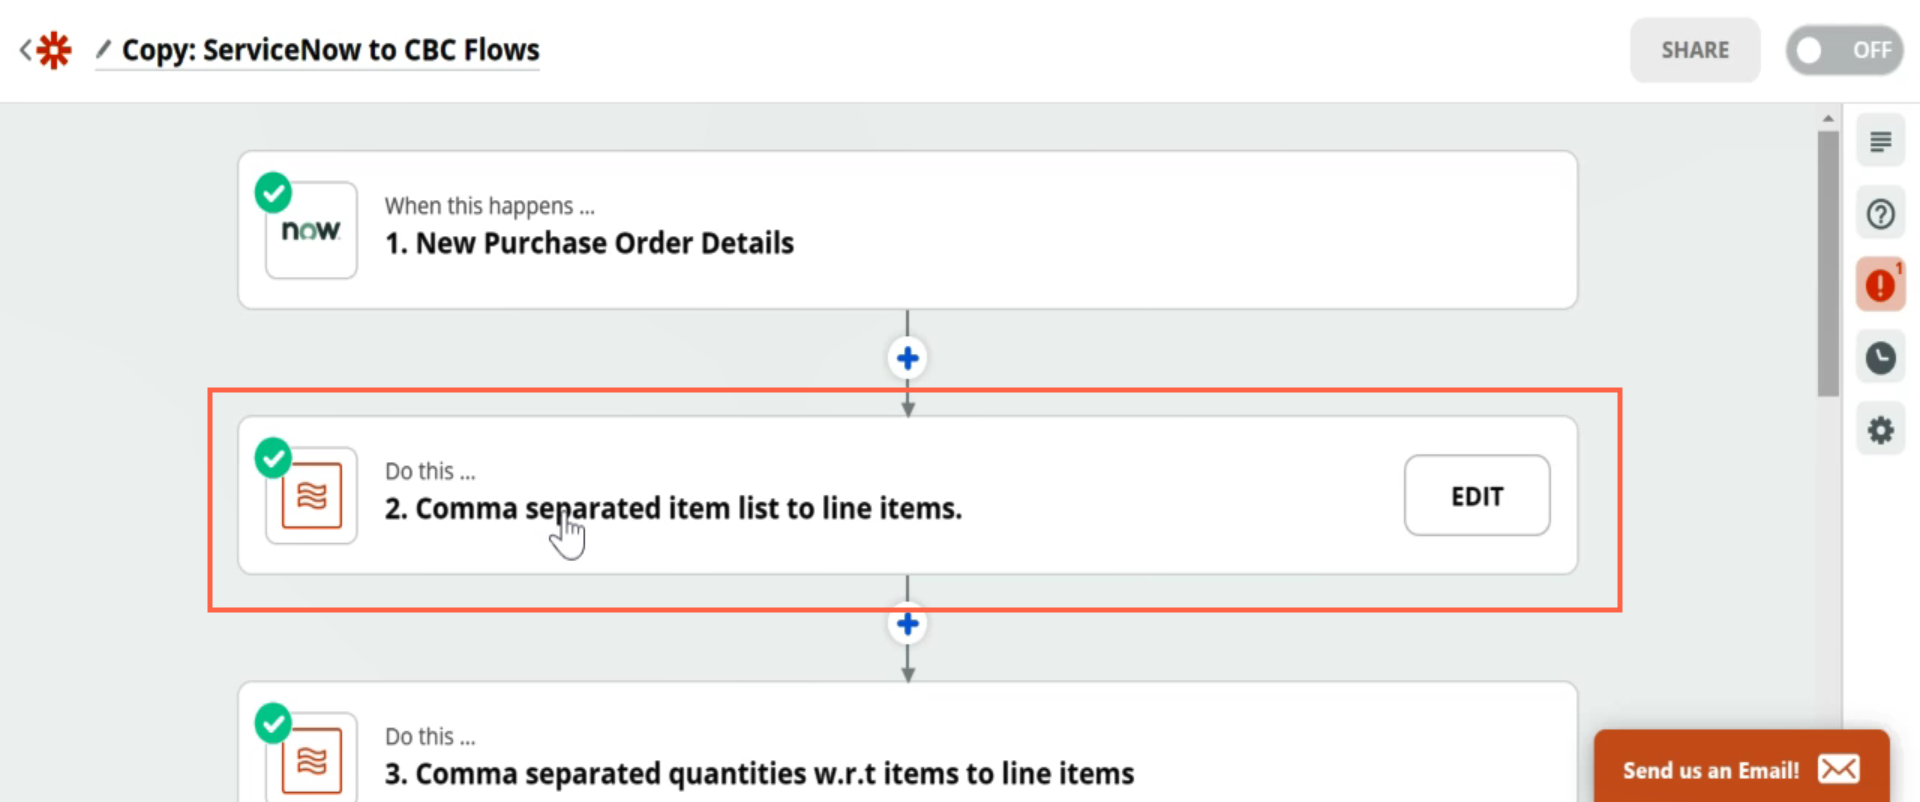
When a specified event occurs in ServiceNow, the Zap is triggered to perform predefined actions in CloudBlue Commerce. In this scenario, the following actions are defined to create new items or update existing items in CloudBlue Commerce respectively.
- Format comma separated item list to line items
- Format comma separated quantity w.r.t items to line items
You must enable these actions to convert ServiceNow item data and order quantities to line items in CloudBlue Commerce. The actions are configured by default according to the preconfigured template. You may modify the settings if required.
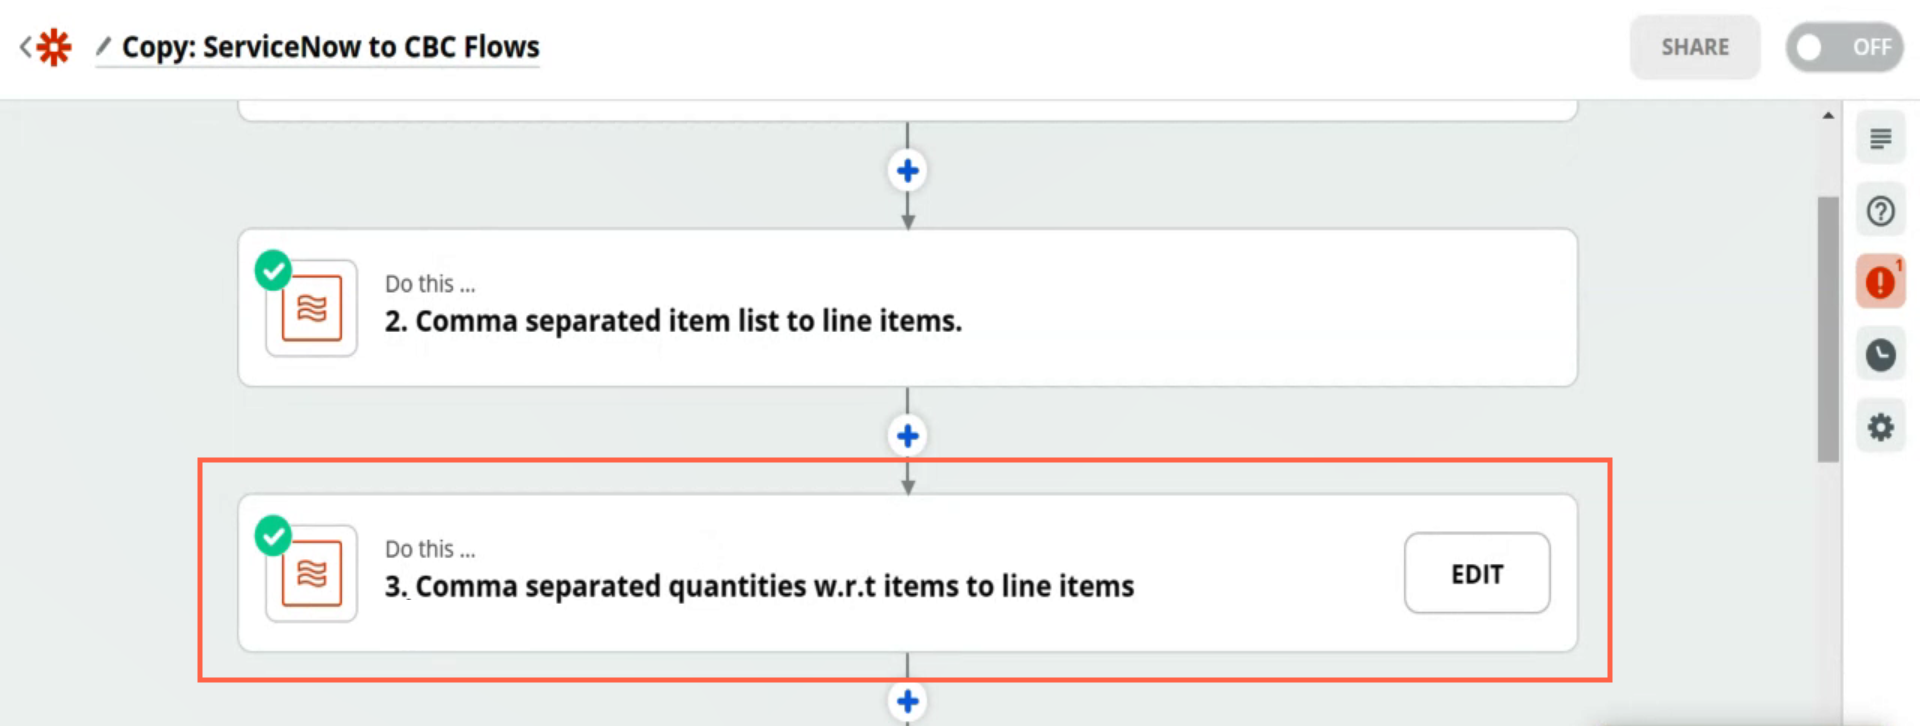
Format comma separated item list to line items
To enable the action, complete the following steps:
- Under Do this, to edit the action, click EDIT.
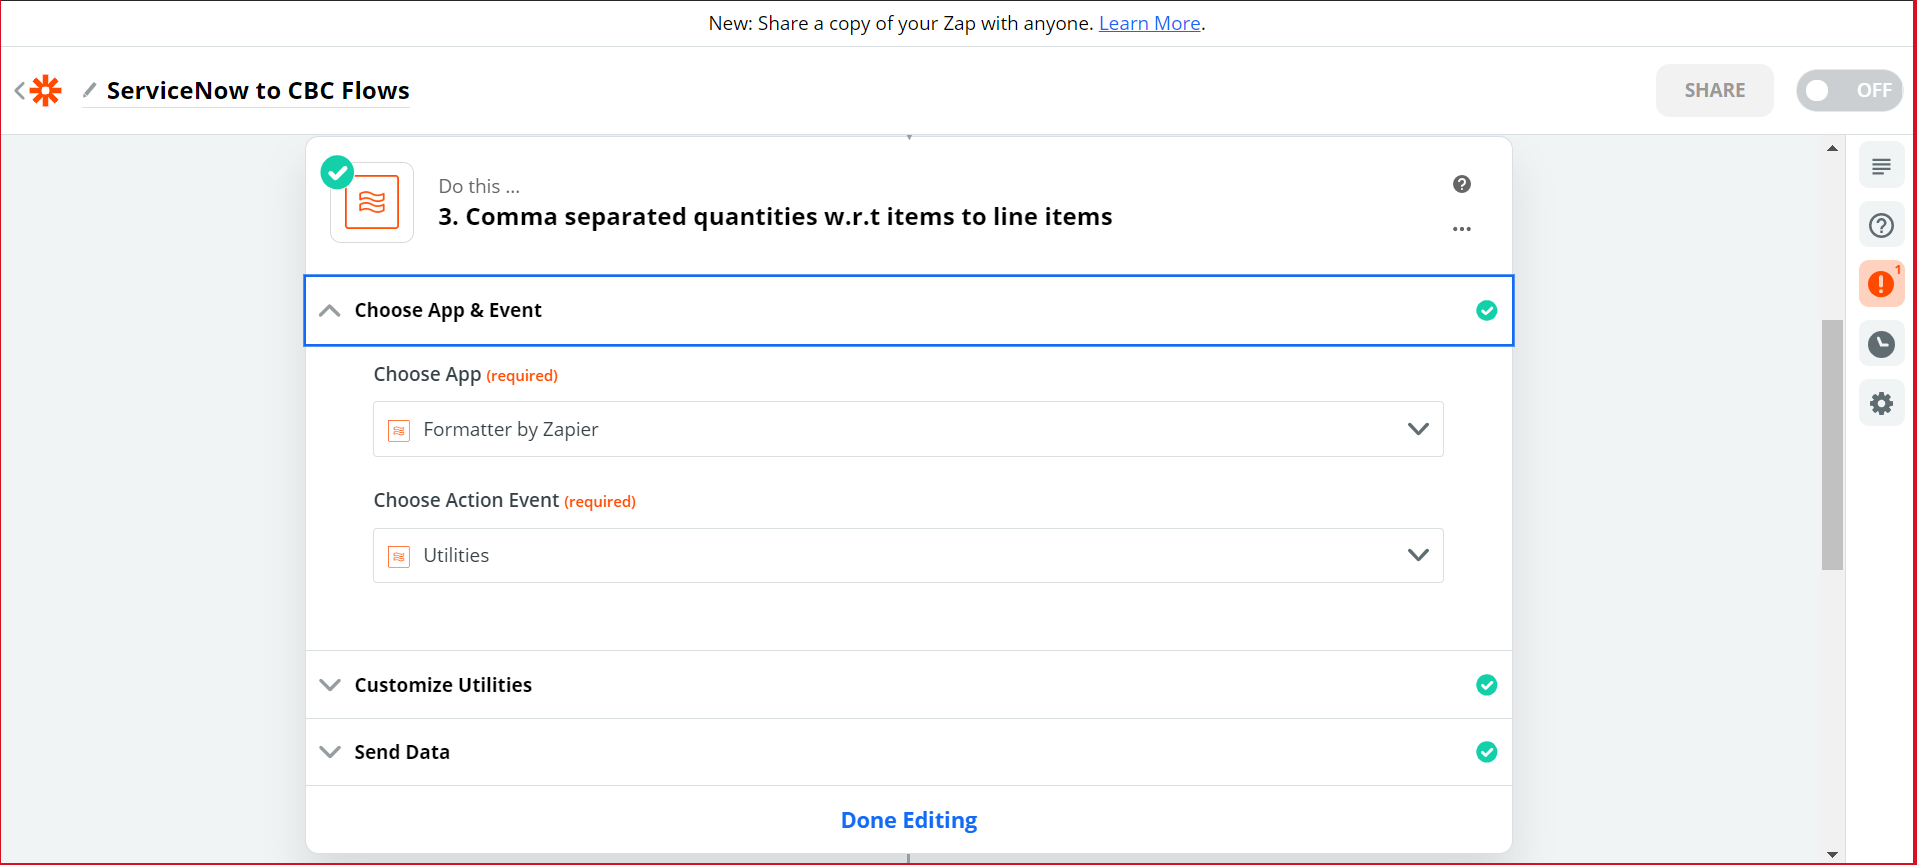
- Under Choose App & Event, the following details are displayed as defined in the template:
- Choose App: Displays the Zapier app required for converting comma-separated quantities ordered from ServiceNow to line items in CloudBlue Commerce.
- Choose Action Event: Displays the Zapier utilities that enable the Zap to capture comma-separated item quantities received from ServiceNow and convert them to line items in CloudBlue Commerce.
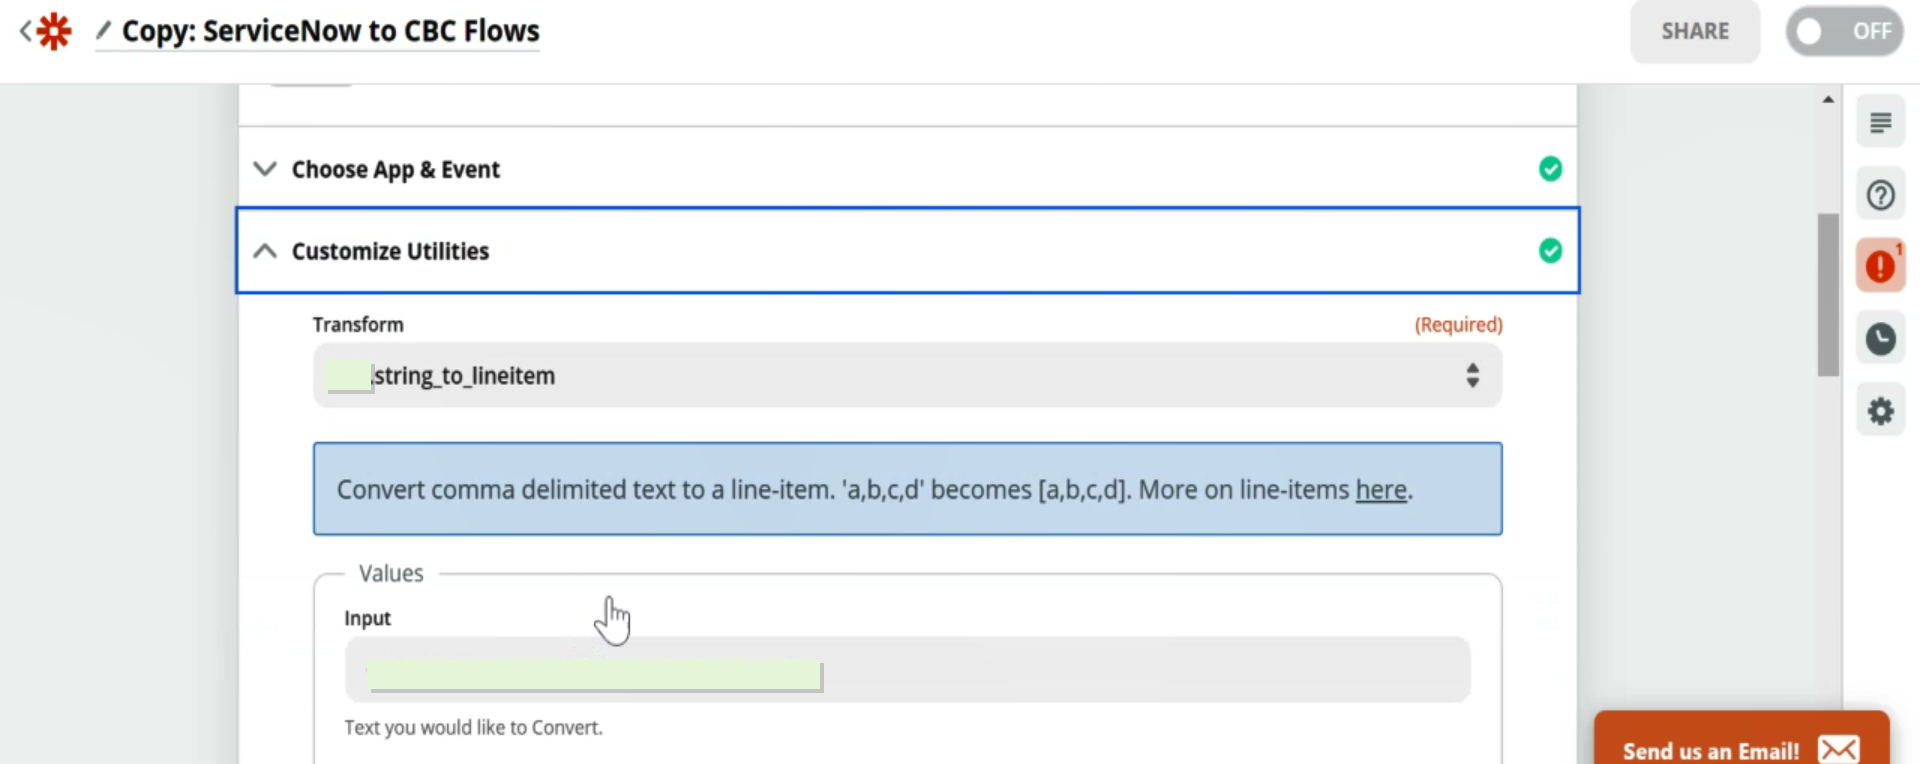
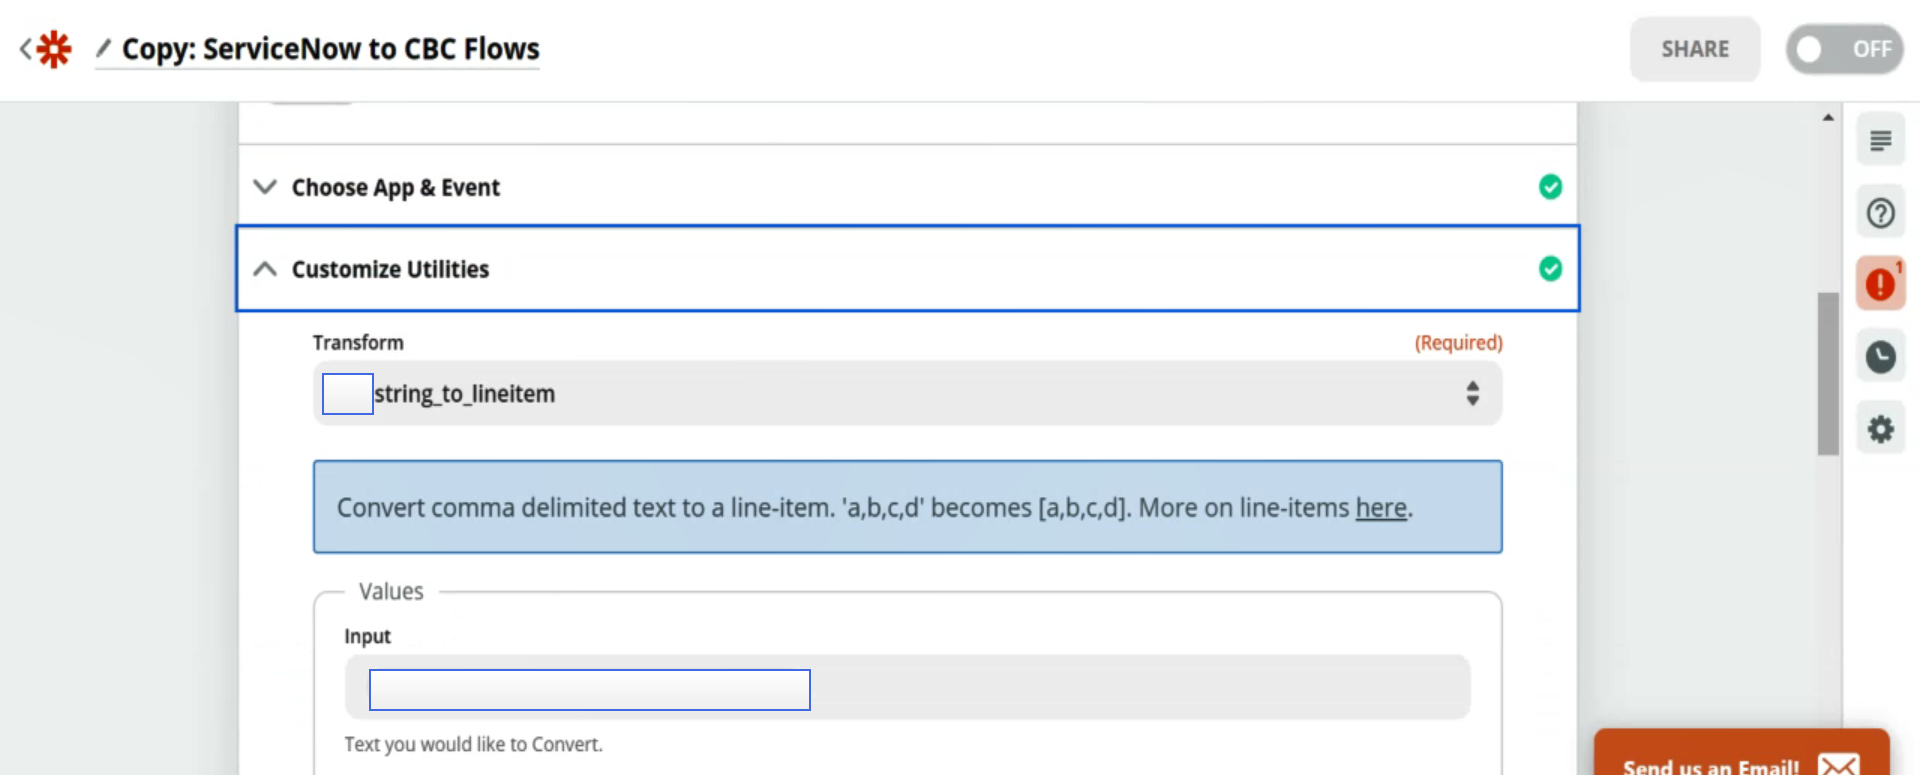
- Customize Utilities: Displays the following details as configured in the template:
- Transform: Displays the type of data conversion to be done by the Zap.
- Values: The Input field displays the ServiceNow item GUID.
- Click Refresh.
- Send Data: Displays the test result. Click TEST & CONTINUE. To skip testing the configuration, click Skip Test.
- Click Done Editing.

Format comma separated quantities w.r.t item to line items
To enable the action, complete the following steps:
- Under Do this, to edit the action, click EDIT.
- Under Choose App & Event, the following details are displayed as defined in the template:
- Choose App: Displays the Zapier app that is required for converting comma-separated quantities ordered from ServiceNow to line items in CloudBlue Commerce.
- Choose Action Event: Displays the Zapier utilities that enable the Zap to capture comma-separated item quantities received from ServiceNow and convert them to line items in CloudBlue Commerce.
- Customize Utilities: Displays the details as configured in the template.
- Transform: Displays the type of data conversion to be done by the Zap.
- Values: The Input field displays the ServiceNow items that Zap needs to convert.
- Click Refresh.
- Send Data: Displays the test result. Click TEST & CONTINUE. To skip testing the configuration, click Skip Test.
- Click Done Editing.
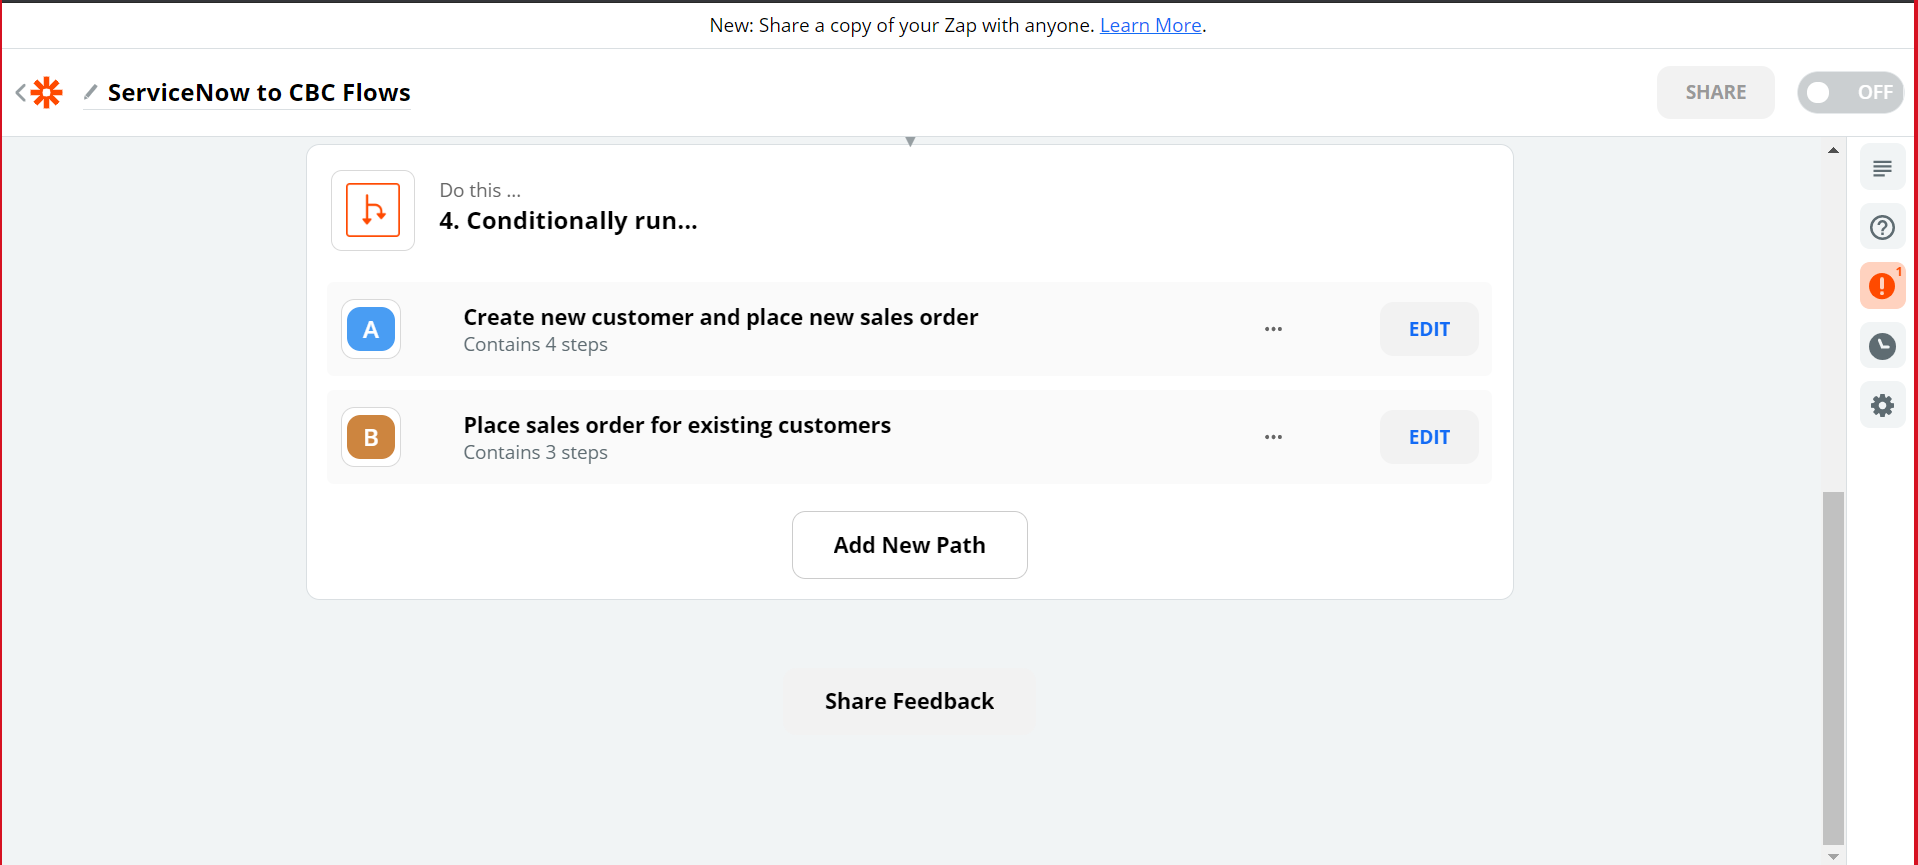
Set Up the Zap Paths
Zap paths are advanced workflows that are created to run different actions based on defined conditions. Paths are created based on the if-then logic, where the required action is performed if a specific condition is fulfilled in ServiceNow. In this scenario, the following paths are defined:
You must enable these conditions to trigger the Zap as required. The paths are configured by default according to the preconfigured template. You may modify the settings if required.
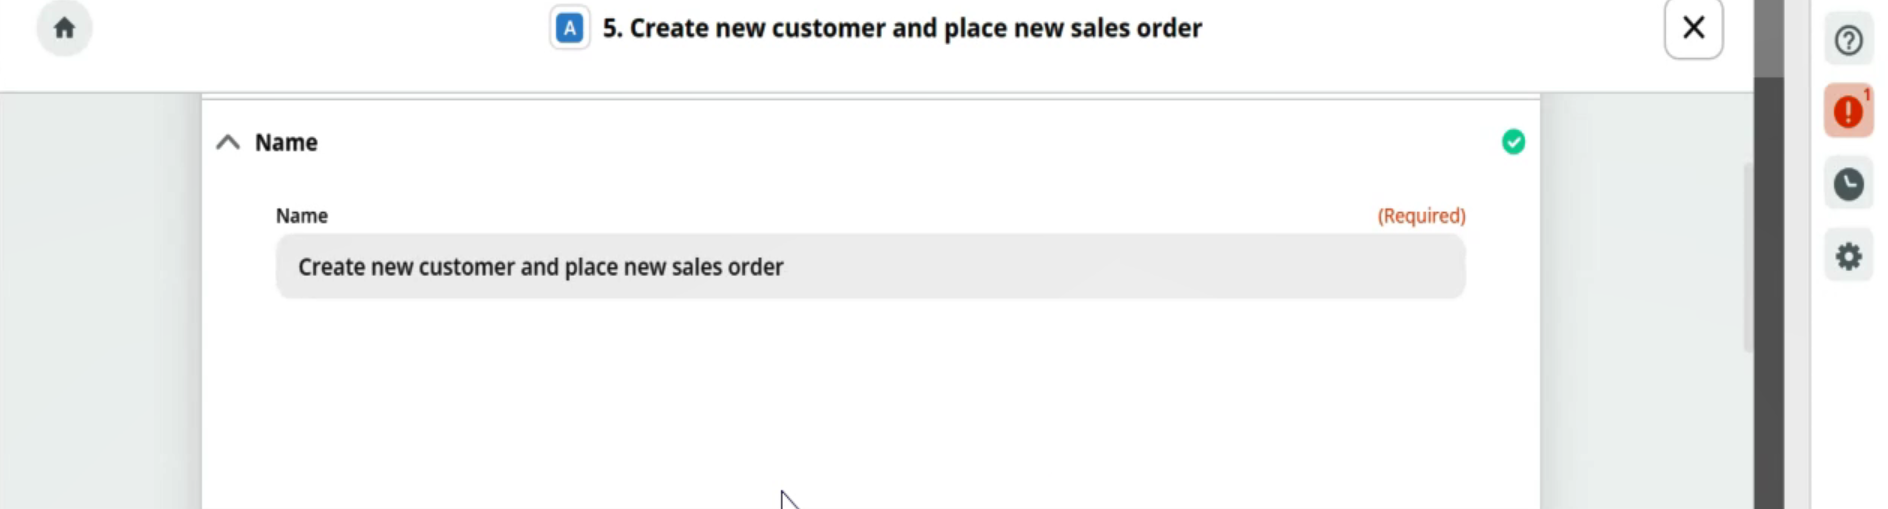
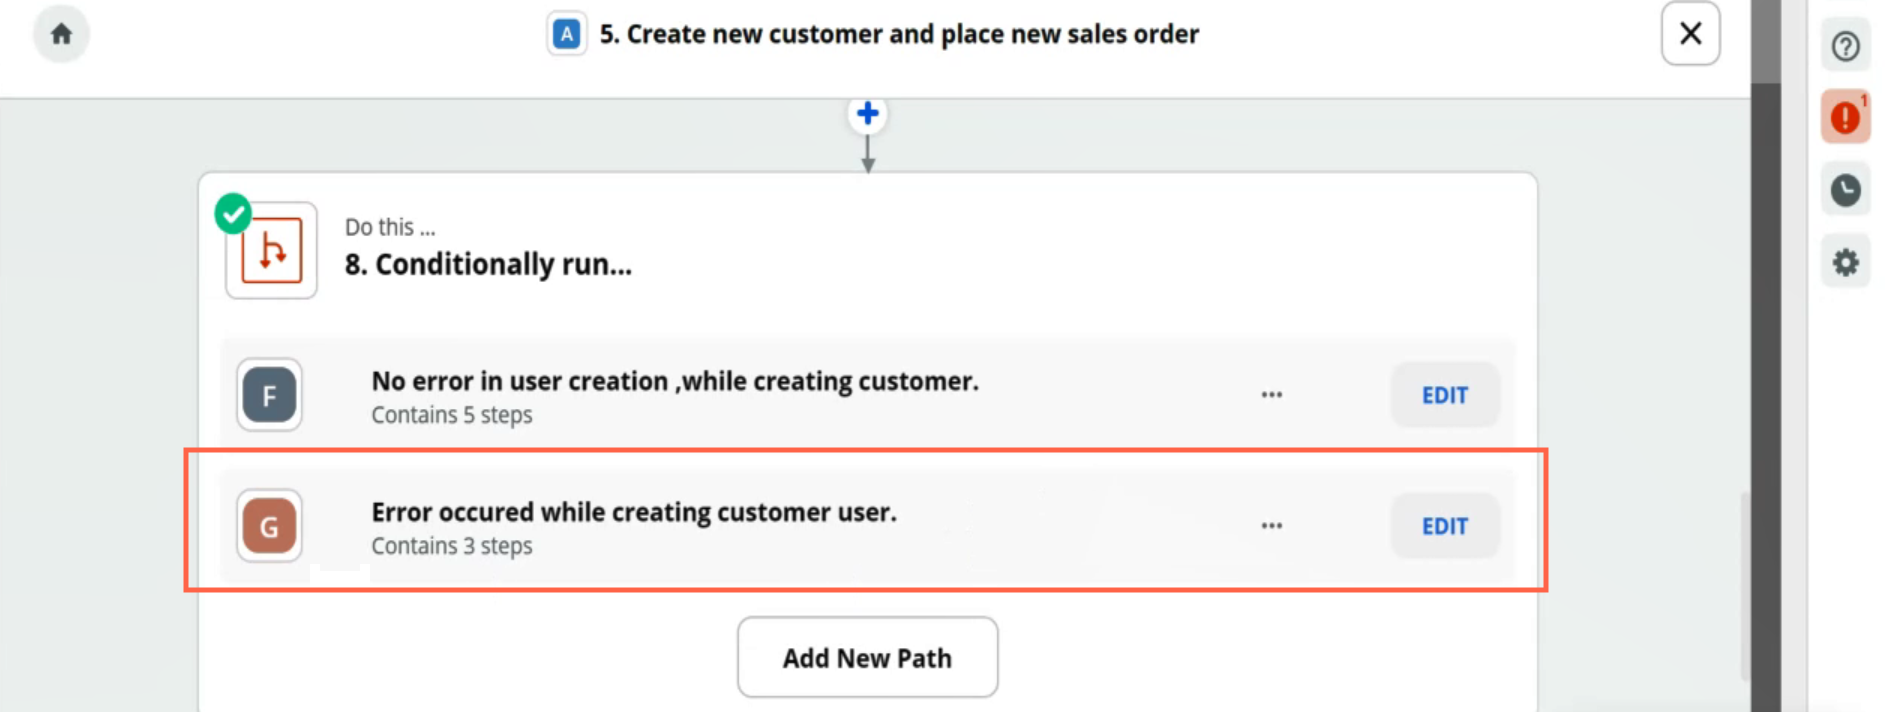
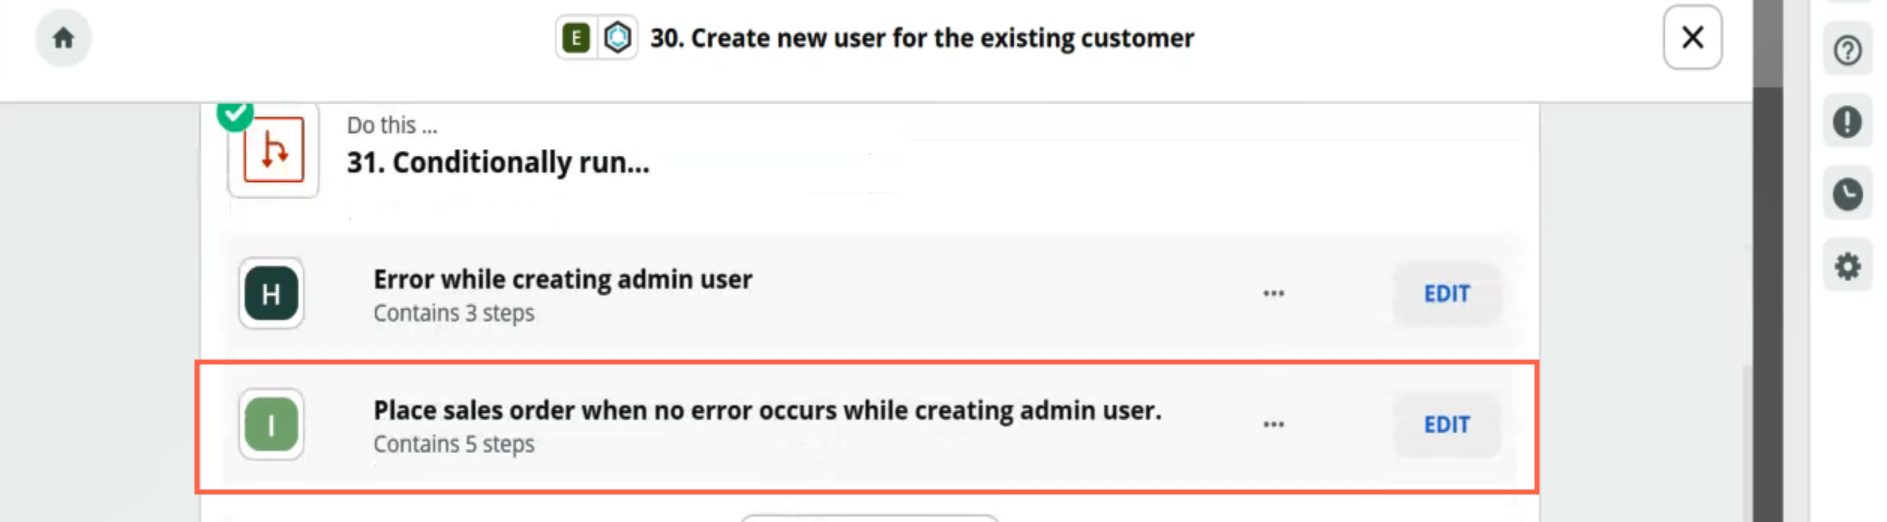
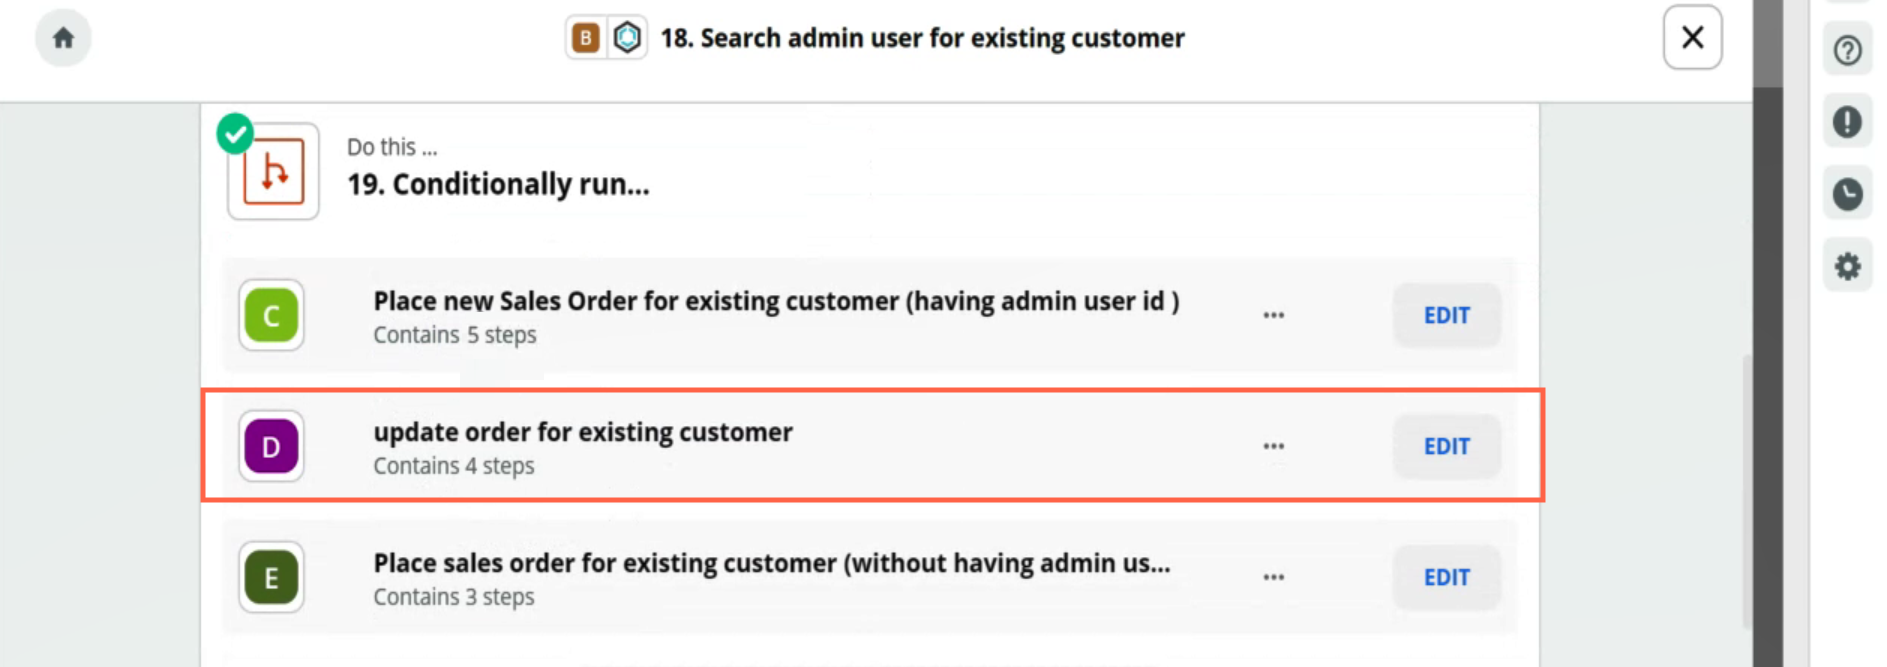
Create a new customer and place a new sales order
To enable the path, complete the following steps:
- Under Conditionally run, to edit the path, click EDIT.
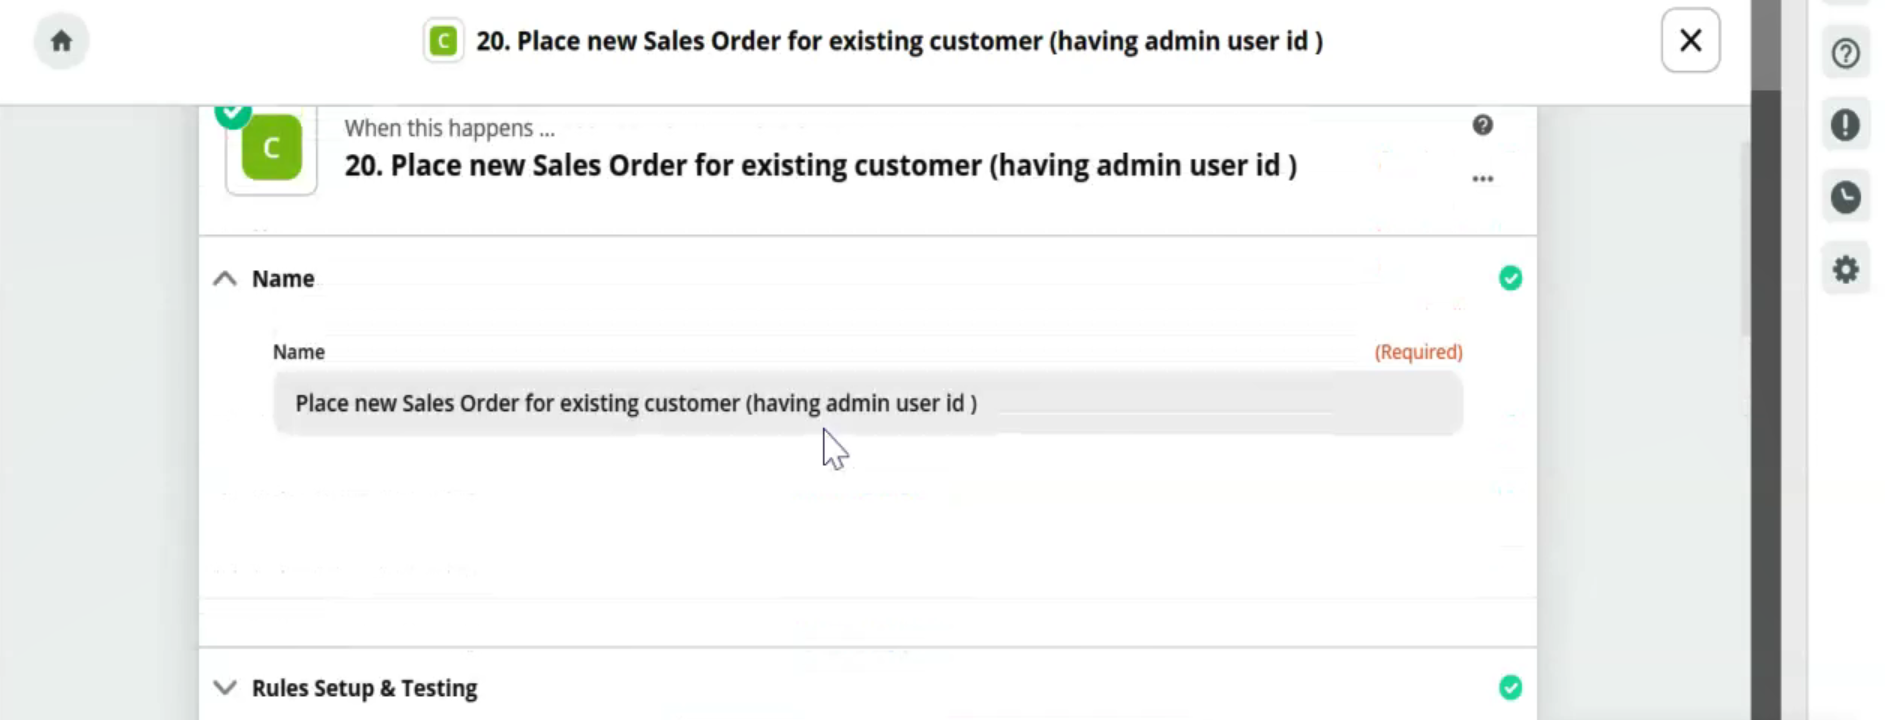
- On the edit page, under When this happens, the following fields are populated by default based on the preconfigured template:
- Name: Displays the name of the trigger for the path.
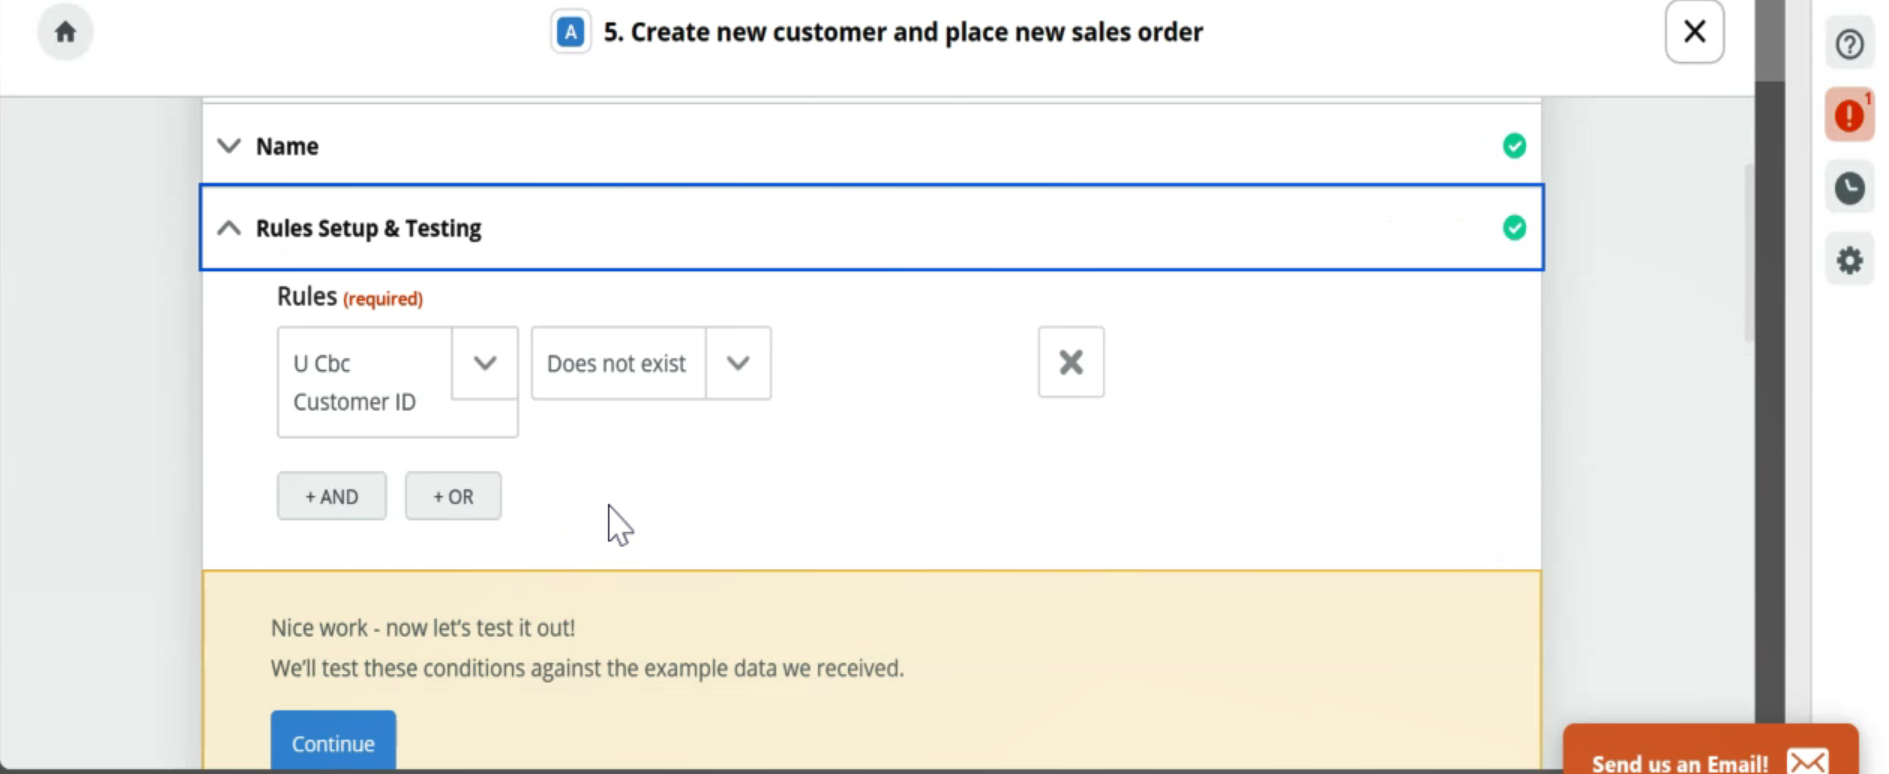
- Rules Setup & Testing: Displays the rules for this path.
- The U Cbc option is preselected. This enables the Zap to capture the identification number of the Purchase Request.
- The Does not exist option is preselected. This enables the Zap to move to the next task even if the Purchase Request ID is not available.
- Click Continue.
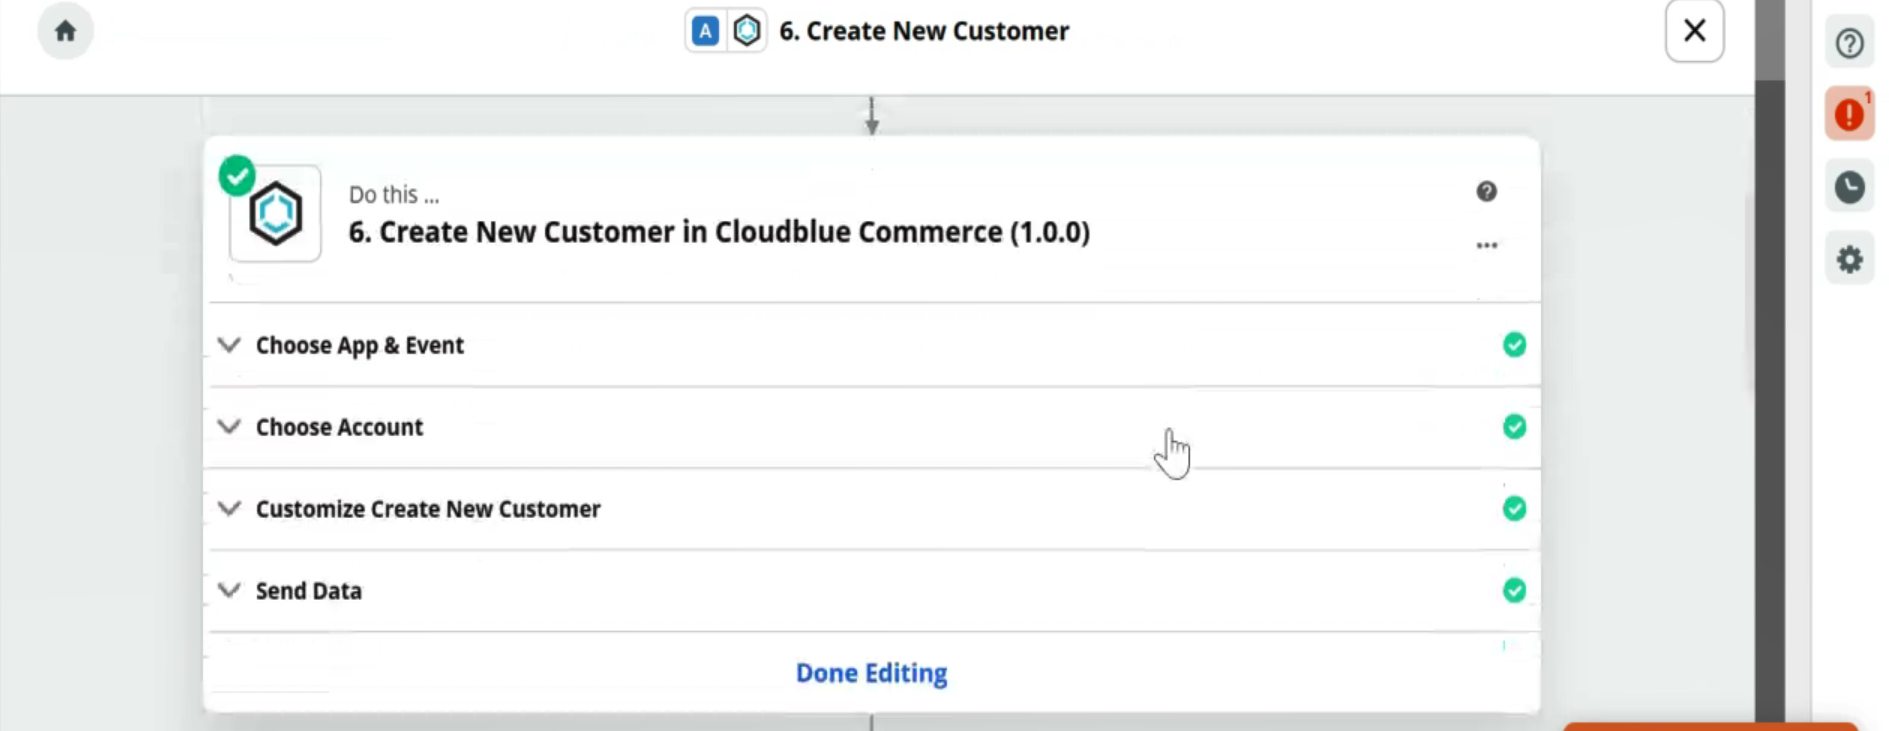
- Under Do this, the name of the action for the path displays. To configure the action, click EDIT. The following fields are populated by default based on the preconfigured template:
- Choose App & Event: Displays the details as defined in the template.
- Choose App: Displays the target application where you want the action to happen.
- Choose Action Event: Displays the action to be performed in the application.
- Click CONTINUE.
- Choose Account: To add Purchase Request line items in CloudBlue Commerce you must log in to CloudBlue Commerce. This field is populated by default if you have logged in to the application previously.
- Click CONTINUE.
- Customize Create New Customer: Displays the configured account of a provider and a customer.
- Send Data: Displays the test result. Click TEST & Continue.
- Click Done Editing.
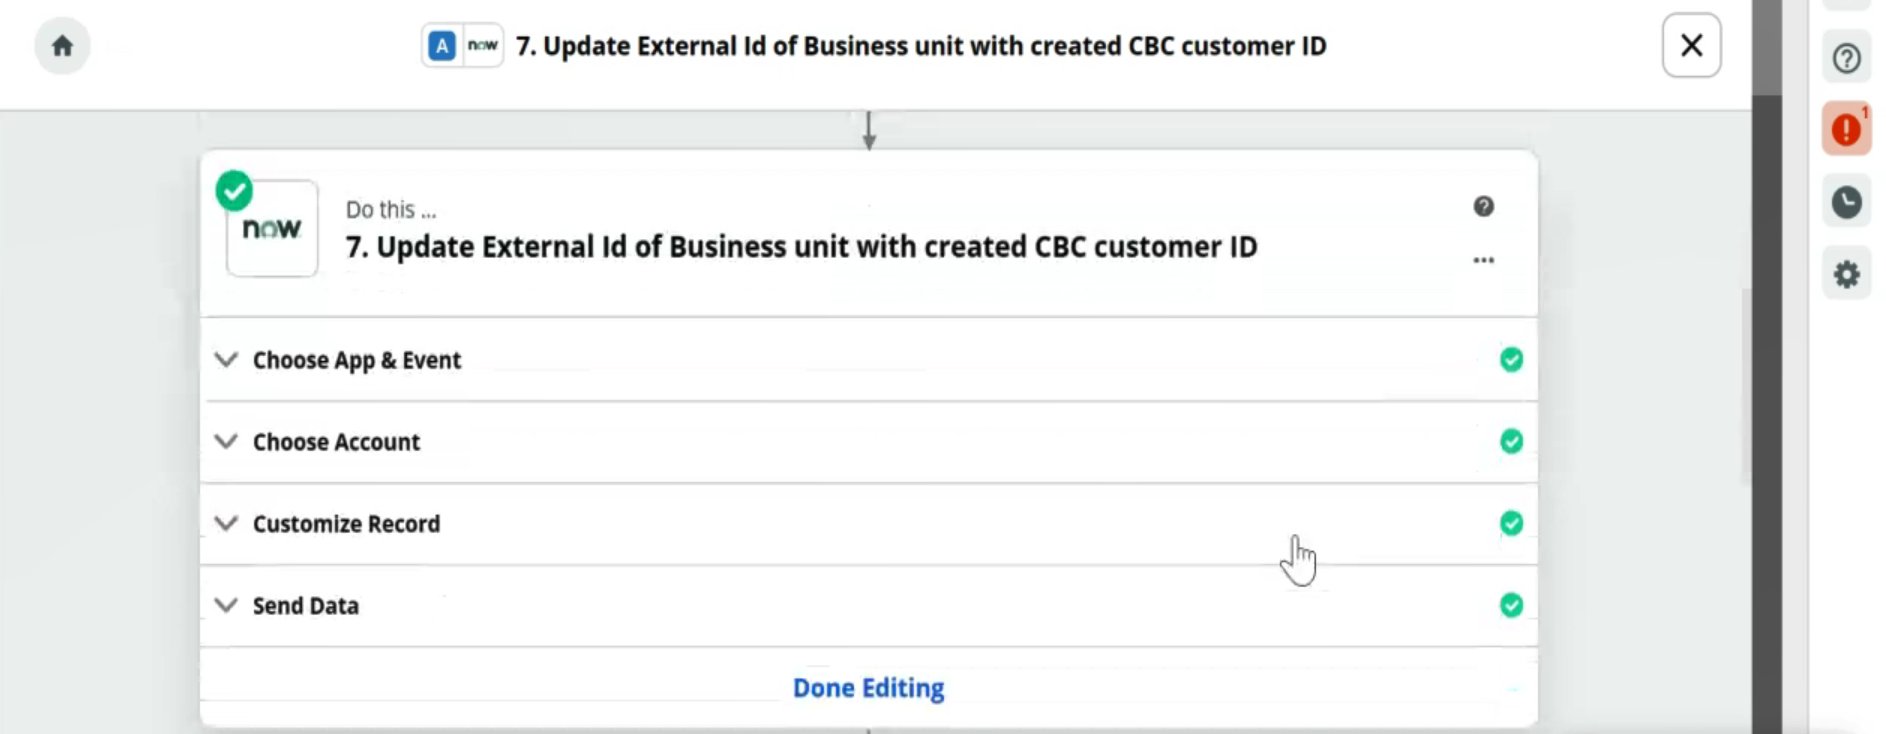
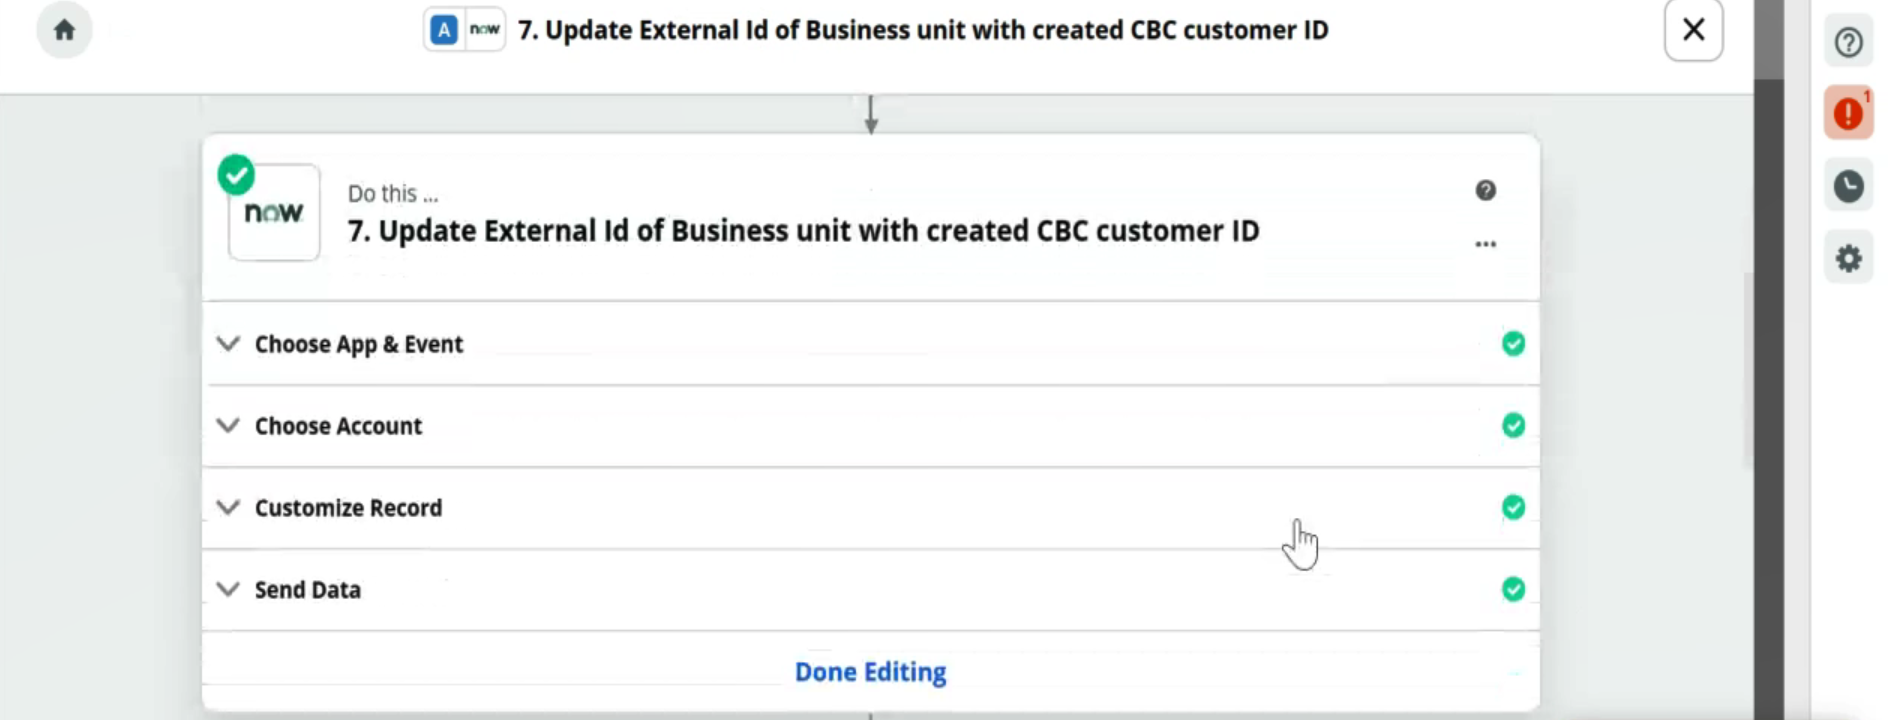
- Under Do this, the name of the action for the path is displayed. Click the action item and edit. The following fields are populated by default based on the preconfigured template.
- Customize Record: Displays the location of the table where the external ID of the Sales Order information (from CloudBlue Commerce) must be updates in ServiceNow.
- Send Data: Displays the test result. Click TEST & Continue.
- Click Done Editing.
- Under Do this, the name of the action for the path displays. To configure the action, click EDIT. The following fields are populated by default based on the preconfigured template:
- Choose App & Event: Displays the details as defined in the template.
- Choose App: Displays the target application where you want the action to happen.
- Choose Action Event: Displays the action to be performed in the application.
- Click CONTINUE.
- Choose Account: To capture the specified event in ServiceNow, you must log in to ServiceNow. This field is populated by default if you have logged in to the application previously.
- Click CONTINUE.
- Customize Record: Displays the table name that triggers the ServiceNow Zap, when it is populated with new order records.
- Send Data: Displays the test result. Click TEST & Continue.
- Click Done Editing.
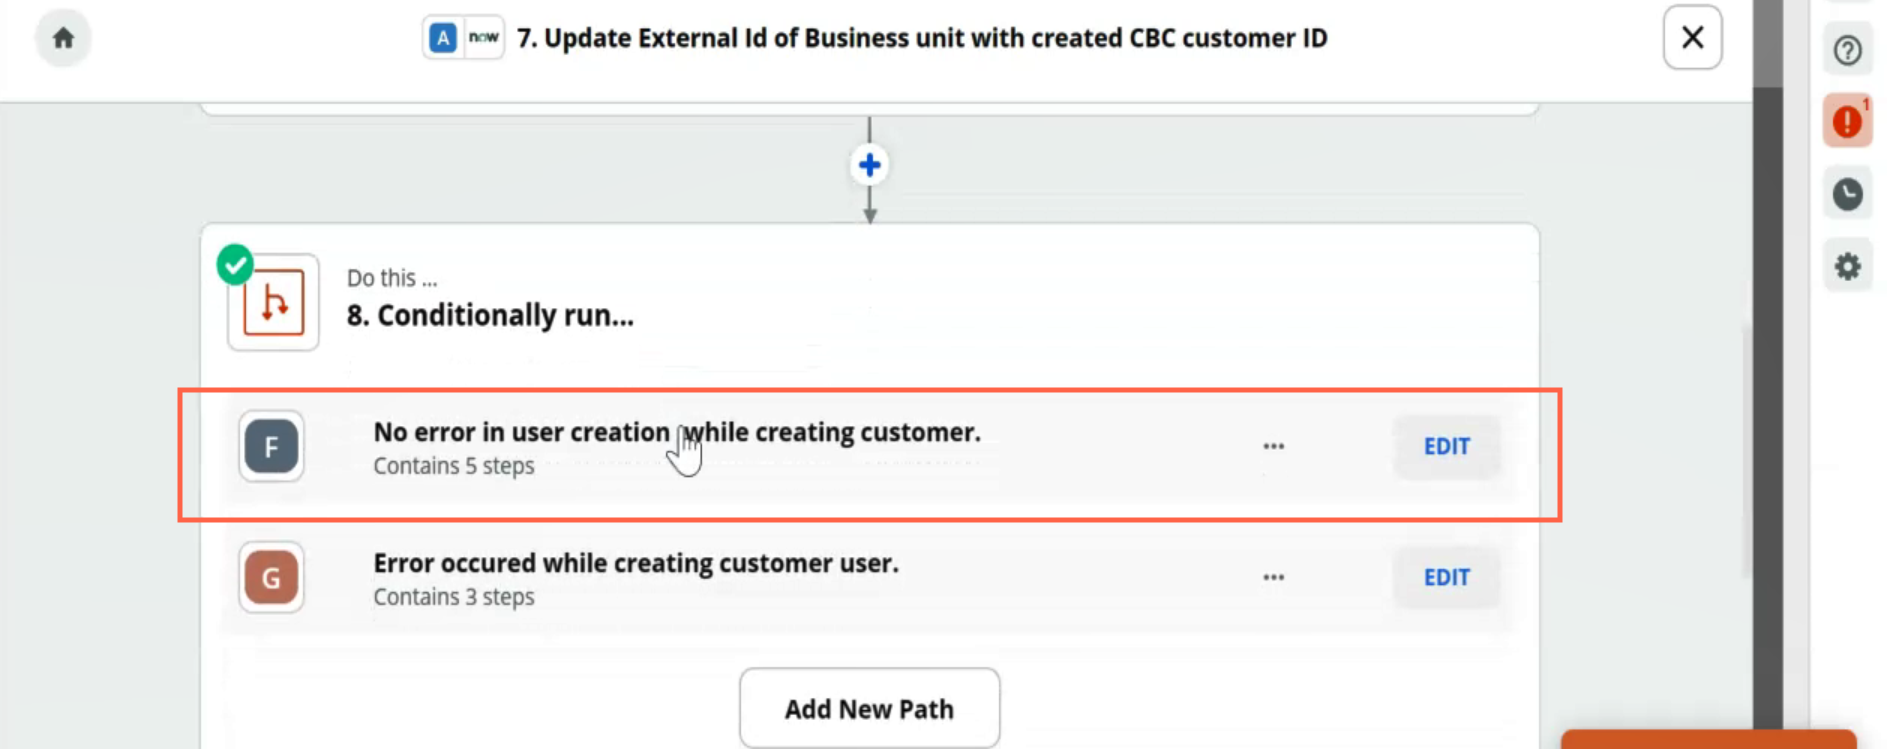
- Under Conditionally Run, to edit the path, click EDIT.
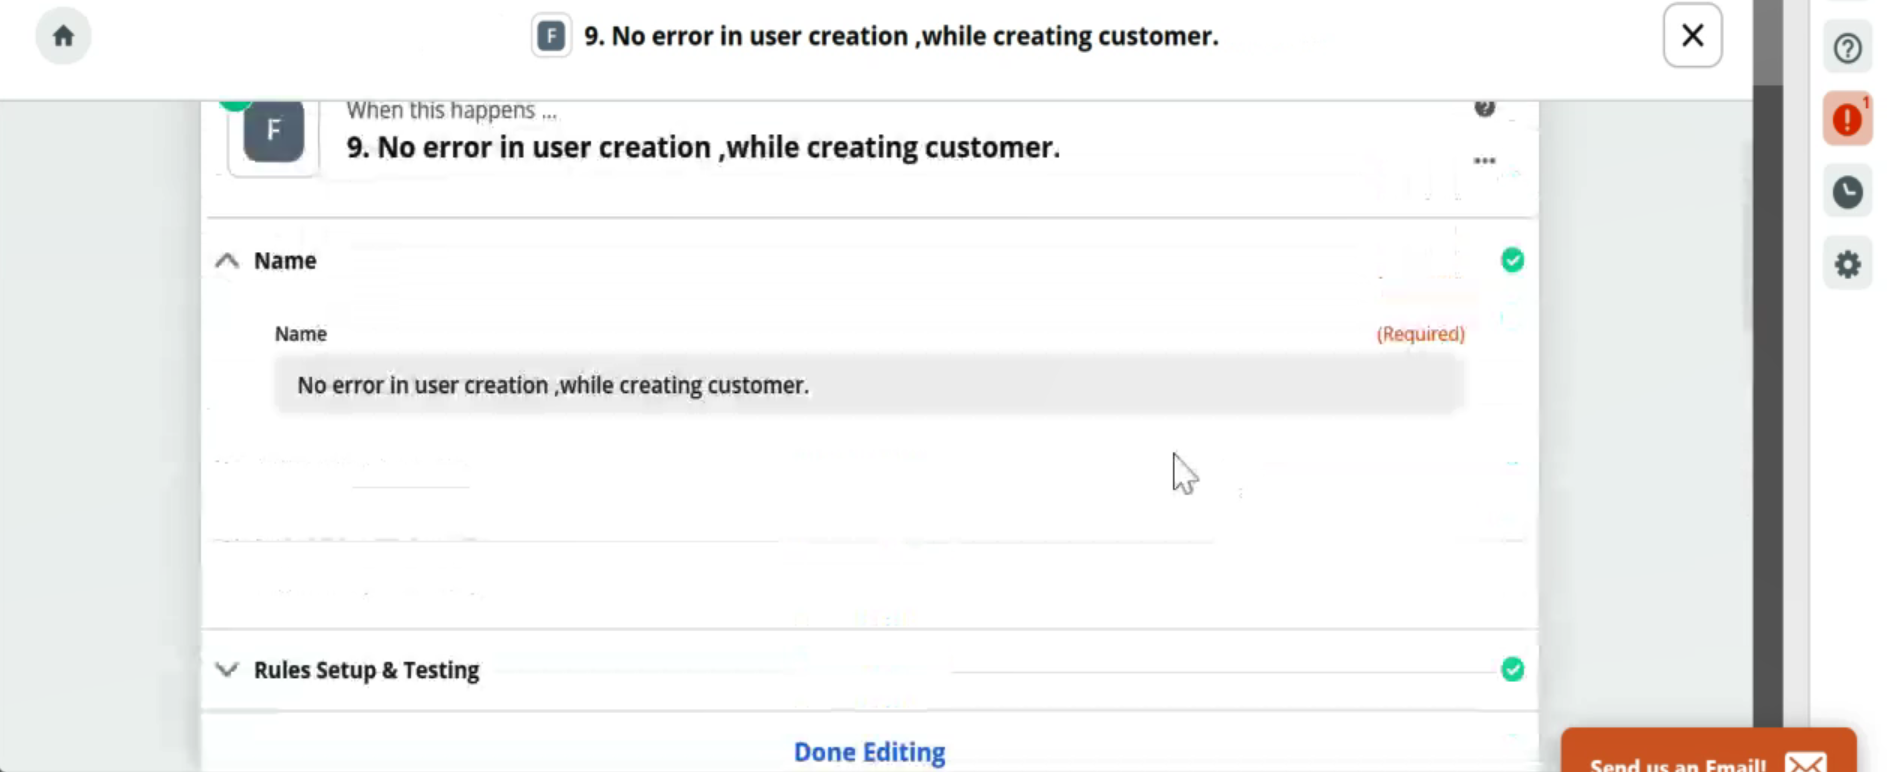
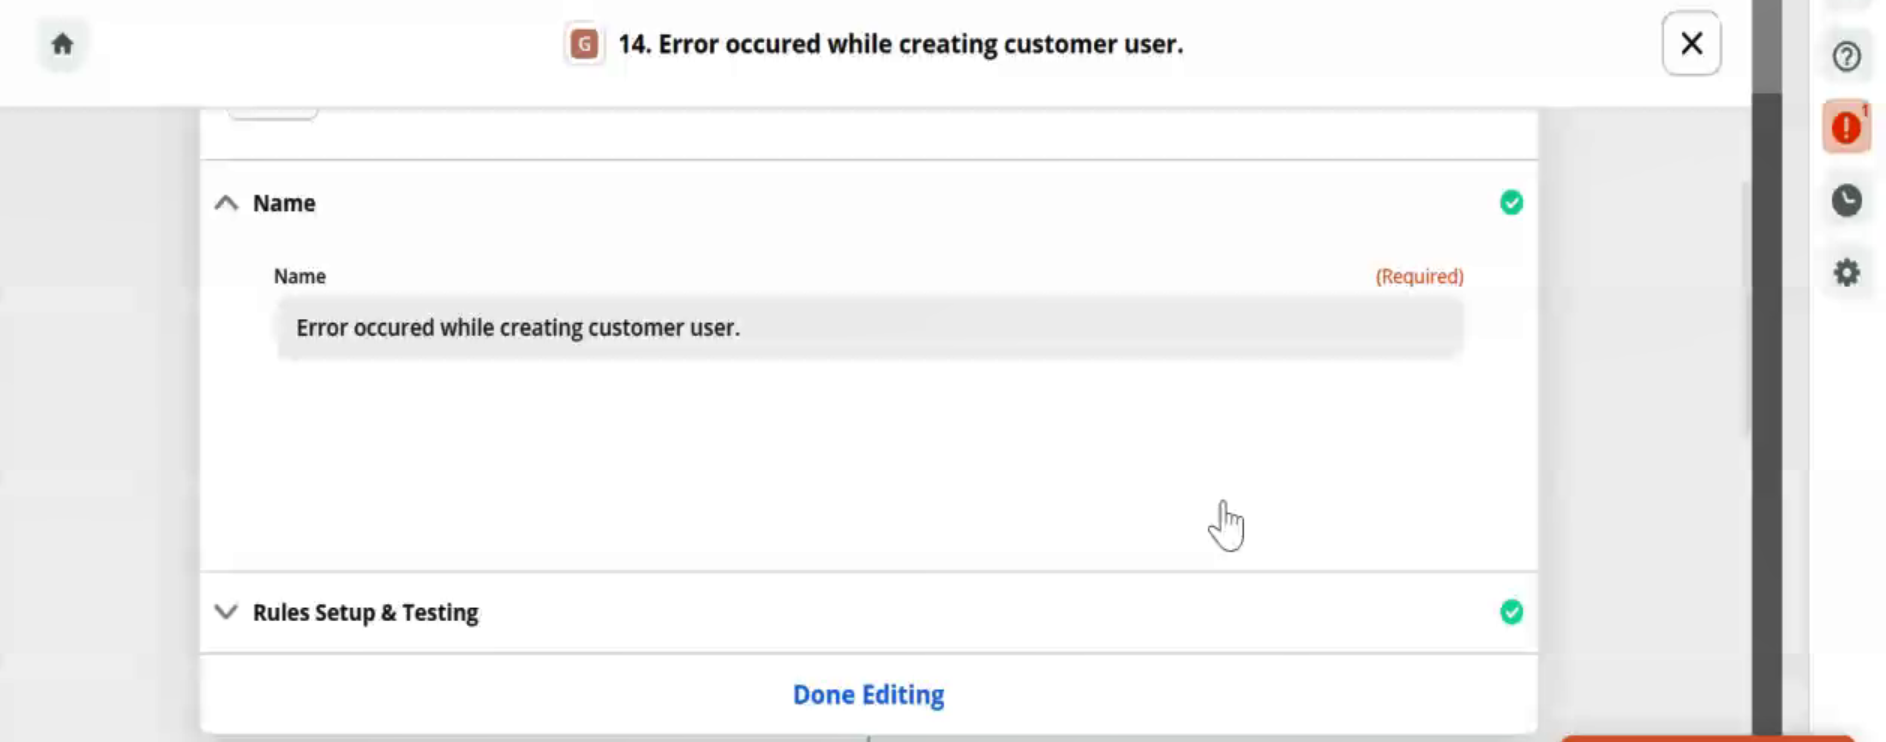
- On the edit page, under When this happens, the following fields are populated by default based on the preconfigured template.
- Name: The name of the trigger for the path is displayed.
- Rules Setup and Testing: Displays the following information:
- The User Status option is selected and the first condition to validate in case of any error.
- The (Test) Does not contain option is selected and validates the other condition for validation.
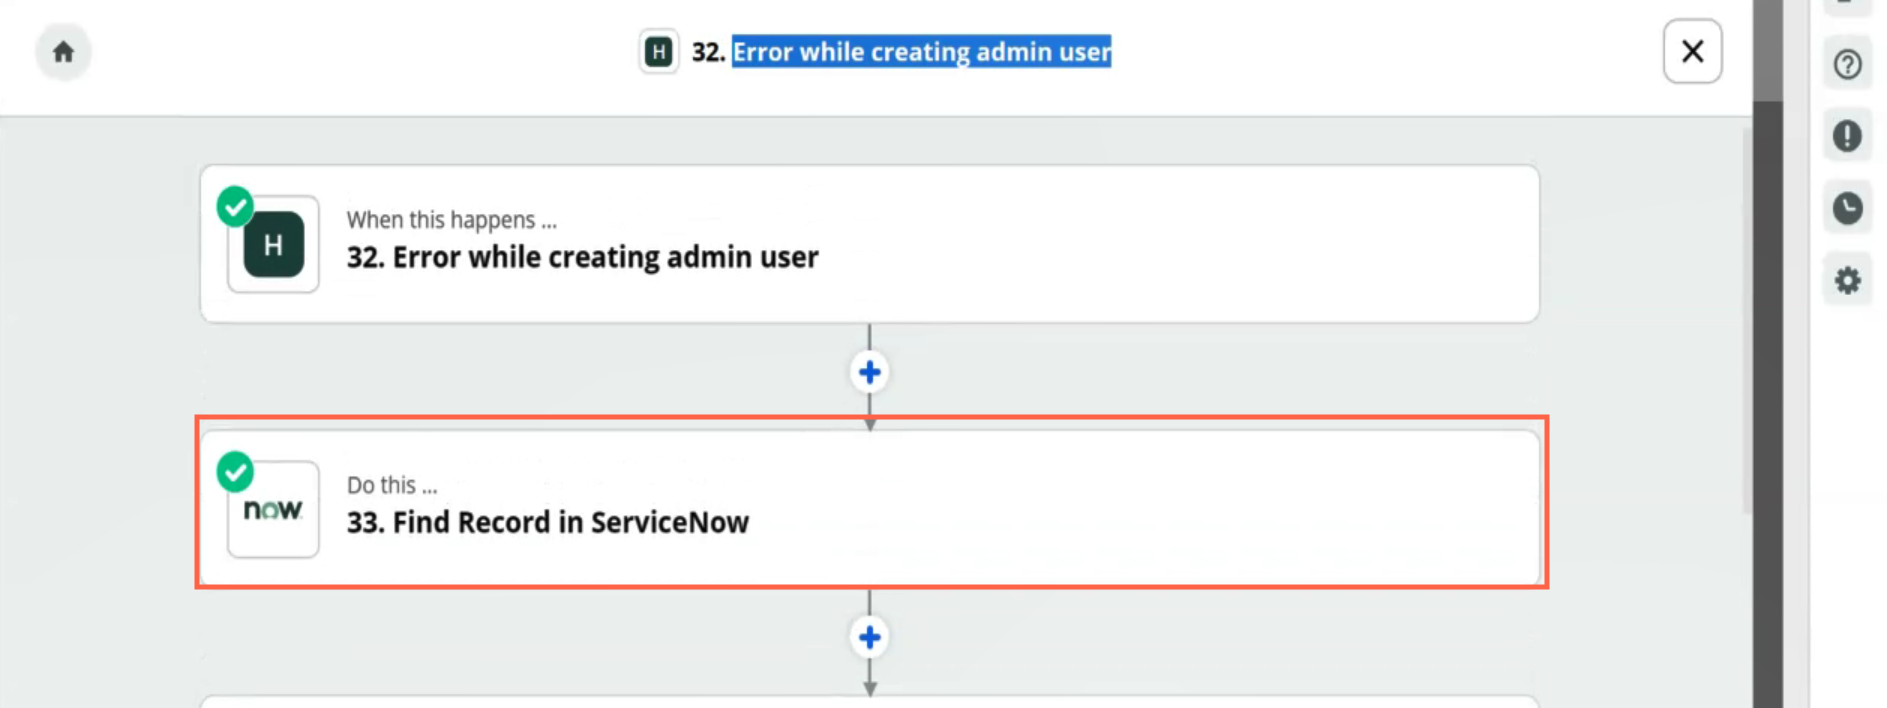
- The Error option is the last condition for validation.
- Click Continue.
- Under Do this, the name of the action for the path is displayed.
Click the action item and edit. The following fields are populated by default based on the preconfigured template.
- Choose App & Event: Displays the details as defined in the template.
- Choose App: Displays the target application where you want the action to happen.
- Choose Action Event: Displays the action to be performed in the application.
- Choose Account: To add Purchase Request line items in CloudBlue Commerce you need to log in to CloudBlue Commerce. This field is pre-populated.
- Click CONTINUE.
- Customize Create Sales Order: Displays the configuration of the order information.
- Send Data: Displays the test result. Click TEST & Continue.
- Click Done Editing.
- Under Do this, the name of the action for the path is displayed.
- Choose App & Event: Displays the details as defined in the template.
- Choose App: Displays the target application where you want the action to happen.
- Choose Action Event: Displays the action to be performed in the application.
- Choose Account: To add Purchase Request line items in CloudBlue Commerce you need to log in to CloudBlue Commerce. This field is pre-populated.
- Click CONTINUE.
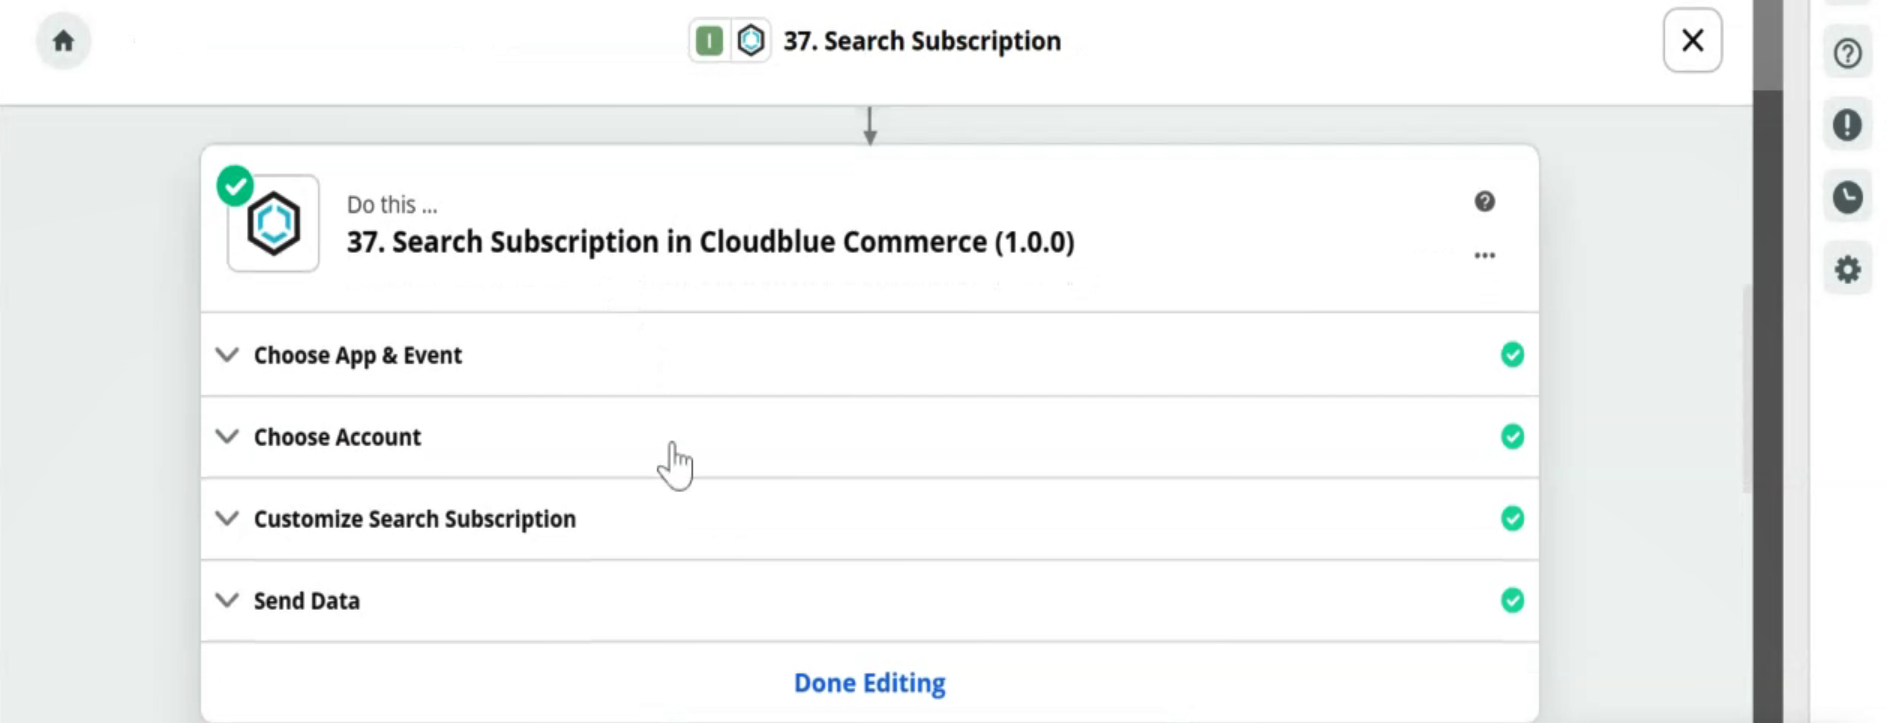
- Customize Search Subscription: Displays the search criteria to search a purchase order.
- Send Data: Displays the test result. Click TEST &Continue.
- Click Done Editing.
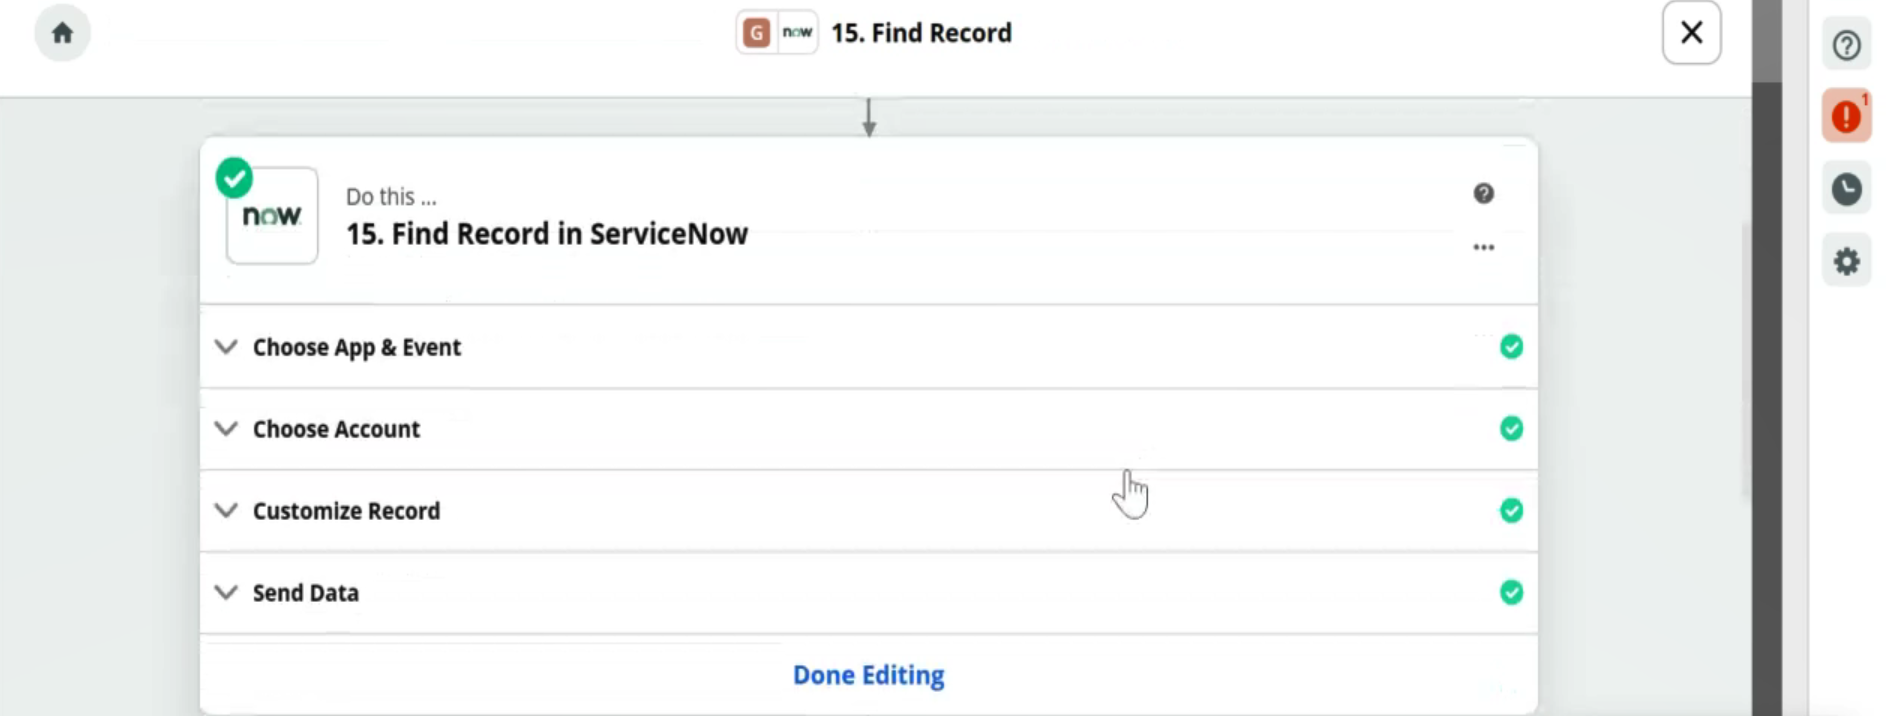
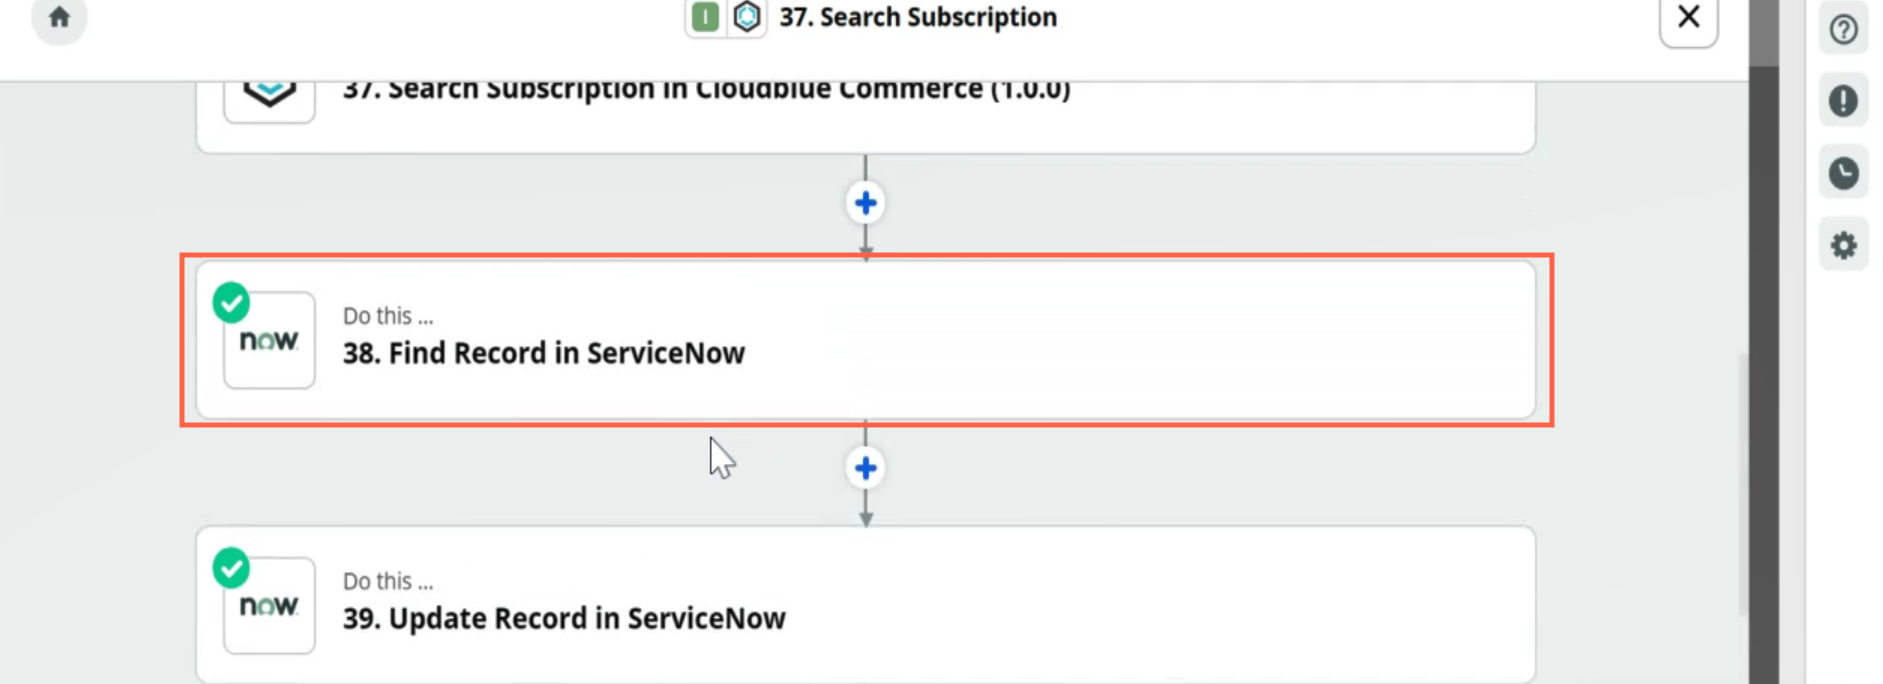
- Under Do this, the name of the action for the path is displayed.
- Choose App & Event: Displays the details as defined in the template.
- Choose App: Displays the application where you want the action to happen.
- Choose action: Displays the action to be performed in the application.
- Choose Account: To capture the specified event in ServiceNow, you must log in to ServiceNow. This field is populated by default if you have logged in to the application previously.
If you are logging in for the first time, click Sign In to ServiceNow, provide the necessary credentials, and then click Allow to log in to the ServiceNow account where the action must take place. To log in to a different ServiceNow account, click +Add a New Account.
- Customize Record: Displays the criteria to search record (for example, Purchase_order_CBC).
- Send Data: Displays the test result. Click TEST & Continue.
- Click Done Editing.
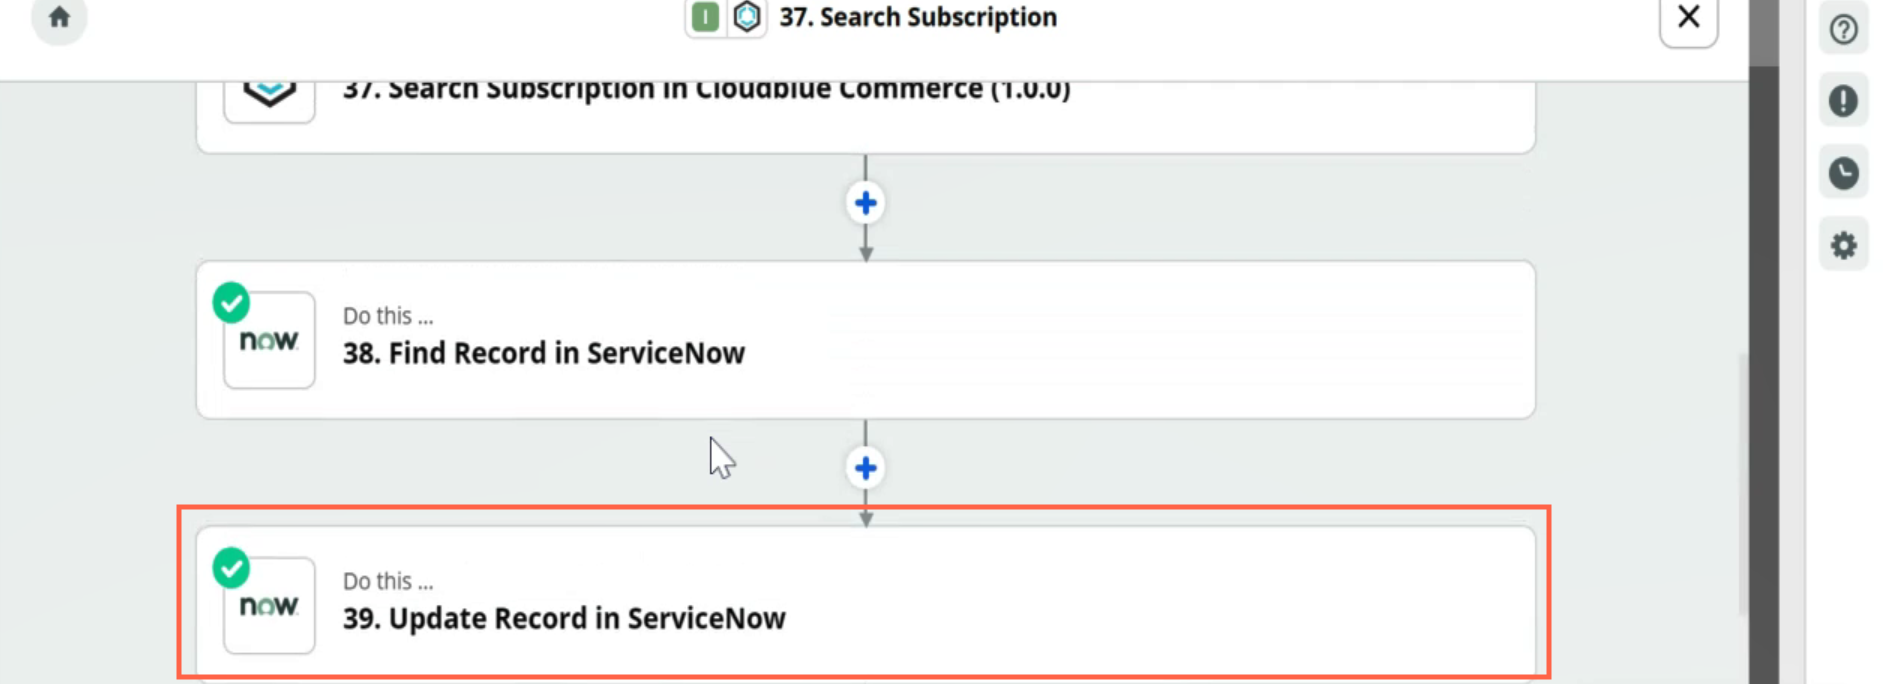
- Under Do this, the name of the action for the path is displayed.
- Choose App & Event: Displays the details as defined in the template.
- Choose App: Displays the application where you want the action to happen.
- Choose Action: Displays the action to be performed in the application.
- Choose Account: To capture the specified event in ServiceNow, you must log in to ServiceNow. This field is populated by default if you have logged in to the application previously.
If you are logging in for the first time, click Sign In to ServiceNow, provide the necessary credentials, and then click Allow to log in to the ServiceNow account where the action must take place. To log in to a different ServiceNow account, click +Add a New Account.
- Customize Record: Displays the table name that triggers the ServiceNow Zap, when it is populated with new order records (for example, Purchase_order_CBC).
- Click Refresh Fields and CONTINUE.
- Send Data: Displays the test result. Click TEST & CONTINUE.
- Click Done Editing.
- Click Share Feedback.
- Under Conditionally Run, to edit the path, click EDIT.
- On the edit page, under When this happens, the following fields are populated by default based on the preconfigured template.
- Name: The name of the trigger for the path is displayed.
- Rules Setup and Testing: Displays the rules for this path.
- Click Continue.
- Under Do this, the name of the action for the path is displayed.
- Choose App & Event: Displays the following details as defined in the template.
- Choose App: Displays the application where you want the action to happen.
- Choose Action: Displays the action to be performed in the application.
- Choose Account: To capture the specified event in ServiceNow, you must log in to ServiceNow. This field is populated by default if you have logged in to the application previously.
- Customize Record: Displays the table name that triggers the ServiceNow Zap, when it is populated with new order records.(for example, Purchase_order_CBC).
- Click Refresh Fields and CONTINUE.
- Send Data: Displays the test result. Click TEST & CONTINUE.
- Click Done Editing.
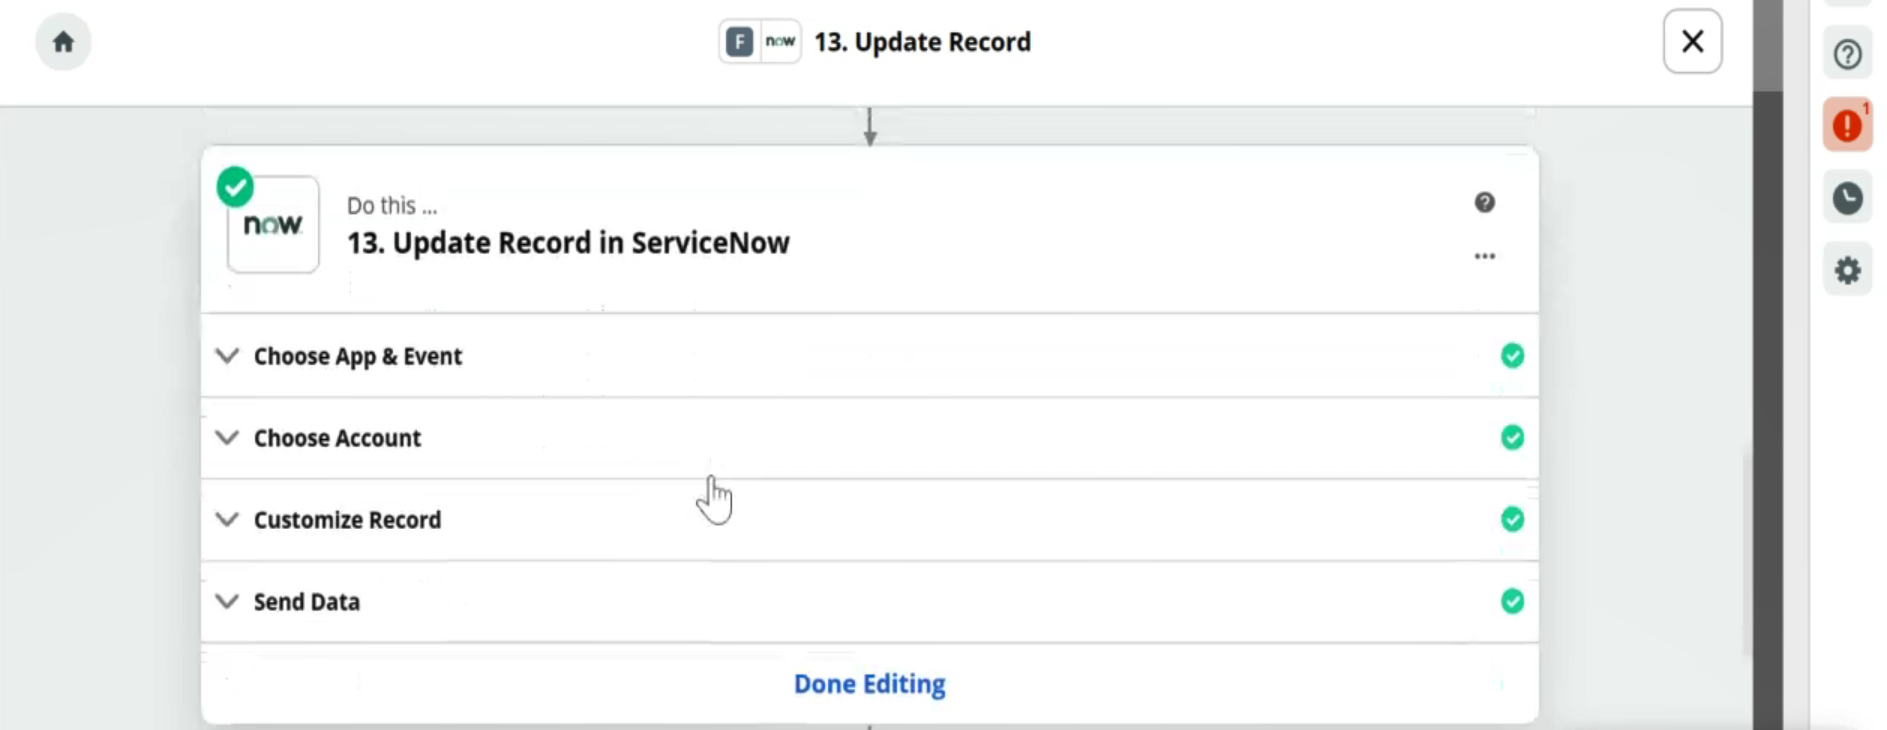
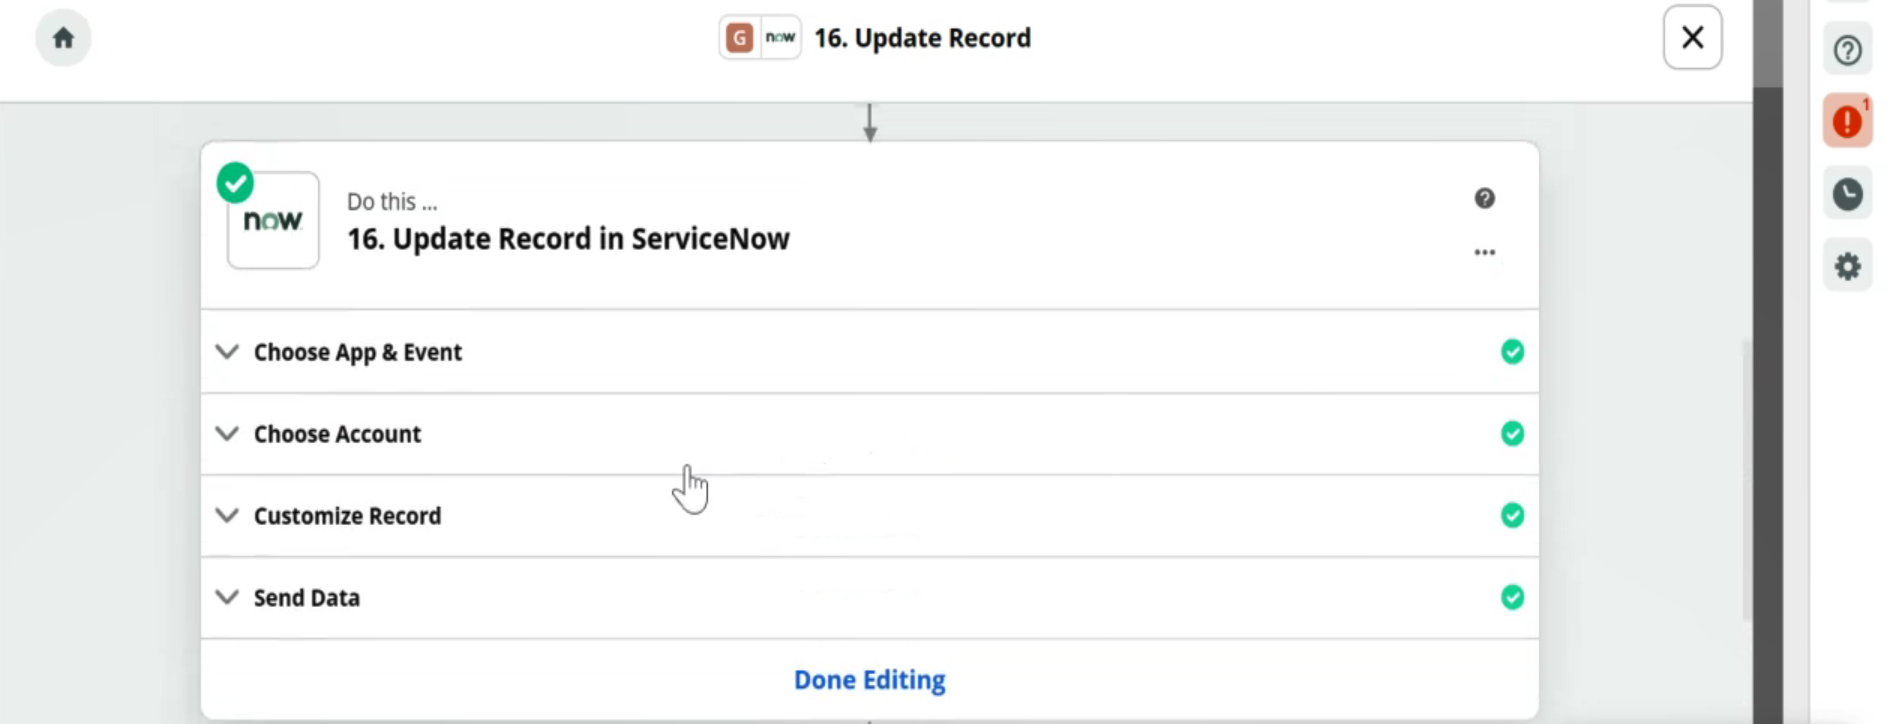
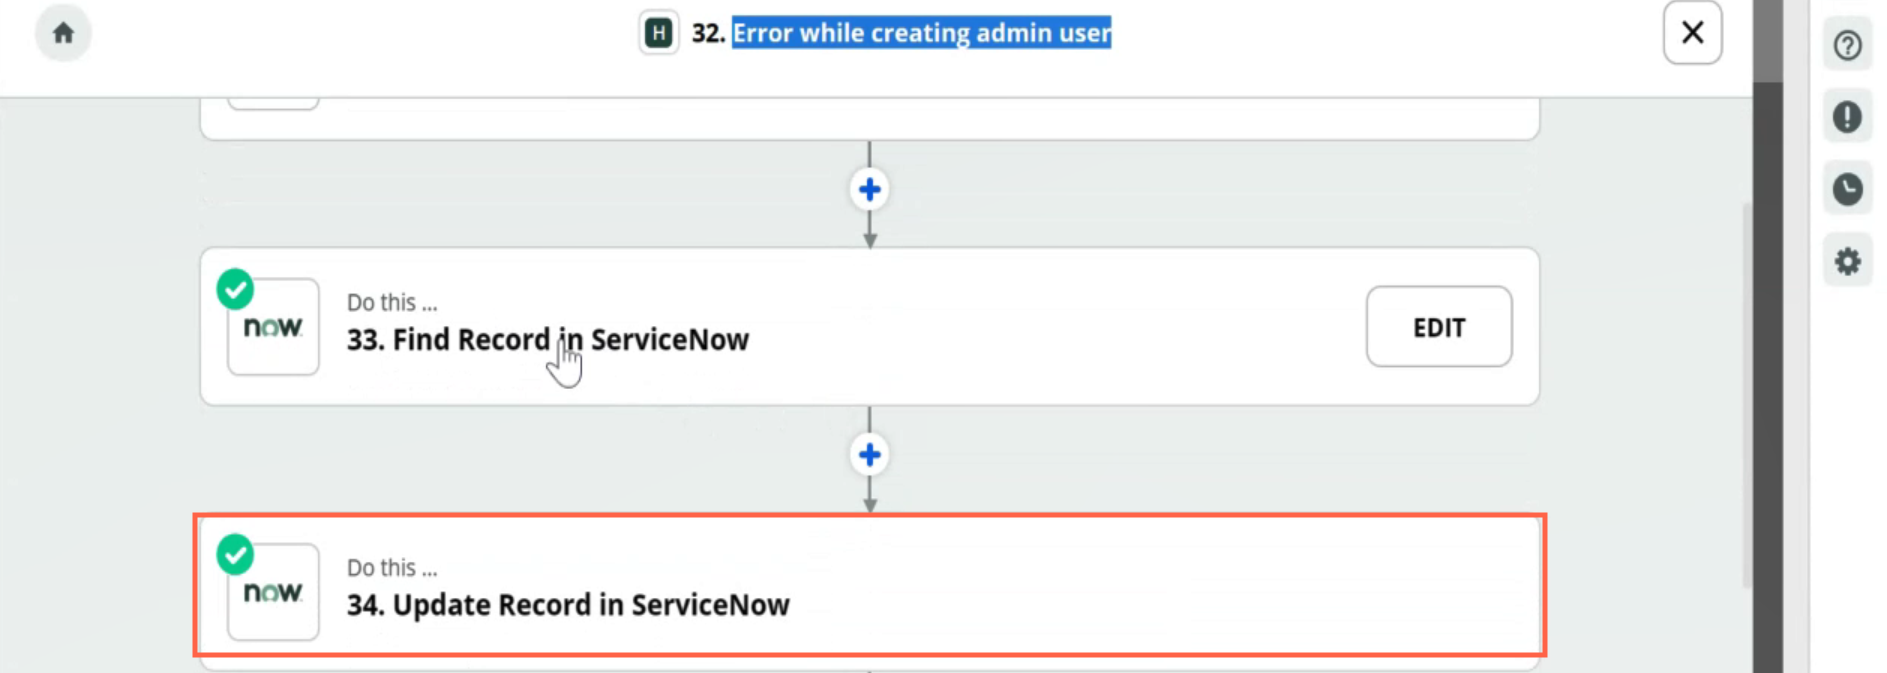
- Under Do this, the name of the action for the path is displayed.
- Choose App & Event: Displays the following details as defined in the template.
- Choose App: Displays the application where you want the action to happen (for example, ServiceNow).
- Choose Action: Displays the action to be performed in the application (for example, Update Record).
- Choose Account: To capture the specified event in ServiceNow, you must log in to ServiceNow. This field is populated by default if you have logged in to the application previously.
- Customize Record: Displays the table name that triggers the ServiceNow Zap, when it is populated with new order records (for example, Purchase_order_CBC).
- Click Refresh Fields and CONTINUE.
- Send Data: Displays the test result. Click TEST & CONTINUE.
- Click Done Editing.
- Click Share Feedback.
If you are logging in for the first time, click Sign In to CloudBlue Commerce, provide the Auth token and your login credentials, and then click Allow to log in to the CloudBlue Commerce account where the action must occur. To log in to a different CloudBlue Commerce account, click +Add a New Account.
If you are logging in for the first time, click Sign In to ServiceNow, provide the necessary credentials, and then click Allow to log in to the ServiceNow account where the action must take place. To log in to a different ServiceNow account, click +Add a New Account.
If you are logging in for the first time, click Sign In to CloudBlue Commerce, provide the Auth token and your login credentials, and then click Allow to log in to a CloudBlue Commerce account where the action must take place. To log in to a different CloudBlue Commerce account, click +Add a New Account.
Click the action item. The following fields are populated by default based on the preconfigured template.
Click the action item and edit. The following fields are populated by default based on the preconfigured template.
Click the action item and edit. The following fields are populated by default based on the preconfigured template.
If you are logging in for the first time, click Sign In to ServiceNow, provide the necessary credentials, and then click Allow to log in to the ServiceNow account where the action must take place. To log in to a different ServiceNow account, click +Add a New Account.
Click the action item and edit. The following fields are populated by default based on the preconfigured template.
If you are logging in for the first time, click Sign In to ServiceNow, provide the necessary credentials, and then click Allow to log in to the ServiceNowServiceNow account where the action must take place. To log in to a different ServiceNow account, click +Add a New Account.
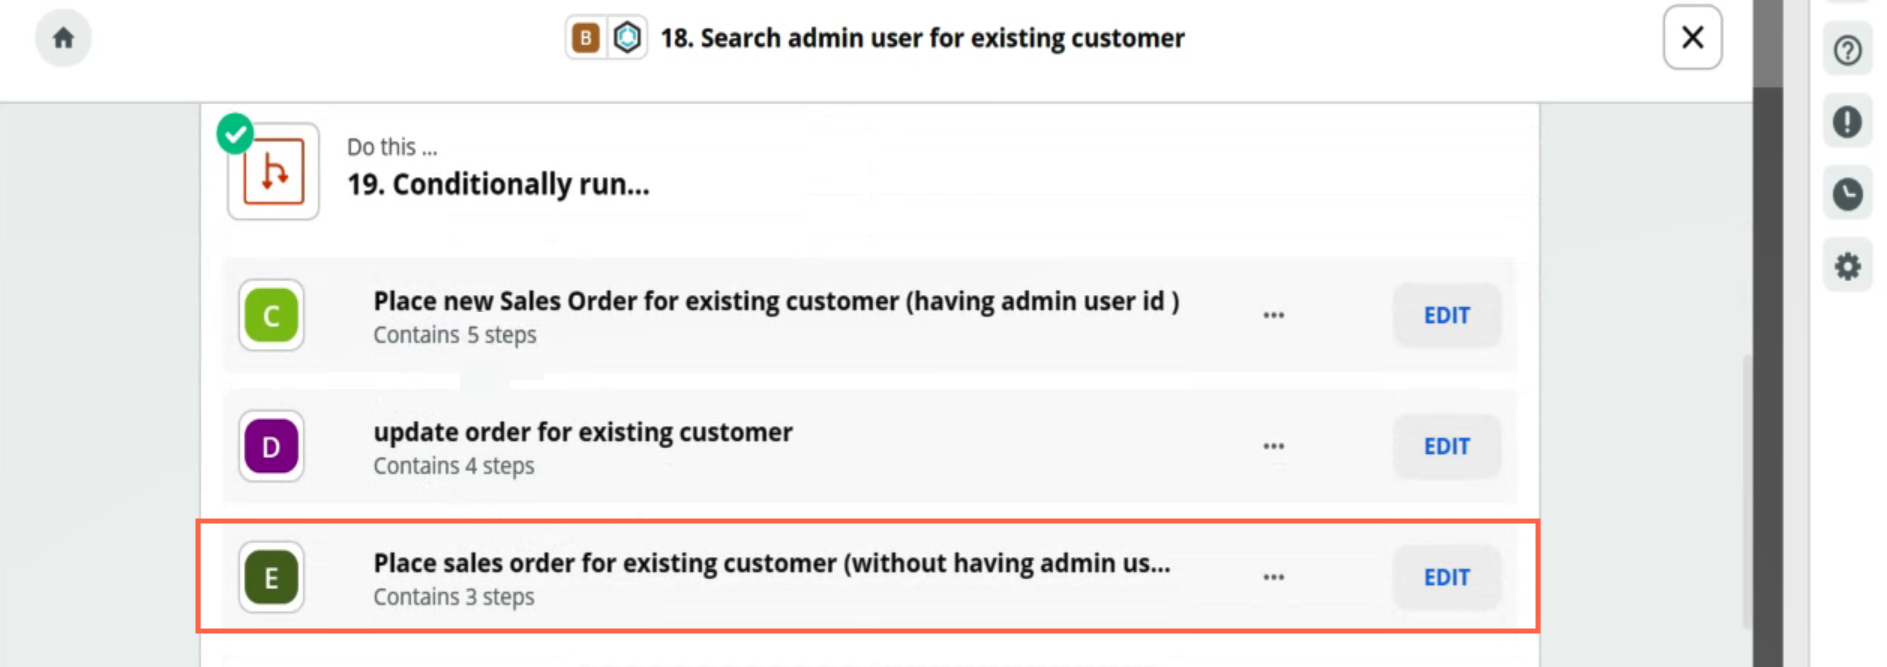
Place a sales order for an existing customer
To enable the path, complete the following steps:
- Under Conditionally Run, to edit the path, click EDIT.
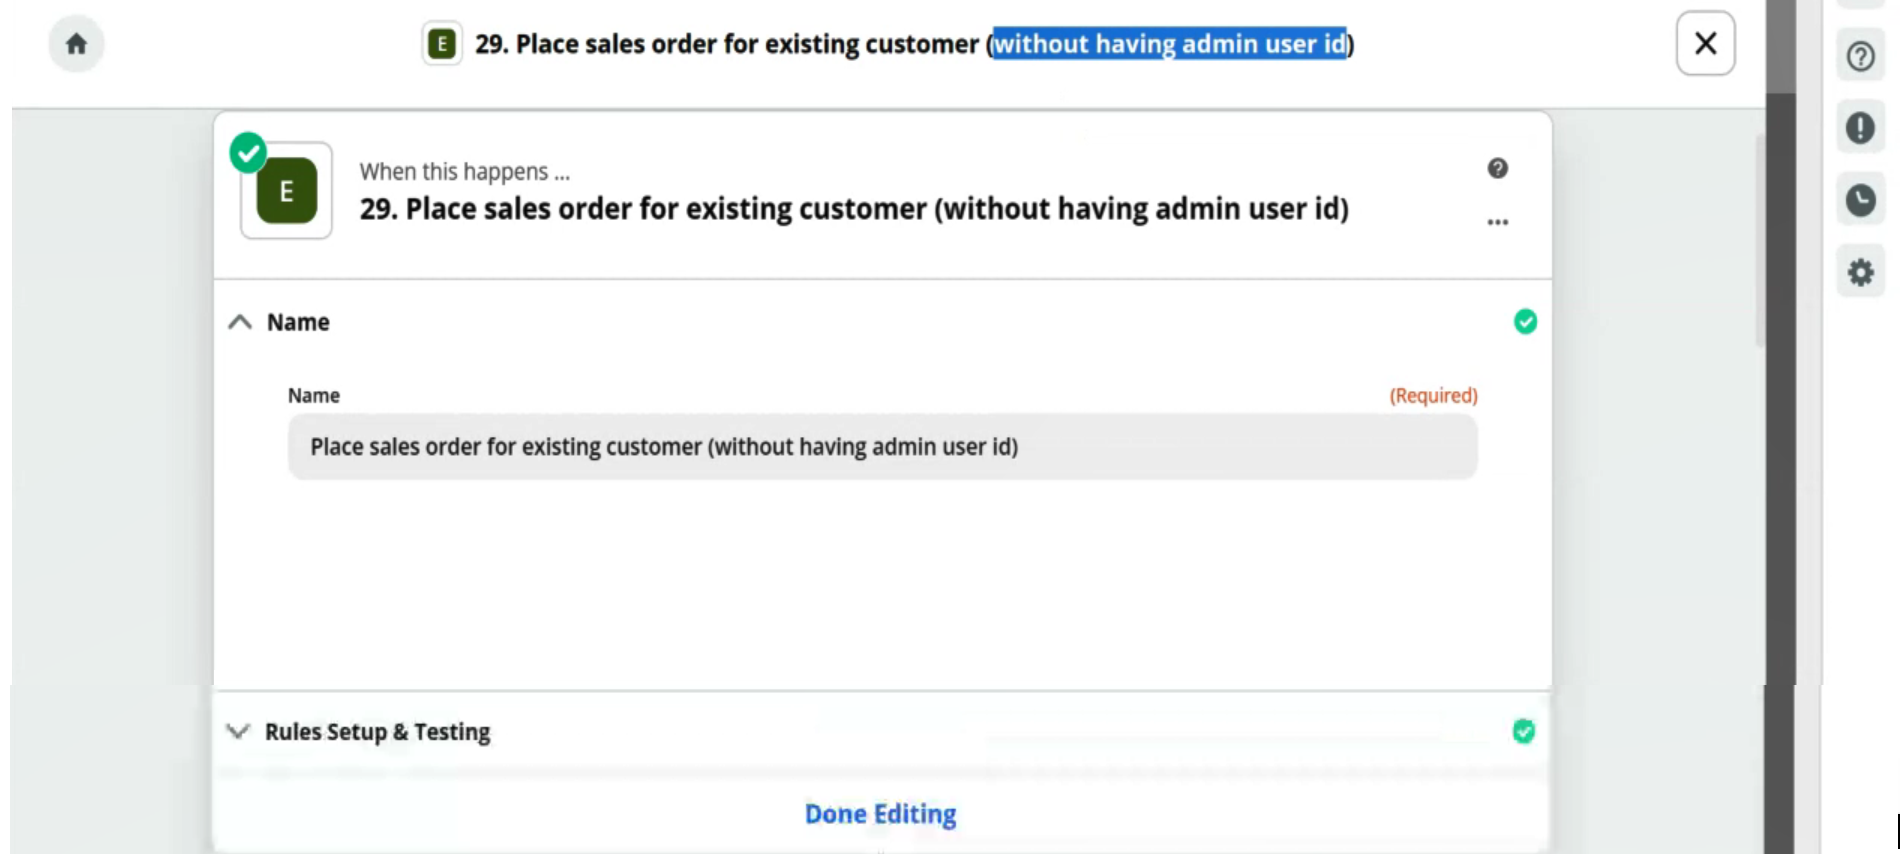
- On the edit page, under When this happens, the following fields are populated by default based on the preconfigured template.
- Name: The name of the trigger for the path is displayed.
- Rules Setup & Testing: Displays the rules for this trigger.
- The U Cbc option is preselected. This enables the Zap to capture the Customer ID in CloudBlue Commerce.
- The Customer ID option is selected. This enables the Zap to move to the next task even if the Customer ID is not available.
- Click Continue.
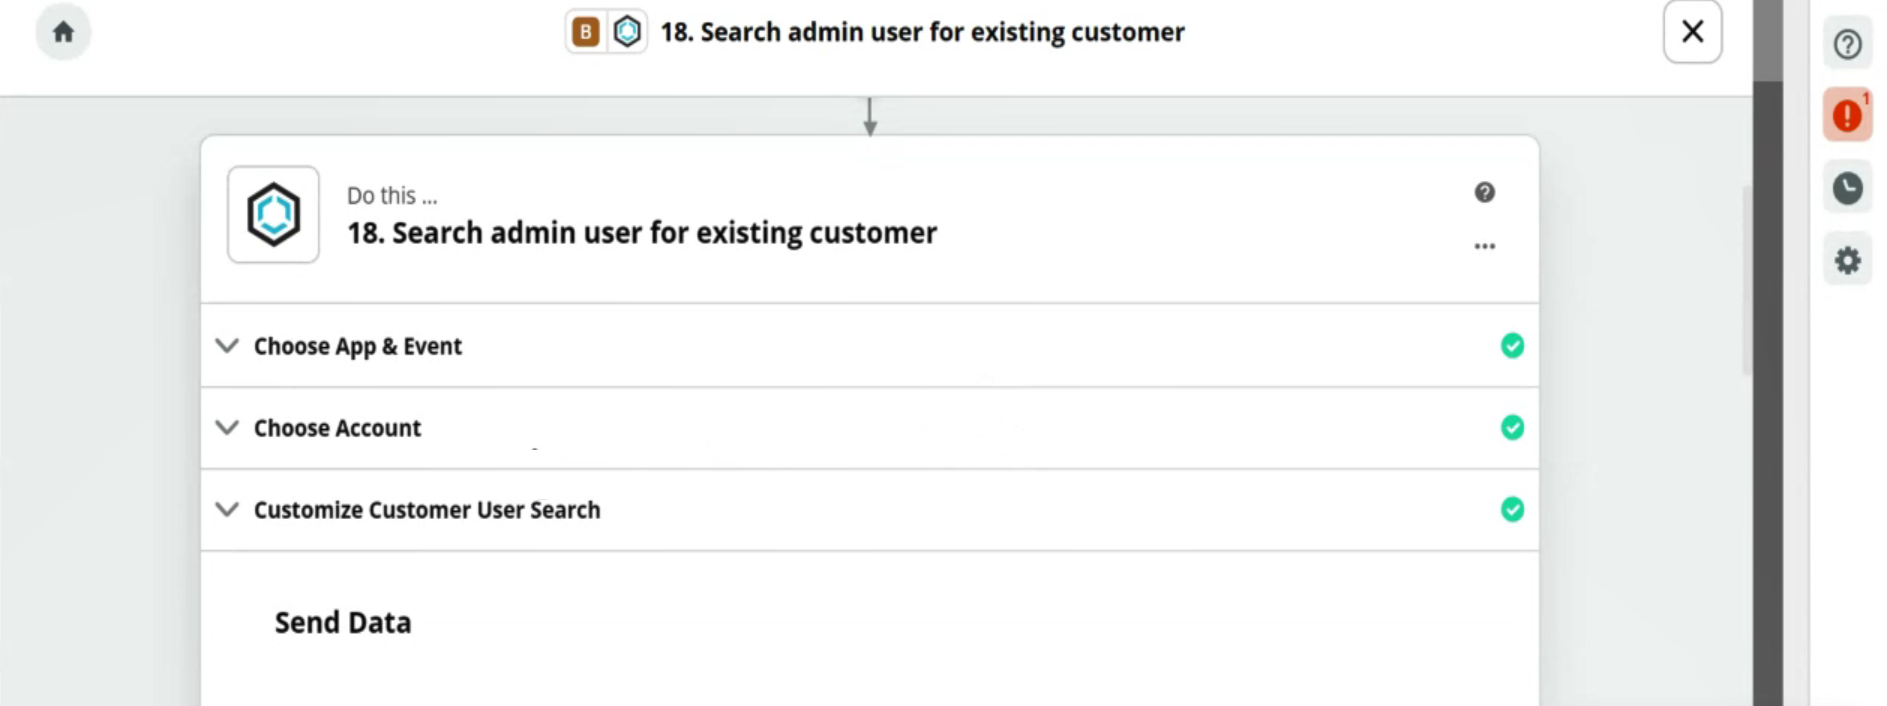
- Under Do this, the name of the action for the path is displayed.
- Choose App & Event: Displays the details as defined in the template:
- Choose App: Displays the application where you want the action to happen.
- Choose Action Event: Displays the action to be performed in the application.
- Click CONTINUE.
- Choose Account: .To add Purchase Request line items in CloudBlue Commerce you must log in to CloudBlue Commerce . This field is populated by default if you have logged in to the application previously.
- Click CONTINUE.
- Customize customer user search: Displays the search criteria to search a customer in CloudBlue Commerceorder.
- Click Refresh Fields & CONTINUE.
- Send Data: Displays the test result. Click TEST & CONTINUE.
- Click Done Editing.
- Under Conditionally run, to edit the path, click EDIT.
- On the edit page, under When this happens, the following fields are populated by default based on the preconfigured template.
- Name: Displays the name of the trigger for the path.
- Rules Setup & Testing: Displays the rules for this path.
- The U Cbc Order option is preselected. This enables the Zap to capture a Purchase Request in ServiceNow to create a sales order in CloudBlue Commerce based on.
- The User ID option is preselected. This enables the Zap to place an order if the user exists in CloudBlue Commerce.
- Click Continue.
- Click Done Editing to proceed.
- Under Do this, the name of the action for the path is displayed.
- Choose App & Event: Displays the details as defined in the template.
- Choose App: Displays the application where you want the action to happen.
- Choose Action Event: Displays the action to be performed in the application.
- Choose Account: To add Purchase Request line items in CloudBlue Commerce you must log in to CloudBlue Commerce . This field is populated by default if you have logged in to the application previously.
- Click CONTINUE.
- Customize Create New Customer: Displays the details as defined in the template.
- Click Refresh Fields and CONTINUE.
- Send Data: Displays the test result. Click TEST & CONTINUE.
- Click Done Editing.
- Under Do this, the name of the action for the path is displayed.
- Choose App & Event: Displays the details as defined in the template.
- Choose App: Displays the application where you want the action to happen.
- Choose Action Event: Displays the action to be performed in the application.
- Choose Account: To add Purchase Request line items in CloudBlue Commerce you must log in to CloudBlue Commerce . This field is populated by default if you have logged in to the application previously.
- Click CONTINUE.
- Customize Search Subscription: Displays the details as defined in the template.
- Click Refresh Fields and CONTINUE.
- Send Data: Displays the test result. Click TEST & CONTINUE.
- Click Done Editing.
- Under Do this, the name of the action for the path is displayed.
- Choose App & Event: Displays the details as defined in the template.
- Choose App: Displays the application where you want the action to happen.
- Choose Action Event: Displays the action to be performed in the application.
- Choose Account: To capture the specified event in ServiceNow, you must log in to ServiceNow. This field is populated by default if you have logged in to the application previously.
- Click CONTINUE.
- Customize Record: Displays the table name that triggers the ServiceNow Zap, when it is populated with new order records.
- Click Refresh Fields and CONTINUE.
- Send Data: Displays the test result. Click TEST & CONTINUE.
- Click Done Editing.
- Under Do this, the name of the action for the path is displayed.
- Choose App & Event: Displays the details as defined in the template.
- Choose App: Displays the application where you want the action to happen.
- Choose Action Event: Displays the action to be performed in the application.
- Choose Account: To capture the specified event in ServiceNow, you must log in to ServiceNow. This field is populated by default if you have logged in to the application previously.
- Customize Record: Displays the table name that triggers the ServiceNow Zap, when it is populated with new order records.
- Click Refresh Fields and CONTINUE.
- Send Data: Displays the test result. Click TEST & CONTINUE.
- Click Done Editing.
- Under Conditionally run, to edit the path, click EDIT.
- On the edit page, under When this happens, the following fields are populated by default based on the preconfigured template.
- Name: Displays the name of the trigger for the path.
- Rules Setup & Testing: Displays the rules for this path.
- Click Continue.
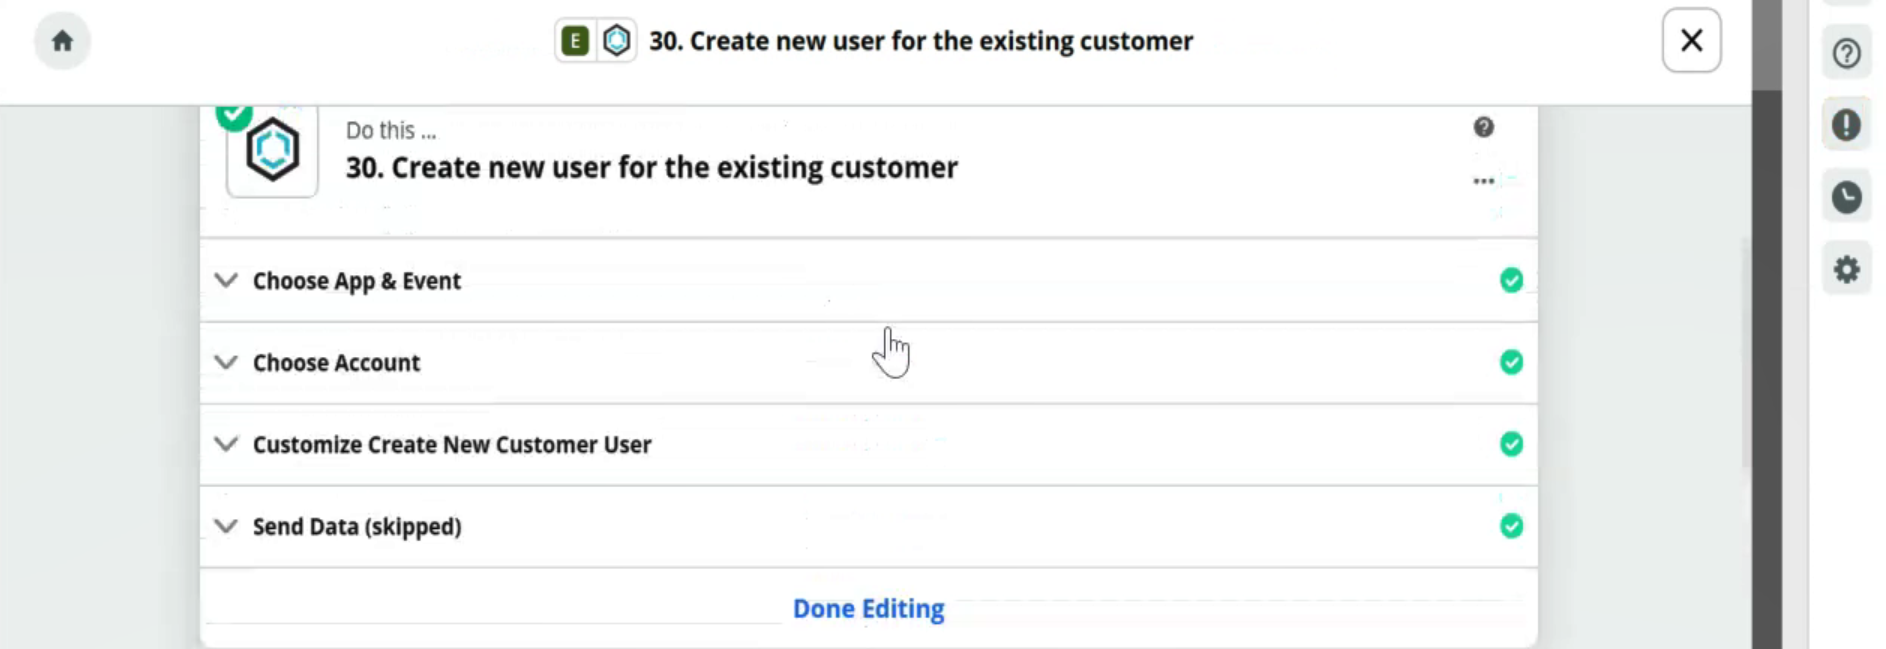
- Under Do this, the name of the action for the path is displayed.
- Choose App & Event: Displays the details as defined in the template.
- Choose App: Displays the application where you want the action to happen.
- Choose Action Event: Displays the action to be performed in the application.
- Choose Account: To add Purchase Request line items in CloudBlue Commerce you must log in to CloudBlue Commerce. This field is populated by default if you have logged in to the application previously.
- Customize Create New Customer User: Displays the details as defined in the template.
- Click Refresh Fields and CONTINUE.
- Send Data (skipped): Displays the test result. Click TEST & CONTINUE.
- Click Done Editing.
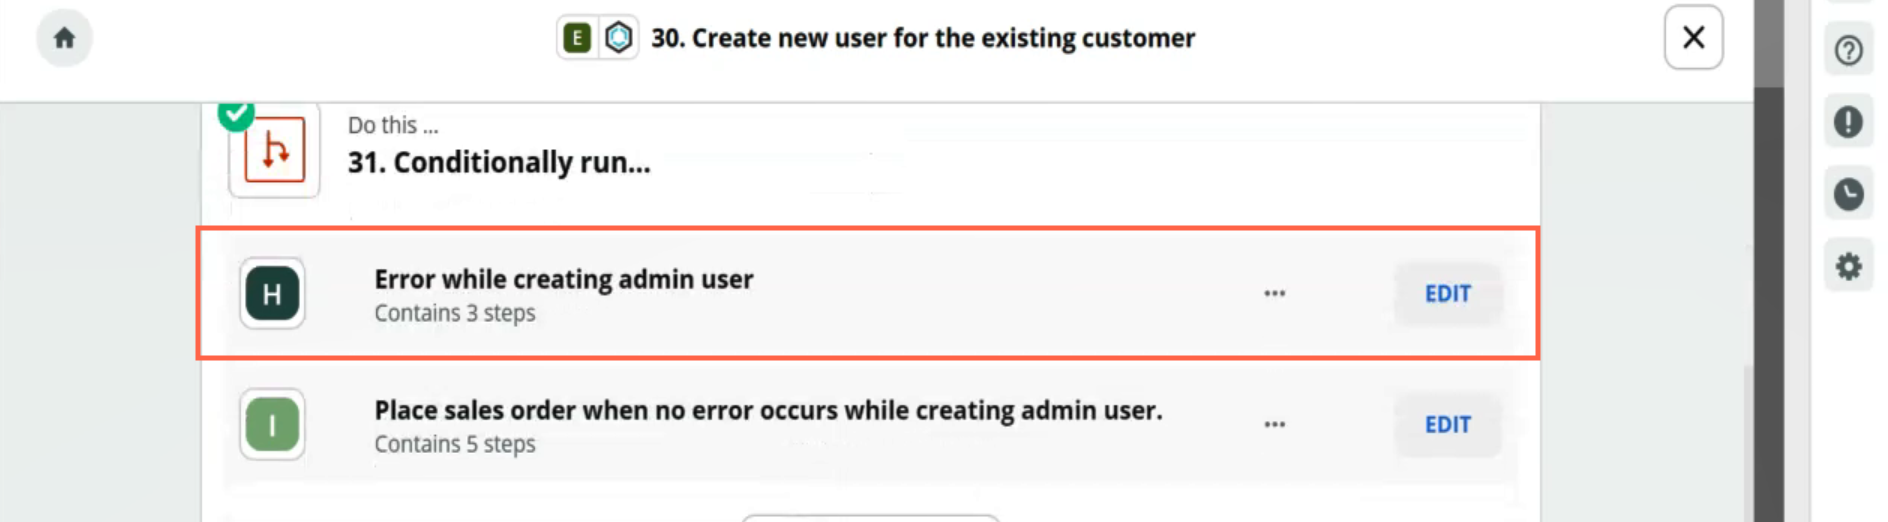
- Under Conditionally run, to edit the path, click EDIT.
- On the edit page, under When this happens, the following fields are populated by default based on the preconfigured template.
- Name: The name of the trigger for the path is displayed.
- Click CONTINUE.
- Rules Setup & Testing: Displays the rules for this trigger.
- Click Continue.
- Click Done Editing to proceed.
- Under Do this, the name of the action for the path is displayed.
- Choose App & Event: Displays the details as defined in the template.
- Choose App: Displays the application where you want the action to happen.
- Choose Action Event: Displays the action to be performed in the application.
- Choose Account: To capture the specified event in ServiceNow, you must log in to ServiceNow. This field is populated by default if you have logged in to the application previously.
- Click CONTINUE.
- Customize Record: Displays the table name that triggers the ServiceNow Zap, when it is populated with new order records.
- Click Refresh Fields and CONTINUE.
- Send Data: Displays the test result. Click TEST & CONTINUE.
- Click Done Editing.
- Under Do this, the name of the action for the path is displayed.
- Choose App & Event: Displays the details as defined in the template.
- Choose App: Displays the application where you want the action to happen.
- Choose Action Event: Displays the action to be performed in the application.
- Choose Account: To capture the specified event in ServiceNow, you must log in to ServiceNow. This field is populated by default if you have logged in to the application previously.
- Customize Record: Displays the table name that triggers the ServiceNow Zap, when it is populated with new order records.
- Click Refresh Fields and CONTINUE.
- Send Data: Displays the test result. Click TEST & CONTINUE.
- Click Done Editing.
- Under Conditionally run, to edit the path, click EDIT.
- On the edit page, under When this happens, the following fields are populated by default based on the preconfigured template.
- Name: The name of the trigger for the path is displayed.
- Click CONTINUE.
- Rules Setup & Testing: Displays the rules for this trigger.
- Click Continue.
- Click Done Editing to proceed.
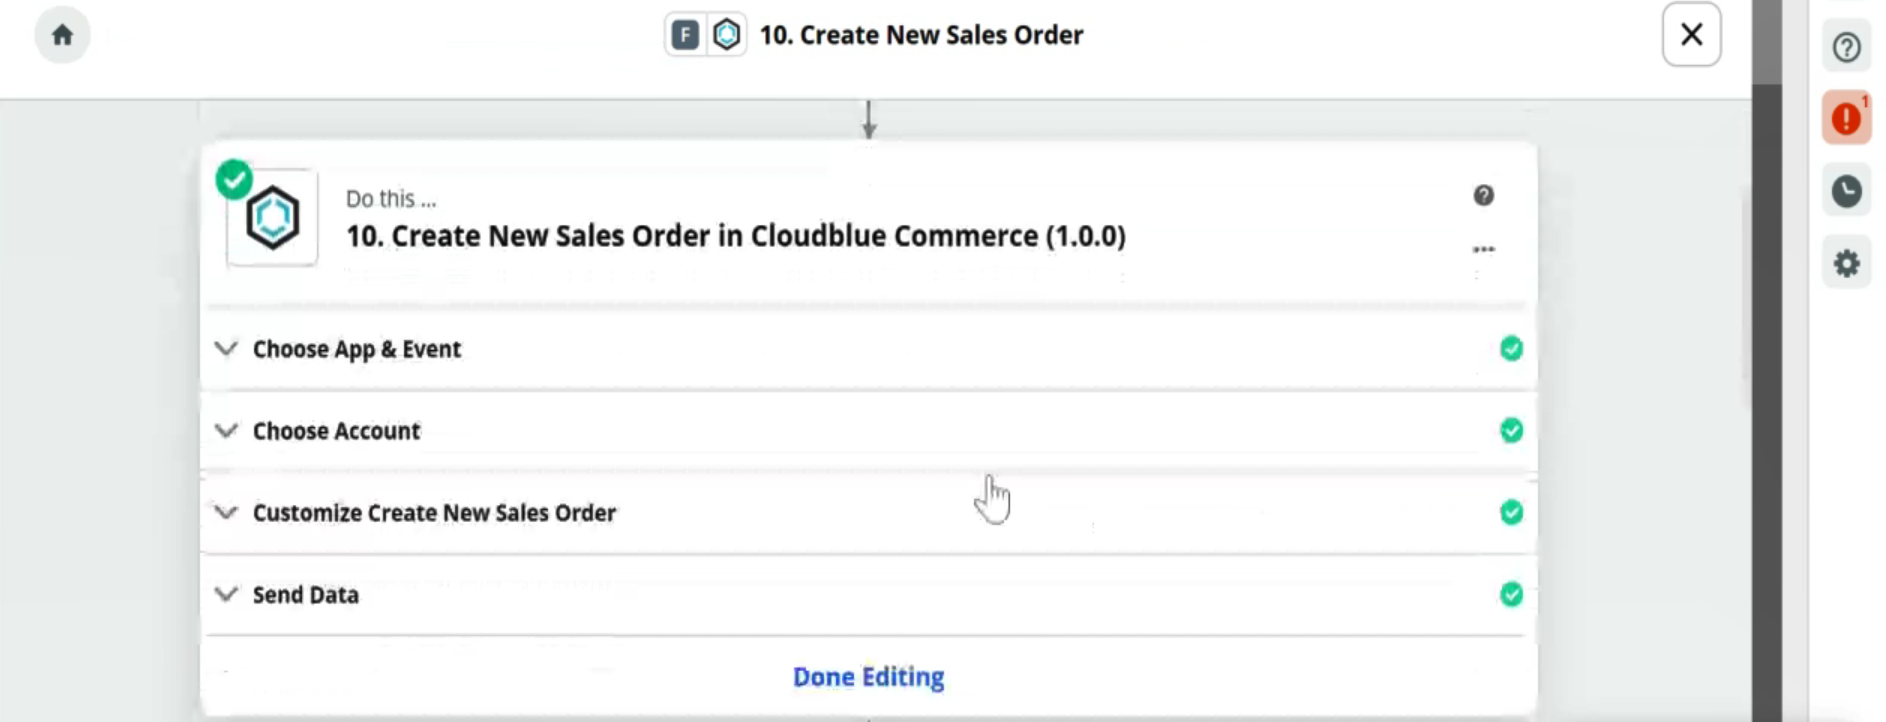
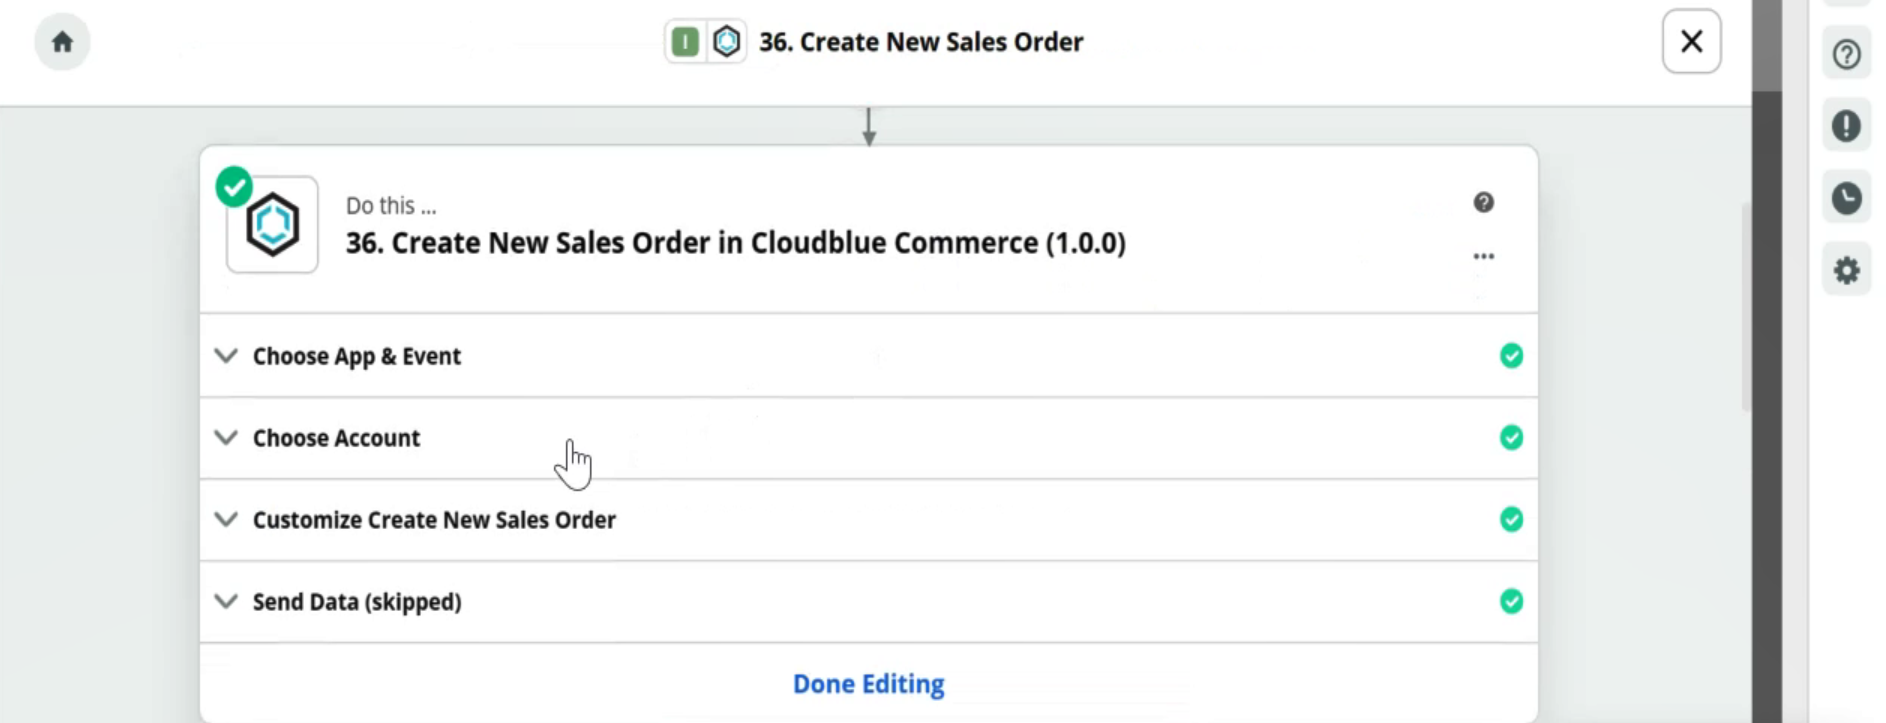
- Under Do this, the name of the action for the path is displayed.
- Choose App & Event: Displays the details as defined in the template.
- Choose App: Displays the application where you want the action to happen.
- Choose Action Event: Displays the action to be performed in the application.
- Choose Account: To add Purchase Request line items in CloudBlue Commerce you must log in to CloudBlue Commerce . This field is populated by default if you have logged in to the application previously.
- Click CONTINUE.
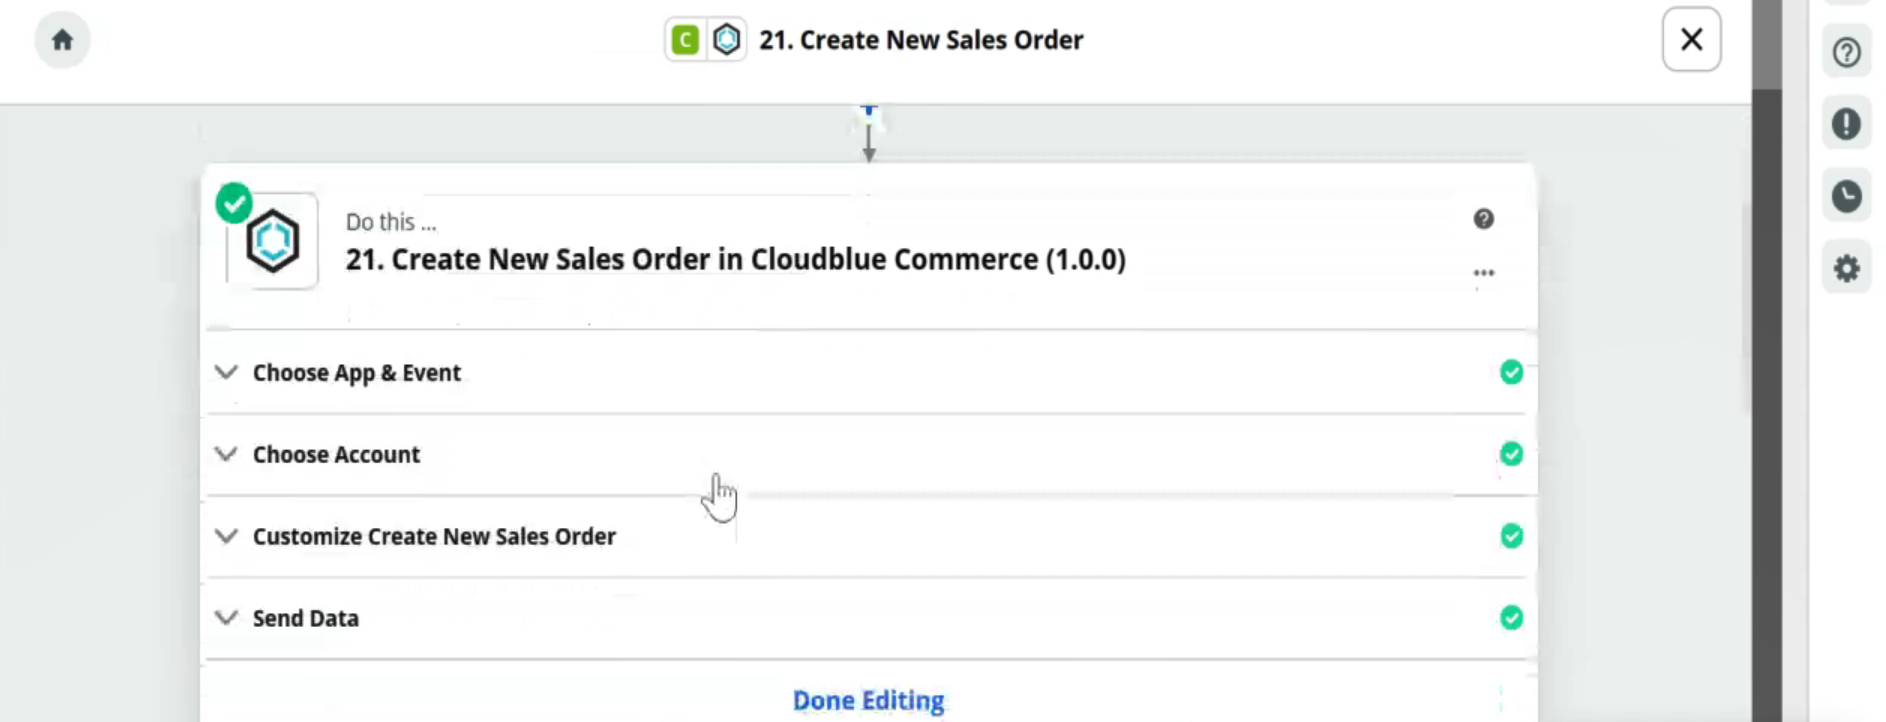
- Customize Create New Sales Order: Displays the details as defined in the template.
- Click Refresh Fields and CONTINUE.
- Send Data: Displays the test result. Click TEST & CONTINUE.
- Click Done Editing.
- Under Do this, the name of the action for the path is displayed.
- Choose App & Event: Displays the details as defined in the template.
- Choose App: Displays the application where you want the action to happen.
- Choose Action Event: Displays the action to be performed in the application.
- Choose Account: To add Purchase Request line items in CloudBlue Commerce you must log in to CloudBlue Commerce. This field is populated by default if you have logged in to the application previously.
- Click CONTINUE.
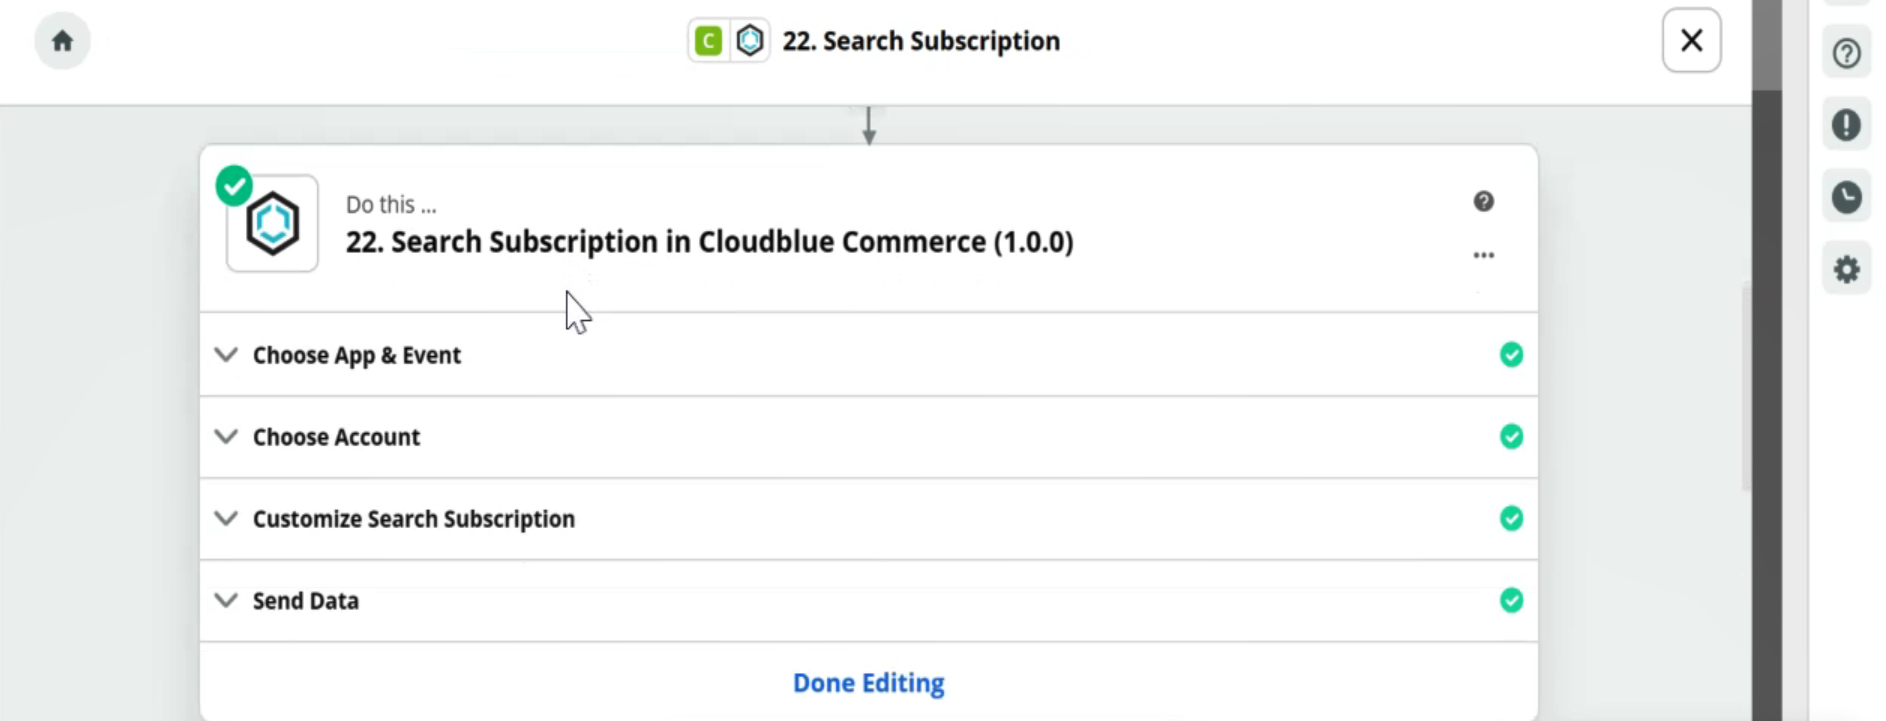
- Customize Search Subscription: Displays the details as defined in the template.
- Click Refresh Fields and CONTINUE.
- Send Data: Displays the test result. Click TEST & CONTINUE.
- Click Done Editing.
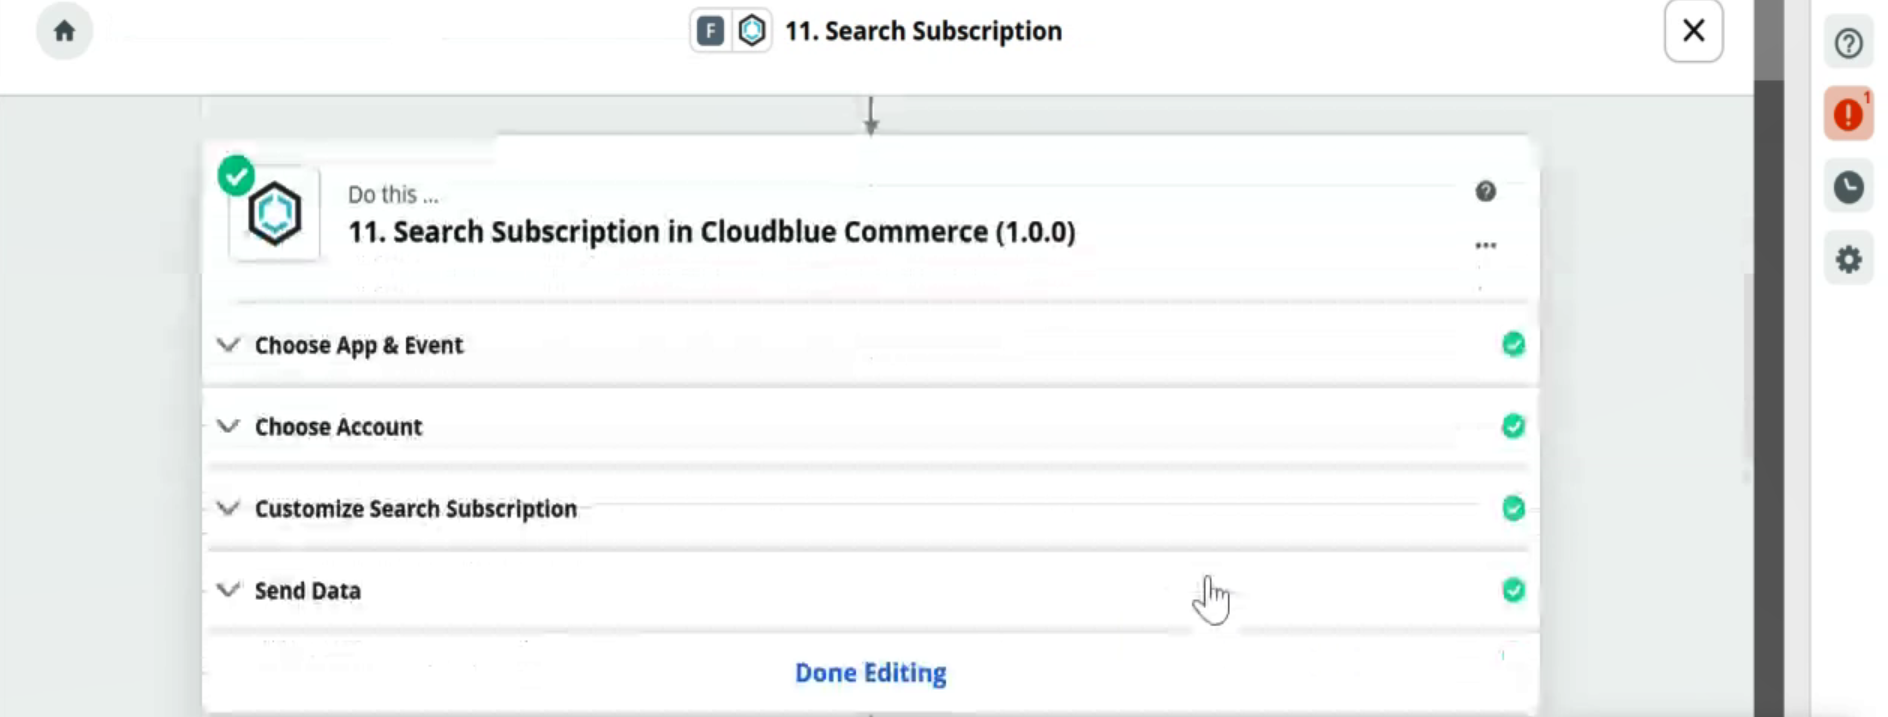
- Under Do this, the name of the action for the path is displayed.
- Choose App & Event: Displays the details as defined in the template.
- Choose App: Displays the application where you want the action to happen.
- Choose Action Event: Displays the action to be performed in the application.
- Choose Account: To capture the specified event in ServiceNow, you must log in to ServiceNow. This field is populated by default if you have logged in to the application previously.
- Click CONTINUE.
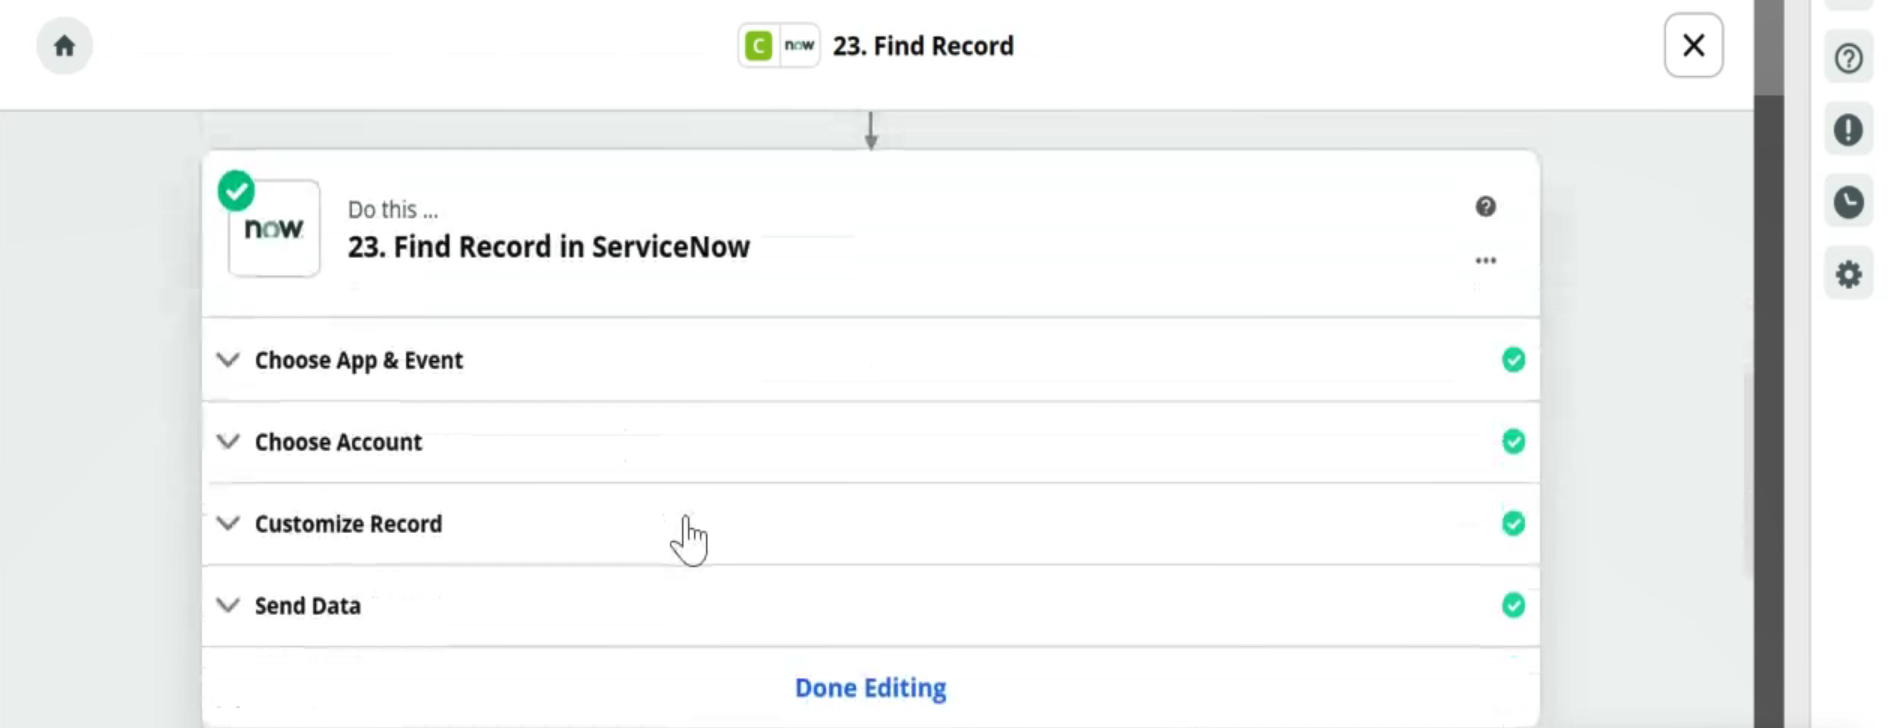
- Customize Record: Displays the table name that triggers the ServiceNow Zap, when it is populated with new order records.
- Click Refresh Fields and CONTINUE.
- Send Data: Displays the test result. Click TEST & CONTINUE.
- Click Done Editing.
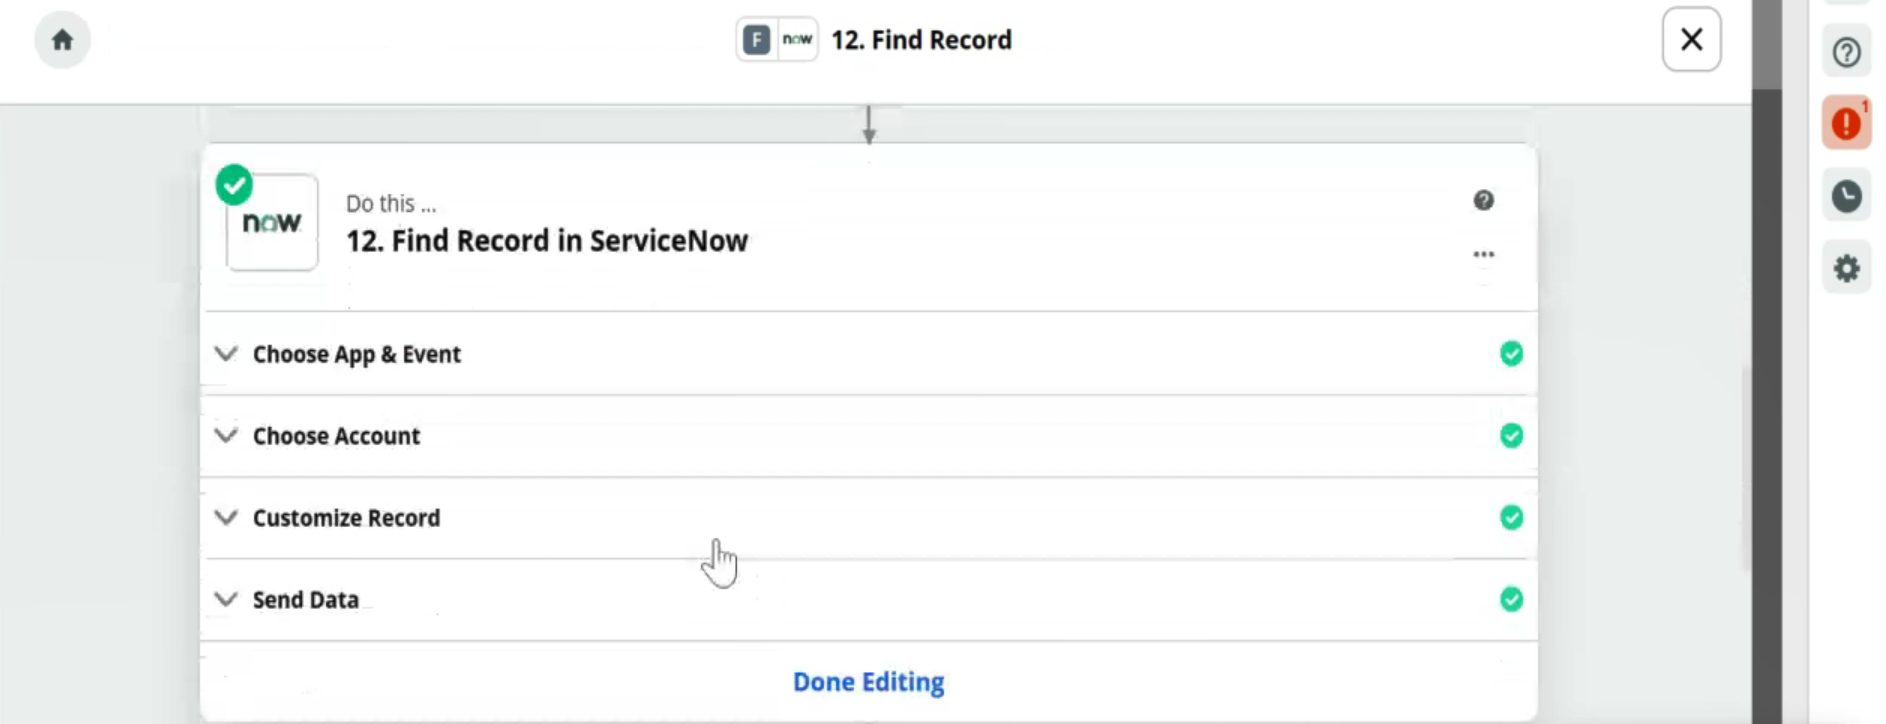
- Under Do this, the name of the action for the path is displayed.
- Choose App & Event: Displays the details as defined in the template.
- Choose App: Displays the application where you want the action to happen.
- Choose Action Event: Displays the action to be performed in the application.
- Choose Account: To capture the specified event in ServiceNow, you must log in to ServiceNow. This field is populated by default if you have logged in to the application previously.
- Customize Record: Displays the table name that triggers the ServiceNow Zap, when it is populated with new order records.
- Click Refresh Fields and CONTINUE.
- Send Data: Displays the test result. Click TEST & CONTINUE.
- Click Done Editing.
- Click Share Feedback.
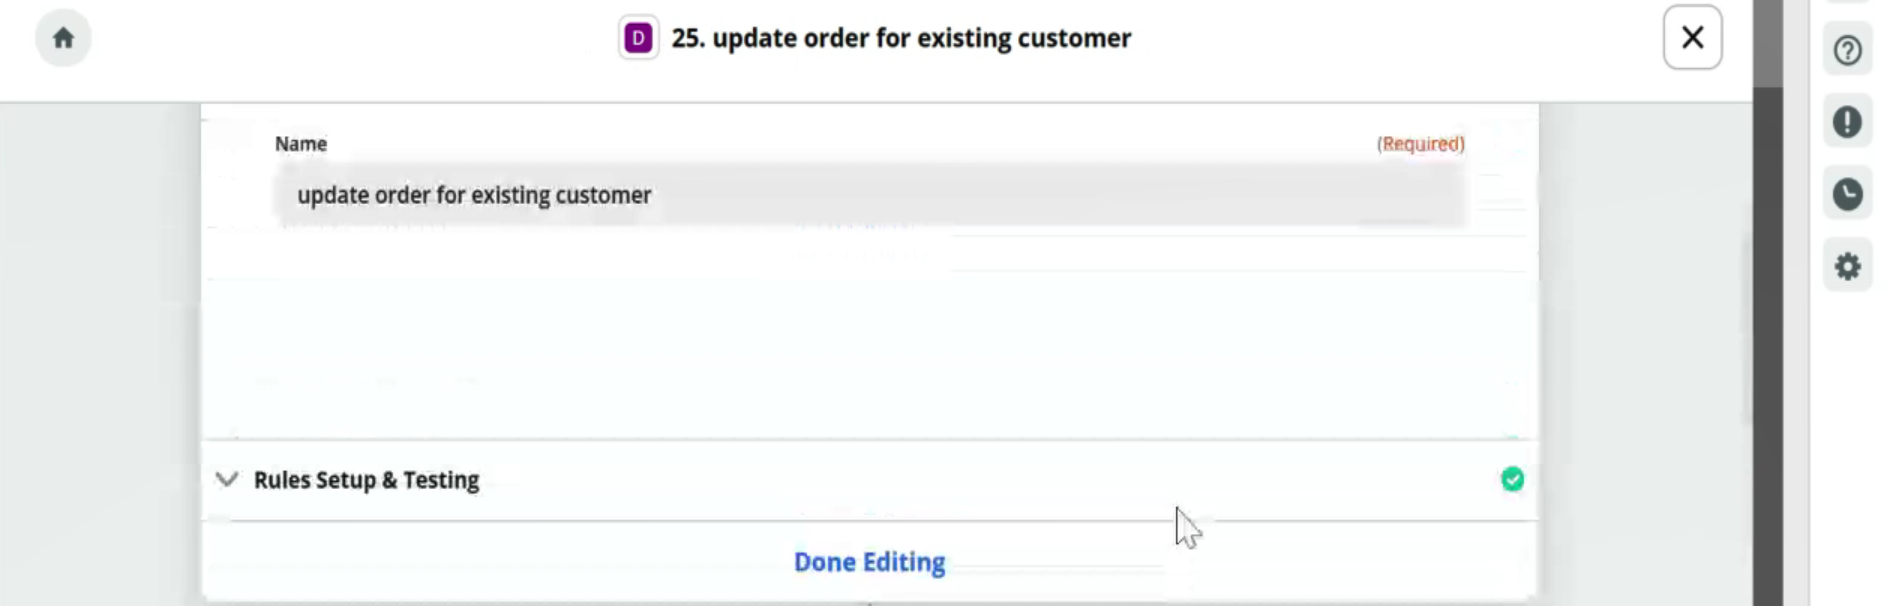
- Under Conditionally run, to edit the path, click EDIT.
- On the edit page, under When this happens, the following fields are populated by default based on the preconfigured template:
- Name: The name of the trigger for the path is displayed.
- Click CONTINUE.
- Rules Setup & Testing: Displays the rules for this trigger.
- Click Continue.
- Click Done Editing to proceed.
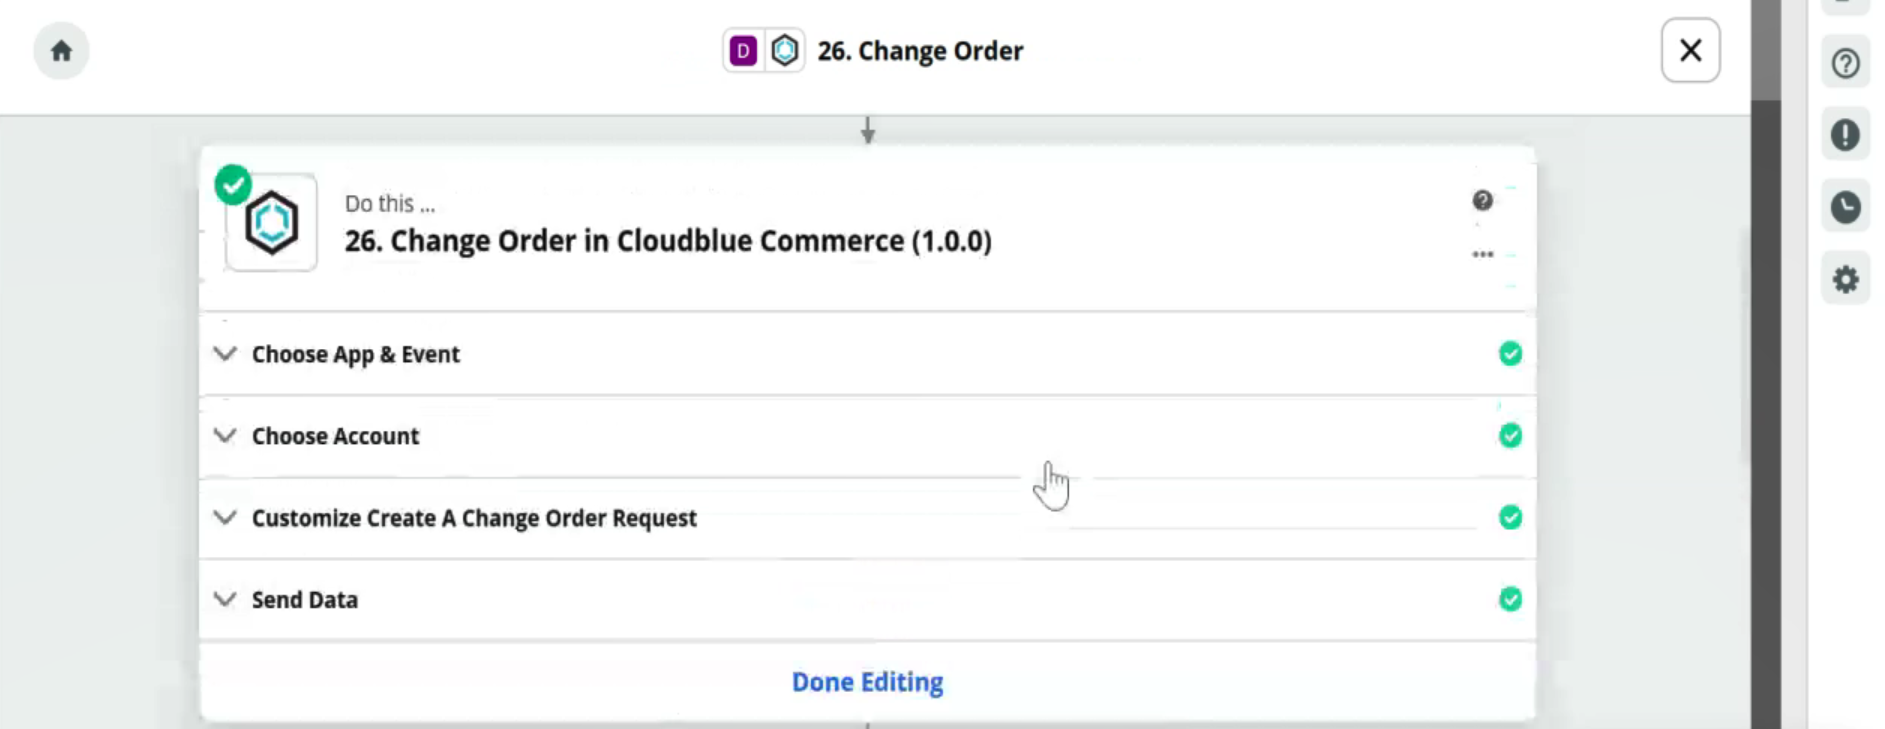
- Under Do this, the name of the action for the path is displayed.
- Choose App & Event: Displays the details as defined in the template.
- Choose App: Displays the application where you want the action to happen.
- Choose Action Event: Displays the action to be performed in the application.
- Choose Account: To add Purchase Request line items in CloudBlue Commerce you must log in to CloudBlue Commerce . This field is populated by default if you have logged in to the application previously.
- Click CONTINUE.
- Customize Create a Change Order Request: Displays the details as defined in the template.
- Click Refresh Fields and CONTINUE.
- Send Data: Displays the test result. Click TEST & CONTINUE.
- Click Done Editing.
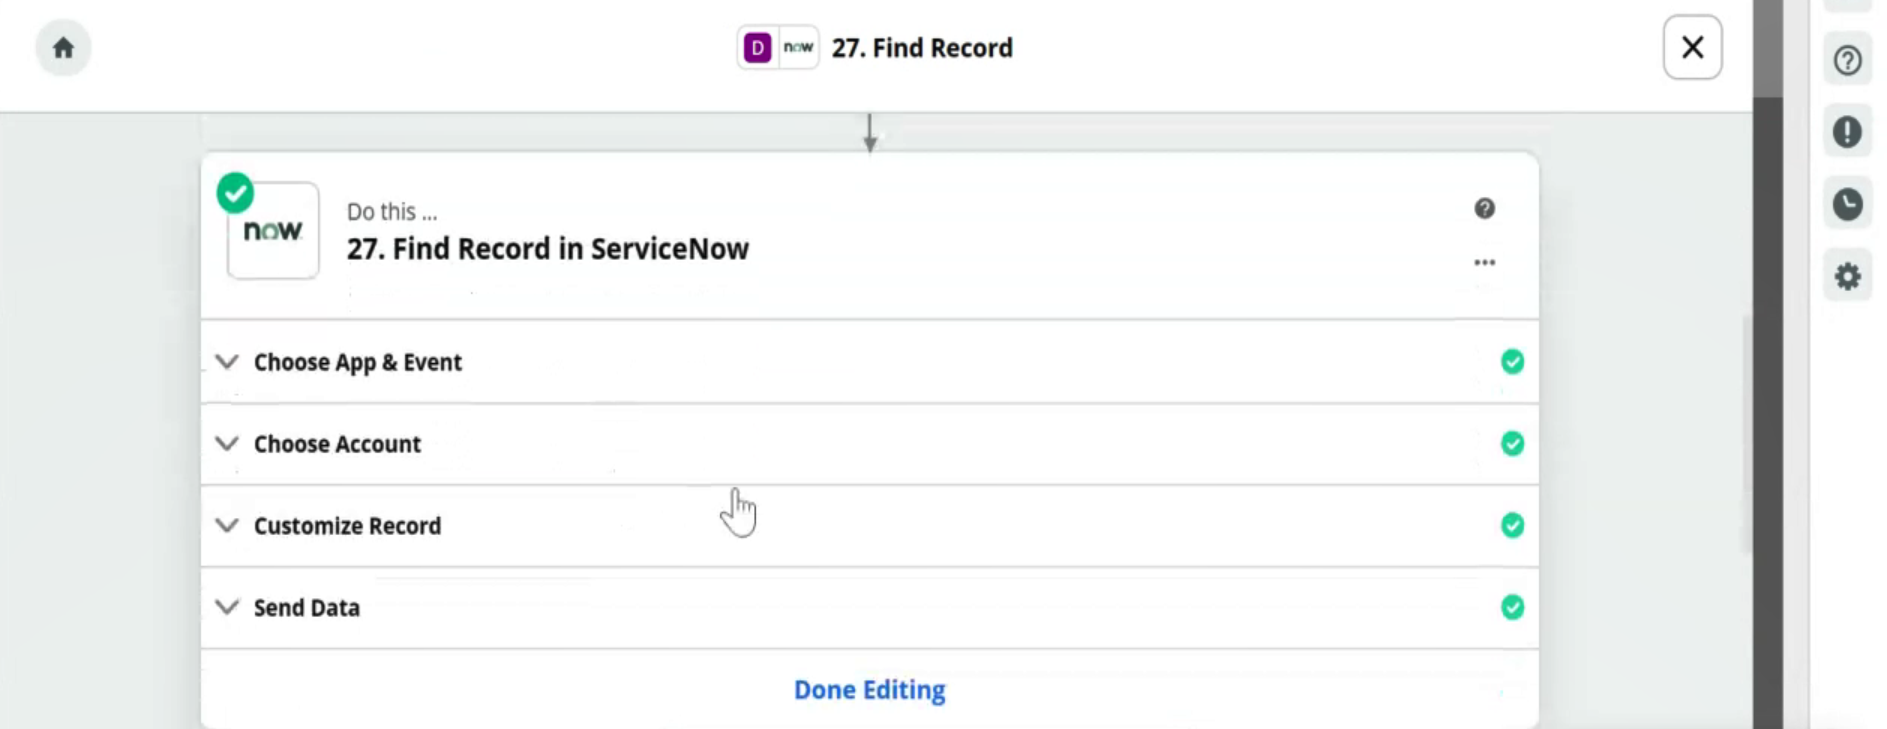
- Under Do this, the name of the action for the path is displayed.
- Choose App & Event: Displays the details as defined in the template.
- Choose App: Displays the application where you want the action to happen.
- Choose Action Event: Displays the action to be performed in the application.
- Choose Account: To capture the specified event in ServiceNow, you must log in to ServiceNow. This field is populated by default if you have logged in to the application previously.
- Click CONTINUE.
- Customize Record: Displays the table name that triggers the ServiceNow Zap, when it is populated with new order records.
- Click Refresh Fields and CONTINUE.
- Send Data: Displays the test result. Click TEST & CONTINUE.
- Click Done Editing.
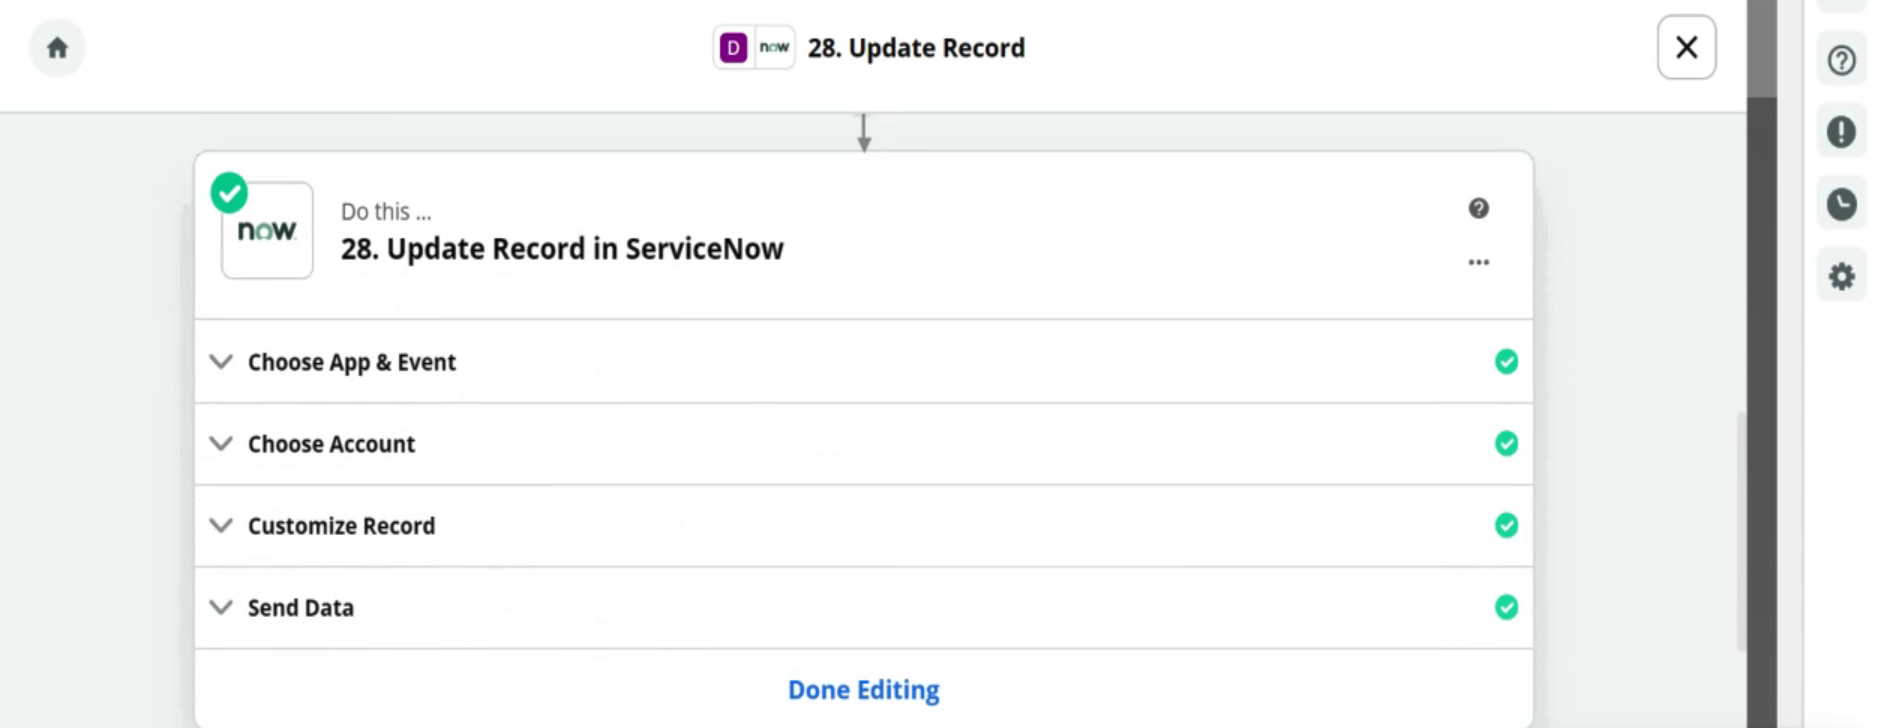
- Under Do this, the name of the action for the path is displayed.
- Choose App & Event: Displays the details as defined in the template.
- Choose App: Displays the application where you want the action to happen.
- Choose Action Event: Displays the action to be performed in the application.
- Choose Account: To capture the specified event in ServiceNow, you must log in to ServiceNow. This field is populated by default if you have logged in to the application previously.
- Customize Record: Displays the table name that triggers the ServiceNow Zap, when it is populated with new order records.
- Click Refresh Fields and CONTINUE.
- Send Data: Displays the test result. Click TEST & CONTINUE.
- Click Done Editing.
- Click Done Editing.
- Click Share Feedback.


Click the action item and edit. The following fields are populated by default based on the preconfigured template.
If you are logging in for the first time, click Sign In to CloudBlue Commerce, provide the necessary credentials, and then click Allow to log in to a CloudBlue Commerce account where the action must take place. To log in to a different ServiceNow account, click +Add a New Account.
In this scenario, the customer has no ID. So, the condition is selected as U Cbc Customer Id:No data.
Click the action item and edit. The following fields are populated by default based on the preconfigured template.
If you are logging in for the first time, click Sign In to CloudBlue Commerce, provide the necessary credentials, and then click Allow to log in to a CloudBlue Commerce account where the action must take place. To log in to a different ServiceNow account, click +Add a New Account.
Click the action item and edit. The following fields are populated by default based on the preconfigured template.
If you are logging in for the first time, click Sign In to ServiceNow, provide the necessary credentials, and then click Allow to log in to the ServiceNow account where the action must take place. To log in to a different ServiceNow account, click +Add a New Account.
Click the action item and edit. The following fields are populated by default based on the preconfigured template.

If you are logging in for the first time, click Sign In to ServiceNow, provide the necessary credentials, and then click Allow to log in to the ServiceNow account where the action must take place. To log in to a different ServiceNow account, click +Add a New Account.
In this scenario, the order number and user ID do not exist.
Click the action item and edit. The following fields are populated by default based on the preconfigured template.
If you are logging in for the first time, click Sign In to CloudBlue Commerce, provide the necessary credentials, and then click Allow to log in to a CloudBlue Commerce account where the action must take place. To log in to a different ServiceNow account, click +Add a New Account.
Click the action item and edit. The following fields are populated by default based on the preconfigured template.

If you are logging in for the first time, click Sign In to ServiceNow, provide the necessary credentials, and then click Allow to log in to the ServiceNow account where the action must take place. To log in to a different ServiceNow account, click +Add a New Account.
Click the action item and edit. The following fields are populated by default based on the preconfigured template.
If you are logging in for the first time, click Sign In to ServiceNow, provide the necessary credentials, and then click Allow to log in to the ServiceNow account where the action must take place. To log in to a different ServiceNow account, click +Add a New Account.

Click the action item and edit. The following fields are populated by default based on the preconfigured template.
If you are logging in for the first time, click Sign In to CloudBlue Commerce, provide the necessary credentials, and then click Allow to log in to a CloudBlue Commerce account where the action must take place. To log in to a different ServiceNow account, click +Add a New Account.
Click the action item and edit. The following fields are populated by default based on the preconfigured template.
If you are logging in for the first time, click Sign In to ServiceNow, provide the necessary credentials, and then click Allow to log in to the ServiceNow account where the action must take place. To log in to a different ServiceNow account, click +Add a New Account..
Click the action item and edit. The following fields are populated by default based on the preconfigured template.
If you are logging in for the first time, click Sign In to ServiceNow, provide the necessary credentials, and then click Allow to log in to the ServiceNow account where the action must take place. To log in to a different ServiceNow account, click +Add a New Account.
Click the action item and edit. The following fields are populated by default based on the preconfigured template.
If you are logging in for the first time, click Sign In to CloudBlue Commerce, provide the necessary credentials, and then click Allow to log in to a CloudBlue Commerce account where the action must take place. To log in to a different ServiceNow account, click +Add a New Account.
Click the action item and edit. The following fields are populated by default based on the preconfigured template.
If you are logging in for the first time, click Sign In to ServiceNow, provide the necessary credentials, and then click Allow to log in to the ServiceNow account where the action must take place. To log in to a different ServiceNow account, click +Add a New Account.
Click the action item and edit. The following fields are populated by default based on the preconfigured template.
If you are logging in for the first time, click Sign In to ServiceNow, provide the necessary credentials, and then click Allow to log in to the ServiceNow account where the action must take place. To log in to a different ServiceNow account, click +Add a New Account.
To configure CloudBlue Commerce to ServiceNow order flow, refer to Enable a Zap for CloudBlue Commerce to ServiceNow Order Management Flow.