Table Of Contents
Application Packaging Standard
Last updated 18-Mar-2019Update Resource
Continue the development of the presentation level.


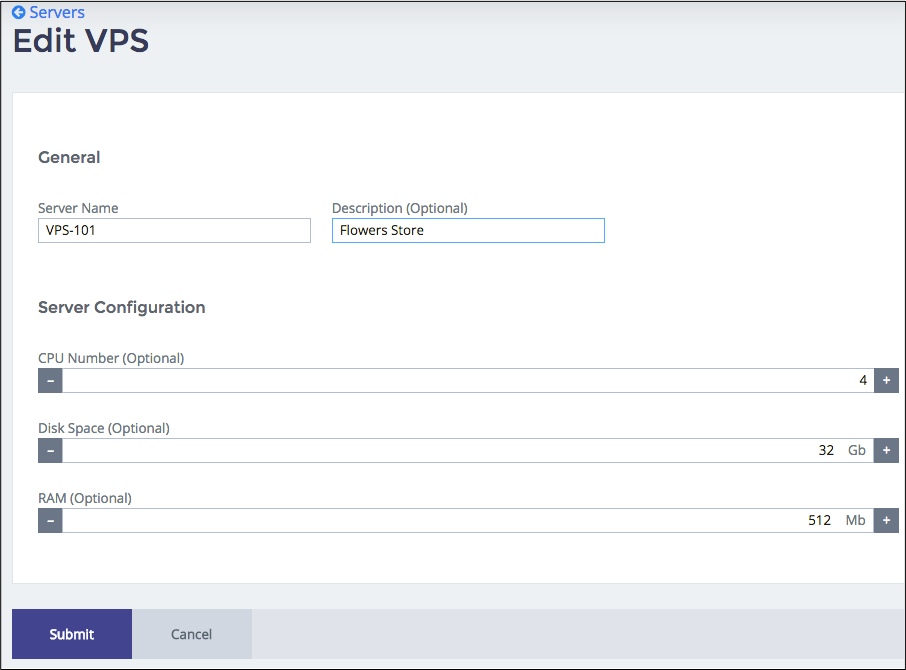
The application must provide an editor view that allows a customer to open a resource profile to update its properties.


In this document:
Design Recommendations
Typical structure of an editor is similar to the above described server creation view. The editor starts from the list of resources, when a user clicks on the resource to be edited. To get properties of the selected resource, the editor uses a navigation variable that carries the JSON representation of the selected resource.
The editor changes resource properties similar to the first step in the server creation procedure.
The differences are:
- The editor gets the initial data from the resource opened for editing. The navigation variable
declared in metadata brings the JSON representation of the resource to the editor
on its
onContextphase. It means, the editor must have theonContextmethod to assign correct initial data to the widgets. The editor will find the navigation variable as an element in the named structureaps.context.vars. The latter is available in any view. - As we are going to edit a resource in one step, you need neither the shared
aps.appstructure nor the flagisNew. - The editor should use the same store and model objects, but the final operation in the
onSubmithandler is to update the existing resource instead of creating a new one although in the code it is the sameputoperation of the store object.
The demo project illustrates implementation of the above recommendations.
Continue Your Demo Project
This section continues the demo project from its previous step. It illustrates creation of the VPS editor.
Follow these steps, when creating the server-edit.js source from scratch.
Create the custom JavaScript skeleton as follows:
define([
  "dojo/_base/declare",
  "dojo/when",
  "dojox/mvc/getPlainValue",
  "dojox/mvc/at",
  "dojox/mvc/getStateful",
  "aps/View",
  "aps/ResourceStore",
  "aps/json!./wizard/newvps.json",
  "./displayError"
], function (declare, when, getPlainValue, at, getStateful, View, Store,
      newVPS, displayError) {
   return declare(View, {
      init: function () {

         /* Declare data sources */

         /* Define and return widgets */
         return [

         ];
      },

      /* Define handlers for the navigation buttons */
      onCancel: function() {

      },
      onSubmit: function() {

      },

      /* Define the view flow methods */
      onContext: function() {

      }
  });
});
This view must read properties of the selected VPS from the APS controller. The data is available, when the
onContextfunction is called. Thus, we need to define this function in addition to theinitfunction.In the
initfunction, define a model for the VPS and initialize it from thenewvps.jsonfile:this.vpsModel = getStateful({"data": newVPS});
The
onContextfunction will redefine the model with the actual properties of the selected VPS.In the
initfunction, define widgets synced withthis.vpsModelfor setting VPS properties:return ["aps/Panel", { id: this.genId("edit_form") }, [ ["aps/FieldSet", { title: "General" }, [ ["aps/TextBox", { label: "Server Name", value: at(this.vpsModel.data, "name"), required: true }], ["aps/TextBox", { label: "Description", value: at(this.vpsModel.data, "description") }] ] ], ["aps/FieldSet", { title: "Server Configuration" }, [ ["aps/Spinner", { label: "CPU Number", minimum: 1, maximum: 16, value: at(this.vpsModel.data.hardware.CPU, "number"), step: 1 }], ["aps/Spinner", { label: "Disk Space", minimum: 1, maximum: 100, value: at(this.vpsModel.data.hardware, "diskspace"), legend: "Gb", step: 1 }], ["aps/Spinner", { label: "RAM", minimum: 128, maximum: 8192, value: at(this.vpsModel.data.hardware, "memory"), legend: "Mb", step: 128 }] ]] ]];
Define navigation button processing.
Cancel button:
onCancel: function() {
    aps.apsc.gotoView("servers");
},
The handler returns a user back to the
serversview.Submit button:
onSubmit: function() {

    var form = self.byId("edit_form");
    if (!form.validate()) {
       aps.apsc.cancelProcessing();
       return;
    }

    var vpsStore = new Store({
       target: "/aps/2/resources"
    });

    when(vpsStore.put(getPlainValue(this.vpsModel.data)),
       function() {
          aps.apsc.gotoView("servers");
       },
       displayError
    );
},
The handler stores the configured properties in the APS controller and then returns a user back to the
serversview. Preliminary, the method runs the page validation and error processing.
Define the
onContextfunction that must initialize the model with the VPS properties provided by the APS controller.onContext: function() { /* Update the model with actual data from the navigation variable */ this.vpsModel.set("data", aps.context.vars.vps); aps.apsc.hideLoading(); /* Mandatory call */ },
Note
The
aps.apsc.hideLoading()call is required in theonContextfunction to reset the “Loading” status.
Conclusion
This completes the APS application development cycle. If you experienced any issues when following
the project steps, you can download
the sample package and compare it with the demo package you have created.