Table Of Contents
Application Packaging Standard
Last updated 18-Mar-2019IDEA 1.0
The first generally available release comes with the following updates compared with the previous beta release:
- Compatible IDE platforms
- Deployment
- Synchronization with deployment targets
- PHP debugger
- Links to the platform control panel from the IDE navigation panel
- Application ID refactoring throughout the package
- Internationalization
In this document:
Compatible IDE platforms
To be compatible with the new version of the development tools, your existing Intellij IDEA installation must be based on one of the following IDE platforms on Windows, OS X, or Linux operating systems:
- IntelliJ IDEA 15
- PhpStorm 10, 2016.1, 2016.2
- PyCharm 5
- WebStorm 11
Deployment
To test a package on a platform lab system (deployment target), the developer should deploy the package on the system, configure a service template with resources, and then provision the resources to a test customer.
The IDE allows you to deploy a package (first of the above steps) directly. The process includes:
- Importing the package to the deployment target.
- Creating a requested APS application endpoint.
- Installing an APS application instance.
Follow these steps to deploy an APS package for the first time:
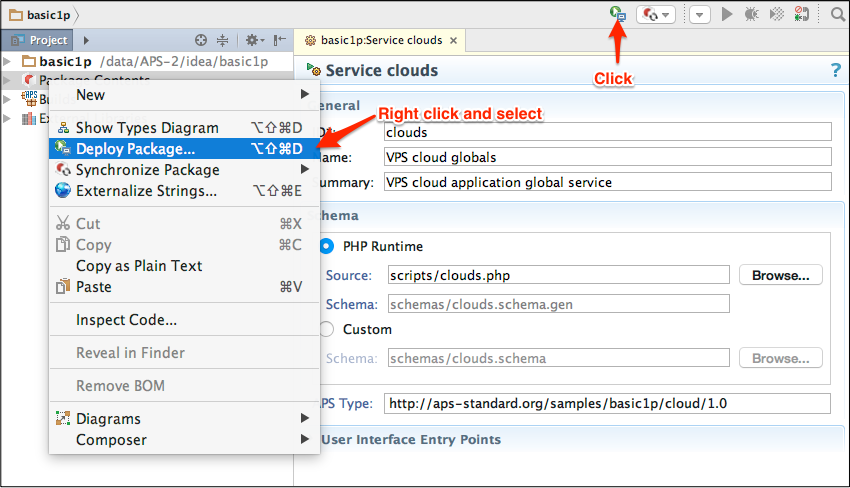
Once you have your APS project opened in IDE, use one of the following methods to initiate the deployment configuration:
- Right click on the Package Context folder and select the Deploy package.. item.
- Click on the Deploy Package icon in the toolbar.
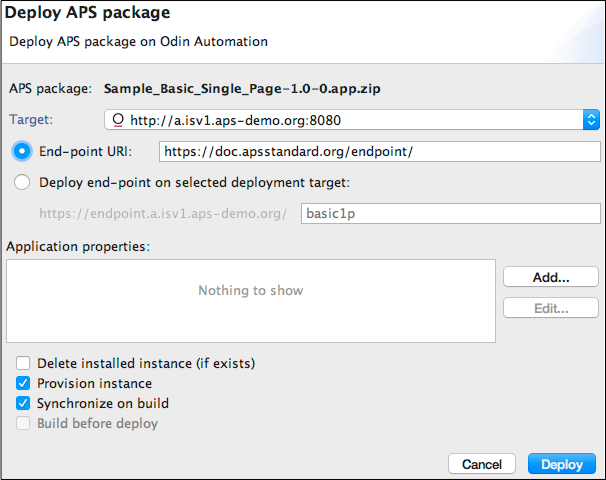
In the Deploy APS package pop-up window, assign a target by choosing one from the selection list. If the list is empty or you need a target different from those available in the list, click on the Target link to start the process of adding more targets or editing an existing target:
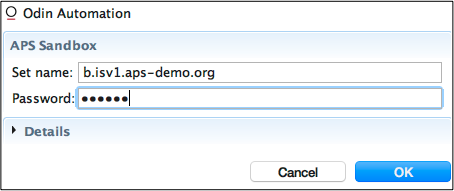
In the APS Deployment Targets pop-up window, you can add, edit, or remove targets. To add a target, click Add...
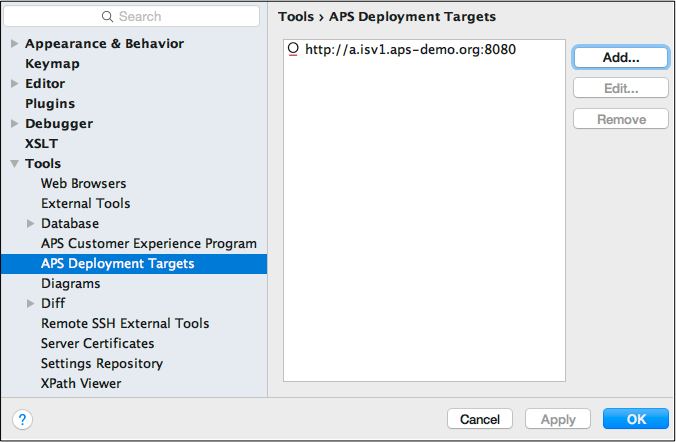
In the simplest case, for example when you use a developer sandbox, the name and password you set in the pop-up window would be enough to configure the whole deployment target. If you have to configure the target components individually, click Details to open the full configuration list.
In the full configuration list, configure the target interfaces individually and then click OK.

After you have the needed list of targets, click OK to save it. Select the newly configured target in the target selection list.
In the Deploy APS package pop-up window, complete the target configuration:
To deploy the application provisioning logic on the endpoint host, select the Deploy end-point on selected deployment target and specify the application endpoint suffix.
If the application root resource requires some parameters, add them in the Application properties list.
Specify necessary setup tasks by selecting the proper checkboxes:
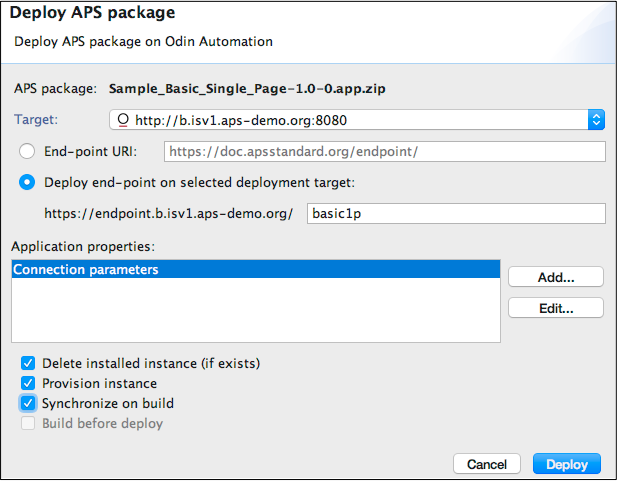
- Delete installed instance - removes all APS application instances on the specified APS application endpoint.
- Provision instance - install an APS application instance on the specified endpoint.
- Synchronize on build - start automatically package synchronization every time you build the package.
- Build before deploy - when you require a package deployment, start building the package before the deployment.
Start deployment by clicking Deploy.
The APS Deployment Console will show the logged process similar to this:
Deploying end-point...
Uploading scripts [OK]
Uploading APP-META.xml [OK]
Uploading setup-endpoint.sh [OK]
Set permissions to /tmp/setup-endpoint.sh [OK]
Setup end-point... [OK]
End-point https://endpoint.b.isv1.aps-demo.org/basic1p is configured successfully.
End-point files are located at /var/www/html/basic1p.
Configure PHP Remote Debug configuration [OK]
Starting debug configuration [OK]
Uploading Sample_Basic_Single_Page-1.0-0.app.zip... [OK] - OA AppID is 122 (from server)
OA AppID = 122
Check import status... [OK]
Installing application... [OK] - OA Application Instance ID = 13
Check installation status... [OK]
Open Odin Automation: http://b.isv1.aps-demo.org:8080
When you start the package deployment for the second and all subsequent times on the same target, the system will recognize the package and request you for one of the options:
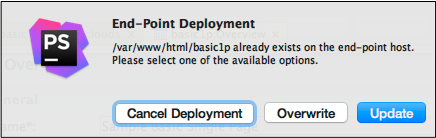
- Cancel Deployment - cancel the whole deployment process
- Overwrite - recreate the APS application endpoint along with the APS application instance
- Update - update application files on the endpoint host
Synchronization with Deployment Target
If you updated a package, you can sync the updates with the deployed package on the deployment target. Use one of the following ways to initiate the process:
- Right click on the Package Context folder and select the Synchronize Package item, and then select the node to sync with.
- Click on the Synchronize Package icon in the toolbar.
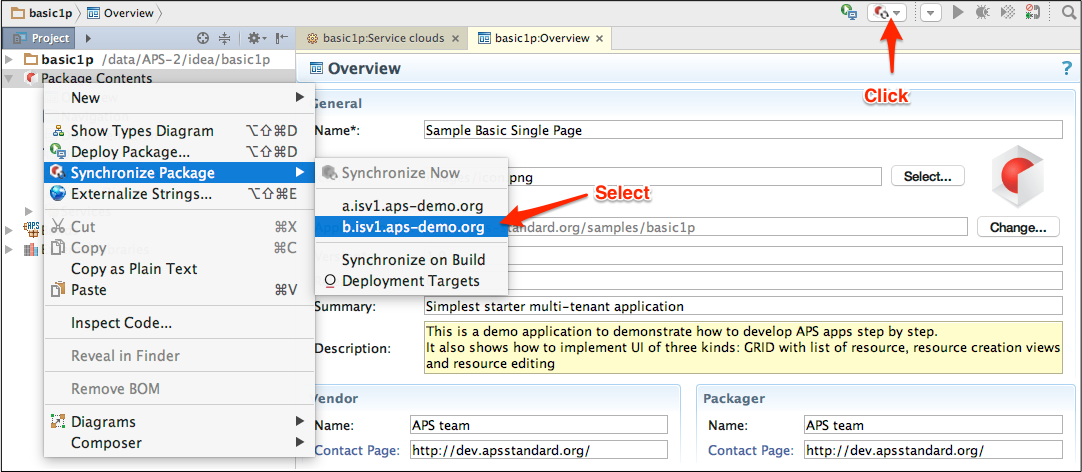
The process will start immediately.
Instead of syncing the package manually, you can set the Synchronize on build option when configuring the deployment process. More over, you can start the package building automatically by selecting the Build Automatically option in the Build menu. In the latter case, after you update a file and save it, the IDE will build the package and then sync it with the depoyment target.
PHP Debugger
The PHP debugger embedded into IDE allows you to debug PHP scripts on the application backend (provisioning scripts). For this purpose, the IDE must have an open TCP port to accept external connections from the APS application instance. If the default port 9000 is busy on your local computer, set another free TCP port:
Open the PhpStorm preferences and navigate to Languages & Frameworks > PHP > Debug.
In the Xdebug section, set the needed Debug port.
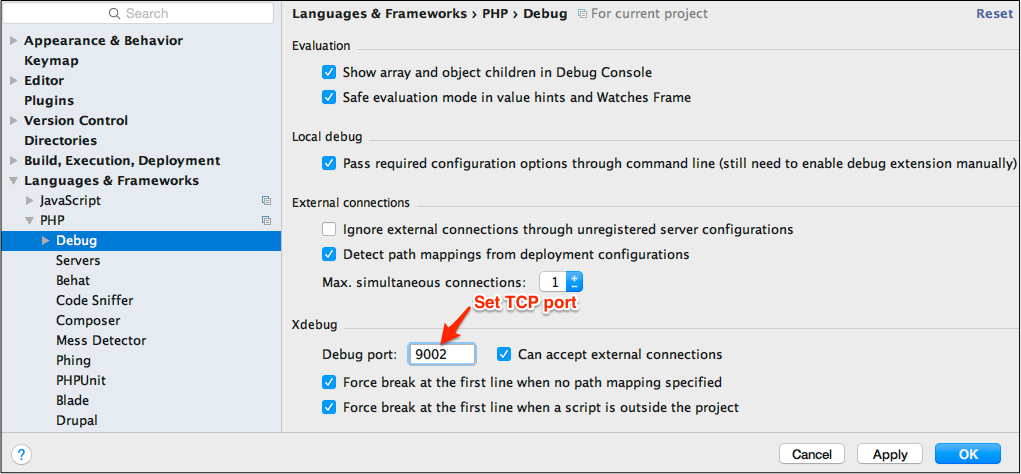
Click OK to save the configuration.
Run the new deployment or update an existing deployed package on the deployment target.
The debugging process looks as follows.
Ensure the package is deployed on a deployment target. Application resources can be provisioned or not depending on the provisioning operation you are debugging. For example, if the provisioning logic cannot install even an application instance, then there are no application resources yet and you have to debug the corresponding script responsible for it.
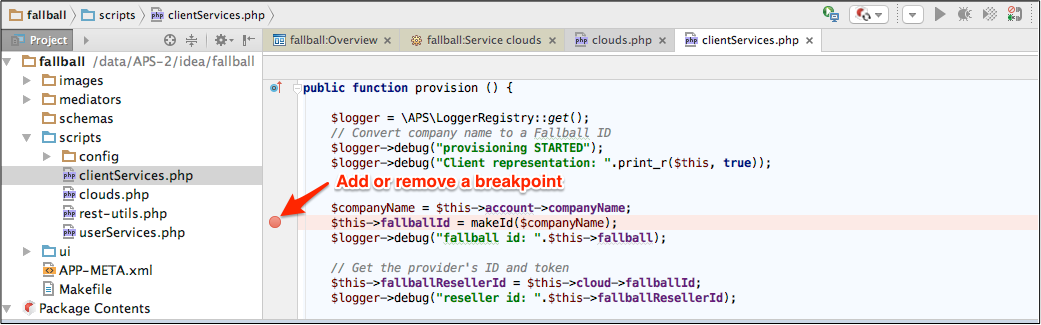
In IDE, open the respective PHP script and set debug breakboints there. To set a breakpoint on a line, click on the sidebar opposite this line.
Sync the package update with the deployment target.
Run the operation you are going to debug. For example, open the control panel on the deployment target and start provisioning or unprovisioning of a resource.
The provisioning PHP script must stop on the breakpoint as in this example:
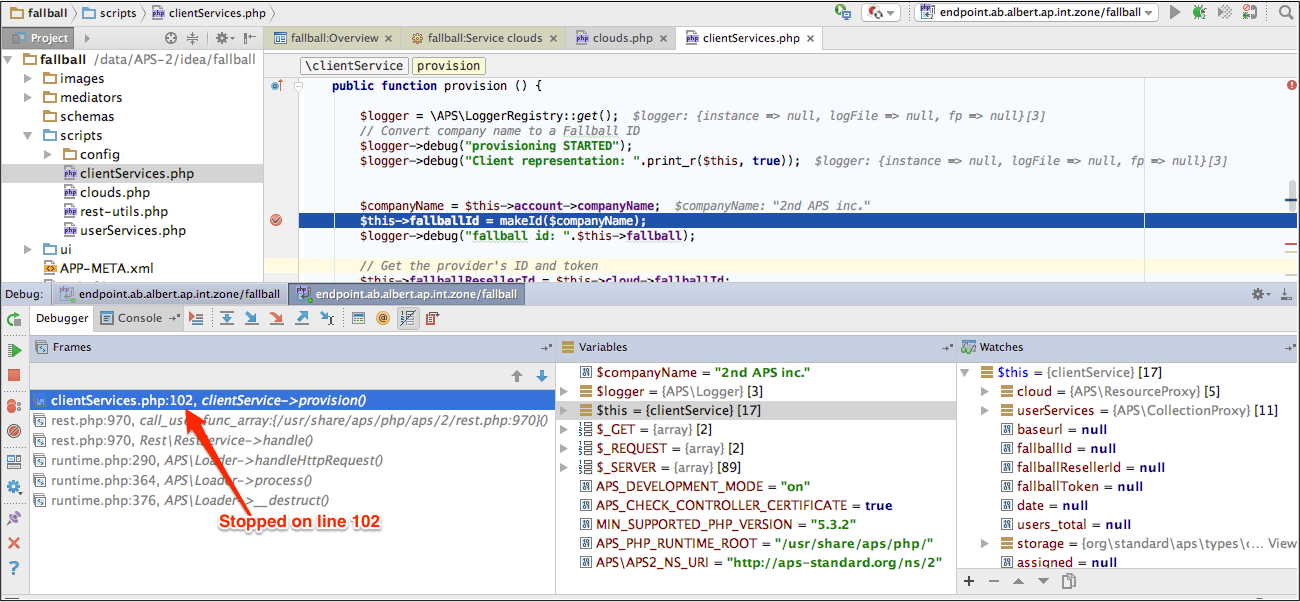
This allows you to continue with typical debug steps.
Links in Navigation Panel
When you change a custom UI code, you often need to quickly verify how it looks on the control panel.
In the Navigation panel, it is possible to open the selected view on the deployment target following these steps:
Ensure the package is deployed on a deployment target.
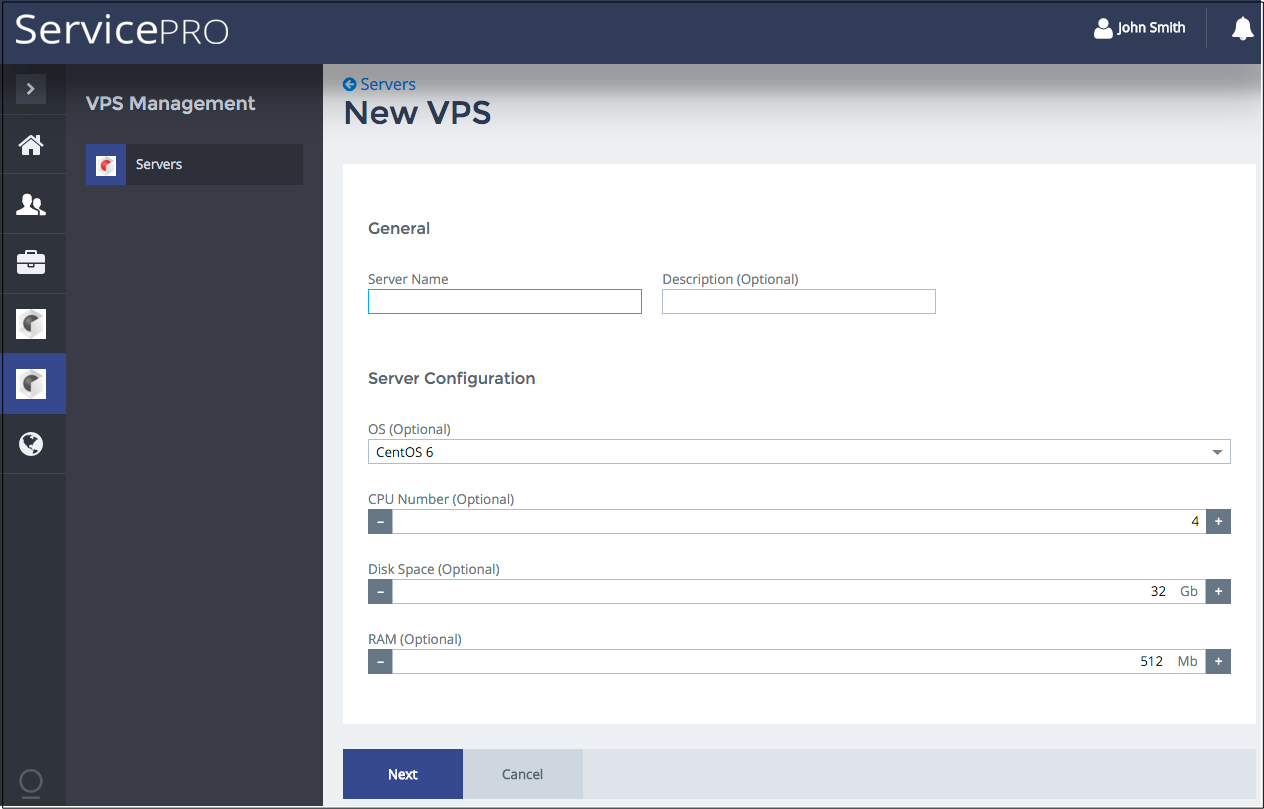
Ensure the deployment target is able to open the required view for you. For example a test customer is subscribed to the application services, and the subscription allows you to open the VPS Creation view if you log in as the customer.
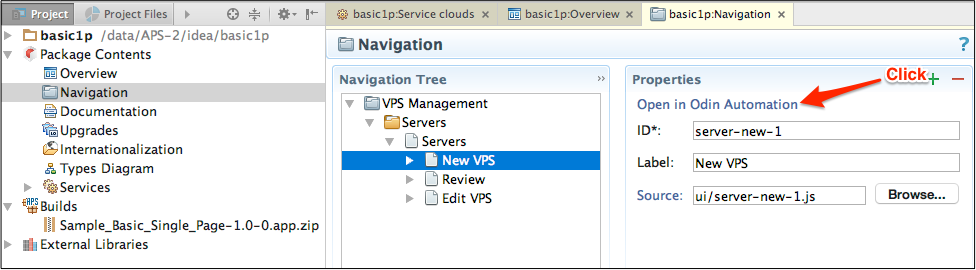
In the Navigation panel, select the view you need to open and click the Open in Odin Automation link.
You will be redirected to your browser and, if you login first time, it will open the login pop-up window for you. The IDE stores the user session parameters and requests you to log in during the other subsequent attempts to follow the same link.
In the login panel, enter the login name and password of a user whose credentials allow you to get access to the required view.
The system will open the control panel and redirect you to the required view.
Application ID Refactoring
Application ID in an APS package uniquely identifies the integration package. It must not change during the package life cycle unless you create a new integration package from the existing one. Normally, the application ID is the prefix in all custom APS type IDs. The application provisioning and UI scripts can often apply to those IDs. So, when you change the application ID, you have to change it in many places.
The IDE allows you to change the application ID throughout the package using the following steps.
Warning
Keep in mind, this process actually converts the current APS integration application to a new one. Maybe you need primarily to clone the current project (package).
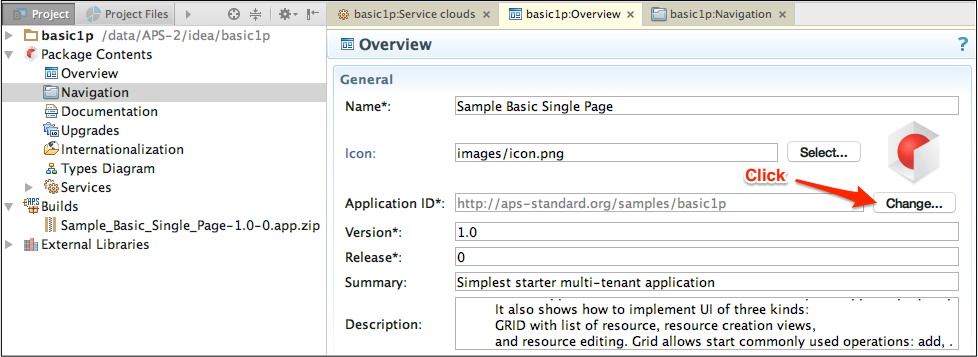
In the Overview editor, click the Change button opposite the Application ID field.
In the New Application ID field, enter the new application ID and then click Find.
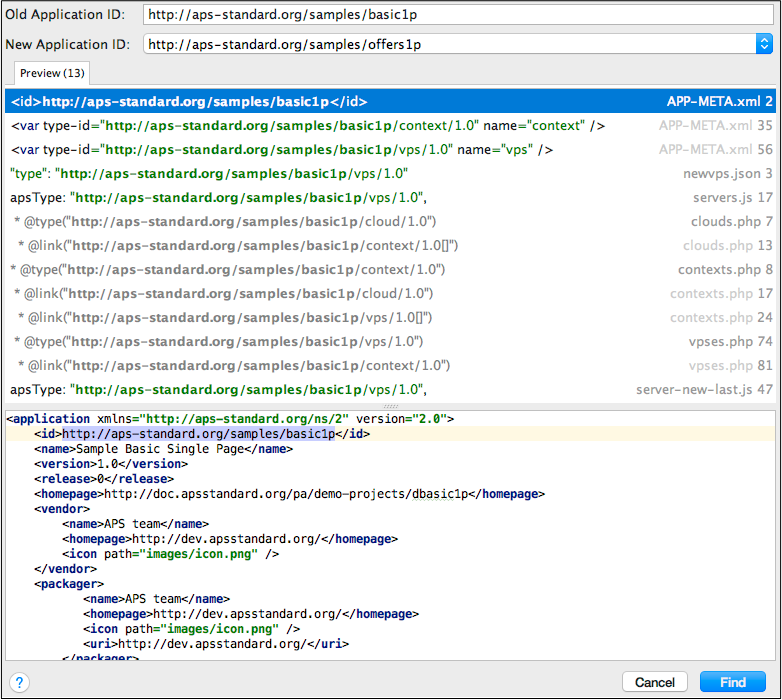
In the pop-up window, select one of the options:

- Review - show a window with all replacement occurrences to happen, where you can start the replacement in the selected lines or in all package files
- Replace - replace the selected occurrence
- Skip - skip the selected occurrence
- Replace All in This File - replace all occurrences in the selected file
- Skip To Next File - skip the remained occurrences in the selected file
- All Files - replace all occurrences in the project
Internationalization
It is possible to adapt a package to many languages as explained in the Internationalization and Localization document.
Translation File
As specified in Internationalization and Localization, for each supported language, you need to create a separate po file.
Follow these steps for it:
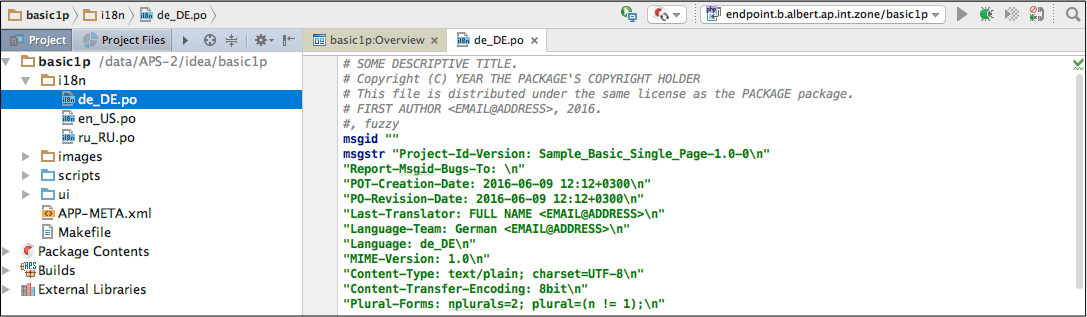
- In the Project panel, open the Package Contents and double click the Internationalization item.
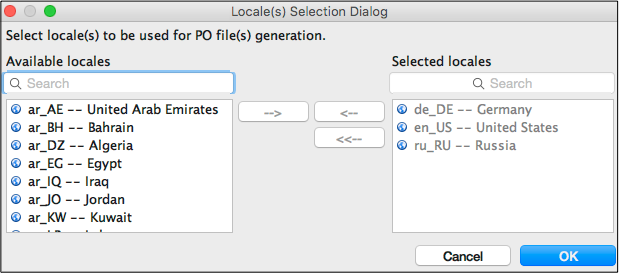
- In the Locale Selection dialog, move all languages you are going to support from the Available locales list to the Selected locales list and then click OK.
This will create a po file for each selected language. The file will contain a translation entry for each
translation string it finds in the package.
Translator
Once a po file is created for a language, an interpreter can open it to start interpreting
translation strings of the package: