CloudBlue Commerce API (DRAFT)
Table Of Contents
Manage Prices
Price Management allows the provider to have a separate product catalog with prices synced with the fees in the service plans created in BSS.


To better understand the price management procedure, you should be familiar with the Platform Data Models.
Note
Refer to the Glossary if you come across an unfamiliar term in this document.
In this document:
Sample Scenario
In a typical scenario, the provider creates the SKUs and assigns them to the product fees. The external system then manages those SKUs and fees via the APS REST interface using the SKUManagement operations.
In BSS, the provider creates a list of SKUs and assigns them to the service plan fees.
The management system reads the list of SKUs with the assigned fees from BSS and imports the list to the product catalog.
If some SKU fees are changed in the product catalog, the management system updates the fees in BSS.
After the system updates the fees in the plans delegated by the vendor (the provider or a reseller) to sub-resellers, the system synchronizes the updated fees throughout the sales channels.
Initial Platform Configuration
If the provider has not activated the SKU operations system-wide follow these steps in the BSS provider control panel to activate the internal SKU manager:
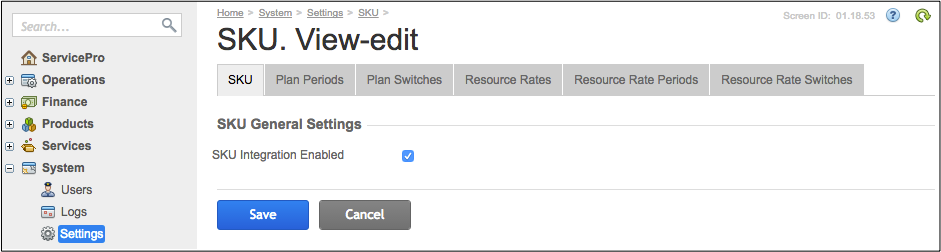
Navigate to System > Settings and in the Products section click SKU.
Click the Setup SKU button, check the SKU Integration Enabled box and then click Save.
Source Data
To operate SKUs, you must call the custom operations exposed by the SKU Manager. All those operations require you to specify the vendor APS ID. In terms of BSS, a vendor is the provider or a reseller.
Identify the Vendor
As specified earlier, a vendor in BSS and particularly in the SKU interface is the provider or a reseller.
A vendor is presented in the platform as an APS resource created from
the platform PAAccount APS type and can be identified by that APS type or
by its parent, the abstract Account APS type.
To separate the provider from the list of accounts, the following request filters the list by id=1 using
the fact that the platform internal ID of the provider is always 1:
GET /aps/2/collections/accounts?eq(id,1)
The response contains the required APS ID in the aps section:
HTTP/1.1 200 OK

[
   {
   "aps": {
      "type": "http://parallels.com/aps/types/pa/account/1.3",
      "id": "0ab950d1-abc9-4433-a87d-8ba009bf4bce",
      "status": "aps:ready",
      "revision": 5,
      "modified": "2017-08-04T14:17:32Z"
   },
      "addressPostal": {/* ... */},
      "adminContact": {/* ... */},
      "billingContact": {/* ... */},
      "companyName": "ServicePro",
      "id": 1,
      "locked": false,
      "personal": false,
      "techContact": {/* ... */},
      "type": "ADMIN"
      }
]
Service Plans
In this scenario, you will need a couple of service plans based on the same APS package. If you do not have such a package in your lab system, import it using your own APS package or a sample package by following these steps:
In the OSS provider control panel, navigate to Infrastructure > Service Nodes to ensure there is a service node registered as APS endpoint node. If there is no such host, register a physical host or a virtual machine (a virtual container cannot be used) with the CentOS 7 operating system:
Click Add New Node and select the APS Endpoint Node role for the node.
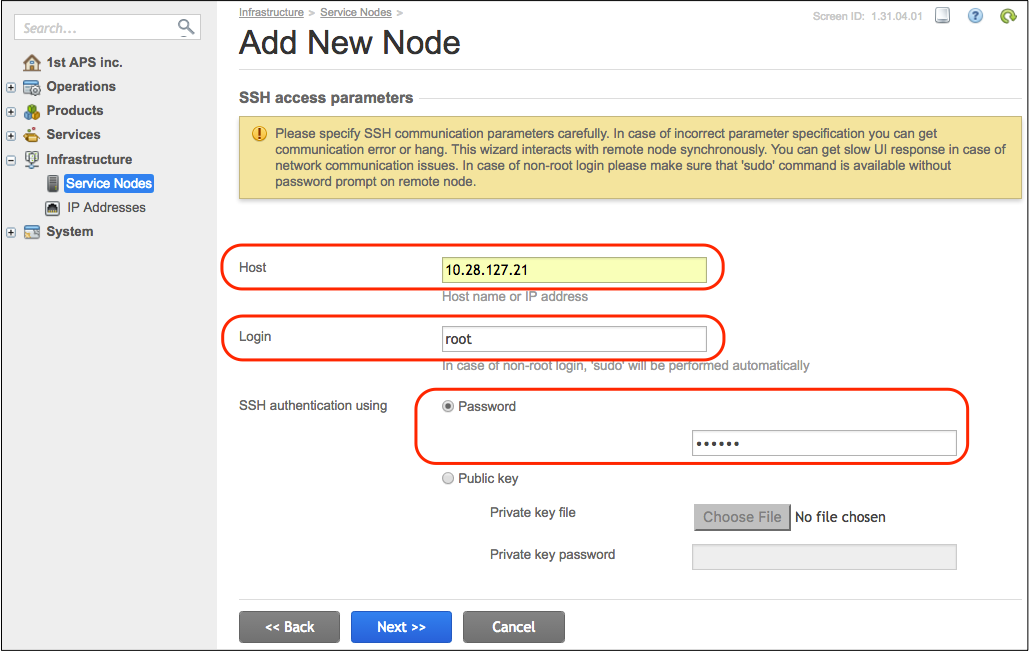
Enter the domain name or IP address of the node and the password for the root user. Then click Next.
Select correctly the backnet IP address and then click Finish. The registration may require a couple of minutes. You can watch for the task completion at Operations > Tasks.
Ensure the system is configured to import an APS connector from the public Docker repository.
Navigate to System > Settings and in the Integration section, click on the Docker Registry Settings link.
On the Docker Registry Settings screen, ensure the Docker Registry Hostname is “docker.io”.
Note
The above two steps prepare your platform to the recommended way of deploying an APS application. In the Application Deployment, you can also find other methods.
Navigate to Services >> Applications and on the APS Catalog tab, import the sample package from the APS application catalog:
In the Categories field of the searching engine, enter “Samples”, in the Name field enter “Offering*” and click Search.
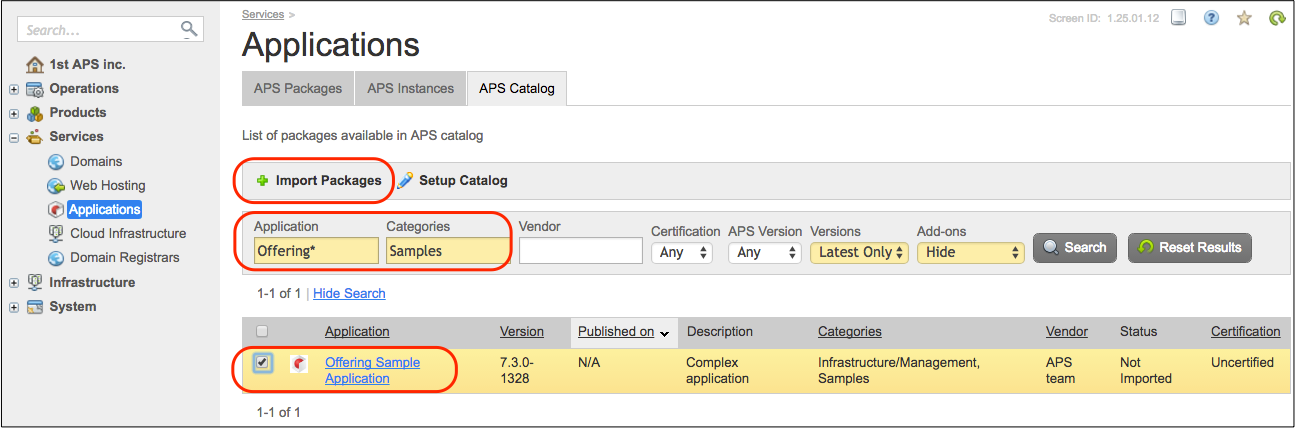
Select the discovered package and click Import Packages.
On the Import packages from APS catalog screen, make sure you have selected the right package and click Import Packages. The imported package must appear in the list of applications.
Refresh the screen to see the package version, category, and the provisioning type.
Install the APS application instance as follows:
Click on the imported package and then click Add Instance.
Ensure the Automatically deploy application backend option is selected and click Next.
In the application service configuration step, leave all fields intact and click Next.
In the final step, click Finish.
Periodically refresh the screen until the status of the instance is Ready.
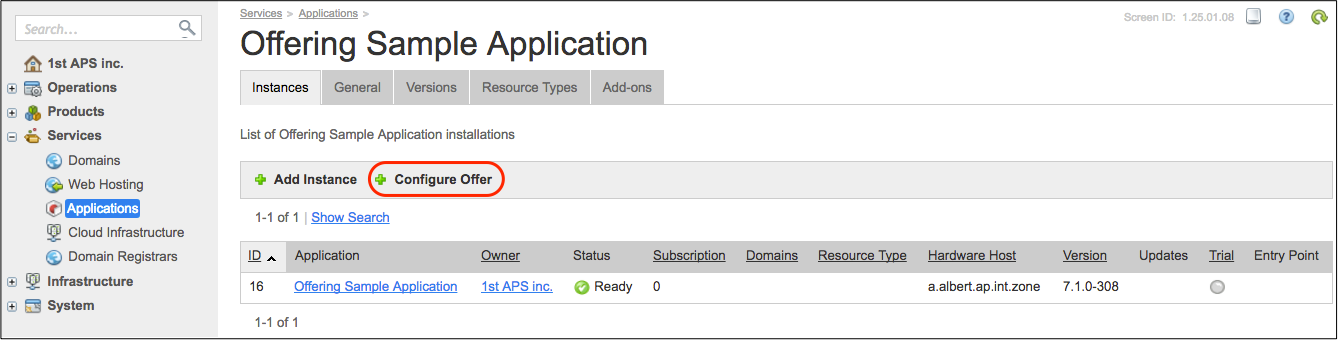
Create a service plan:
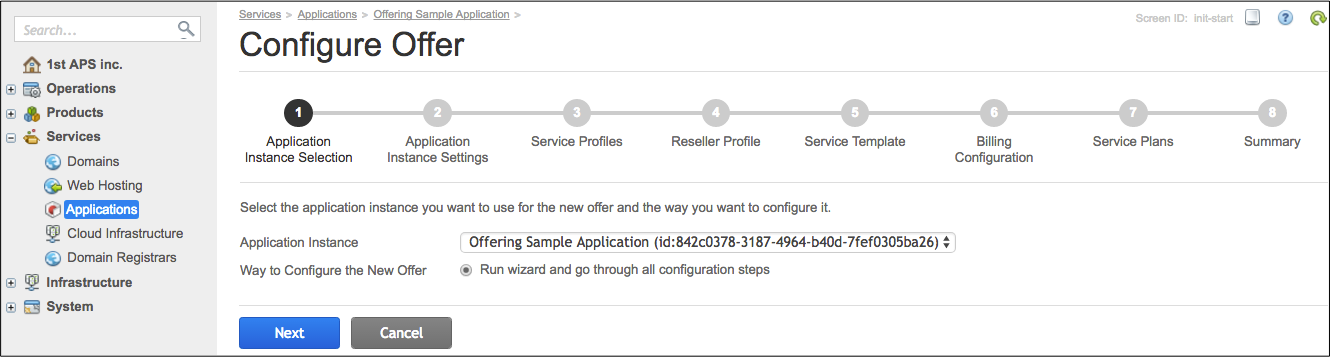
On the Instances tab of the application, click Configure Offer.
In step 1, click Next.
In step 2, click Test connection and then click Next.

In steps 3-6, leave all settings intact and click Next.
In step 7, click on the “AIW Cloud App SP 2” to edit it:
In the Name field, change the name for “User Management Demo”.
In the Subscription Period section, assign 1.95 to the Setup fee.
In the Service Plan Resources section, select and configure the “AIW Gold Offer RT”.

Click Save.
Click Add Service Plan and configure the new SP as follows:
In the Name field enter “User Management Demo 2”.
In the Short description and Long description fields, enter any text.
Do not set fees for the subscription period.
In the Service Plan Resources section, select the AIW Silver Offer RT and AIW Gold Offer RT.
Click Save.
Click Next and in the final step click Finish.
Switch to the BSS control panel to verify if the new service plans appeared there.
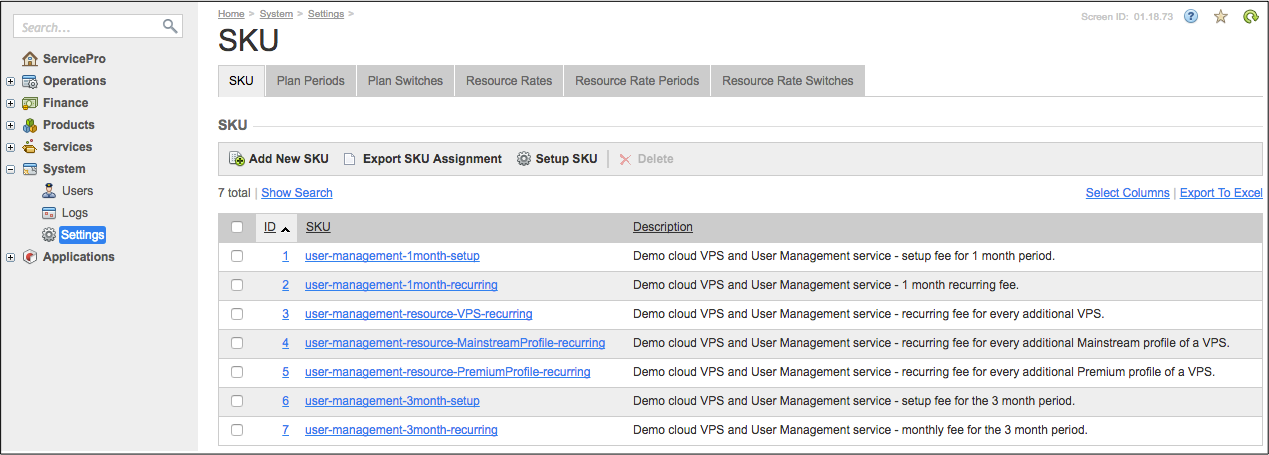
Create SKUs
Follow these steps to create a list of SKUs:
In the BSS PCP, navigate to System > Settings and in the Products section click SKU.
Click Add New SKU to start creating a unique SKU.
For the SKU name, use the SKU naming rule approved in the provider’s company. In the following example, the name reflects the application name, followed by the price level (either a subscription period or a resource followed by the resource name), which in turn is followed by the fee type (
setup,recurring, or another).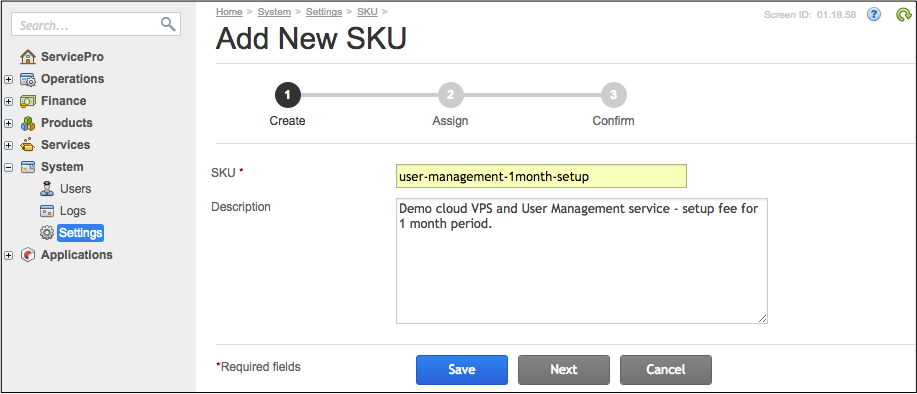
Click Next.
In the Assign step, you can assign the new SKU to a fee in a service plan now or skip it and do it later. To assign the new SKU to a plan setup fee, do the following:
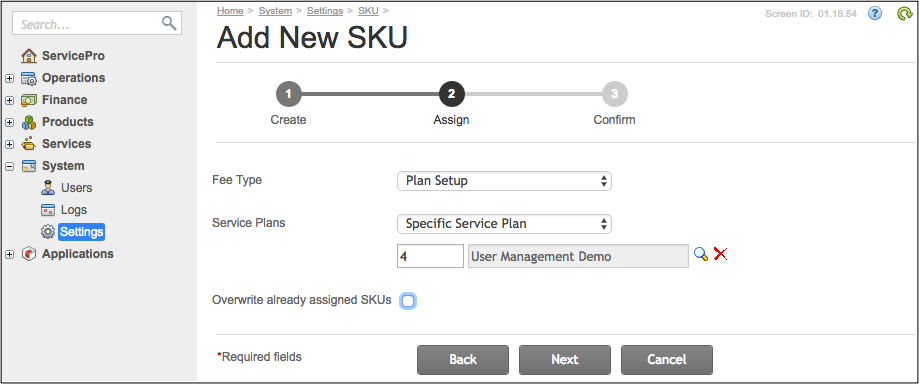
In the Fee Type selection list, select Plan Setup. It means you assign it either to the setup fees in the selected service plan (to all its subscription periods) or in all service plans depending on your choice in the Service Plans selection list.
In the Service Plans selection list, select Specific Service Plan and then select the service plan you want to assign the SKU.
If you have not assigned SKUs yet, you do not need to check the Overwrite already assigned SKUs box. If you did, you can check the box to override the existing assignments.
Click Next.
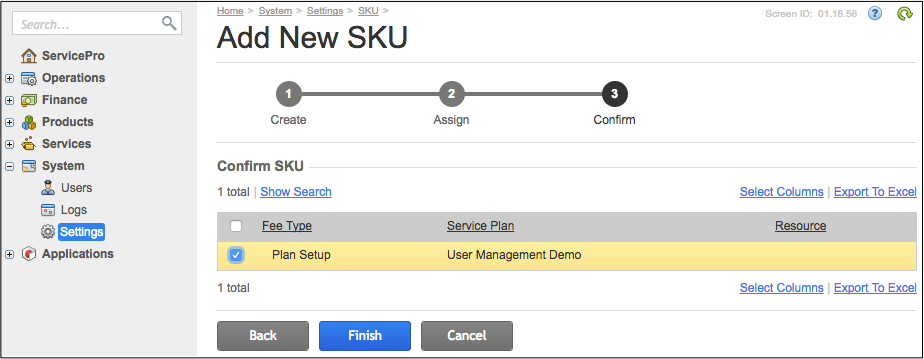
In the final step, select the fee to assign the SKU and then click Finish.
Repeat this process until you have a list of unique SKUs.
Assign SKUs to Fees
This process allows the provider to assign the new SKUs to the fees if they were not assigned during the SKU creation or if that assignment requires some correctives. PCP allows the provider to assign SKUs in various ways:
When creating a service plan.
When editing an existing service plan.
Using the special SKUs UI.
The latter way implies the following steps:
In the BSS PCP, navigate to System > Settings and in the Products section click SKU.
In the SKUs screen, open one by one the tabs presenting different SKU groups to verify the SKU assignment:
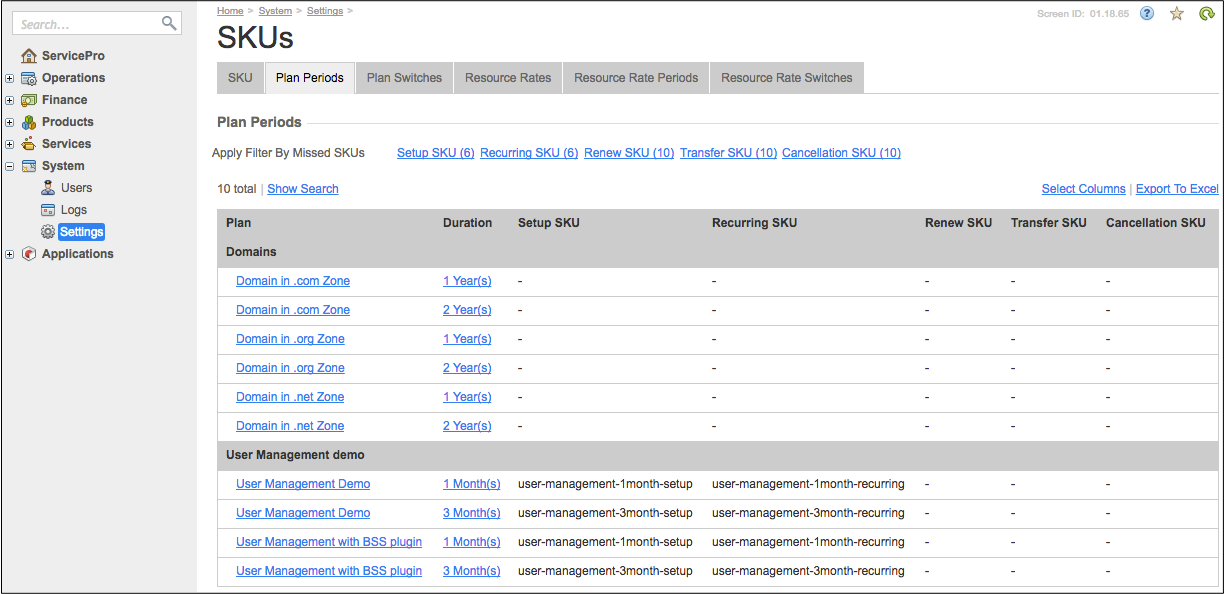
Note
On the tabs, the plans are grouped by plan category, for example, “Domains” and “User Management Demo” categories in the above screenshot.
The Plan Periods group may contain the following fee types for every subscription period:
setup: one-time fee for setting the service.recurring: monthly fee.renew: the fee paid for the renewal of the subscription for the next subscription period.transfer: used for domain registration plans and paid for transferring a registered domain from the current domain registrar to the registrar used by the provider.cancellation: the fee paid by customers if they cancel the subscription.
The Plan Switches group contains the switch fee paid by a customer for switching a subscription from another service plan to the current plan.
The Resource Rates group, as opposed to Resource Rate Periods, contains the resource rate fees that are independent of the subscription period:
setup: one-time fee for setting the service based on the resource.recurring: monthly fee per every additional resource unit.overuse: monthly fee per every resource unit used above the limit set in the resource rate.cancellation: the fee paid by customers if they cancel the subscribed resource.
The Resource Rates Periods group overrides the Resource Rate settings for a particular resource. It contains the same fee types as in the Resource Rate settings, but specific for a particular subscription period.
The Resource Rate Switches group contains the fee paid by a customer for switching a specified resource from another resource.
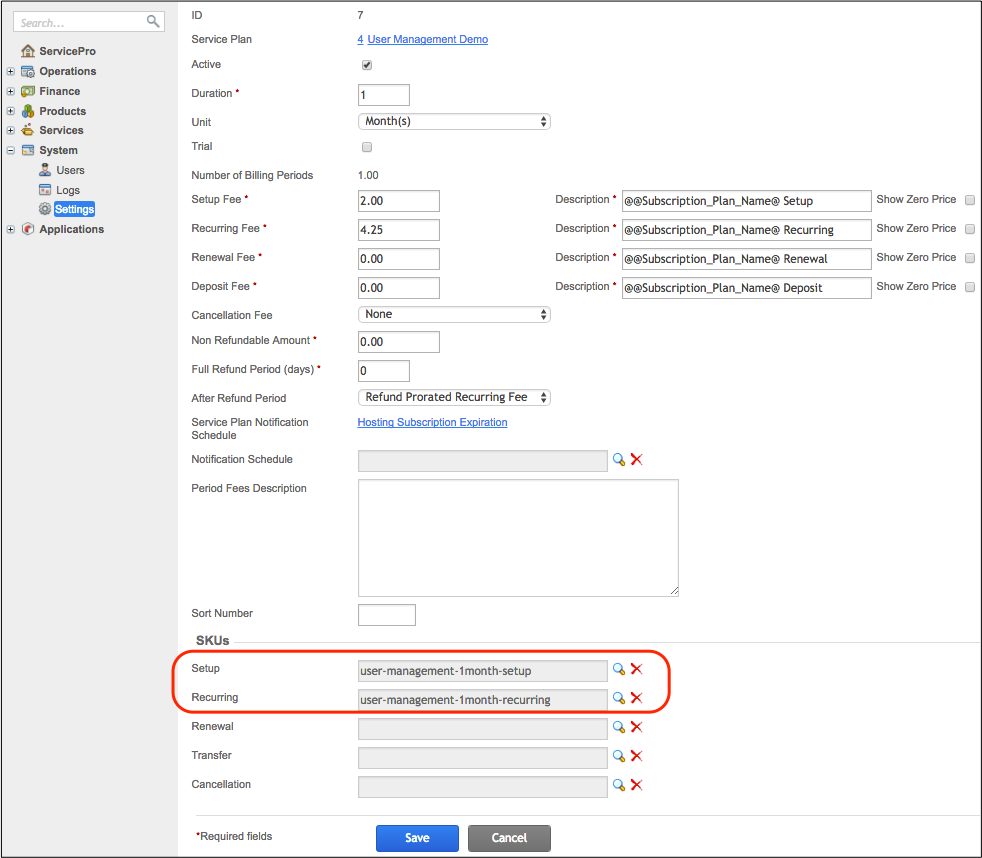
To modify a SKU assignment, click on the respective line and then edit the assignment.
Conclusion
On completion of this initialization step, the platform contains the required SKUs to fees assignment and it is ready to receive requests for operations with the list of SKUs from an external system responsible for the SKU catalog.
The next steps operate the fees assigned to SKUs.