Migrating Between Modules of Odin Automation > Moving Webspaces Between WebHosting Linux Nodes > Migrating Data > Running Migration
Running Migration
- Go to System > Migration Manager > Migration Projects, and click Start Migration (in the Actions column).
- Review the webspaces selected for migration and click Next.
- A number of pre-migration checks are run. If you need details about the checks, see the section Running Pre-migration Checks.
- After the checks are completed, click Next.
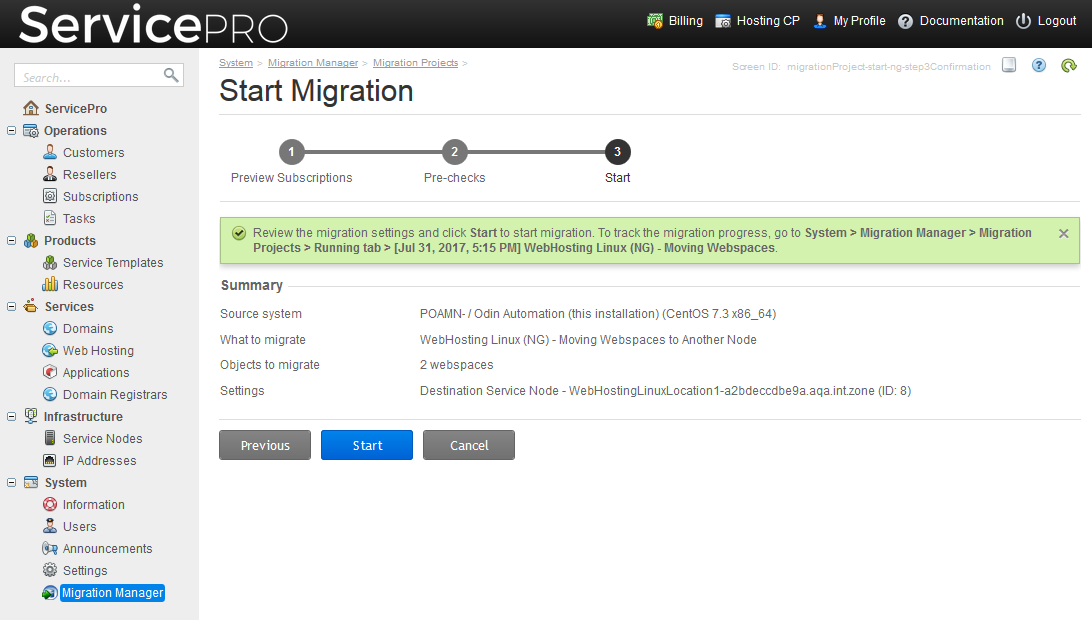
- Review the migration settings and click Start.
Running the Pre-migration Checks
We recommend that you run the following checks before starting migration.
Infrastructure checks
|
- Check the connection between the source and the target servers.
- Check that IP pools used by webspaces are assigned to the target node.
|
Target server checks
|
- Check the capacity of the target node.
- Check that there is enough disk space on the target node to host all files of all webspaces.
- Check the PHP versions available at the target node.
|
Checking the Migration Progress
To check the migration progress, go to System > Migration Manager > Migration Projects > Running tab > <migration project name>. When the migration is completed, a record about it is shown in System > Migration Manager > Migration Projects > Completed tab.