CloudBlue Commerce API (DRAFT)
Table Of Contents
Provisioning
This is the phase, where customers subscribe to the application services and then provision resources for themselves.


In this document:
Subscribe to Application Services
Create a test customer account and subscribe it to the application services.
Order Application Service
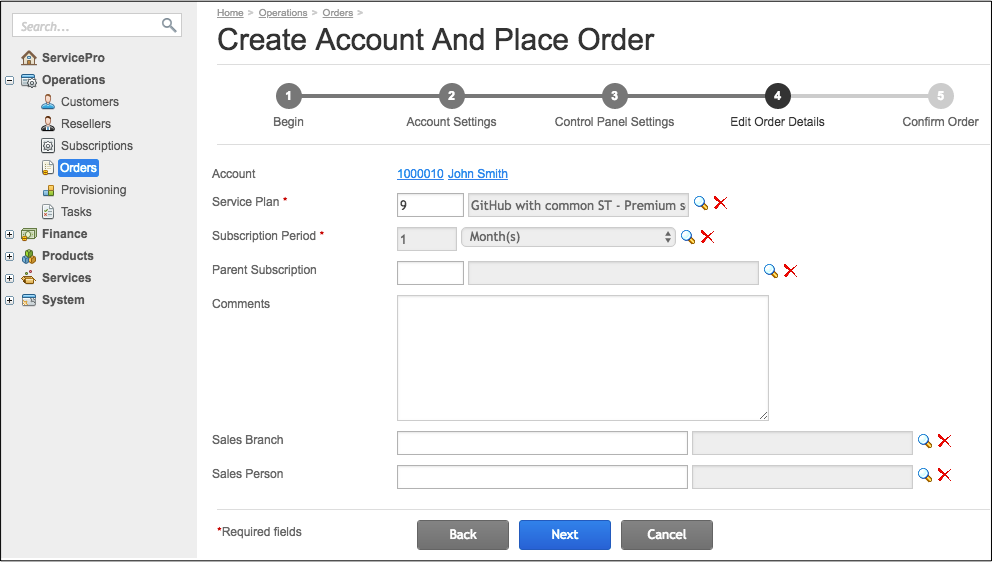
In the BSS provider control panel, navigate to Operations > Orders, click Create Account And Place Order and then go through all wizard steps.
In the Begin step, select the Personal account type for simplicity.
In the Account Settings step, enter all required settings.
In the Control Panel Settings step, enter or generate a user password.
In the Edit Order Details step, select the premium service plan and the one-month subscription period available in that plan.
In the Parameters step, leave everything as is.
In the Confirm Order step, click Place Order to complete the wizard process.
Pay Sales Order and Activate Application Service
In the list of orders, find the newly created sales order (its status is New) and start processing it:
Click on the sales order to open it.
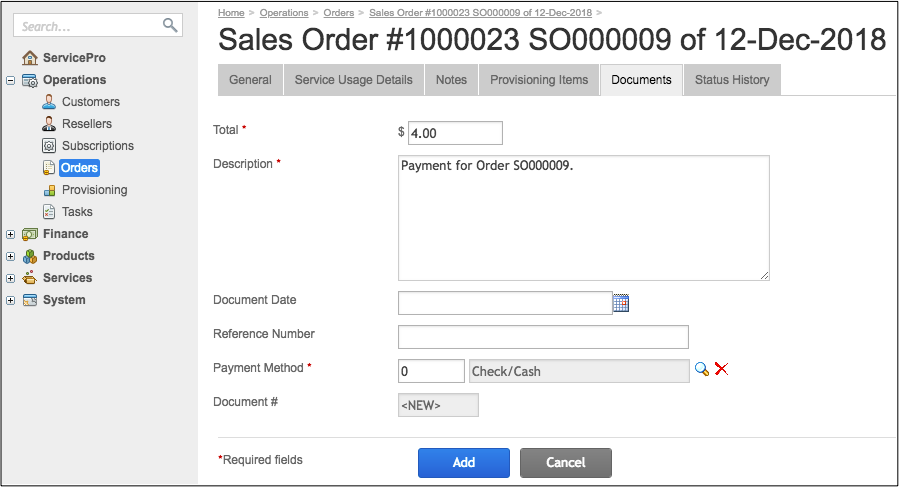
On the Documents tab, click Add New Payment.
Select the Check/Cash payment method and then click Add:
Select the new payment and click Release.
Switch to the General tab and click Open to start the order processing.
Click Check Order Provisioning Status periodically to verify whether the order is processed. The order status must become Completed.
After the order is processed, a new subscription must appear in the list of subscriptions. Navigate to Operations > Subscriptions to find this.
Stay on this screen to start the testing procedure.
Test Application in UX1
The following steps walk you through the test procedure:
In the list of customer subscriptions, find your test subscription and click on its Actions link in the last column.
The UX1 panel opens in a separate browser tab.
In the UX1 navigation panel, find your demo application and select it.
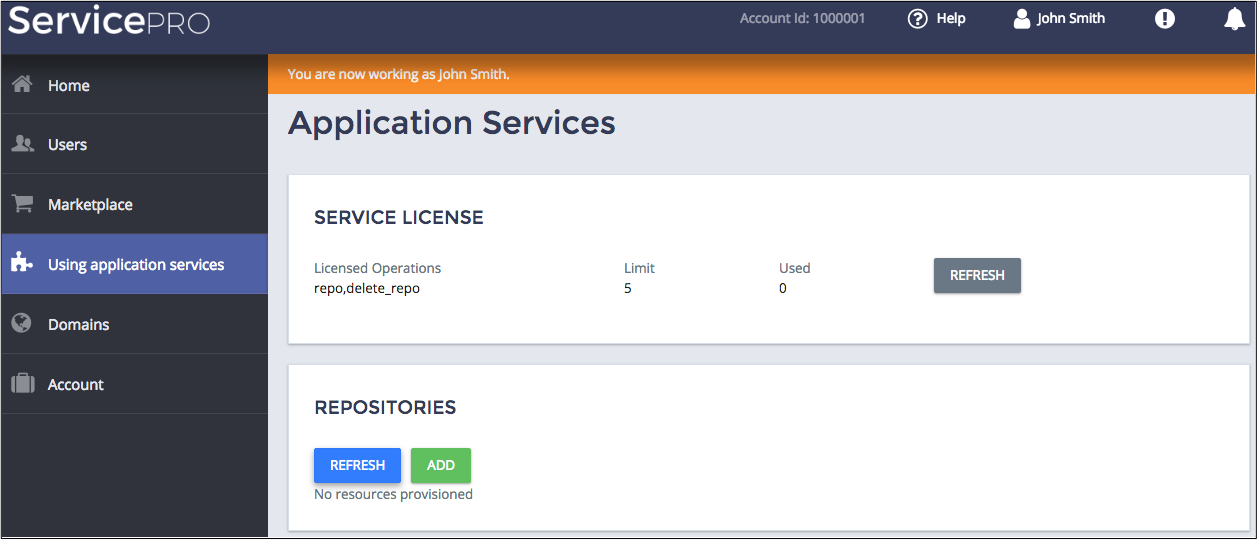
The main service view shows the license assigned to the tenant and an empty list of repositories.
In the Repositories panel, click Add as many times as needed to create multiple repositories. After the new repositories appear in the list, click the Refresh icon to refresh the Service License panel:
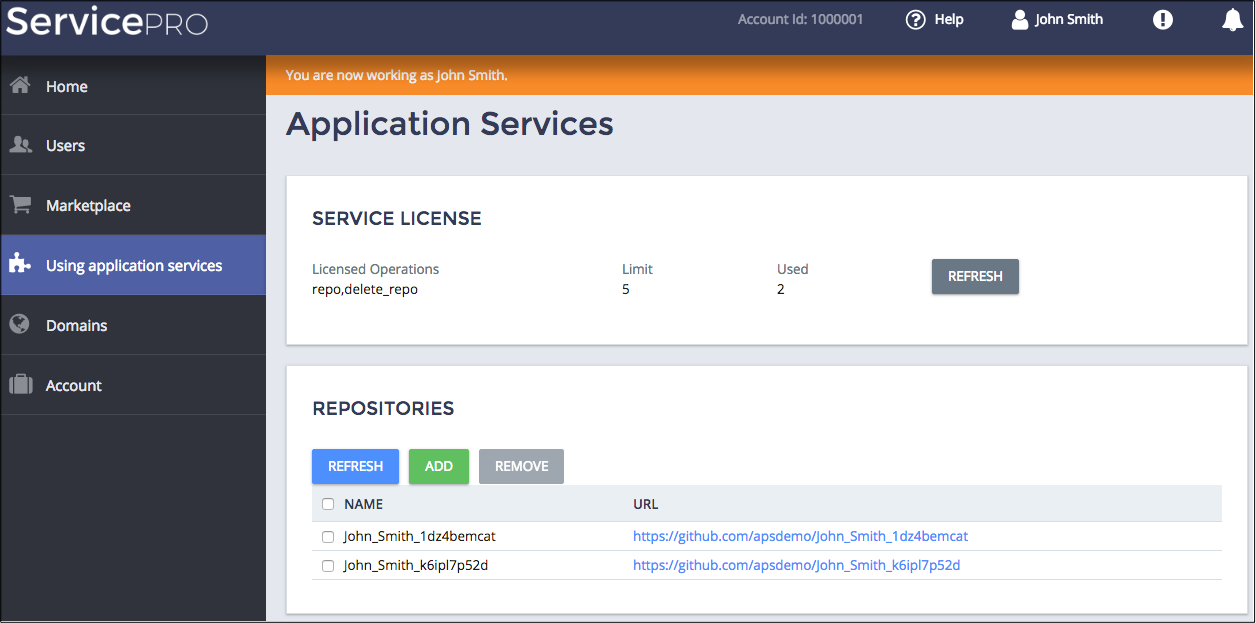
A repository name consists of two parts: the prefix reflects the owner’s name and the suffix is a random string. This corresponds the project UX design.
Select one or two repositories and click Remove to test that the
delete_reposcope allows for removal. After that, click Refresh to ensure that the selected repositories are actually removed on the application side.
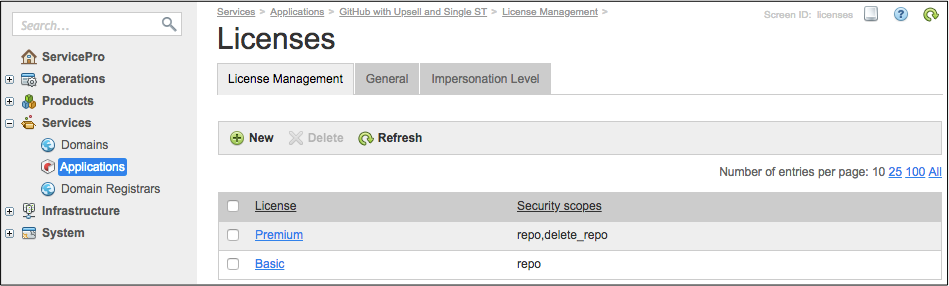
License Management
If the provider needs to add licenses or update existing licenses, the provider staff can use the application UI for PCP you have developed earlier in this project. To test it, do the following in PCP:
Navigate to Services > Applications and click your demo application to open it. On the Instances tab, there is an APS application instance you have created during the application deployment.
Click on the instance to open it.
On the License Management tab, you will find the landing page you have developed in this project. Use its widgets to manage licenses as required.
Conclusion
This completes the application design-development-deployment-provisioning lifecycle. The project is simplified to focus you on the most important specifics. If you have understood the main ideas of the application integration process, the demo project has reached its goal.
You can verify if the requested resources were created on the application side here: