Table Of Contents
Application Packaging Standard
Last updated 18-Mar-2019Workflows
An APS application can effectively use the wizard based API by plugging its views into the platform built-in wizards (for example, User Service) and by providing its own wizard to the provider and customers.
In this document:
Wizard
Structure
A wizard presents for a user a sequence of dialog boxes that lead the user through a series of well-defined steps. Typically, a wizard is helpful in creation or update of complex resources with plenty of properties logically split into various groups, and those groups can depend on each other.
A wizard consists of several steps depending on the number of properties a user has to select or enter while going through the wizard. The current step number or name is displayed next to the wizard name.

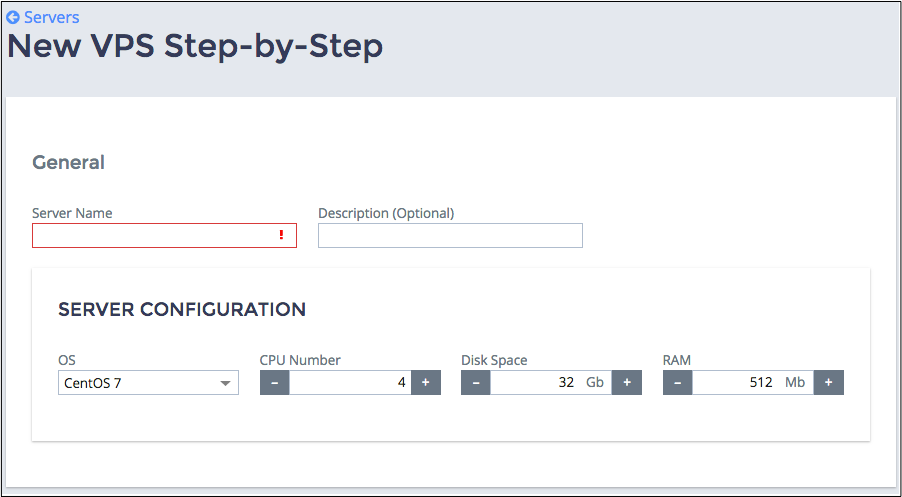
First Step
Every step usually contains properties of the similar nature. For example, the first step requires a user to provide a name and description of the resource created. Additionally, the first step may contain some fields or selectors prompting a user to provide some basic data of the created resource.
Intermediate Steps
The subsequent steps suggest that a user selects or enters more specific data of an resource. Sometimes the selected options on earlier steps may have effect on the displayed properties of further wizard steps.
Each wizard step can contain an explanation sentence in the imperative mood of what a user should do at this screen. For example, “enter general properties”, “select resources”, “set limits”, and so on. Sometimes, an individual parameter or group of properties on the screen may require additional explanations. In this case, the text is placed under the parameter field or group of fields.
Moving between the wizard steps is performed by pressing the Next or Back button located at the bottom of each step. It means that going through the wizard can be done forward and backward. The data once provided in any step is saved and can be changed when returning to the desired step, no matter how far a user has gone through the wizard. Sometimes, those navigation buttons are not needed. For example, a wizard opens on the page containing the table with the list of alternative clickable elements. To move to the next wizard step, the user must click on the element name.
Standing at any wizard step, a user can also break off the current operation by clicking the Cancel button. In this case, the wizard interrupts, all the provided data is lost, and the user is returned to the initial screen.
Last Step
In the last step of the wizard, a notification message is displayed on top of the dialog panel telling the user that the wizard is ready to complete the operation and prompting to verify the provided data. All the previously entered data and the selected properties are displayed at this confirmation page.
Use the confirmation screen in the wizard in the following cases:
- If the expected result of the wizard walkthrough leads to the consequences that cannot be reverted or that touch the finance procedures of customers.
- During the walkthrough the wizard collects data that the wizard calculated and now it needs the user’s approval.
In the last wizard step, there is a Finish button (or a button with similar label) instead of Next. By clicking it, a user confirms the completion of the process and the wizard starts the actual operation.
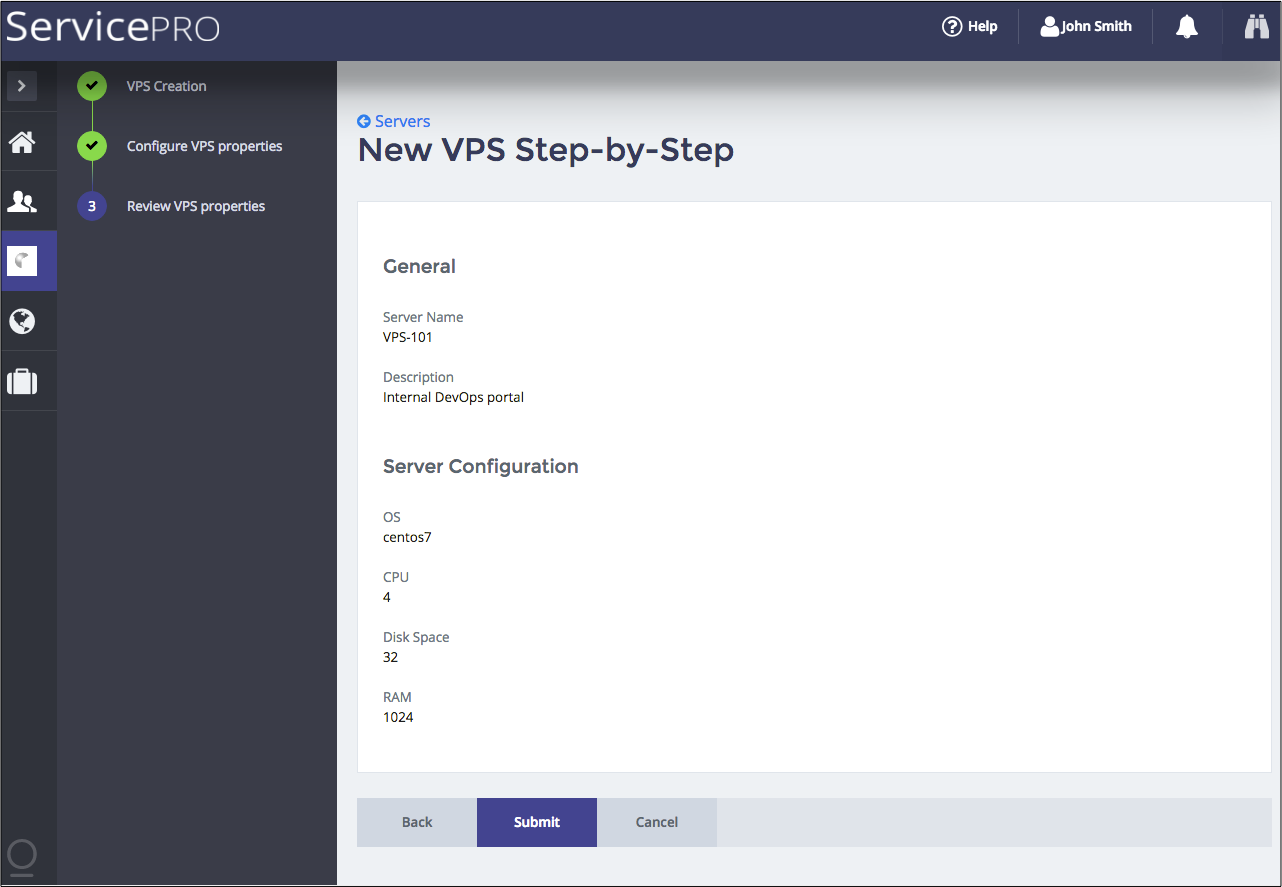
The user is returned to the screen with the list of resources. The application can display a notification message on top of the screen telling that the operation has completed successfully. In case the operation failed, the notification states the reason and offers some steps to fix it.
Documentation
- Concepts
- Demo project containing the following steps building a wizard: