CloudBlue Commerce API (DRAFT)
Table Of Contents
Deployment
To make the application services available to customers, that is to allow customers to subscribe to those services, the following steps are required.
APS application deployment including the installation of the APS application on the platform and activating the connection between the platform and the original cloud application through an APS application instance.
Product deployment that presents the application services as a product for sale.


In this document:
Setting Default Product Configuration
To assist service providers in product configuration, you should add the getInitWizardConfig method to the
root service definition as explained in Deployment Configuration.
In the management node, the provider must configure
a service template used to subscribe customers to application services.
The getInitWizardConfig method must return a set of default resource types
and a default service template configuration containing those resource types.
The service template must contain resource types presenting the APS application instance and APS types of the application. The application resource model contains three APS types. For each of them, you must create a resource type and place all those resource types into a service template.
APS Service |
Description |
||
|---|---|---|---|
VPS cloud globals |
Application Service Reference |
VPS Demo - App REF |
Application instance |
VPS management |
Application Service |
VPS Demo - Management Context |
Customer management environment (context) |
Virtual private server |
Application Service |
VPS Demo - Server |
Customer’s virtual server |
In addition, the service must also have the testConnection method to test a connection
with the application to be integrated with the platform.
Follow these steps to define the required methods:
In the
scripts/folder, create a file containing the JSON definition of the data that thegetInitWizardConfigmethod must return. The file format is explained in the Configuration for OSS document. To simplify the process, download thewizard_data.jsonfile to thescripts/folder.In the
scripts/apps.phpfile, find theappclass definition and add thegetInitWizardConfigmethod inside it:/** * @verb(GET) * @path("/getInitWizardConfig") * @access(admin, true) * @access(owner, true) * @access(referrer, true) */ public function getInitWizardConfig() { $myfile = fopen("./wizard_data.json", "r") or die("Unable to open file!"); $data = fread($myfile,filesize("./wizard_data.json")); fclose($myfile); return json_decode($data); }
The method returns the content of the
scripts/wizard_data.jsonfile created in the previous step.In the same
appclass, add thetestConnectionmethod as follows:/** * @verb(GET) * @path("/testConnection") * @param(object,body) * @access(admin, true) * @access(owner, true) * @access(referrer, true) */ public function testConnection($body) { return ""; }
The above configuration makes the APS package ready for the final Create Service Template step in the deployment phase. But before going to that step, you should prepare the APS package for the APS application deployment as the next section explains.
Deployment Schema
The APS package must also provide some data to be used for deploying an APS connector as specified by the general deployment schema. The best practice is to install an APS connector from an image using the Docker virtualization technology as explained in this document.
Let us look at the deployment schema a bit closer taking into account the Docker technique.
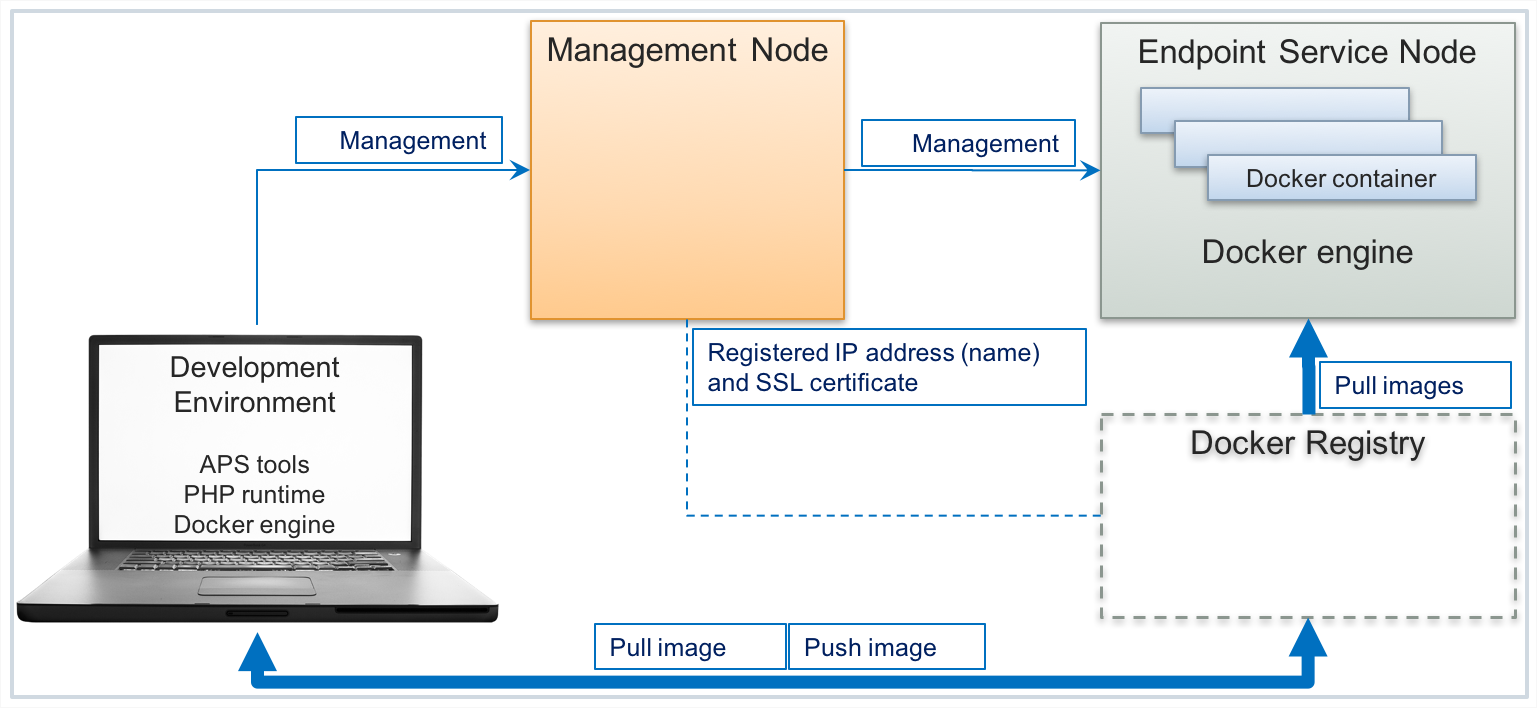
In this schema, every APS connector is functioning inside its own Docker container. The latter must be installed from an image stored in the Docker registry. The management node must be aware of the Docker registry address to be used for deploying Docker containers. During installation, the management node is configured to use the default Docker registry supported by the APS team.
Prerequisites
Connect to Docker Registry
When preparing an APS application for deployment, you must have access to a Docker registry where you are going to save a Docker image that the system will use during the application deployment.
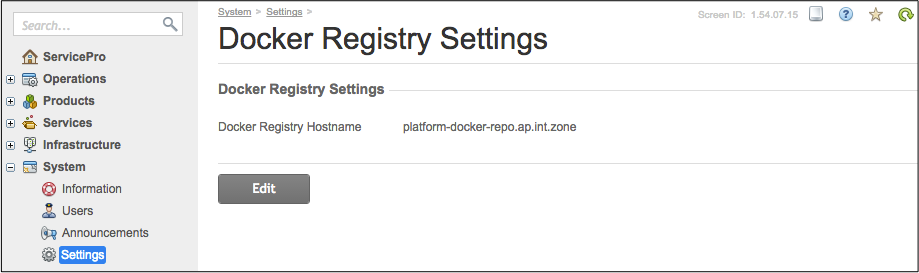
In the platform configuration, find the Docker registry connection parameters configured currently. For this, in the provider control panel, navigate to System > Settings and in the Integration section click on the Docker Registry Settings link. You will find the domain name or IP address of the Docker registry, for example:
Normally, you should replace it with a Docker registry available for your development environment
and for the platform you are going to use. In most cases, it must be the Docker official hub docker.io.
To upload your Docker images there, you should have an account registered at Docker Hub.
In the following examples, we suppose that account name (login) is “isv1”.
With these assumption, do the following:
Click Edit and replace the Docker Registry Hostname with
docker.io.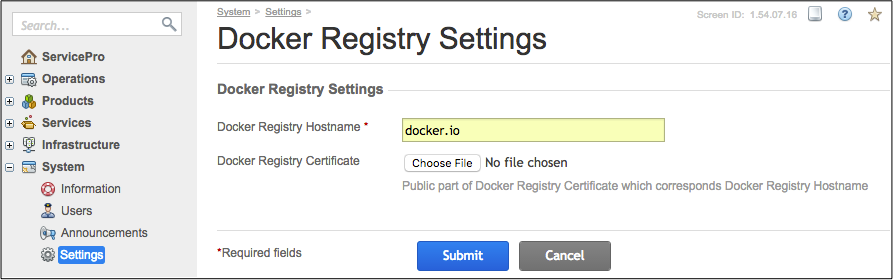
Click Submit to save the configuration without providing any certificate.
Register Endpoint Host
In addition to the OSS management node, the deployment schema contains a separate endpoint host based on a virtual machine or a physical server for installation of APS connectors inside Docker containers. The endpoint host must meet the following requirements:
There is the CentOS-7 operating system on it.
The
SELinuxservice is disabled as explained in the respective CentOS document.The host must be available for the management node on its backend interface.
It must have access to the Docker registry that provides necessary images for installing Docker containers.
There is no Docker engine on the host, since you will add it during the service node registration as explained in the next section.
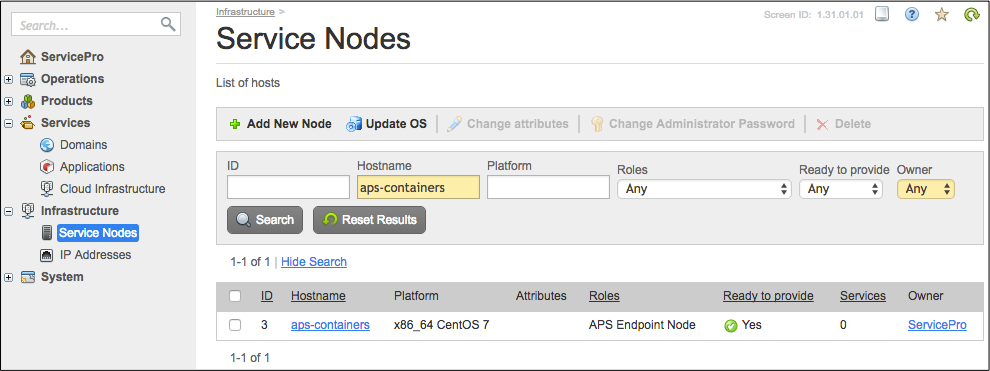
The following instruction helps you register your CentOS-7 host as an APS Endpoint Node:
In the provider control panel, navigate to Infrastructure > Service Nodes.
Click Add New Node.
Select the APS Endpoint Node role.
Enter the host name and authentication parameters:
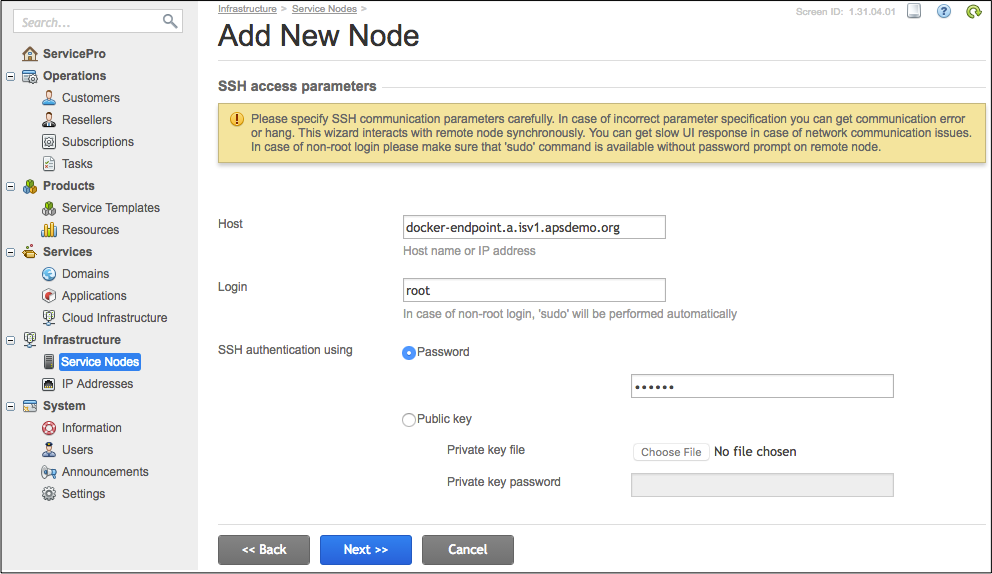
Click Next.
Configure the other parameters:
Optionally, assign a convenient Hostname
Specify the Backnet IP address
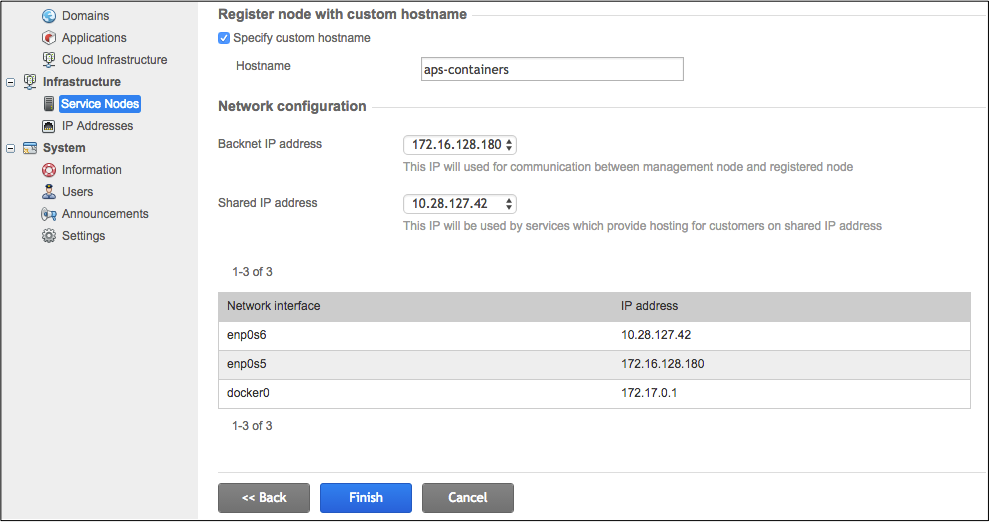
Wait for a couple of minutes until the management node adds the server as a service node and installs the Docker engine on it.
Docker Engine
The best way to deploy the provisioning (backend) logic of an APS application in the platform is to use a Docker image of the backend part (APS connector contents) of the APS application. To create an image, you will need the Docker engine following one of the alternative ways:
Use the Docker engine on the APS endpoint host that you have register already on the platform. In this case, you do not need to install the Docker engine on your local computer.
Install the Docker engine on the same computer you use for development. For example, follow the Install Docker on CentOS document to install the Docker engine in CentOS.
Docker Image
Edit Image Settings
The project template includes the deploy-image/ folder that contains the
Apache configuration
structure in the etc/ folder and data structure in the var/ folder. This typical data set
makes APS provisioning scripts available on the /endpoint/ alias.
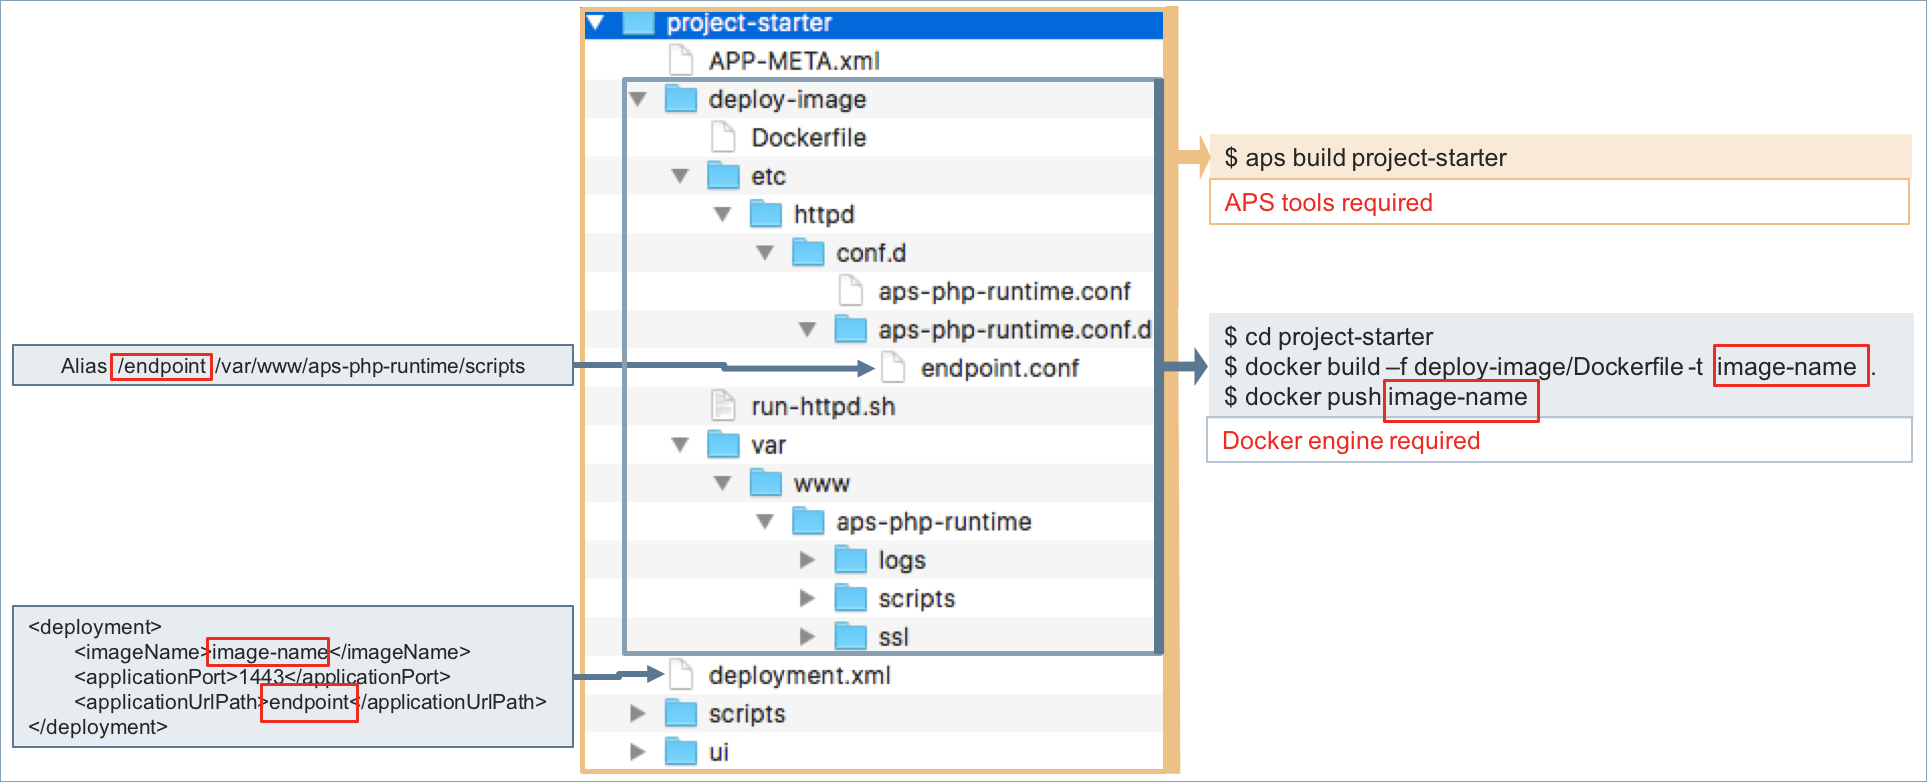
The Docker build command will use the Dockerfile configuration, the deploy-image/ contents,
and the APS application scripts/ contents
to build an image containing the APS application provisioning logic, that is
the APS application connector image.
If you are going to store the image in the Docker official hub, ensure you have the following deployment settings in the package:
In the
deployment.xmlfile, enter a unique image name that will be used in the Docker image tag, for example:<?xml version="1.0" encoding="UTF-8"?> <deployment> <imageName>isv1/starter</imageName> <applicationPort>1443</applicationPort> <applicationUrlPath>endpoint</applicationUrlPath> </deployment>
Note
In the <imageName> element, the “isv1” string is a placeholder for your account at the Docker official hub. The entered value must be assigned later to the image tag.
In the
deploy-image/Dockerfilefile, ensure the correct path to the APS PHP runtime image is specified:FROM apsstandard/aps-php-runtime
Create Image
Follow these steps to create an image:
Ensure the whole project package is on the host that has the Docker engine, for example copy it to the host registered as the endpoint service node as in the following command:
$ scp -r project-starter root@docker-endpoint.a.isv1.apsdemo.org:
In the host where the Docker engine is running, change your current directory to the
project-starter/folder, that is the top folder of your project.Run the Docker build command to build an image locally:
# docker build -f deploy-image/Dockerfile -t isv1/starter:1.0-0 .
Note
1. The “isv1” prefix is a placeholder for your actual account registered at the Docker official hub.
2. The image tag version, for example,
1.0-0, must be the same as the APS package version specified in theAPP-META.xmlfile.3. Do not miss the period
.at the end of the command. It specifies the current folder as the Docker build context.Log in to the Docker hub:
# docker login ## You will be prompted for the login name (for example, "isv1") and password
Push the image to the Docker registry:
# docker push isv1/starter:1.0-0
Note
Do not forget to replace “isv1” with your actual account at the Docker hub.
Build APS Package
Build your APS package on a computer with the installed APS tools and APS PHP runtime. Change your current directory one level above the project folder and build the APS package, for example:
# cd ..
# aps build project-starter
Import APS Package
Import the APS package to the platform as follows.
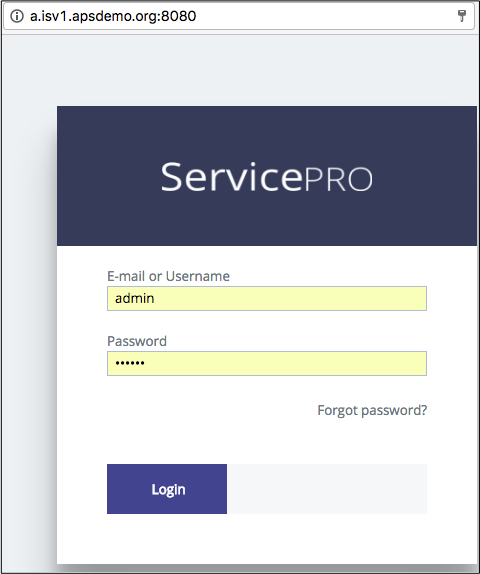
Log in to the platform provider control panel (PCP). For example, if the OSS management node is a.isv1.apsdemo.org, enter http://a.isv1.apsdemo.org:8080 in the browser address field. Log in as admin.
In PCP, navigate to Services > Applications and click Import Package.

Browse your local storage for the APS package, select it, and then click Submit to import the package to the platform. Click the Refresh icon on top right of the screen.
You will see the imported application on the bottom of the list.

Deploy APS Application Instance
In PCP, follow these steps to deploy an APS application instance.
Open the imported application and on the Instances tab, click Add Instance.
Make sure the Automatically deploy application’s backend is selected:
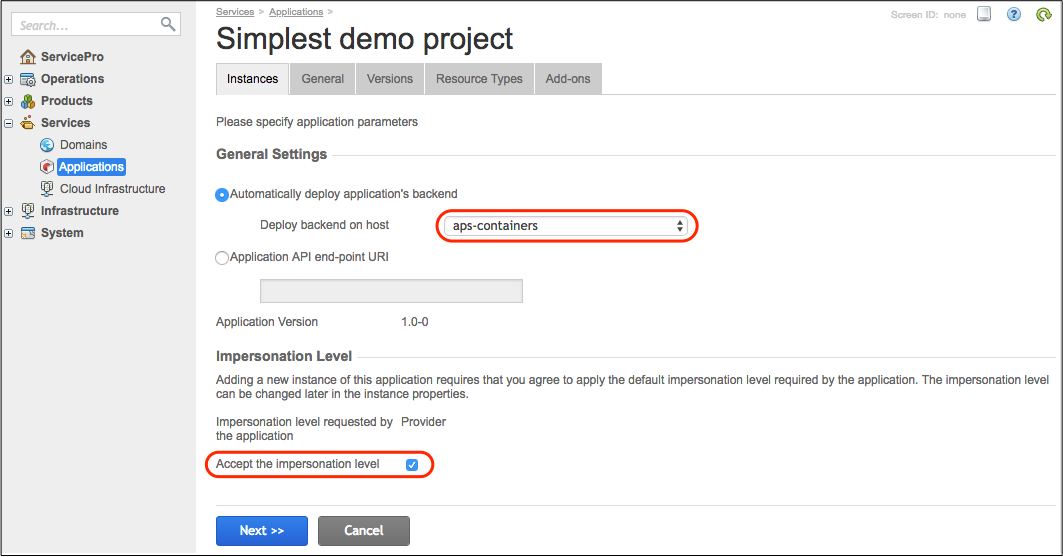
Click Next and then Finish.
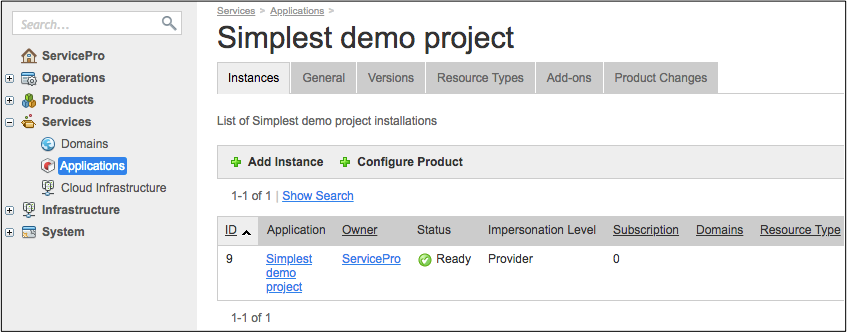
Wait until the new instance appears and its status is Ready. If it takes longer than 2 minutes, navigate to Operations > Tasks to clarify the cause of the delay.
Create Service Template
A service template in OSS is used to create subscriptions for customers. It must contain all resource types presenting the application services defined in the APS package. Every resource type is limited or unlimited in a service template.
The root apps service of the APS application contains the getInitWizardConfig method that
returns the default configuration of the service template and resource types in it. In PCP,
start the product initialization wizard to configure a service template using the default configuration.
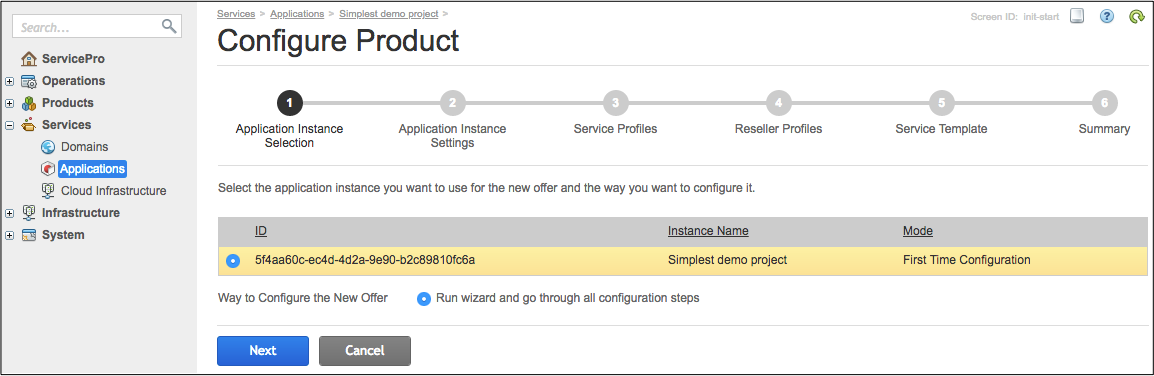
Open the imported APS package on the Instances tab and click the Configure Product button.
Follow the wizard steps as explained here.
In the Application Instance Selection step, ensure, your demo application instance is selected.
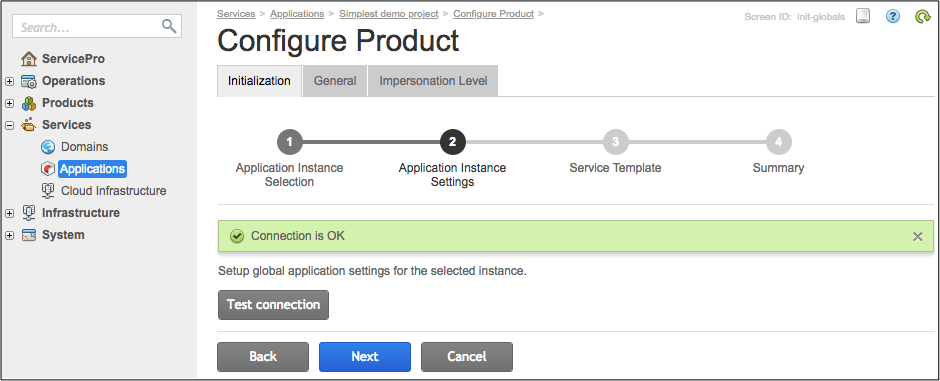
In the Application Instance Settings step, you can click the Test connection button. In a production system, this must call a method that verifies the connection with the remote application.
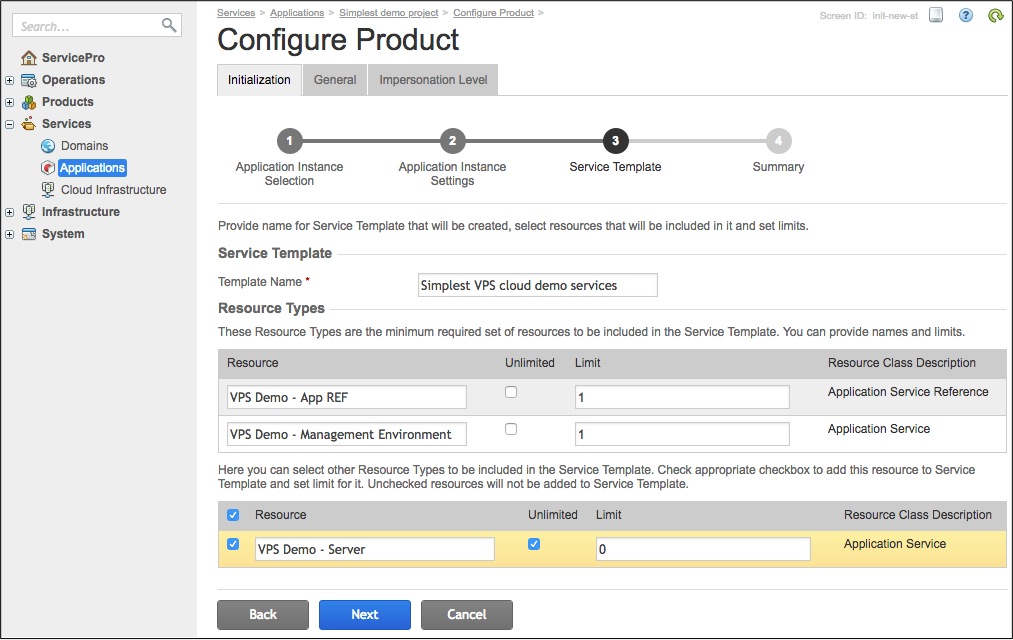
In the Service Template step, find the default service template configuration proposed by the application:
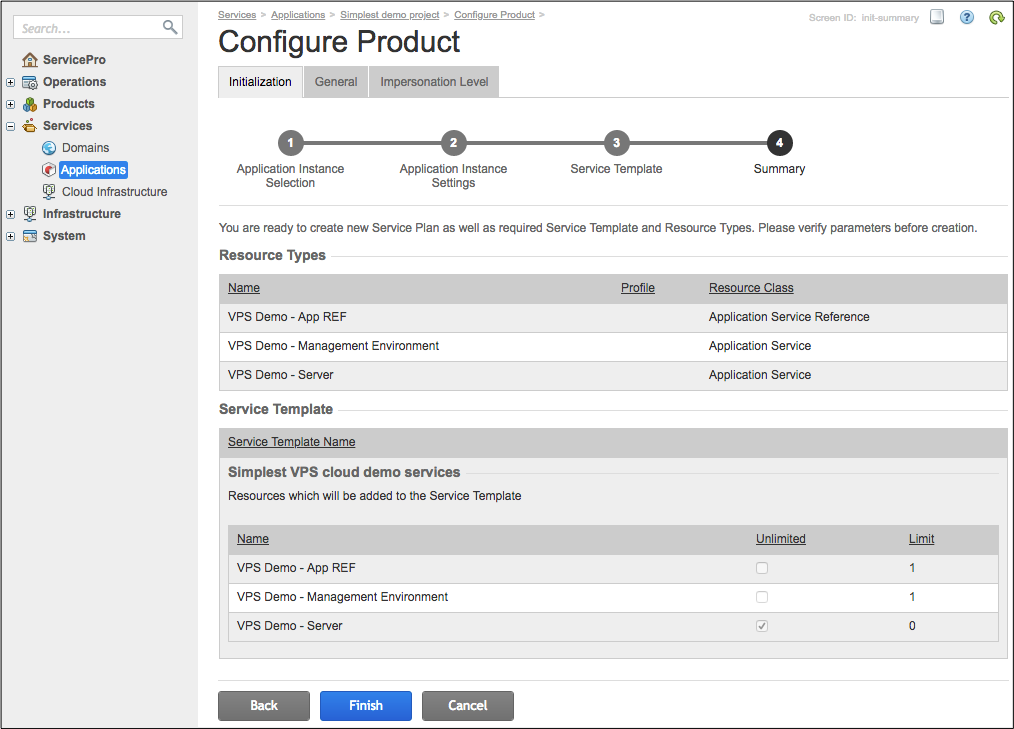
In the Summary step, review the final configuration of the service template and click Finish:
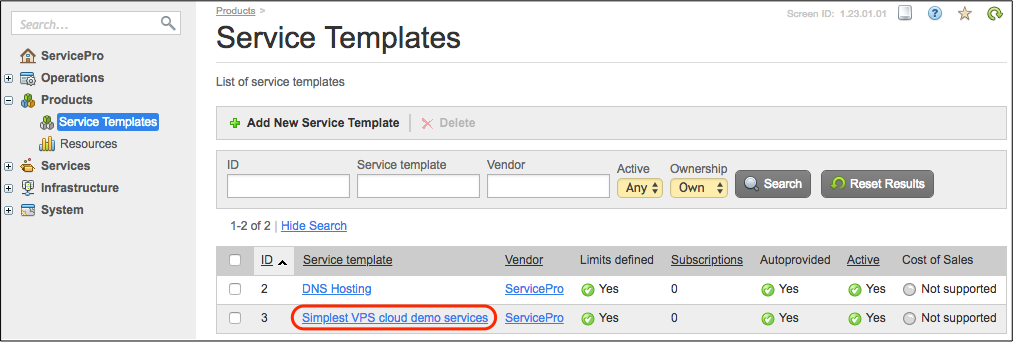
The new service template must appear in the list of service templates. To verify it, navigate to Products > Service Templates.
Conclusion
You have completed the application deployment and application-based product deployment. Now the system is ready to provision the application services to customers.