Table Of Contents
Application Packaging Standard
Last updated 18-Mar-2019General Settings
In this document:
Project Structure
Once the project is created, you will find the package structure in APS Project Explorer.
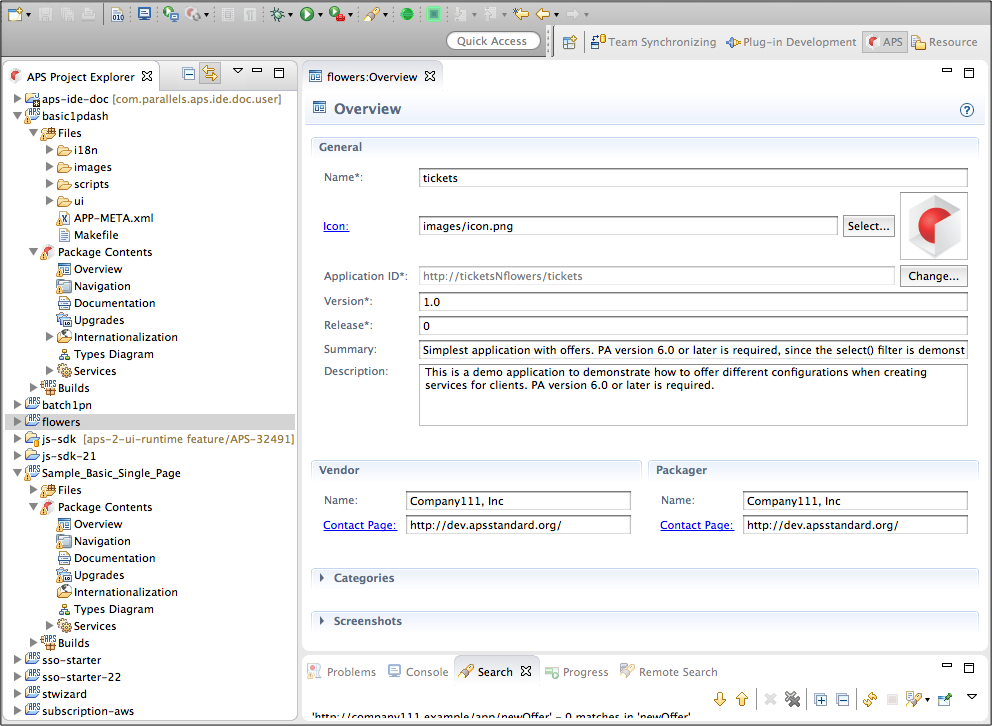
It contains:
Filesfolder with all files included into the packagePackage Contentsfolder with the list of active APS views and editorsBuildsfolder with built packages
Application ID
First of all, pay attention to the Application ID in the new project since it uniquely identifies the integration package. It must not change during the package life cycle unless you create a new integration package from the existing one. The latter is the case you face now - you are creating a new integration package. Ensure the chosen application ID is unique and will satisfy you during its life cycle. If not, change it before you launch the package into production as follows.
In the Overview editor, click the Change button opposite the Application ID field.
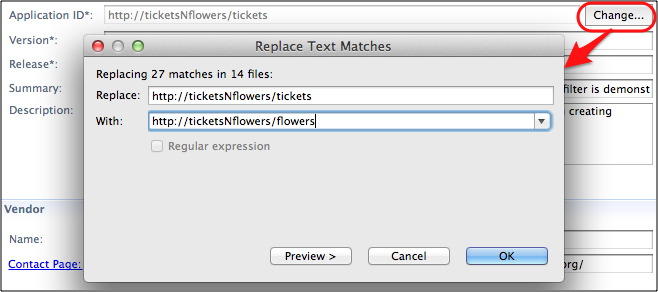
In the With: field, enter the new application ID and click OK.
This will start the process of replacing all occurrences of the current application ID with the one you entered in the With: field within the whole project.
Usually, the application ID is used as the prefix in all APS type IDs, thus making them globally unique.
Edit General Settings
To open an APS editor or a file, double-click on it in the APS Project Explorer.
Use the APS editors to create the needed components of the package in the following order.
In the Overview editor, enter the general information missed during project creation:
Add the path to the application icon
Enter URLs of the vendor’s and packager contact pages
Fill in the Summary and Description fields
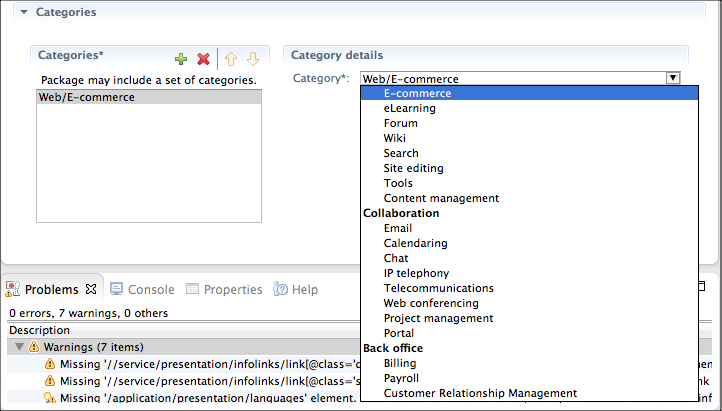
Assign at least one category to the project. When the package is uploaded to the APS catalog, one can find it in one or several product categories respectively.
Add at least one screenshot related to the application
On the Services editor, configure presentation data for each service your application can provide. To add a service, right click on the Services sub-folder and then select New > APS Service.
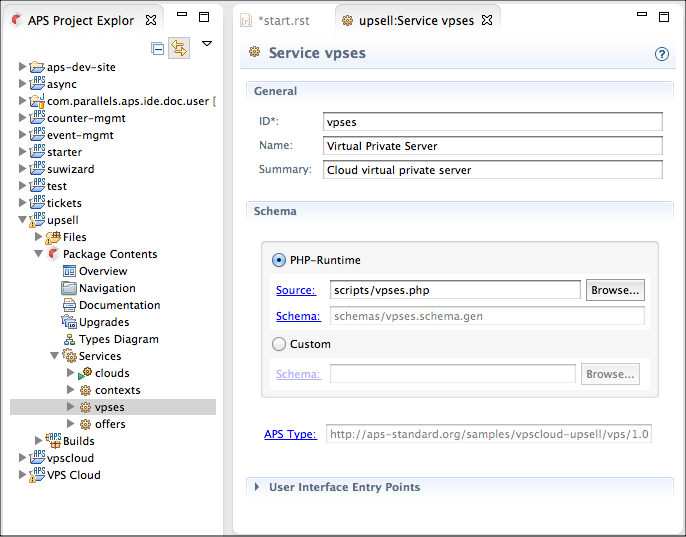
Configure each service in the following order:
- Enter the service ID that uniquely identifies the service in the package.
- Enter the service Name and Summary.
- Specify the source of the resource schema, either a PHP file
(only if APS PHP runtime is used) that generates
the schema during the building process or a custom file with manually defined resource schema whose
name extension is
.schema.
You can go directly to the Types Diagram by clicking the APS Type link.
Note
Development of provisioning PHP scripts is explained in demo projects.
When editing a.schemafile, you can use a short format of type IDs, no matter in their declaration or in relations. In the short format, you can omit the application ID prefix. For example, instead offull “id”: “http://aps-standard.org/samples/suwizard1p/backup/1.0”, you can useshort “id”: “backup/1.0” When building a package, the embedded APS build utility will convert it to the full format by adding the application ID as the prefix to the short form.View and validate the resource model using the APS types diagram.
In the Navigation editor, create the custom UI navigation trees for different control panels as explained in the Developing UI Navigation Trees section.
To update previous versions of the package, in the Upgrades editor, specify the update rules and edit the package change log.
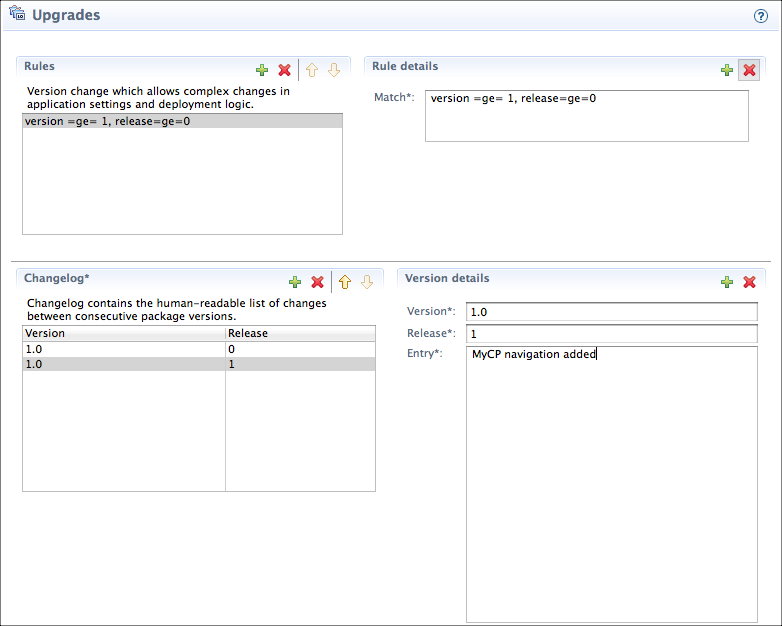
- If a new package version is able to update previous versions, you need to have at least one rule in the Rules list. When a rule is selected, in the Rule details, define the RQL statement used to select previous packages that the current package can update.
- For each previous package version and for its own version, the current package must contain a proper record in the Changelog.
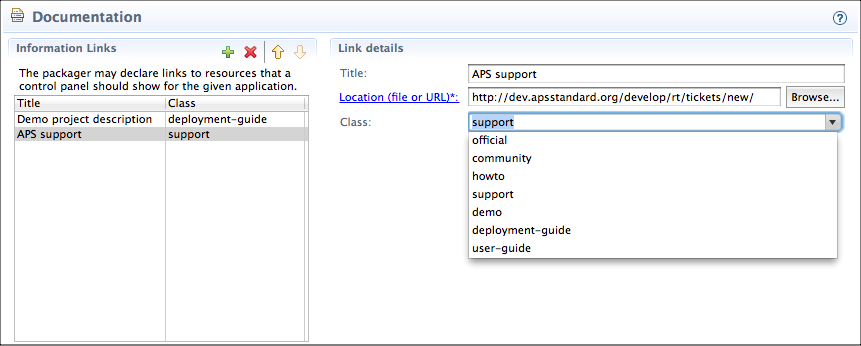
APS package certification criteria require each package to have at least the document specified as class deployment-guide and optionally other documents. Use the Documentation editor for this purpose.
In the
Filesfolder, open theAPP-META.xmlfile to verify its contents and add other elements that might be missed in the GUI tools.To save the project, click CTRL-S on Windows or Linux, or CMD-S on Mac.