CloudBlue Commerce API (DRAFT)
Table Of Contents
Provisioning
At the provisioning stage, you verify if a subscriber is able to use offers to create and assign VPSes to end-users in integration with the User Management system. Each of the views integrated with the latter must be tested here.


Before you proceed to the tests, subscribe a customer to the services deployed earlier and then open the customer control panel as explained in the next sections.
Note
In this document, the subscription process runs from the BSS system. If your platform consists of the OSS only, create a subscription directly from the service template in the OSS provider control panel.
In this document:
Sell Product
Create Customer
Ensure you have a test customer whom you will subscribe to the service plan. If you do not have such a customer, create it from the BSS provider control panel (PCP):
If you are in the OSS PCP, switch to BSS by clicking the Billing icon on top right.
In the BSS PCP, navigate to Operations > Customers.
Click New Customer Account and follow the wizard steps to complete creation of the customer.
Subscribe Customer
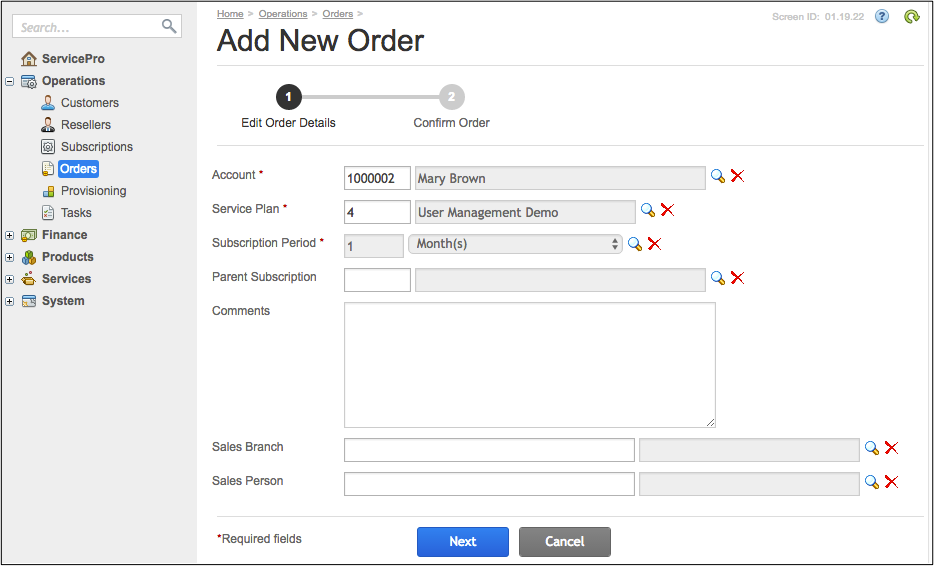
In BSS PCP, navigate to Operations > Order and click Add New Order.
In the Edit Order Details step, select the test customer and then select the service plan and the subscription period created at the deployment stage:
In the Parameters step, leave all intact and click Next.
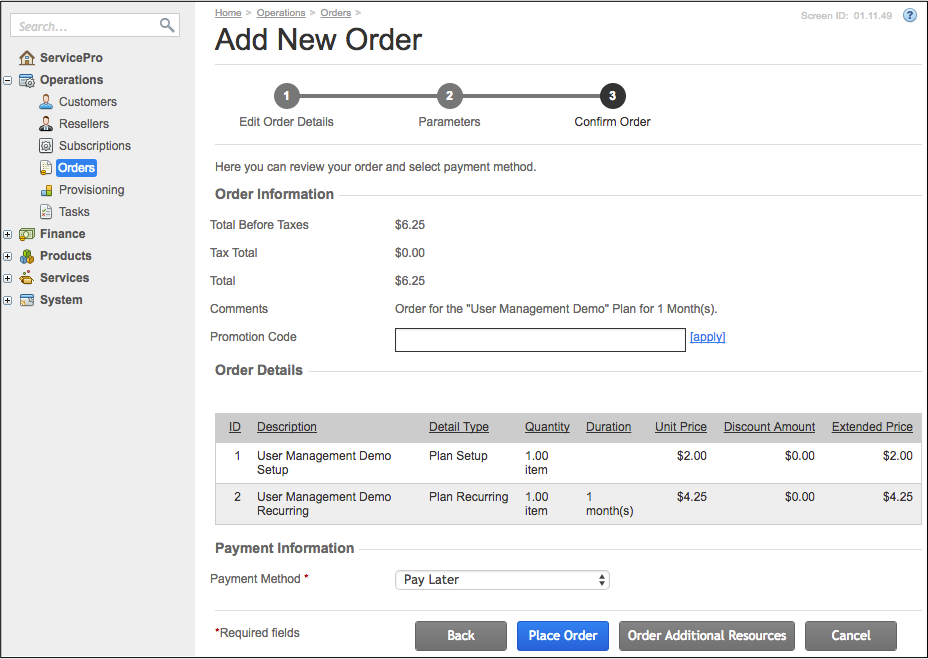
In the Confirm Order step, click Order Additional Resources to increase the limit on the VPSes of various configurations.
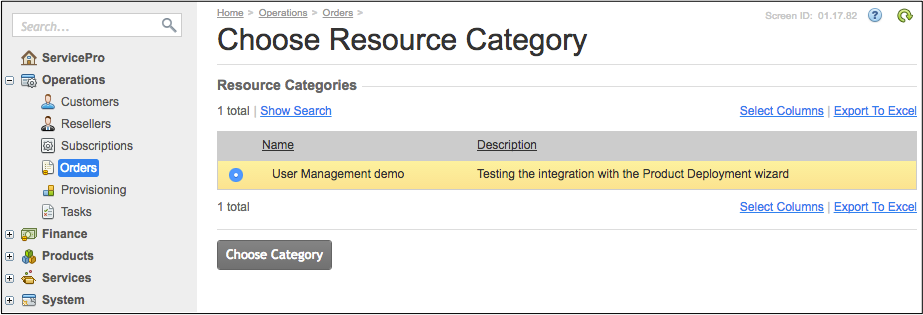
On the Choose Resource Category screen, you will find the resource category configured in the package. Click Choose Category.
Select the resources presenting the VPS Mainstream Profile:
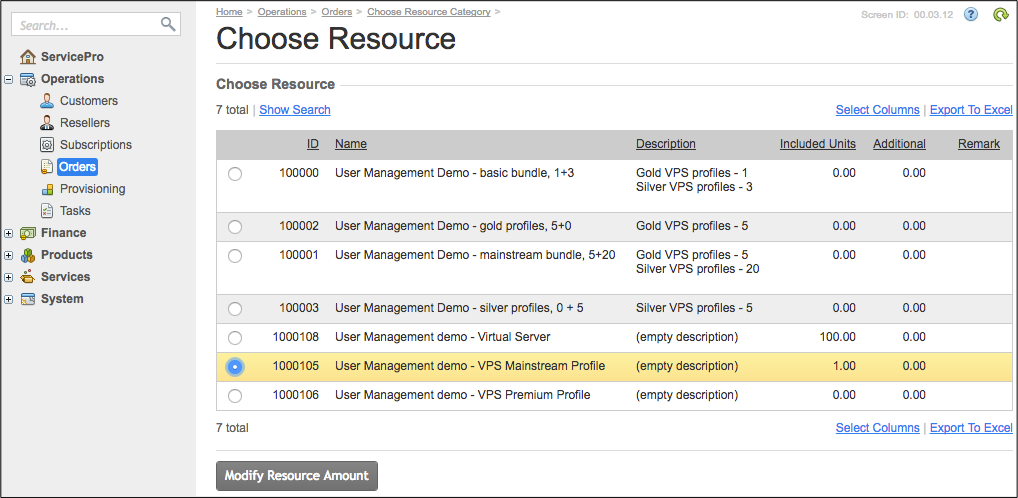
Notice, the included amount of the resource is
1. Click Modify Resource Amount, in the Additional field enter1to sell the additional amount of the mainstream offer, and then click Next.Once you are back in the Confirm Order step, notice the new provisioning item in the list of Order that increases the limit on the mainstream offer.
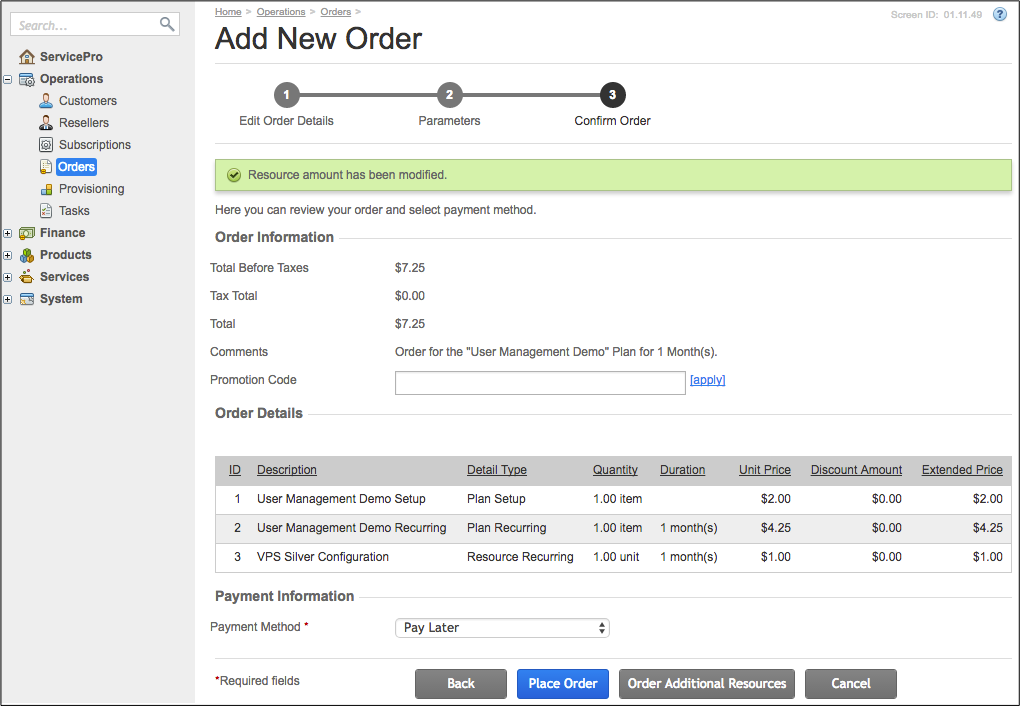
Click Place Order. The new sales order must appear in the list of orders. Its status is New.
Click on the new order and on the Documents tab add a payment. In the payment document configuration, select the
Check/Cashor another payment method: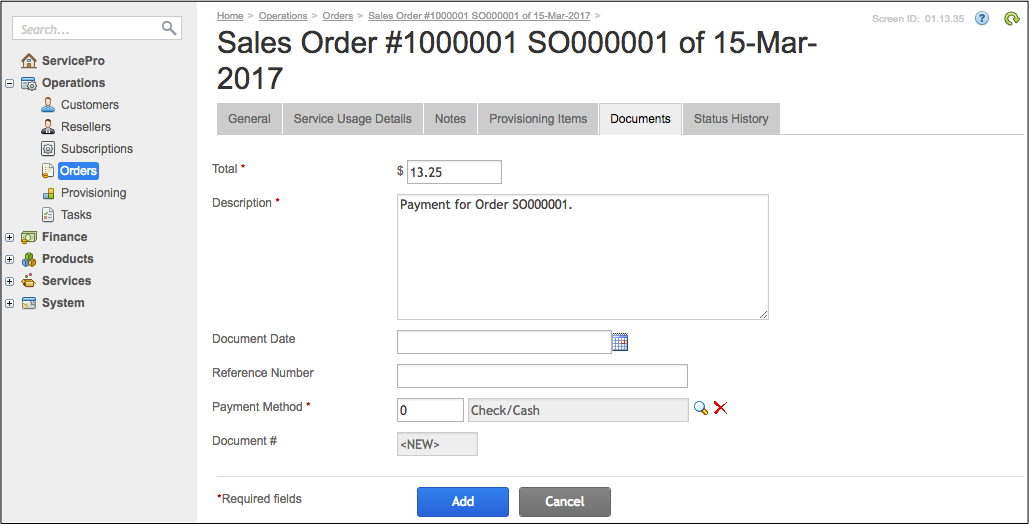
If the
Check/Cashmethod is used select the new document and click Release. This completes the payment process.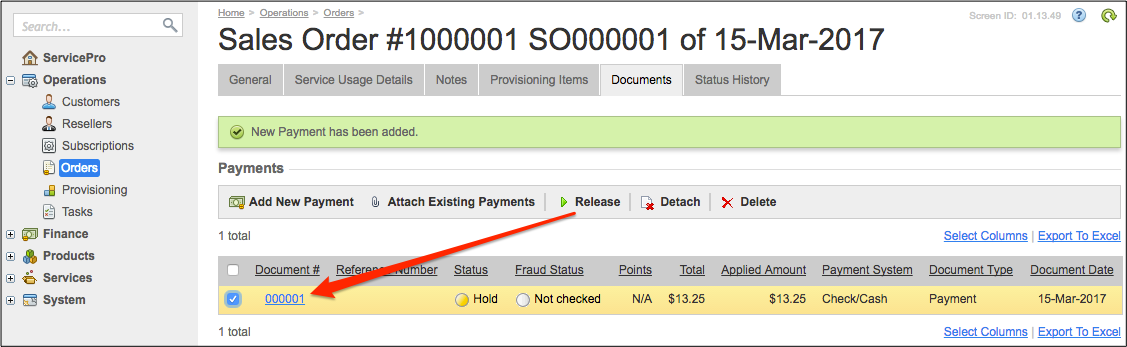
On the General tab, click Open Order to start the provisioning process:
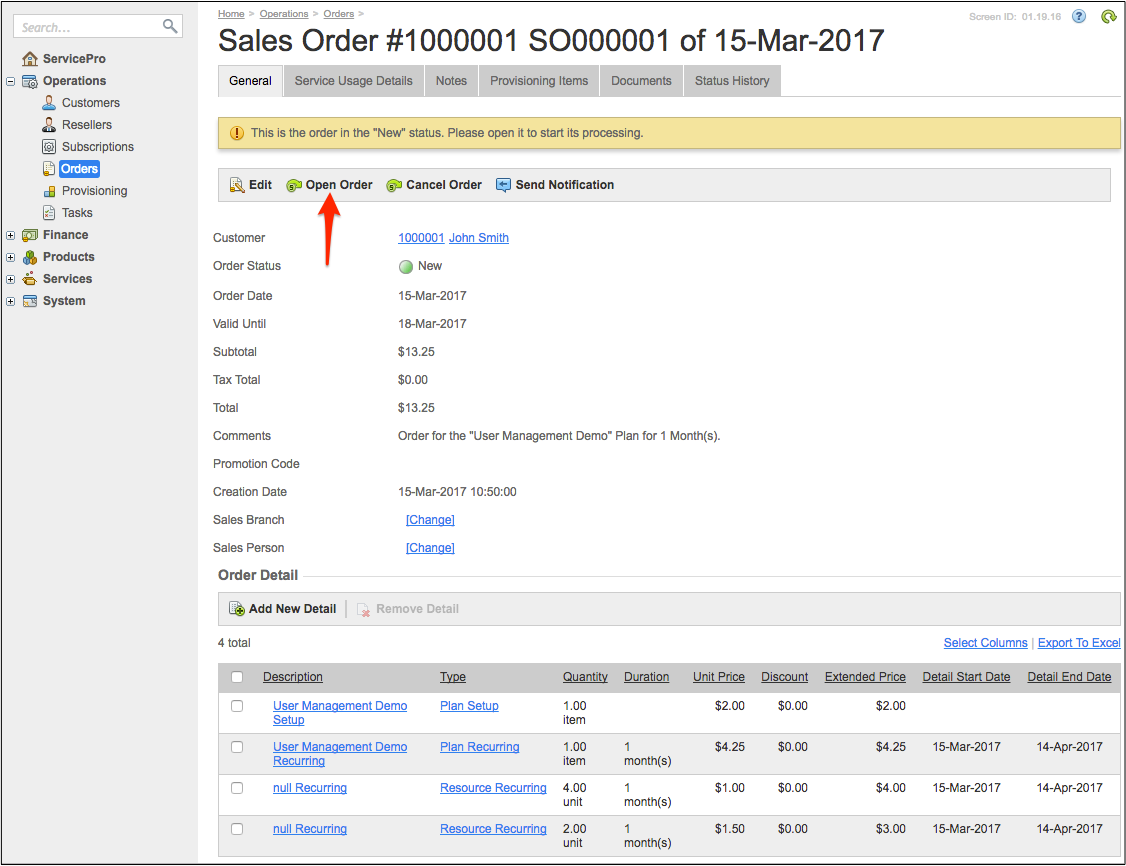
Check periodically the provisioning status until the order status is Completed.
Navigate to Operations > Subscriptions to find the new subscription:
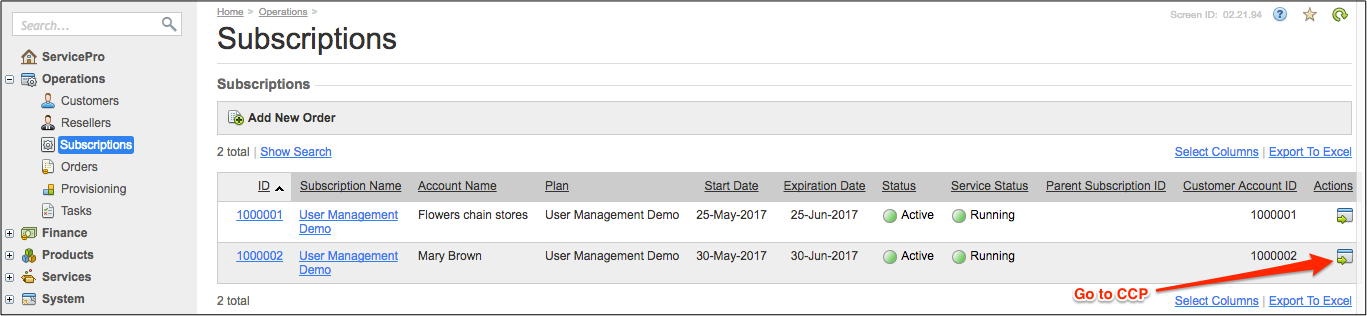
Click on the icon in the Actions column to go to UX1 on behalf of the customer. In UX1, you will be directed to the Home tab.
Add Users
In this section, you will verify how the demo application works with the User Creation wizard and whether it is able to initiate the resource upsell process in a case when the subscription does not contain the available amount of an offers required by the customer.
On the Home tab, click the ADD NEW USER button.
Fill out the SPECIFY NEW USER form.
Click ONE MORE USER and fill out the user parameters like you did for the first user.
In the ASSIGN SERVICES TO NEW USERS section, tick the Add VPS check box.
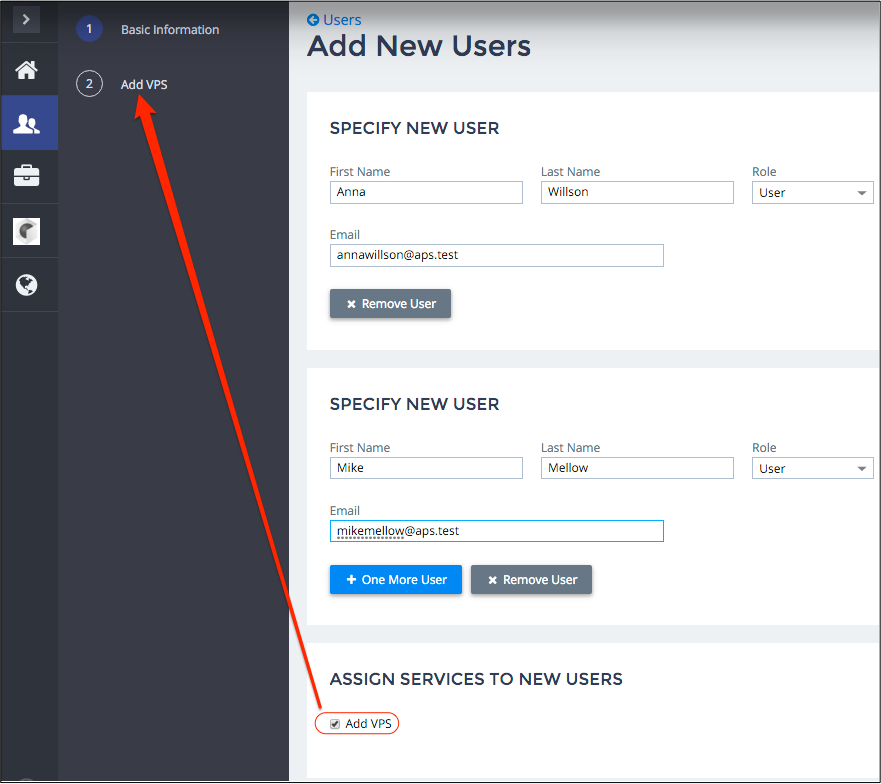
Click Next.
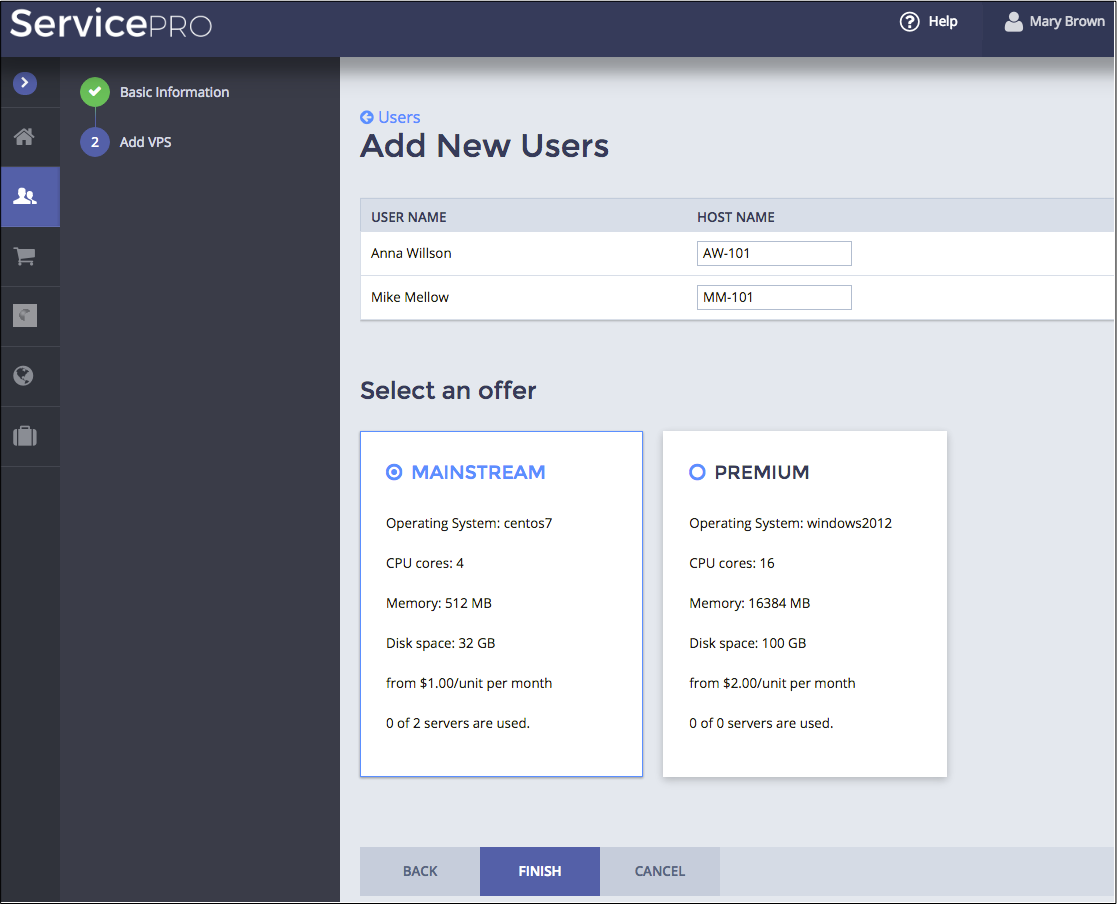
In the list of users, enter a host name for each of the users.
Notice that when the mainstream offer is selected for the two users, the control panel does not require any additional purchases.
If you select the premium offer, you will find a proposal to buy additional amount of the offer.
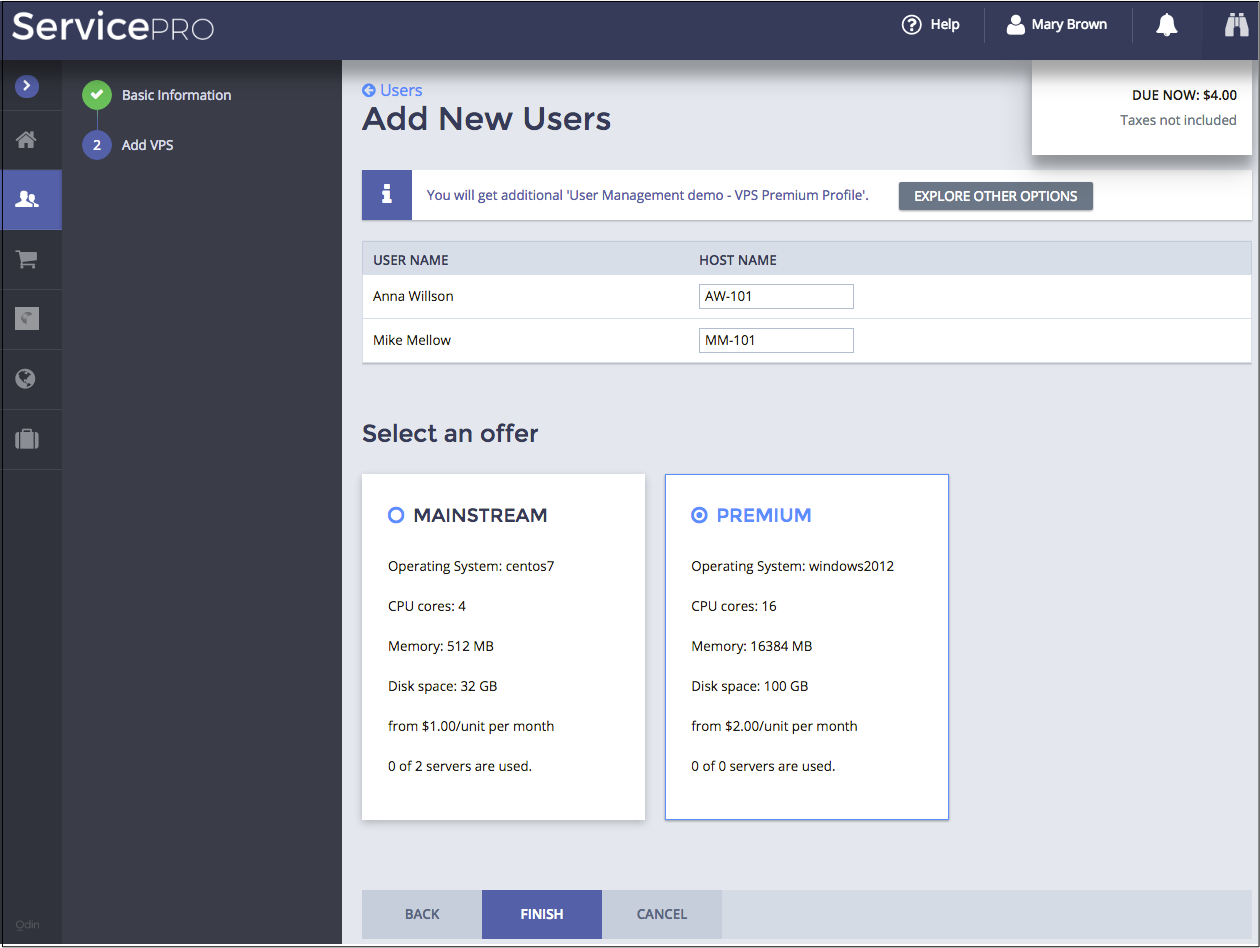
Click EXPLORE OTHER OPTIONS to find the all options that include the selected premium offer.
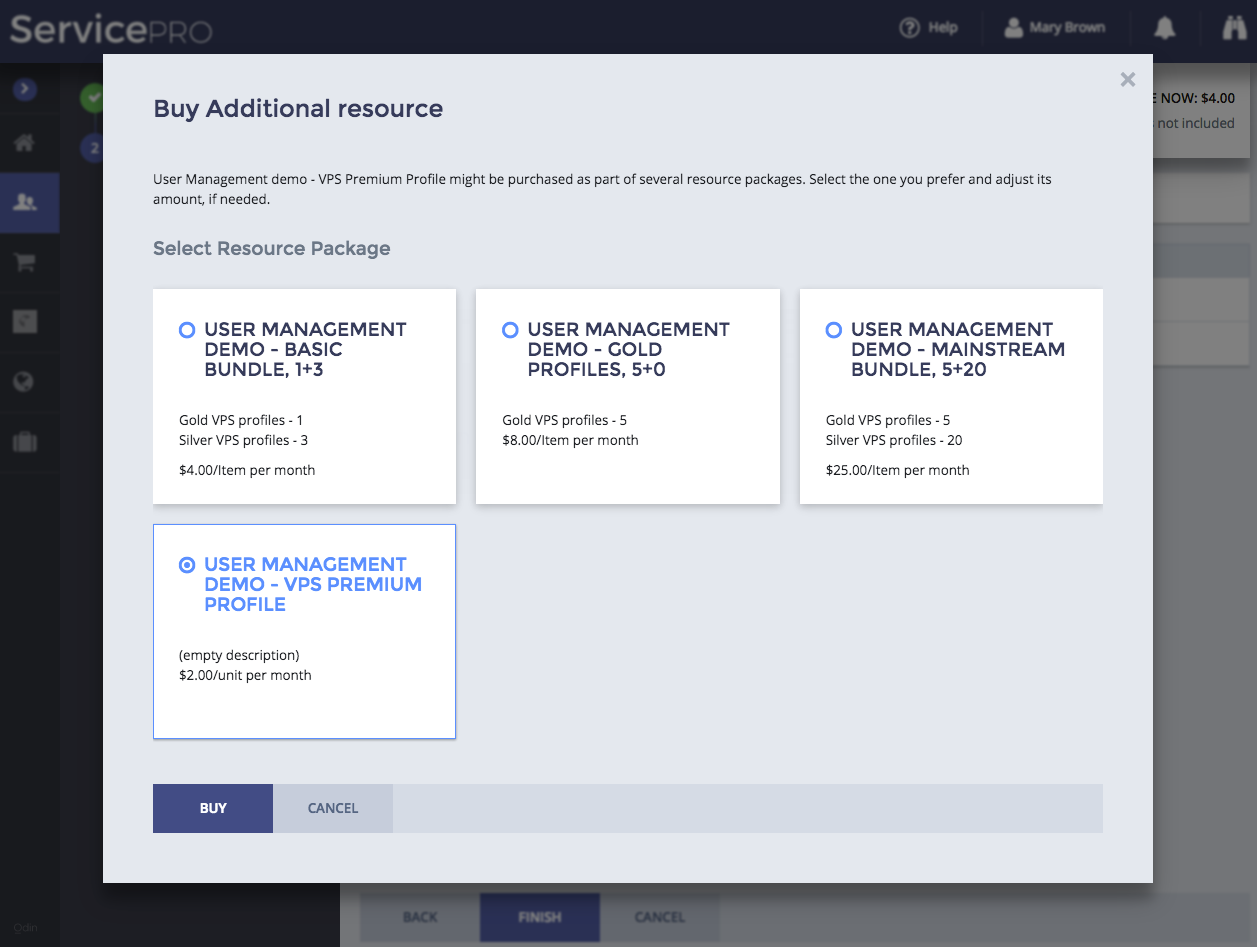
Select a proper option and click BUY. After that, click Finish to proceed to the purchase process. During that process, you will place a new order. If the customer does not have a registered bank card, process the order in the provider control panel as described the Subscribe Customer process.
Switch to the VPS Management tab to verify if the new servers with expected parameters have been created.
Click on a VPS name to edit the VPS properties to meet the owner’s need.
Watch VPS Services in User List
In this section, you will verify if the User Manager shows service data in the list of users.
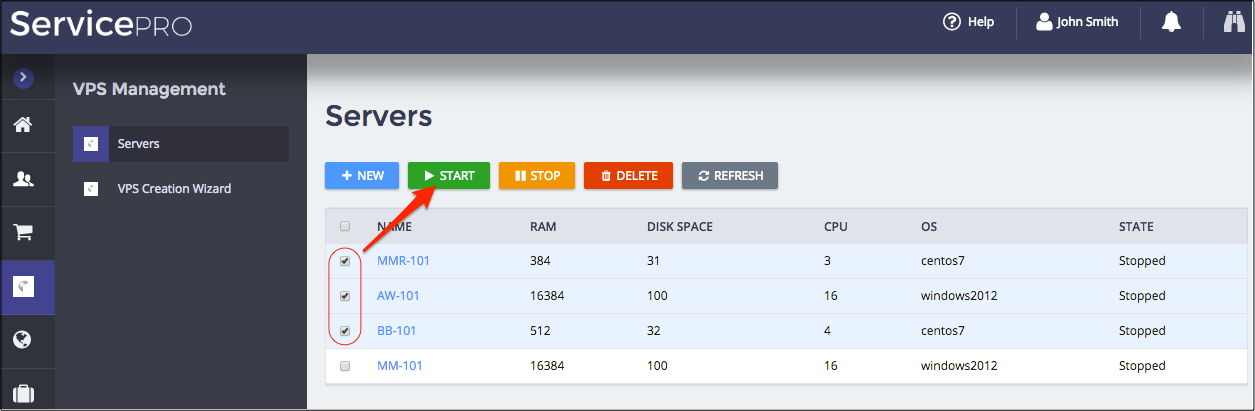
On the VPS Management tab, make some VPSes started and leave some of them stopped.
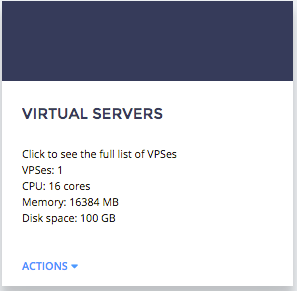
On the Users tab, select the
Gridpresentation on top right and verify if there is the VPSes column informing you of the VPSes assigned to the users and their state.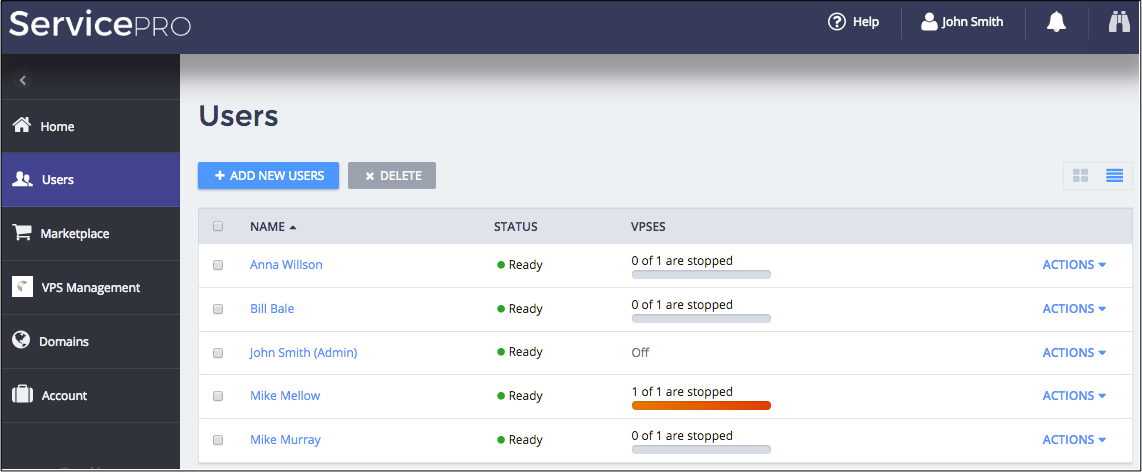
Select the
Tilepresentation and verify it the same data is presented in tiles.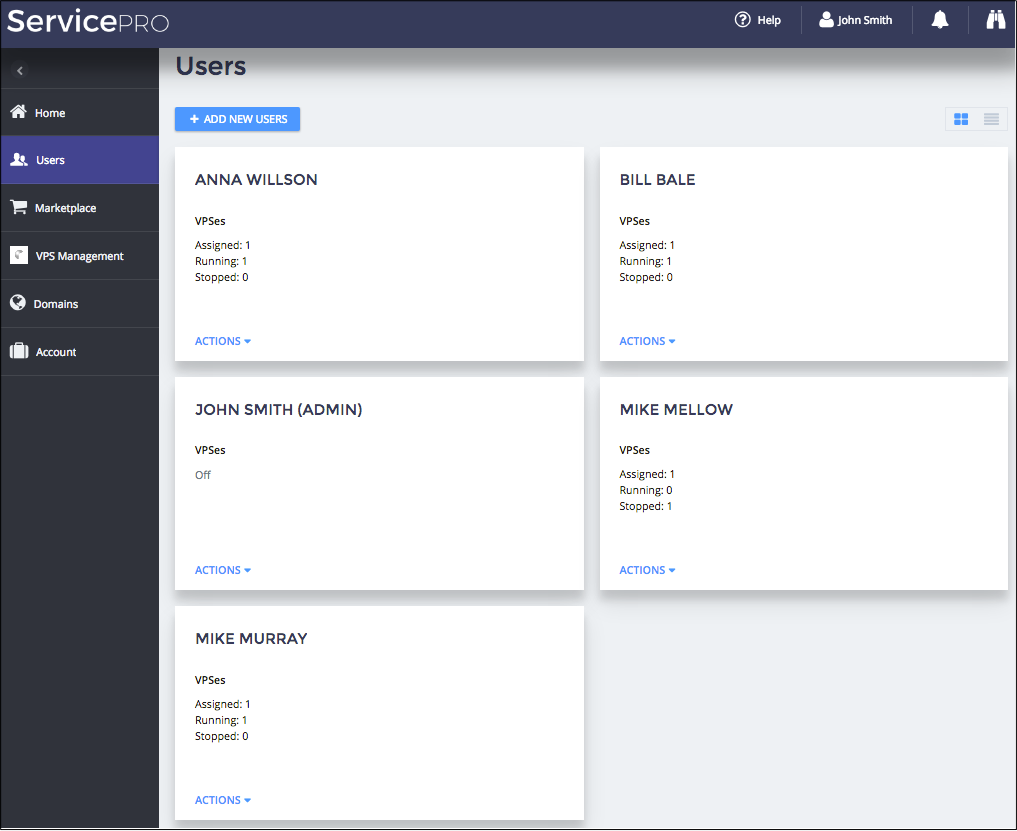
Manage Single User
In this section, you will verify if it is possible to manage application services assigned to a user.
On the Users tab, click on the user name to open the user profile. Make sure the user has at least one VPS assigned.
Click on the tile to verify if you are directed to another view in accordance with the tile configuration. Return back to the tile.
Click on the menu and select the Assign a VPS option.
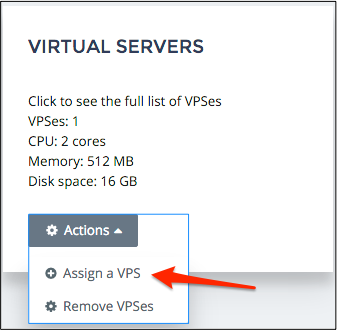
At the VPS creation wizard, configure the new VPS parameters, ensure the current user is selected, and complete the process. You must be directed to the VPS Management tab. Verify if the new VPS was created.
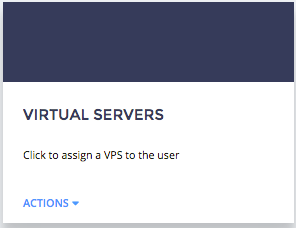
Repeat steps 1 and 2 to open a user profile. Click on the menu and select the Remove VPSes option. You will stay on the same tile:
Test User Control Panel
In a user profile, select the Log in as User option in the Actions list. You will be directed to MyCP, where you will see the list of VPSes assigned to the user.
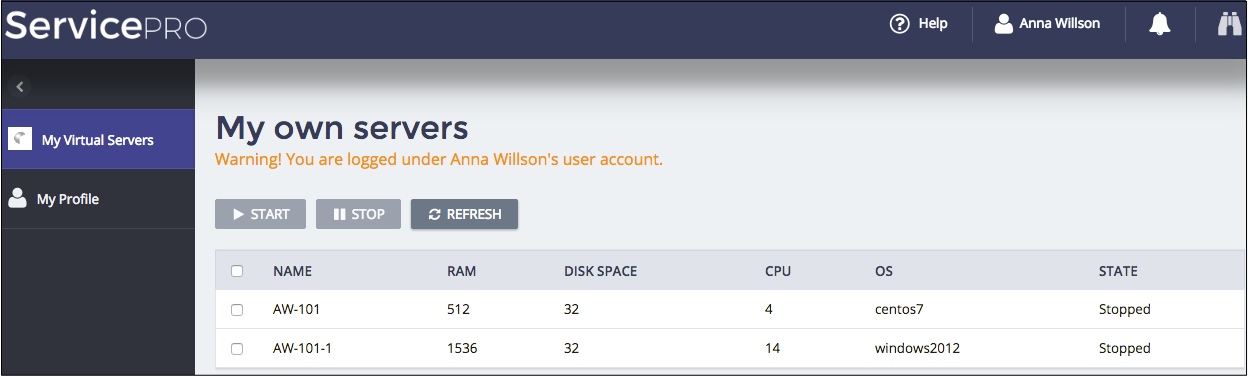
The user must be able to manage their own VPSes. In this project, you can start and stop them. Verify if you can select VPSes and change their state by clicking on the Start and Stop buttons.
Conclusion
This completes the APS application development cycle. In the demo project, you have integrated the VPS service with the system built-in User Creation wizard and User Manager. This allows customer administrators to assign services to end-users and allows end-users to manage the assigned services.
If you experienced any issues when following
the project steps, you can download the final
sample package
and compare it with the demo package you have created.