CloudBlue Commerce API (DRAFT)
Table Of Contents
Provisioning
At the provisioning stage, you will verify if a subscriber will be able to perform the following DNS related operations with VPSes:
When creating a VPS, add DNS properties to the VPS.
In the the system Domain Manager UI identify VPSes assigned to domains.
Start some operations with VPSes from a domain profile.


In this document:
Continue the demo project from the previous step.
Create Subscription
Before you proceed to the tests, create a subscription for a customer and open the customer control panel. You will be directed to the Home dashboard.
Prepare Domains
To test new features, you need to prepare a couple of domains and an A record in each.
Create Domains
Create a couple of domains for the customer:
In the navigation panel, select the Domains item and click Add New Domain.
In the Specify Domain field, enter
srv.aps.exampleas the domain name.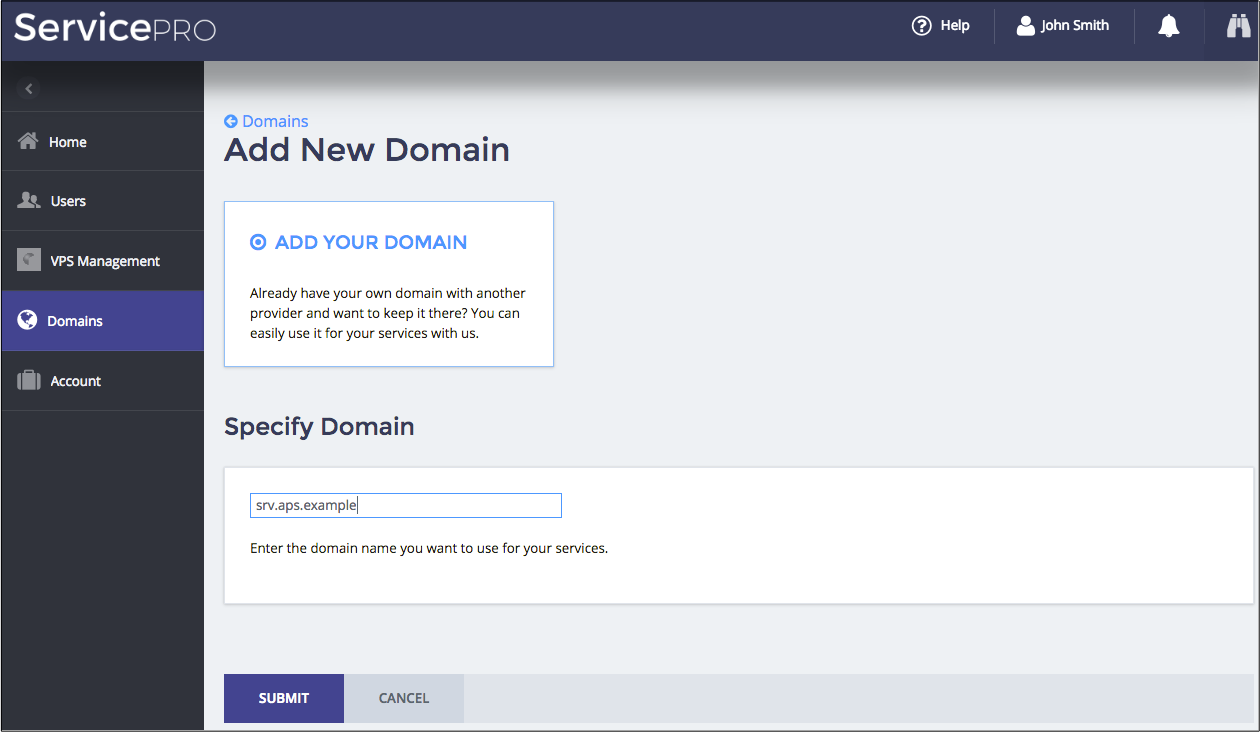
Click Submit. The domain must appear in the list of domains.
Repeat this cycle one more time to create the srv.aps.test domain and any number of additional
domains and subdomains.

Create A Records
Make sure each of the domains has an “A” record. CNAME will be aliased to it later.
In the customer control panel, navigate to Domains.
In the Actions list of the
srv.aps.testdomain select Manage DNS Records.On the DNS Records pane, click Add New Record.
In the Record Type drop-down list, select A.
In the IPv4 input field, enter an IP address in any subnet range not used in your network, for example,
10.100.100.101.In the Host field, type
vps.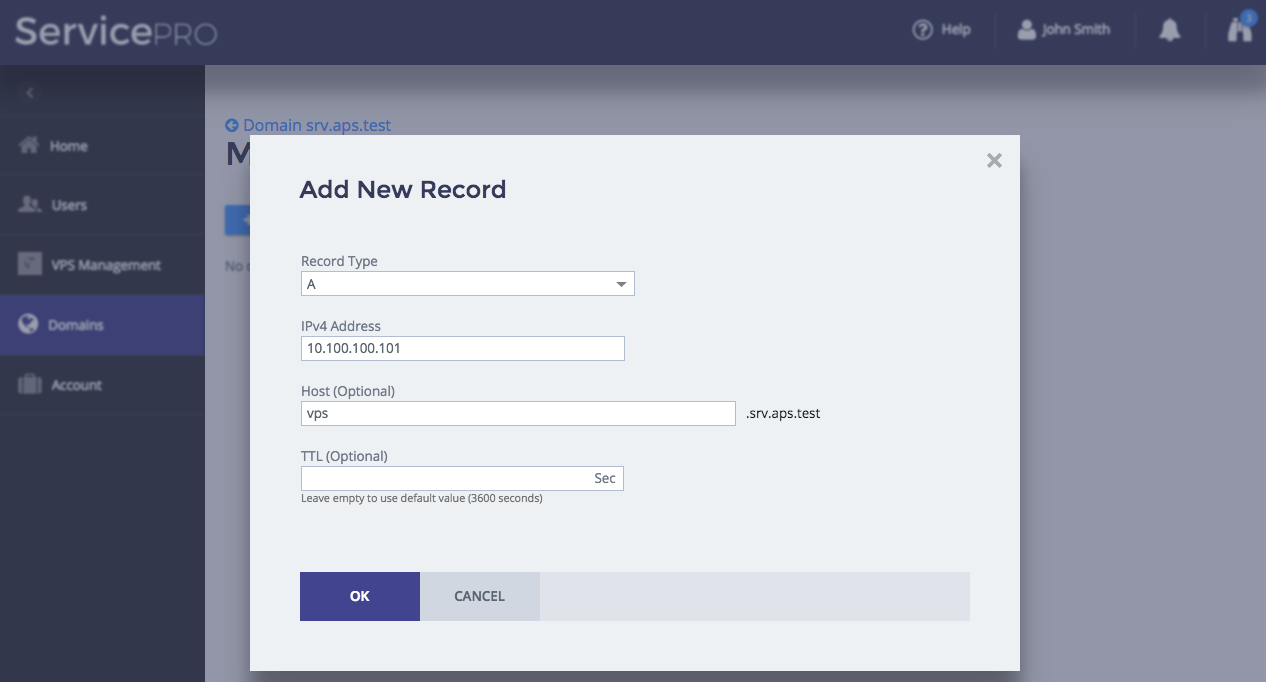
Click Finish.
Repeat this cycle for one more customer domain assigning another IP address to the A record, for example, 10.100.100.102.
Feel free to do it for other domains and subdomains.
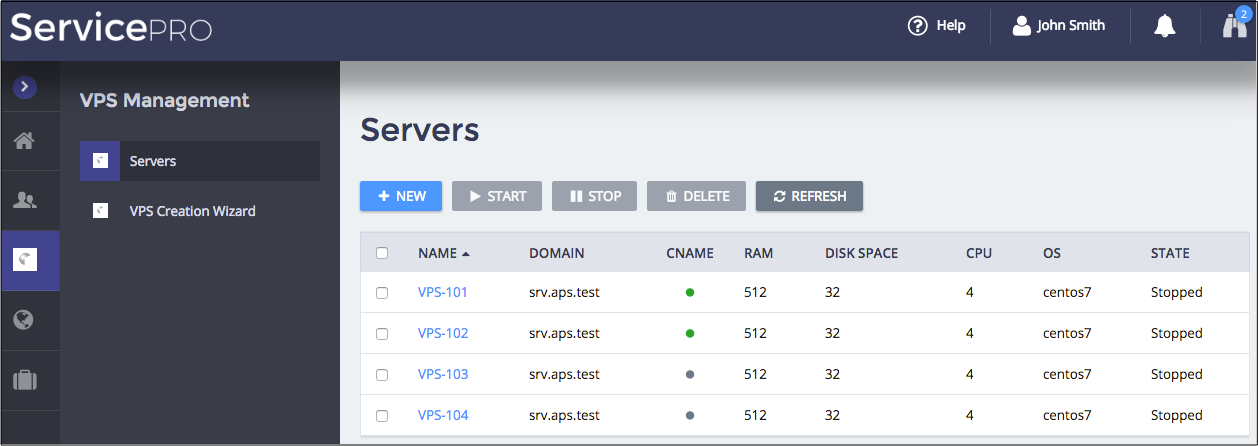
Create Servers with DNS Properties
In the customer control panel, walk through the following steps to verify if it is possible to set DNS properties when creating a VPS.
On the VPS Management menu item, click New to start creating a VPS.
In the Server Name field, enter the server name, for example,
VPS-101.Tick the CNAME record checkbox.
In the Select Domain drop-down list, select a domain, for example,
srv.aps.test.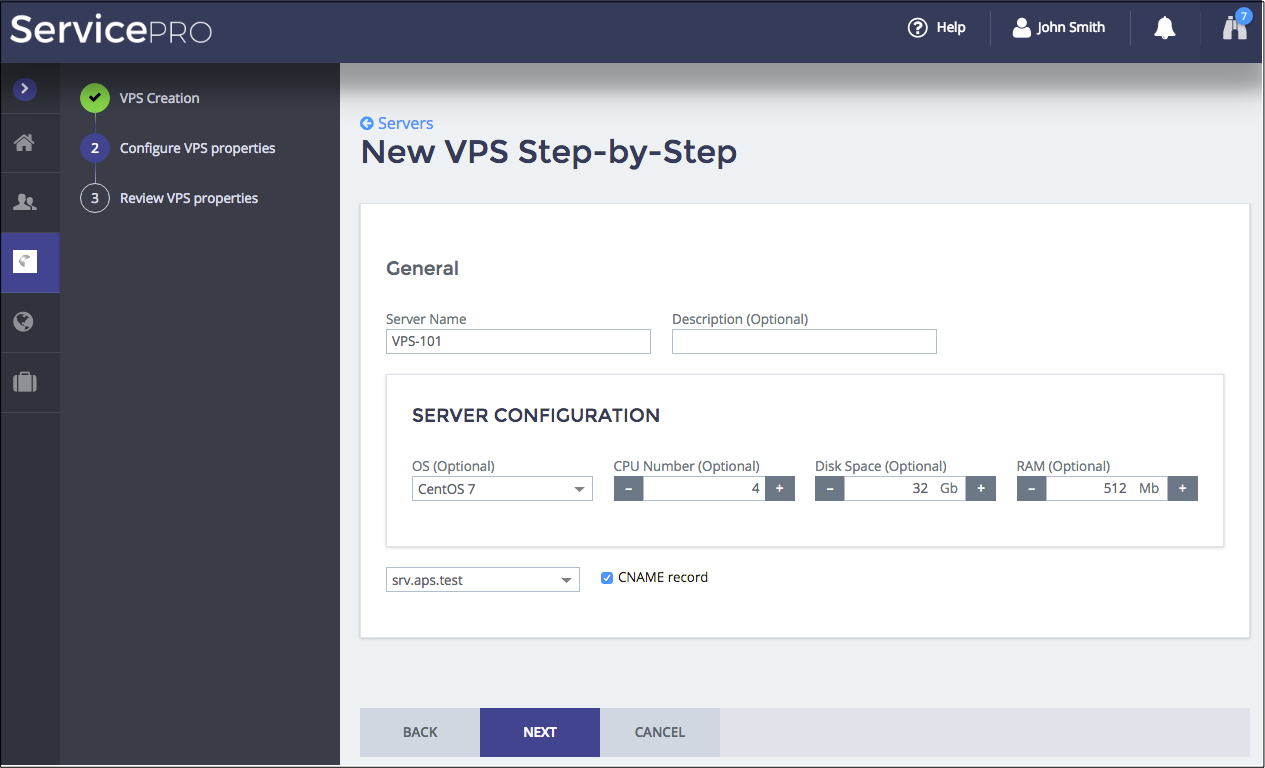
Click Next.
On the Review screen, verify if a domain is selected and CNAME is required.
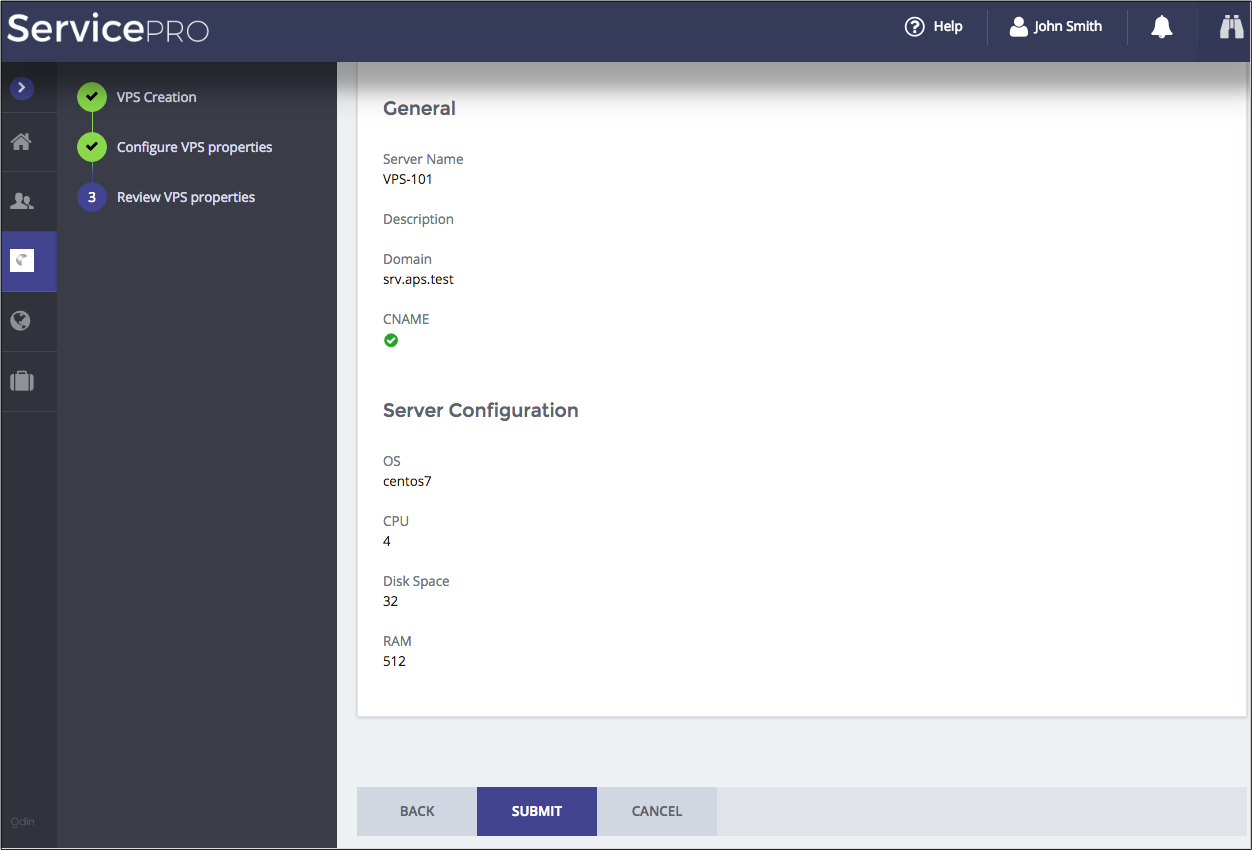
Click Finish and make sure the new VPS is presented in the list of servers.
Repeat this cycle to create one more VPS with CNAME and two more VPSes without CNAME. Assign them all to the same domain assigned to the former VPS.
The list of servers will look as follows:
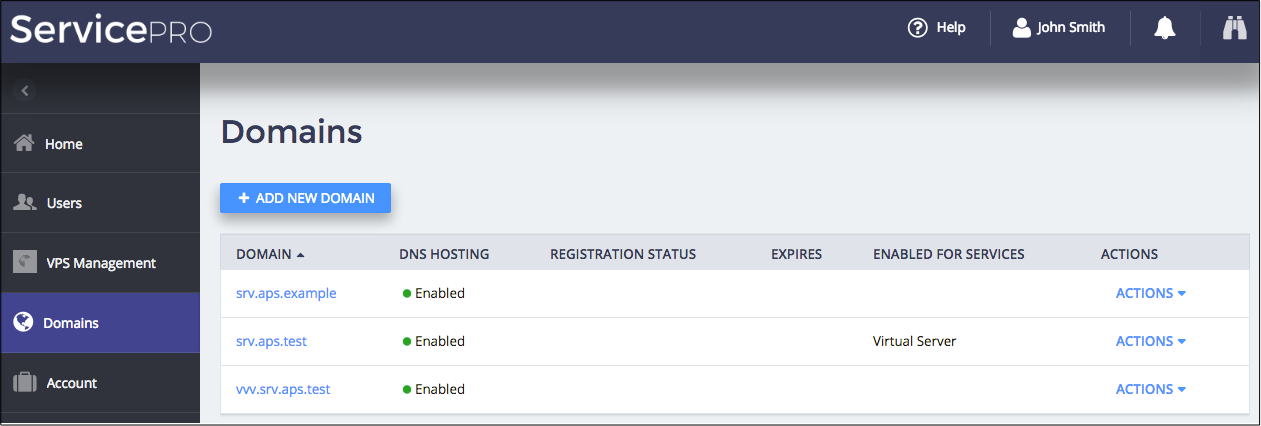
Watch Application Services in Domain List
In this section, you will verify if the Domain Manager shows service data in the list of domains.
On the Domains menu item, verify if the Enabled for Services column correctly informs you that one of the domains is enabled for VPSes.
Manage Single Domain
Verify if the domain profile presents all assigned VPSes and allows you to start some operations over VPSes.
Test Domain Tile
On the Domains menu item, click on the domain name that is assigned to VPSes. The domain profile must show a list of assigned VPSes.
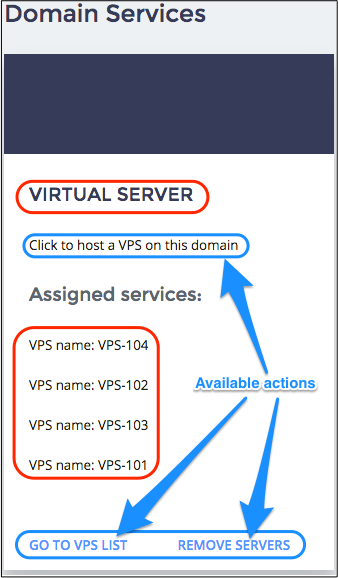
Click on the tile to verify if you are directed to the custom VPS creation wizard in accordance with the tile configuration. In the Select Domain drop-down list, the domain name must be pre-selected.
Click Cancel to return to the list of servers or click Next and complete creation of one more VPS.
Conclusion
This completes the APS application design-development-deployment-provisioning cycle.
If you encounter any issues when following the project steps, you can download
the sample package
and compare it with the demo package you have created.